Adding shiplap & molding above a fireplace
June 26, 2012
Share this
Ever since we covered our corner fireplace last year, I’ve been planning a treatment over the mantel to finish it off a bit. It has looked just a bit nekked to me all this time, but I wanted to do something I knew I would like long term, so I waited:
I was just SO thrilled to not have that annoying corner fireplace anymore, I was fine with a little nekked. (Can you be a little nekked?)
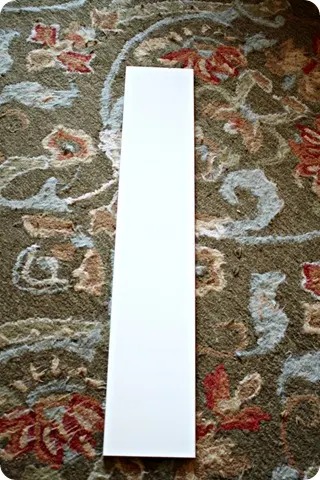
I wanted to do something different than my normal wainscoting squares, and I finally figured out exactly what I wanted to do yesterday and got ‘er done. I started with these baseboard pieces from Lowe’s:
They come in eight and 12 foot lengths and are about 5.25 inches wide. The design couldn’t be simpler – just one board across the top, mitered at the corners, then two side pieces coming down:
I was lucky because the measurements allowed me to use ten boards horizontally, and they fit perfectly in the wall space above the mantel. I didn’t have to cut any of the boards down on a table saw to make it work. Which is a good thing cause I don’t have a table saw. ;)
The only hiccup I came to was how to mark where I had the screws for the mirror that hangs above the fireplace. They were already exactly where they needed to be and in studs, so I didn’t want to have to redo the whole thing.
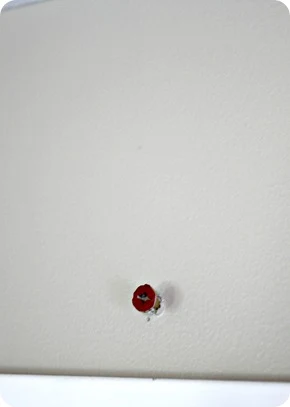
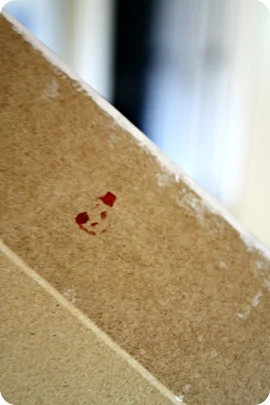
Sooo, I grabbed some lipstick, painted the front of the screws with it, then I placed the board that was going in that spot directly on top of them to get a mark for the holes on the back:
It worked like a charm! I just drilled the holes where the lipstick was and then took the screws out of the wall, put the board up, then put the screws back in through the board. Does that make sense?
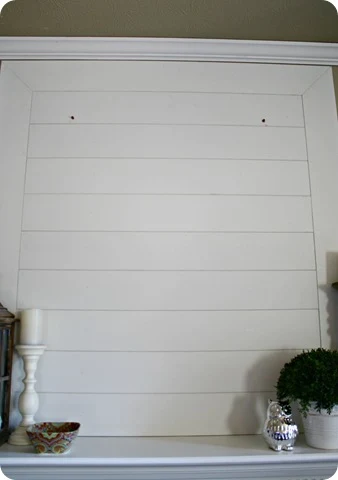
The design was so simple it took me less than an hour to get it up:
(You can see the screws for the mirror up on the top.)
Since I kept the middle basic, I just cut a bunch of 42 inch boards and nailed them up – super easy!
Of course the project that I think about for months takes all of an hour to do. :)
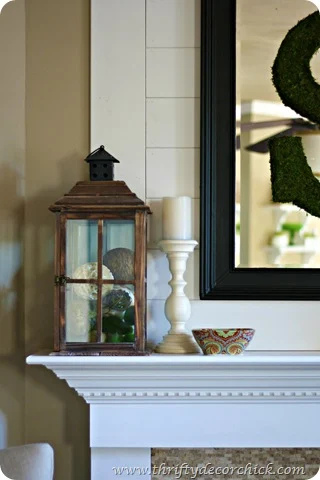
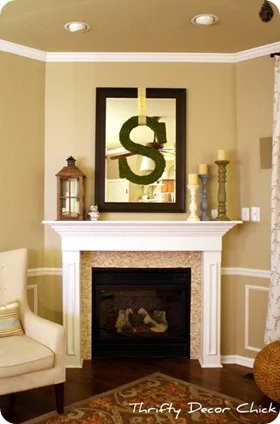
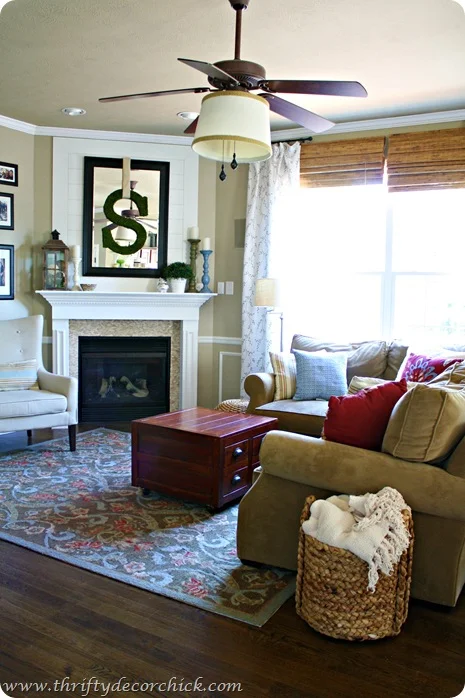
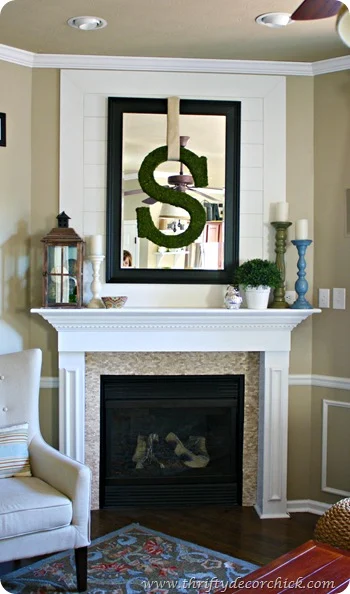
I LOVE how it turned out!:
Confession time though – I haven’t even painted it yet. Primed boards are worth their weight in gold, I tell you WHAT.
I want to be careful about painting it because I like that you can see the “seams” between the boards – I don’t want the paint to fill any of it in, so I’ll need to take my time with it.
And who am I kidding, you can’t even tell it’s not painted unless you get close, so it will most likely be eight months from now before semi gloss touches it’s surface. For REAL.
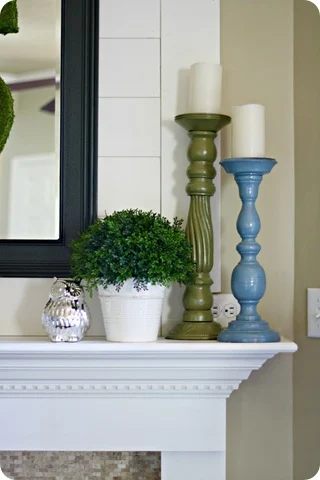
I had to notch out one of the boards to make the outlet work, but the accessories cover it well:
And if anyone ever noticed it…well you know what that means. THEY GET A COOKIE.
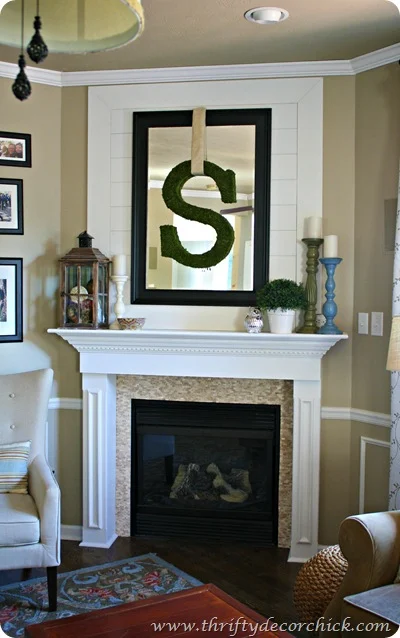
I think it is the perfect finishing touch to the fireplace wall that I now LOVE:
Let’s look back on the transformation, shall we? I put up molding above our old corner fireplace years ago, then as I mentioned, we had the wall (and a REAL mantel) put up last fall:
Now it’s what I’ve always dreamed it would be…sniff.
It took about $60 and an hour to do – and after all this time I have a fireplace that makes a statement instead of hiding away in a corner. ;)
I think fireplaces can be so hard – so many I see in blogland look effortless but I find something that works and stick with it…forever. I like the accessories I’ve had up there so unless major inspiration hits, they’ll be like this till fall.
Do you struggle with what to do on your mantel and above your fireplace? Do you change it up often?


![image[42] image[42]](http://lh5.ggpht.com/-zR9aExo9hbo/T-pkkGwOOhI/AAAAAAAAVxQ/jonnWT-9I9E/rw/image%25255B42%25255D_thumb%25255B8%25255D.png?imgmax=800)
I have a huge corner white brick fireplace. It makes arranging the furniture difficult.
ReplyDeleteI am constantly struggling with how to decorate the too small mantle and the huge white space above it. Add that it opens up into my outdated 1970's avacado green kitchen and it is a nightmare.
LOOOVE this! Gorgeous!
ReplyDeleteYour fireplace mantle wall looks great! I don't have a mantle in my new house, but when I did it was getting the scale of the accessories right that I had trouble with. I Love what you did!
ReplyDeleteMary
LOVE it! Great job and really creative!
ReplyDeleteLove the fireplace wall, and your fireplace looks fabulous. Hugs, Marty
ReplyDeleteIt looks awesome girl! We just redid our fireplace area too and it makes such a huge difference. I'm with you though...I don't change it up much. :) Maybe for Christmas. Haha!
ReplyDeletelooks great, Sarah! almost pallet-like, or has a shutter feeling to it but yet a little more sophisticated!
ReplyDeleteI honestly never thought of doing a treatment above my mantel but now you have me thinking. Will have to ponder it for a while! :)
Yours looks so pretty - so much better than your corner one and I know you love it!
I love this! and the fact that you're semi-peeking out in the last photo! You're so crafty.
ReplyDeleteLove the boards above your mantle. Totally aced it! And that little notch for the outlet? Well if they notice that, they've gone from visitin' and on to nit-pick'n and it's time for them to leave! :o)
ReplyDeletelove love love it!! i really love how the space has transformed over the past year or so! it is a testament that you don't have to do EVERYTHING at once! design takes time. i'm telling myself this. over and over. :)
ReplyDeleteLooks great! A real focal point :)
ReplyDeleteLesson #1: Learn when NOT to tell Bloggers about crtain things. For example, if you had no told us the boards were unpainted, no one would ever have known and someone would have possibly asked what color you used. :-D
ReplyDeleteJust love this idea! It goes perfect with your decor and style. Your fireplace looks happy. :)
love it. it looks so good. did you pick a winner for the giveaway? oh and if you move the accessories you would not see the outlet. ang
ReplyDeleteI LOVE this! If I had a fireplace I would totally copy you! So sad I don't... Thank you for sharing all of your decor/DIY projects. I am not a creative person and love getting ideas from you.
ReplyDeleteLooks amazing! Beautifully done, its a perfect backdrop to your mirror and I'm sure it will make your upcoming Seasonal decor pop!
ReplyDeleteYour mantel looks so great.. both custom and expensive. And thanks so much for the lipstick tip. Such a good idea!
ReplyDeleteThese are exactly the home improvements we bloggers love to see! Thanks for sharing this whole transformation. This is very clever!
ReplyDeleteI thought it looked done before, but now it looks finished! Very unique idea that is perfect!
ReplyDeletelove it and so right...I still have not come up with what I want...or lets say I know what I want,just lots of work and a little costly and is it smart for the lay out in the house...hmmmm may be someday.
ReplyDeleteLove what your did and yes hugh impact...
That looks FANTASTIC!! =) xo ~Liz
ReplyDeletewell done! and very lovely! Great tip about the lipstick!!
ReplyDeleteThat is really pretty! Great idea.
ReplyDeleteLooks great, hey at least you don't have to mess with brick on your fire place. It was great to meet you at Haven last week. Can I just tell you I was surprised that your voice was a little deeper{not manly}than I thought. I hear your voice on your blog as you write, and I think you make up a voice in your head, sound crazy I know!! Oh anyway, love ya even more! Thanks for sharing so much and always inspiring
ReplyDeleteYup, don't paint it. Perfect as is.
ReplyDeleteIt looks amazing! What a huge impact. I wish I could do something similar with my fireplace {it's dark and I hate it}, but since it's all brick I'm a bit limited.
ReplyDeleteI love this transformation Sarah! The lipstick trick makes you seem like a chic yet powerful DIYer! Haha! The boards look great! :-)
ReplyDeleteBeautiful fireplace job! Love it!
ReplyDeleteIt looks great! What a perfect finishing touch. And I love that you didn't even have to paint the boards. :)
ReplyDeleteYour fireplace is looking fabulous!! What a fabulous, quick & thrifty way to add more oomph to it. I tend to change up my fireplace accessories on a regular seasonal basis but the backdrop I leave as I have 10'ft ceilings and changing up the artwork is too much work!
ReplyDeleteHave a great day!!
Christine
Brilliant! I am so Pinning this...as soon as I finish my comment. :) Your mantel really and truly pops now. Love the lipstick tip--who says you can't use lipstick when you are DIYing? ;)
ReplyDeletePhooey, you mean you're supposed to paint the pre-primed stuff? :) Your fireplace looks great!
ReplyDeleteI love it! Hard to believe you did it in an hour...looks like a big job that turned out perfect!
ReplyDeleteIt looks great Sarah! I thought it looked good before, but now it really does look even better!! Everything pops against the white background! And I can't believe it only took you an hour!!
ReplyDeleteI love that lipstick trick with the screws--so clever! I am definitely going to use that. I am also a big fan of primed molding for the very same reason--no one can tell if you're lazy! Though, getting mine painted is one my to-do list... :)
ReplyDeleteI luuuurve it! ;) I think it adds that extra pizazz to the fireplace and rounds out the whole room. Great job! I'm off to pin it now, in case I ever get a fireplace. Thanks for the inspiration.
ReplyDeleteIt looks amazing, Sarah! It's the perfect finishing touch to your new fireplace wall!!
ReplyDeleteIt was so nice to meet you at Haven. (I was the dork that walked up to you at the cocktail party and muttered something awkwardly, that I can't seem to recall!)
Haven was fantastic, and I want to say a big thank you to you and the ladies, for all of your hard work!
xo-Lisa
Love your blog. Have poured over the pictures many times. Come visit me at my brand new blog-right now mostly self-help but eventually will include DIY projects.
ReplyDeleteKeep up the good work.
That looks absolutely 100% better! I love it!
ReplyDeleteI love it! It was worth the weight. I don't change my mantle up until the holidays (Thanksgiving and Christmas)
ReplyDeleteOh, wow, that's really beautiful, Sarah. Such a huge difference from what that corner used to look like! It really kind of brightens it up, too. Love it!
ReplyDeleteLove all the changes to the fireplace! The planks really tie together the mantel and bring some presence to the fireplace. Corner fireplaces are a real challenge (but oh so lovely on a cold night!). I have a lovely 1960's stone behemoth in my tiny living room. I call it 'the Hulk'. Removal is not an option, so I'm going with the retro-vintage vibe for now. Thanks so much for all you share in your blog! It is wonderful!
ReplyDeleteI feel your joy! We had the 80's 'wall o' brick' fireplace--with ugly brick AND an ugly blocky mantel that was neither deep nor level. 8' wide and floor-to-ceiling ickiness.
ReplyDeleteHorrible.
Would love to say I performed a diy transformation, but actually I sought professional help. We had the top half sheetrocked and a surround added to the bottom, wire-brushed the remaining exposed brick (it came out more mellow-looking), had built-ins added on each side, and I now have a beautiful 8' long x 10" deep mantle to decorate. I change it out seasonally at least--hubby calls it my new hobby. Lol. I'd link pics if I knew how--sorry!
Susan in Raleigh
This looks so nice. It really lightens up the room!
ReplyDeleteCan you tell me where you got your rug? I love the colors!
ReplyDeleteYes! That looks super. Super duper. I praise your patience, your problem solving abilities, your aesthetic, and your simply gorgeous new fireplace corner.
ReplyDeleteLove your Mantel. I actually recently changed it up for the 4th of July season. See it her: http://mandyandconner.com/2012/06/29/baby-youre-a-firework/
ReplyDeleteWhat a great idea -- it really looks great! And I love the accessories you have up there -- truly timeless. :-)
ReplyDeleteHey, love the mantle! So gorgeous!
ReplyDeleteIf you do paint it, you can always use a glaze to hi light the groves.
Nice job! Before I started blogging I only changed my mantle at Christmas. I liked the way it looked a lot and didn't see any reason to change it. Since blogging, I have been experimenting with seasonal mantles and it has been a fun challenge. I've been slow with summer and probably will get it done just about the time the fall mantle parties start though!
ReplyDelete