Wood planked coffee table
July 21, 2014
Share this
We haven’t had a coffee table in our family room for a while – I took out our square one about a year ago and loved how open it felt, so it stayed that way. (It now lives at my sister’s.)
When I moved the furniture around to the way I’ll have it when all the construction is done I realized I really wanted one again. But I needed it to be long and skinny. I don’t have any long and skinny so I’ve kept my eye out for something that might work.
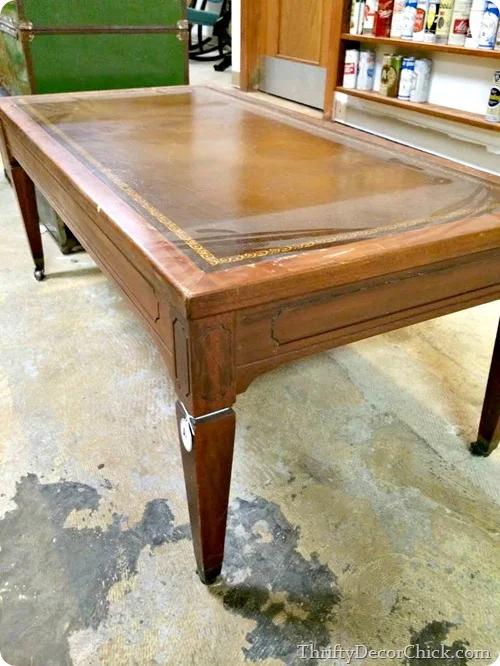
A few weeks back I found this at a local antique/thrift shop and it had me at WHEELS:
You know how much I love wheels on furniture. They are my jam.
The top of the table was a mess though, and I couldn’t figure out what to do with it as I stood there, so I left it. (No returns so I had to make sure it would work.)
Fast forward a few weeks and I couldn’t get that table out of my head. I went back, it was still there and it came home with me. I still didn’t know what I was going to do with the top but I had to have it.
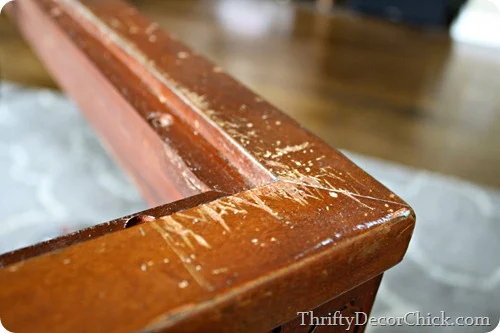
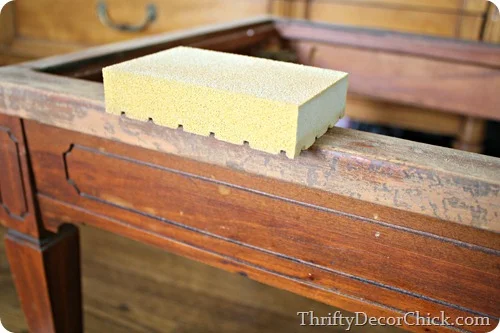
Initially I was thinking of sanding it down lightly and restaining the damaged parts, but when I got it home and took a closer look I realized it was a real mess:
I thought about keeping the leather top – for a minute. Then I got it cleaned off and saw it was beyond repair. The leather was cracked, which didn’t really bother me. But it also had paint and what looked like burn marks on it as well. And when I got it cleaned off I realized it was a very unattractive puke-brown color. Not so sad I couldn’t salvage it after that. :)
We have enough natural wood in the family room anyway, so my next plan was to paint it. I turned it over and realized I could take the top off:
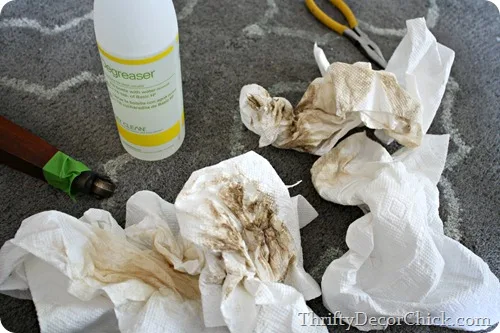
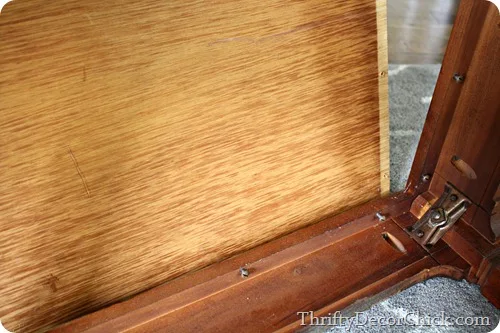 Then I cleaned the heck out of the thing:
Grody. I lightly sanded it to get more grime off:
Then took it outside to spray prime it -- I just used a basic gray primer. By the way, I mention this a lot but it’s worth saying again – make sure to clean any piece you’re going to spray paint! If you don’t you’ll get the dreaded crackle.
I picked up another gray spray paint called silver fox by Valspar for the main color – I figured it would be easiest with the detail on the table.
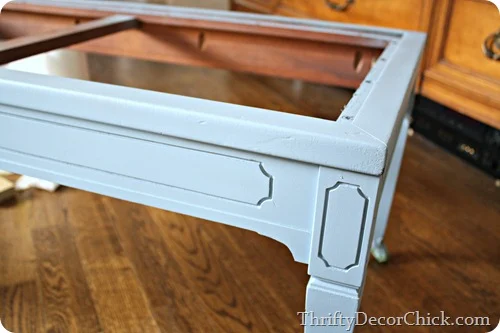
Outside it looked decent, but when I brought it in I realized it was BLUE. Like, baby blue. What the??:
ARGH. Spray paint lids not matching the color are quickly becoming one of my biggest pet peeves. DIYer probs.
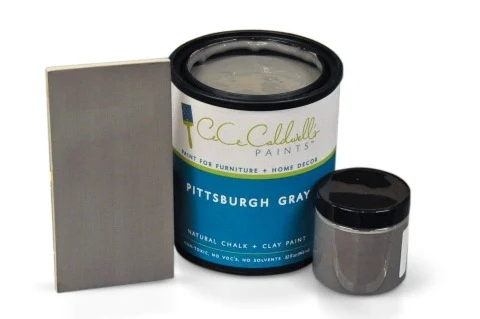
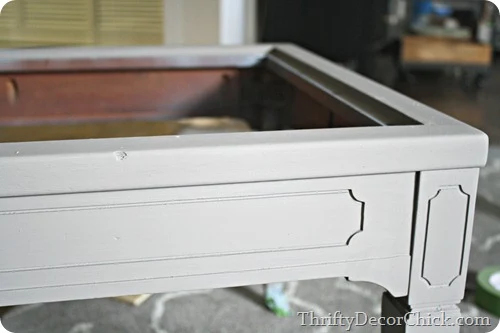
So I grabbed some chalk paint, which is what I should have done from the start. (But I still would have primed – these reddish stains can bleed through.) I used my CeCe Caldwell gray that I already had:
I shared my thoughts on this paint and how to apply it here – I really love these paints. It dries much lighter:
But when you apply the wax it gets richer and darker. I did have issues with the wax this time though, more on that in a minute.
I came up with a plan for the new tabletop – first I grabbed some scrap luan and cut it size with my jigsaw. I stained it just in case you’d see it under the new tabletop:
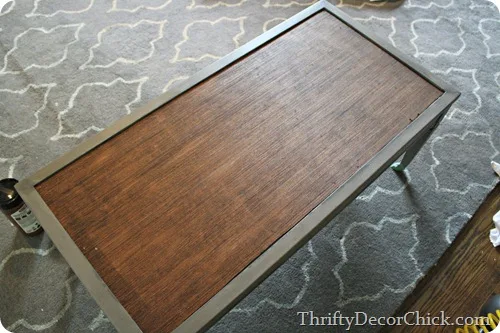 I used my nail gun to nail it into the edges where the old top sat. You can see there how much darker the chalk paint gets when you apply the wax by the way.
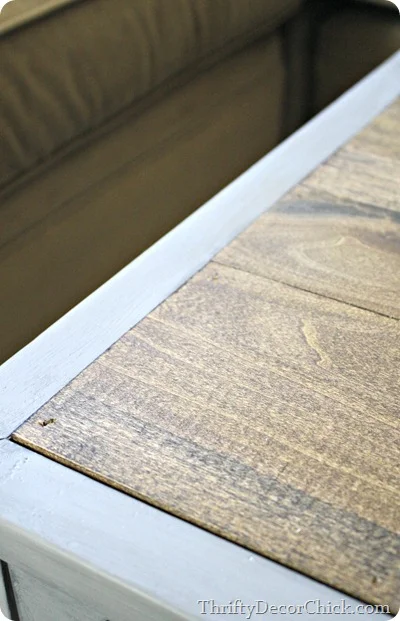
Then I used some very thin boards from Lowe’s (they are called craft boards) that I stained dark walnut by Minwax (one of my favorite colors):
The boards were more than I planned to spend but I needed a very specific thickness and they also had to be decent, stainable wood.
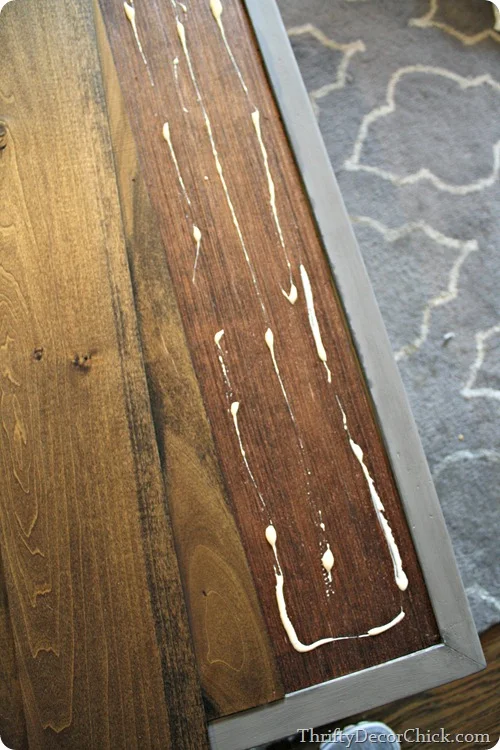
I put a little bit of glue down on the luan and then laid the craft boards down:
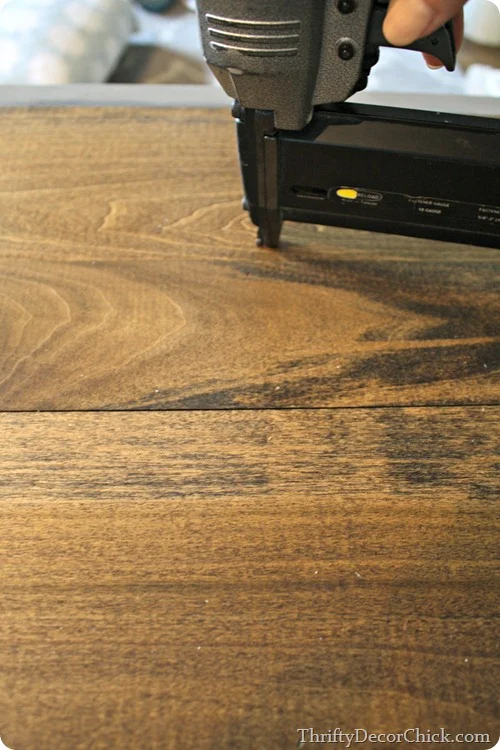
And nailed them in as well:
I took the old tabletop with me to the hardware store so I was able to find a combination of boards that fit the top almost perfectly. These boards aren’t all the same size – two are the same, the other two are different sizes. It didn’t bother me and I actually like that they aren’t all the same:
I’m not thrilled with how that skinny board stained up – I used conditioner on all of them and that one doesn’t look as good as the others. But it looks rustic…that’s what I’m going with for anyway.
If it bugs me I’ll replace it. Or live with it. :)
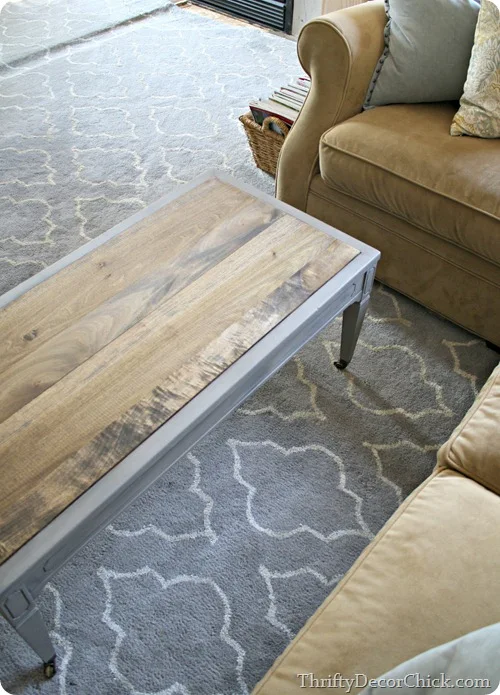
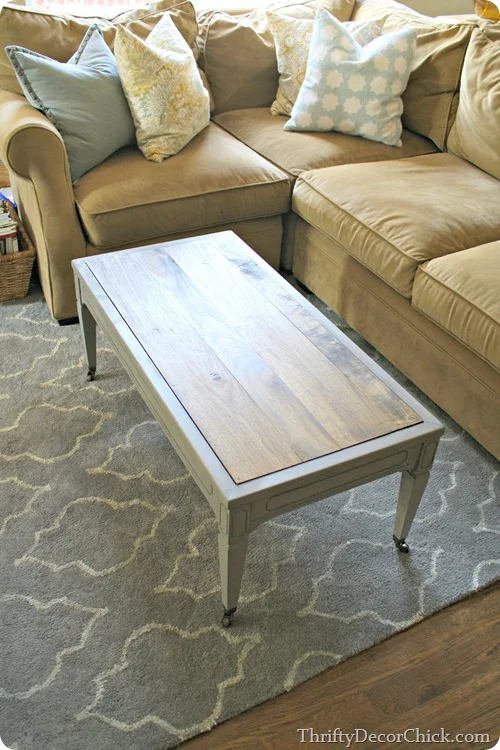
The top is super smooth – I stood back when I was done and was SO happy with how it turned out:
I LOVE it:
The sectional will be moved soon so ignore the rug placement and all – this will get flipped to face the fireplace when the TV can be moved over. Hoping this week!
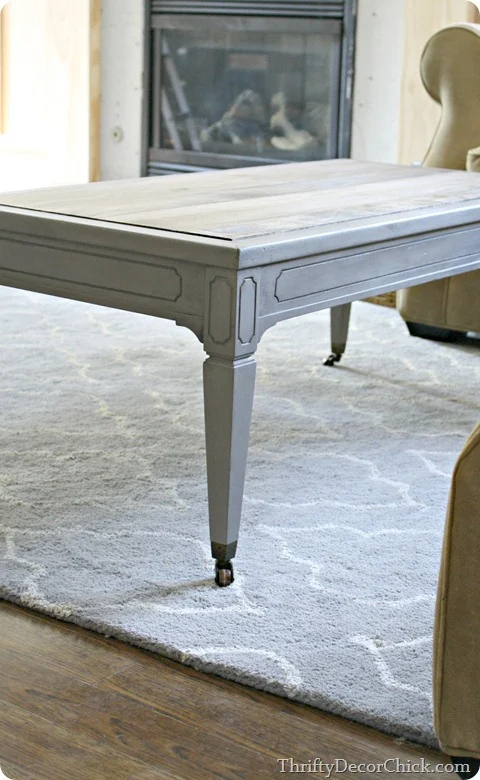
WHEELS:
I’m bugged out by the wax this time – this wax has done this the past two times I’ve used it. It gets blotchy and doesn’t dry well in some spots. Most of it looks great – it’s just certain areas. Usually this happens when you use too much, but I wiped this sucker well so I know it’s not that.
It’s frustrating because I’m going to have to sand down a couple spots and do another coat of paint and wax to correct it. But I LOVE the look – the dark wood combined with the gray is luscious. So it will be worth it. :)
There were a few issues along the way but I ended up with a coffee table I love in just the right size. The table was $20 and I spent about $25 on wood (those smaller pieces get expensive!) – not bad at all! Don’t overlook those pieces that are a mess – they can be turned into beauties!
Have you made over any messes lately?



I really like how it turned out!
ReplyDeleteCan you give me the name of the store you purchased this at? I live in Noblesville and I'm always trying to find new thrift stores to visit.
ReplyDeleteBTW this looks great!
That looks AMAZING! I love that it mixes styles. You're makin' me think...can you smell the smoke? HA!
ReplyDeleteIt looks absolutely beautiful Sarah!!!!
ReplyDeleteLove it Sarah! The wood blanks add so much character to this table.
ReplyDeleteMarie@The Interior Frugalista
gorgeous! I love the variations in the wood!
ReplyDeleteI really like the contrast between the paint and the natural wood.
ReplyDelete-Ash
www.stylizedwannabe.blogspot.com
It looks perfect in your room. Who knew it could look that good.
ReplyDeleteSarah! You're killing me with your creativity here girlfriend. I have a similar table that has sat in my basement for longer than I care to recount (wheels included), since I haven't been able to figure out what to do with it. I love your idea - it turned out beautifully. Mine has a top that flips open, but after seeing yours torn off, it's getting my wheels turning again (no pun intended). ;-)
ReplyDeleteSarah the table looks great! I love the new color!
ReplyDeleteVery very pretty! love it that you changed the dern top!! I am in the process of redoing our very ugly dining room table. I've had a table cloth on it long enough. It will either look good when i'm finished painting it, or it will go bye bye. We'll see!
ReplyDeletegreat transformation! I could also have seen replacing the leather with a large piece of mirror cut at the hardware store - or a piece of wallpaper perhaps? I see these coffee tables all the time and will have to keep my eye out for one now!
ReplyDeleteI love that paint colour. I can't wait to see the family room all finished up! You must be getting so excited to get it all done and enjoy the space.
ReplyDeleteIt's gorgeous!! Now you can give your little sister your old one! :)
ReplyDeleteBummer about the wax fiasco, but it turned out beautifully! I love rustic wood paired with a luscious gray, too. Well done, Sarah! =)
ReplyDeleteWhat what!!! It turned out awesome! Love the castors, too. If it were mine, I wouldn't worry about that one top board. And not just 'cause I'm lazy. Once you get all your prettys on it, you'll never even notice it.
ReplyDeleteIt looks great! Love the two tone and the wheels!
ReplyDeleteThat is very pretty! You did a great job.
ReplyDeleteThis looks amazing! I'm curious though because I've had frustrating waxing "issues" as well...what type/brand of wax did you use?
ReplyDeleteUse General Finishes gel stain...the first coat will look AWEFUL but the second and maybe third coat really makes a difference. You will still see the grain but it won't be so "blotchy." I do not use any gel stain but GF...I have tried the minwax and it just does not come out as pretty! Part of the problem is the stain you used has a poly finish in it so once it is down, another coat of a regular stain is not going to penetrate....so it is impossible to make adjustments without using gel stain. Next time try using a stain WITHOUT a "sealer/finisher" and that way you can layer another stain if you don't like the color or look. Also, before you sand the wax spots you aren't happy with, try just stripping it with mineral spirits or whatever lightly strips wax. I don't wax chalk paint...I use poly. Preference.
ReplyDeleteOtherwise, it IS beautiful!!! Beck
beckwithstreasures.com
Looks great!
ReplyDeleteohhh I love it! I too have had that prolem with waxes before. Honestly that's why I switched to poly on top of pieces, expecially if they'll get a lot is use and abuse. I do love the wax, but it drives me crazy when there's on small spot that doesn't look the same as the rest! I can't wait to see your new family room!
ReplyDeleteWhat are you using to clean the piece with? Looks like a "degreaser"? I have kitchen cabinets (varnished, I believe) that REALLY need a good cleaning and I'm not sure what to use on them. What would you suggest using?
ReplyDeleteOh I love the look of the table!
ReplyDeleteLooks great!
ReplyDeletethis is AWEOME. But, I am never that lucky at the thrift shop. Dang it small town!! Gorg
ReplyDeleteThe little piece you are not happy with is the piece I love the most! The imperfections in wood are what gives it all the character and charm. I bet it will grow on you.
ReplyDeleteLOVE the rustic wood and beautiful grey! Perfect combo!
ReplyDeleteIt looks fabulous to me. Don't see anything that needs fixing. Great job!
ReplyDeleteWow Sarah ! It's fantastic. Quick question where did u get the cushions on your couch? I have the same coloured couch and always struggles trying to match colours to it. love ur colour scheme
ReplyDeleteMany thanks
Emma
Please tell me every thing need to know about the nail gun and compressor you use. I want to buy one too.
ReplyDelete