How to add open shelves in the kitchen
November 11, 2015
Share this
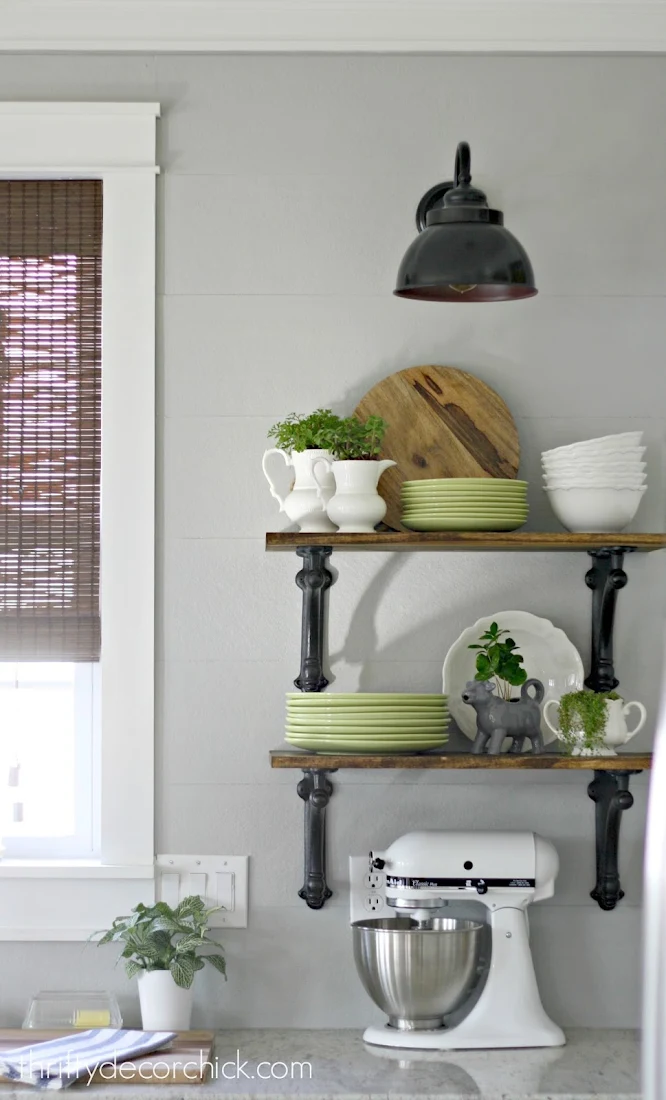
Today I'm sharing my first "shelfie" in our (almost) remodeled kitchen. I'm so excited to have the shelves up on the empty wall. Having a blank slate for so long was kind of nice -- so open. But I was definitely craving some function and to warm it up a bit.
The last time you saw this space (the area to the right) it was empty:
I have worked with Minwax on a few projects over the past few months (see my DIY state art here and the planked wall over the basement kitchenette here) and this is another one. I use their products all the time and I'll say it again -- I love staining. It's instant gratification. Seeing the color go on and how it pulls out the beauty of the wood is a winner every time.
At first I thought I wanted thick chunky shelves but then I ended up going with something more streamlined. The two inch thick wood that is readily available has a lot of knots and I wanted something without. I went with a piece of poplar:
Here's a tip to make sure your wood isn't bowed -- you want it nice and straight for something like this. Turn it on it's side and eye it down the length of the wood. You'll be able to see if there are any curves or bows:
Sorry for the garage floor. I obviously do this in the hardware store before I buy and that would have made for a much nicer backdrop. ;)
I've preached this before but it's so important -- use a pre-conditioner before you stain. It takes just a few minutes to swipe it on and it makes a big difference in how the stain absorbs:
If it's rough in between coats of this or stain, use some steel wool to knock down the texture a little bit. You can go ahead and stain within a few minutes of applying.
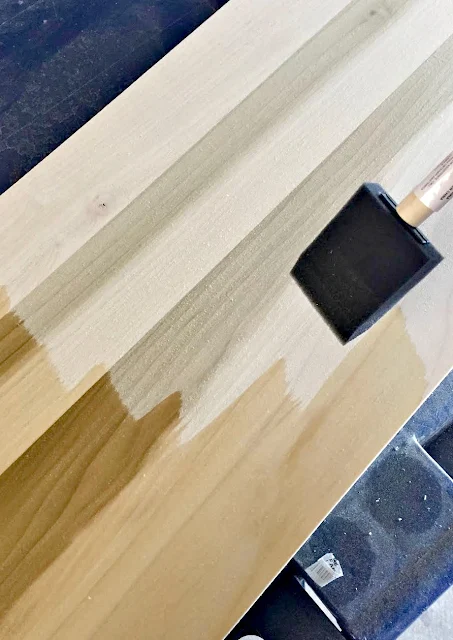
I was going for a little lighter stain than what I typically use. I loved this Provincial color when I did the planked wall a couple months ago and decided to go with that:
It went on much darker than I expected, but I love it. More on that in a bit.
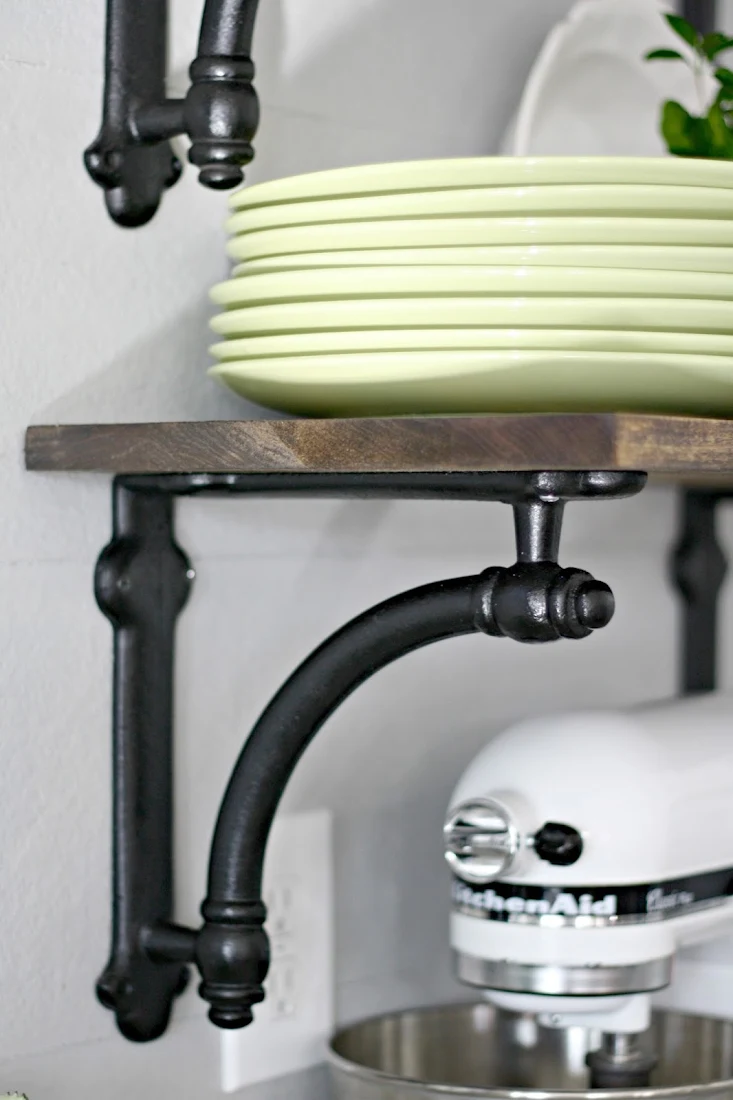
The brackets were something I've been planning to use for awhile. I first fell in love with these when I showed you Nicole's kitchen here. I had to have them! These are the Arc Bracket from Restoration Hardware and they were a splurge! But they were on sale and I found an online discount so that helped a bunch:
I used a black spray paint and they looked SO much better. It works so well with the black lights and other touches we have in this room.
I got the brackets and boards up and then started the process of adding a polyurethane to the top:
You can do all of this before you hang them but I like to see things up and figure it out before I do this final step. It's easy to finish them up while hanging.
See how much the poly brings out even more of the wood detail? Love it.
I use a foam brush to apply the poly -- it helps to cut down on bubbles. Bubbles are not your friend when doing this part. If you get them:
Be sure to make a swipe over them to make it smooth. If you don't they will dry that way.
This is the fast drying version but I let it sit overnight anyway:
I was able to fit quite a bit on these two shelves!
I put our plates and some decorative items up as well:
This hangs right over the dishwasher and let me tell you -- it is AWESOME to just put stuff right up there. I don't worry about dust because we use these nearly every day. Love.
It's funny -- I thought for sure I'd want white dishes up there, but I put our green plates up and LOVED it. I did mix it with some white we have as well, but the green looks so pretty:
And even though the stain came out darker than I expected, it turns out it works perfectly with the bamboo shade on the window and with the wood chairs at the island. I don't believe woods and metals have to match in a space -- that's a matter of personal preference. Variety = interest for me. But you do want to try to tie things together somewhat.
Speaking of that, I'm so glad I painted the brackets:
They tie in beautifully with the lights in this room and some other accents like our pantry door and the chalkboard wall. It's all coming together and I couldn't be happier!Many of you have asked about the cabinet to the right and my plan with that. I knew all along that I'd still be able to open that up -- it opens plenty to access everything inside, but I do have a trick up my sleeve. More on that later if it works out. :)
There you go -- my very first shelfie. Not gonna lie, I'm excited to dress these up for the holidays as well:
A little tip when hanging shelves like this -- look at both sides of your wood and pick the prettiest side for the top of the lower shelf and the bottom of the upper shelf. Those are the only parts you'll see. :)
This is probably the last you'll see of the kitchen until I share the reveal next week. Not sure what day it will be but it WILL be next week! :)
I have been compensated for this post by Minwax but all opinions are my own. I only share products that I use and love. Follow Minwax on Facebook for tons of DIY ideas!


Looking forward to seeing the finished kitchen! My home is only 11 yrs old but already want to change up the kitchen and what you've posted so far looks great!
ReplyDeleteOh and is it bad that I want to buy those brackets and not have a use for them?? Those are purrrttttyy!
DeleteI get it -- I knew I had to use them!
DeleteLooks great! Also ... I love the creamer cow! My mom has one of those that she never uses but now I must steal it from her and put a mini plant in it!
ReplyDeletewhere did you get the cow from? I hope it is Monday that we will see the kitchen.
ReplyDeleteTarget! :)
DeleteI love it, but it looks a tad shorter than I would have done it. I feel like it would have looked more balanced if you had extended the wood out past the brackets. I hope you don't mind me saying that. Can't wait to see the finished kitchen as your work is ALWAYS excellent.
ReplyDeleteThank you! I couldn't go any wider so I could clear the door next to it. They go two inches past the brackets. :)
DeleteI was thinking the same thing but I can tell it will probably look great when we see the big picture of the kitchen. :)
DeleteOh my goodness they look so good! I like the length of them- they fit perfectly over the Kitchen-Aid and look really balanced :)
ReplyDeletehttp://katelynmcphee.blogspot.ca
You are so cute! Your "shelfie" is awesome! Honestly, your shelves look great, and I'm excited to see the whole reveal!
ReplyDeleteOh Sarah, your shelves look so good! I'm so happy for you and your progress. Your kitchen really looks so great!!! P.S. Thanks for the pre conditioner tip, pinning for later.
ReplyDeleteLOVE your shelves so much!! I love that you stained them and painted the brackets black as it's different from the usual white shelves. Can't wait to see the whole kitchen!!
ReplyDeleteIt looks great and cant wait to see the big reveal. Would also love to know what is the name of your gray paint?? I never knew how hard it was to pick out a gray color. Mine turned purple, not good
ReplyDeleteSeriously the anticipation of this kitchen is killing me. I love every single detail, and these shelves are gorgeous. I just love seeing it all come together!
ReplyDeleteI've loved watching your kitchen and living room evolve over time. I can only imagine that you are absolutely thrilled seeing your vision come to life. I love, love, love the look and feel you are going for. Your rooms look fantastic and I can't wait to see the final reveal. Thank you for sharing the journey with us!
ReplyDeleteThose dishes look pretty. One day I want pretty dishes. Right now it's knock off corelle. When we planned our kitchen 2 years ago I wanted open shelves but couldn't decide and when with uppers. I still love the look of open shelves. Maybe someday.
ReplyDeleteDid you go back to Sheetrock on the wall? I thought you were doing planks but its totally smooth looking, I don't see any spaces between planks. I'm assuming you made some changes?
ReplyDeleteNo the planks are there, they have more texture than the wall. I mentioned in the post about those I didn't like the spacing in between so I filled it in. :)
DeleteI can't wait to see it altogether! This project is shaping up as one of my all-time favorite renos you've done in your house. I will be copying some of your style when I start updating around here next year. We built our house 12 years ago and it is definitely not decorated to suite my current taste. I wish I had the time to start now! Beautiful work you do, Sarah.
ReplyDeleteThat turned out amazing!
ReplyDeleteXO Ellen from Ask Away
www.askawayblog.com
I smiled when I scrolled down & saw that cow. I think my Grandmother had one similar. I want to hug it. Ha-ha
ReplyDeleteThe shelves add so much interest. Adorable.
The text was lined up fine on my cellphone, by the way.
I smiled when I scrolled down & saw that cow. I think my Grandmother had one similar. I want to hug it. Ha-ha
ReplyDeleteThe shelves add so much interest. Adorable.
The text was lined up fine on my cellphone, by the way.
Love it!!! The green dishes are very pretty up there and I love the cow. Can't wait for next week!
ReplyDeleteMy favorite go to blog! Love what you are doing in your kitchen. You validate what a woman can do with a dream and a purpose. Looking forward to the reveal next week. Bobbie
ReplyDeleteI love the brackets and totally get splurging on them. Very nice. I agree with a previous comment about the scale of the shelves: far to short and maybe too thin in balance with the heft of the brackets and the scale of the rest of the items in the kitchen, such as the large island, fridge and stove. It's a balance thing, maybe there's a way to rethink that corner cabinet/door clearance issue??? Anyway... Love the hardware on the drawers. I've been thinking of changing mine out. May I ask where you found those? Thanks.
ReplyDeleteI have to disagree, they aren't too short for the wall they are on. Balance is indeed important -- and not everything needs to be large. As I mentioned, I have something in mind for the corner cabinet and if it works I may make the shelves a bit longer, but not much.
DeleteOh, I just LOVE those brackets! They're so substantial. CANNOT WAIT to see the big reveal!!!
ReplyDeleteI absolutely love what's happening here in your new and improved kitchen - I cannot wait to see the reveal!!!
ReplyDeleteTook me while to get this far,had to read all comments. I find it amazing what is to be learned from reading the comments. I have to admit I am so darned envious of your home including kitchen. I'm just not ambitious enuf to attempt any of projects you have and I'd have to fight hubs on every darned one since he is the man in house, what could i possibly know better? Too much energy to be wasted arguing with him and believe me he'd be putting his two cents in every chance he got.
ReplyDeleteThose brackets are awesome and painting them black is perfect to go with other features in your kitchen. I was surprised you didn't put 3 shelves up instead of two but think you just might know what you're doing in your house much better than rest of us, just maybe? Besides you paid for all supplies and did all the work, think that gives you right of decision making. You've known what you were doing all this time so think trust in your judgement is warranted.
Have wonderful weekend and love your shelves, so pretty. Thx for tip about pre-conditioning wood before staining.
I absolutely love your kitchen and can't wait to see the full reveal soon. I think you mentioned the wall color is Gray Clouds in another post. Is that Sherwin Williams or Benjamin Moore? Also, what finish do you recommend?
ReplyDeleteThanks Amanda! That color was from Sherwin Williams.
DeleteWatched The Intern last night (the new Anne Hathaway movie) and when it showed her kitchen, it looks eerily similar to yours! The color of the bottom cabinets and countertops looks just like yours and it had wood shelves about the same color and I could have sworn the brackets look just like the one in this post. I'm not sure if there are any pictures online yet of movie screenshots but if there aren't, you'll have to check out the movie just to see. Plus, it was a pretty good movie.
ReplyDeleteHow deep are these shelves? I'm about to make some open shelves (floating) for a friend in her kitchen but we are debating whether to use 1x12 or 1x8 or something else. Thoughts?
ReplyDelete