How to install new baseboards over old
March 04, 2014
Share this
I’m kind of infamous around here for starting one project and then snowballing it into a massive project that will take me weeks to finish. Yeah. So when we had the new floors installed in the master a couple weeks ago I started another snowball.
I wanted to install new baseboards in there but didn’t have enough time to take out the old ones before they started. So after the floors were laid it was going to be impossible to get the old out. (The floors are higher than the carpet so the bottom of the base was way down under the flooring.) Hope that makes sense – basically I couldn’t have done it without damaging the floors.
SO I started thinking about how I could beef up the baseboards another way. Eventually I’d love to change out all of our wimpy base with thicker stuff. I just love the look. I realized I had two options – either extend them somehow with additional trim (you add a line of a thin molding above and then paint between them to give the illusion of thicker base) or put something over it.
Because I’m doing a wall treatment on one wall and I want the wood on that wall to be flush with the baseboards, I decided to go with the latter. I’ve been using this mdf stuff as the base in all the rooms I’ve redone lately: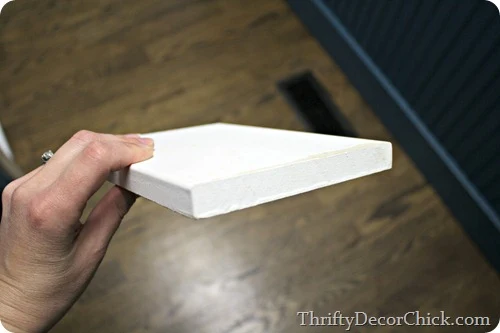
It comes primed and it’s got a slight curved edge that I love.
You can see it here the powder room:

Since it’s mdf you have to decide if you want to use it in a space that could get water since it can swell if it gets wet. But once it’s painted it holds up well. The toilet in that bathroom overflowed the other day and the base is fine. :)
I also used it in the mud room:
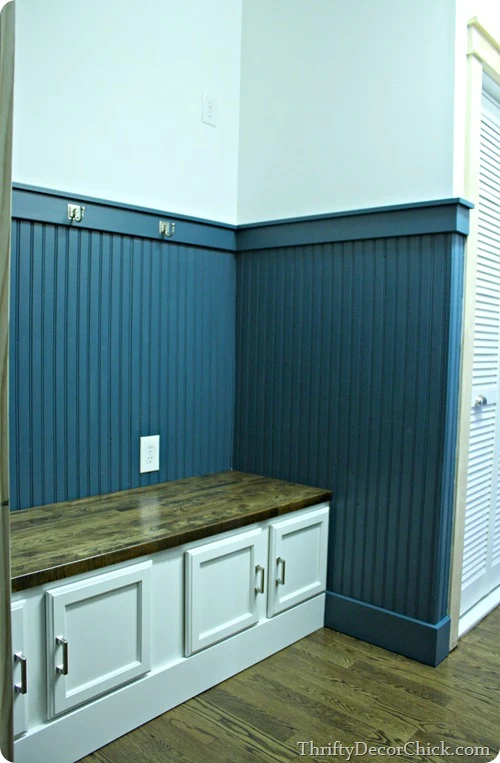
I used to always use quarter round with my base but I’m finding I like the simpler look without it.
I came up with a plan to redo the base in the bedroom without tearing it all out, but first I had to deal with the door trim. That’s another thing I’m slowly changing out in our house – I love the thicker craftsman trim and just do it as I work on a space.
So far I’ve decided to redo the base and now the door trim. Are you keeping up? And it started with new flooring. :)
Because I was keeping the old base and working around it I had to cut it down to make room for the new thicker door trim:
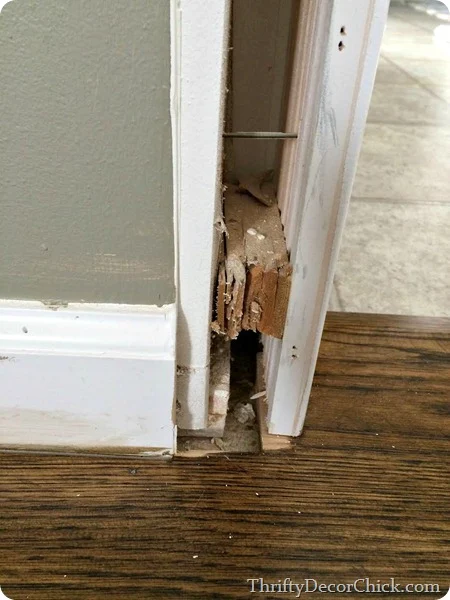
The only way I know how to do this is with a cutting tool and thankfully I have a Dremel Multi Max made just for this kind of job:
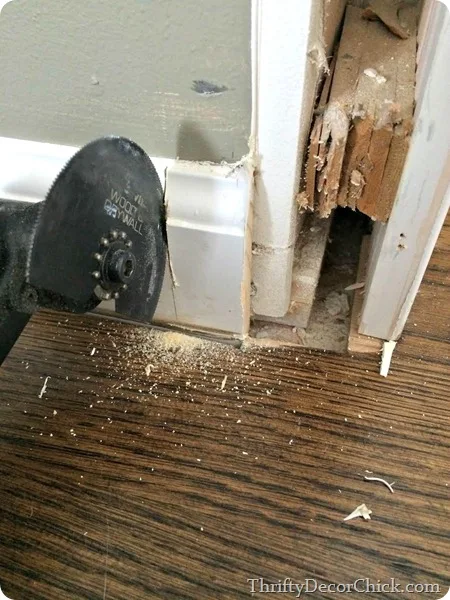
It took FOREVER to do each one though. I had to be super careful with the floors so I’d cut horizontally then vertically, over and over again.
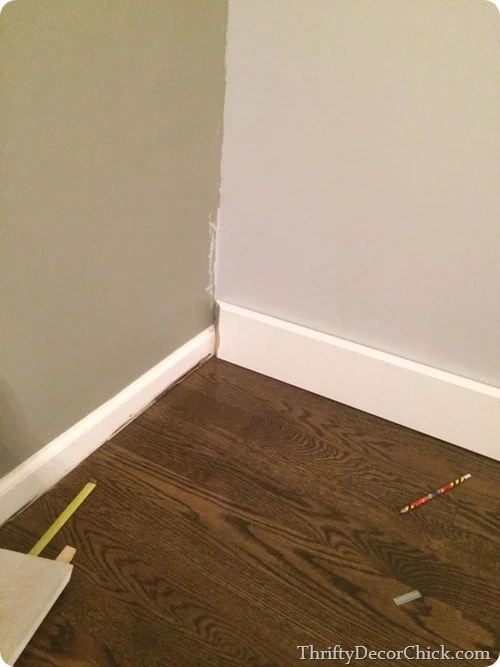
After those were cut down I was able to address the base. This was my dilemma – if I placed the new stuff over the old there was a big gap at the top:
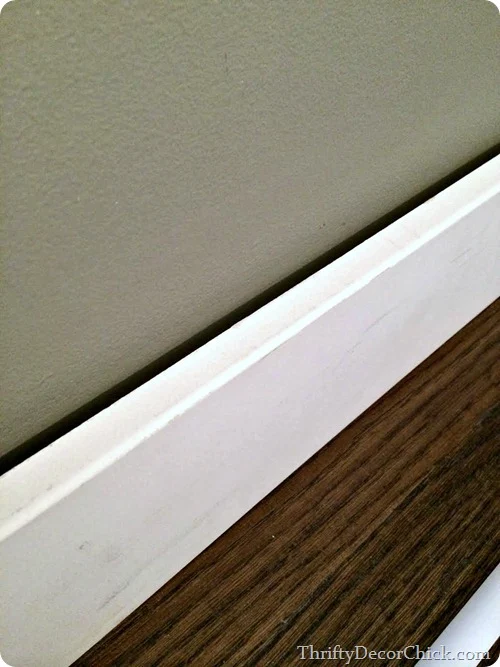
Obviously because the original base was about half an inch thick – so I needed to find something thin that was only half an inch thick to fit behind it.
I walked the trim aisle looking for anything that was skinny and that size and finally realized the cheapest stuff they had was going to work perfectly – quarter round! It’s the small stuff that’s usually installed at the base of baseboards.
I got some and brought it home to try it and it worked perfectly. I just would hold it up behind the new stuff, then make sure they were flush and then used long nails in my nail gun to install it (securing each one into a stud):
You see what I did there? The quarter round was just the same thickness as the original base that’s still installed behind the taller stuff. So it made up the difference and made the new baseboards flush. Oh, and I turned the quarter round upside down so the flat side is on the top.
Ignore the two different paint colors. I swear I’m dealing with that soon. :)
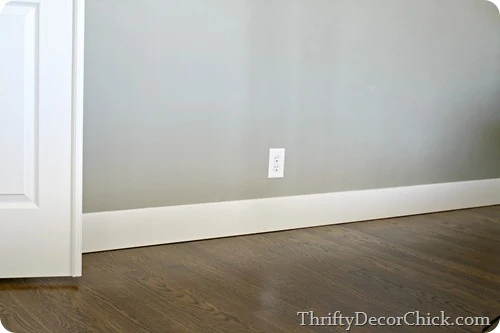
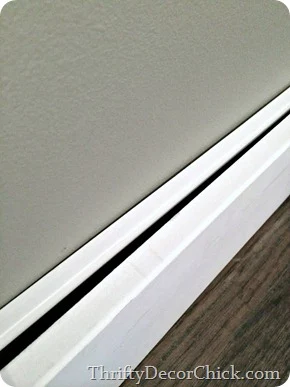
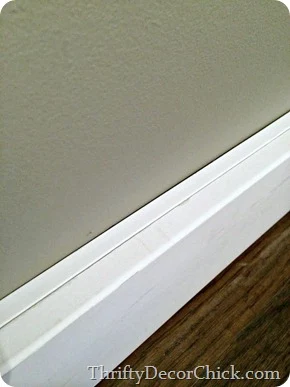
There is a line along the top where the two meet but you really don’t notice it. After they get paint you’ll notice it even less. Here’s a finished wall from the side:
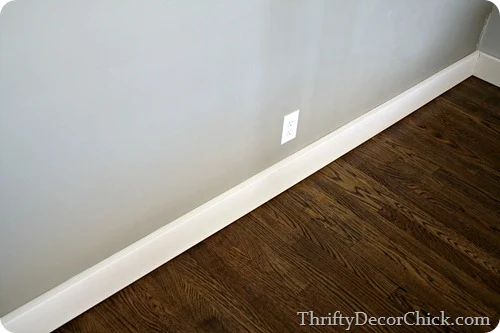
And from the top:
I still need to paint and caulk but here’s an idea of how it looks all done:
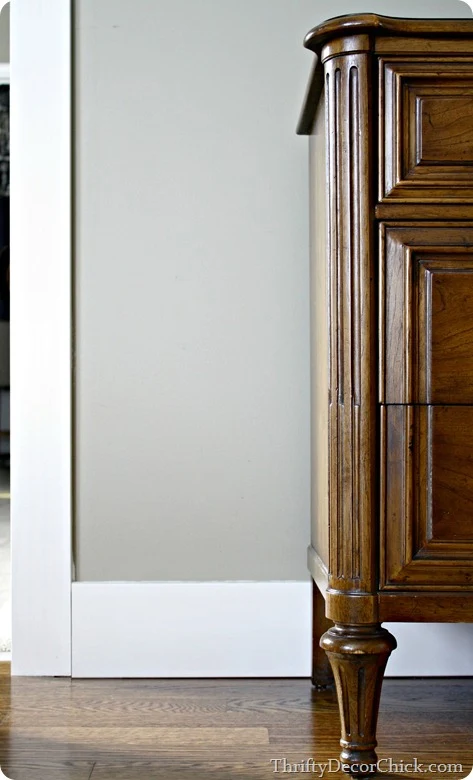
I cut in there so with the new paint color and caulk it will be nice and clean, but you get the idea. The new door trim needs two more coats but I’ll show you all of that when I’m done.
Now that the floors are done I need to hem the drapes a little more (see? the list goes on and on) but here’s another shot of the new base installed, before any of the finishing touches:
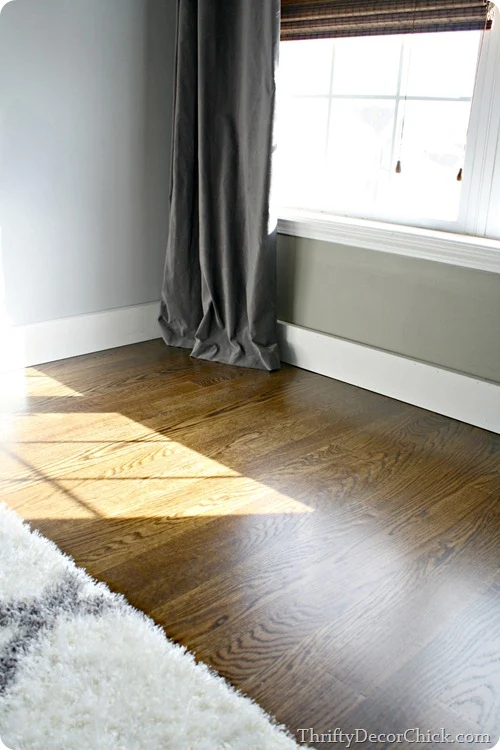
SO much better. I love the look and I love that I was able to figure out a way to make it happen!
As far as supplies go, I would have needed to purchase the quarter round anyway if I had kept the original base. So the cost was in the new mdf stuff for the room. I’m pretty sure they are around $8 for an eight foot piece.
I LOVE the look of the thicker trim – it’s just so much more substantial. This is a big room so it fits it much better. Have you tried any tricks to beef up your baseboards? Or are you lucky enough to already have the thicker trim?
I wanted to install new baseboards in there but didn’t have enough time to take out the old ones before they started. So after the floors were laid it was going to be impossible to get the old out. (The floors are higher than the carpet so the bottom of the base was way down under the flooring.) Hope that makes sense – basically I couldn’t have done it without damaging the floors.
SO I started thinking about how I could beef up the baseboards another way. Eventually I’d love to change out all of our wimpy base with thicker stuff. I just love the look. I realized I had two options – either extend them somehow with additional trim (you add a line of a thin molding above and then paint between them to give the illusion of thicker base) or put something over it.
Because I’m doing a wall treatment on one wall and I want the wood on that wall to be flush with the baseboards, I decided to go with the latter. I’ve been using this mdf stuff as the base in all the rooms I’ve redone lately:

It comes primed and it’s got a slight curved edge that I love.
You can see it here the powder room:

Since it’s mdf you have to decide if you want to use it in a space that could get water since it can swell if it gets wet. But once it’s painted it holds up well. The toilet in that bathroom overflowed the other day and the base is fine. :)
I also used it in the mud room:

I used to always use quarter round with my base but I’m finding I like the simpler look without it.
I came up with a plan to redo the base in the bedroom without tearing it all out, but first I had to deal with the door trim. That’s another thing I’m slowly changing out in our house – I love the thicker craftsman trim and just do it as I work on a space.
So far I’ve decided to redo the base and now the door trim. Are you keeping up? And it started with new flooring. :)
Because I was keeping the old base and working around it I had to cut it down to make room for the new thicker door trim:

The only way I know how to do this is with a cutting tool and thankfully I have a Dremel Multi Max made just for this kind of job:

It took FOREVER to do each one though. I had to be super careful with the floors so I’d cut horizontally then vertically, over and over again.
I used my crow bar to pry it off, but it always came off in pieces:
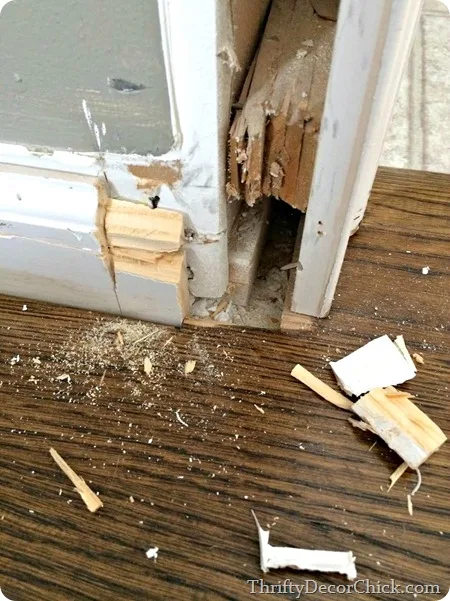
This was mostly due to the fact that the Dremel kept dying when I would turn up the power. The battery was fully charged but the thing kept pooping out. Anyone else deal with this? Maybe it’s because the batteries are a few years old? It made for a long process, but eventually between that and a hammer and the crow bar I finally got them off.

This was mostly due to the fact that the Dremel kept dying when I would turn up the power. The battery was fully charged but the thing kept pooping out. Anyone else deal with this? Maybe it’s because the batteries are a few years old? It made for a long process, but eventually between that and a hammer and the crow bar I finally got them off.
After those were cut down I was able to address the base. This was my dilemma – if I placed the new stuff over the old there was a big gap at the top:

Obviously because the original base was about half an inch thick – so I needed to find something thin that was only half an inch thick to fit behind it.
I walked the trim aisle looking for anything that was skinny and that size and finally realized the cheapest stuff they had was going to work perfectly – quarter round! It’s the small stuff that’s usually installed at the base of baseboards.
I got some and brought it home to try it and it worked perfectly. I just would hold it up behind the new stuff, then make sure they were flush and then used long nails in my nail gun to install it (securing each one into a stud):
You see what I did there? The quarter round was just the same thickness as the original base that’s still installed behind the taller stuff. So it made up the difference and made the new baseboards flush. Oh, and I turned the quarter round upside down so the flat side is on the top.
Ignore the two different paint colors. I swear I’m dealing with that soon. :)
There is a line along the top where the two meet but you really don’t notice it. After they get paint you’ll notice it even less. Here’s a finished wall from the side:

And from the top:

I still need to paint and caulk but here’s an idea of how it looks all done:

I cut in there so with the new paint color and caulk it will be nice and clean, but you get the idea. The new door trim needs two more coats but I’ll show you all of that when I’m done.
Now that the floors are done I need to hem the drapes a little more (see? the list goes on and on) but here’s another shot of the new base installed, before any of the finishing touches:

SO much better. I love the look and I love that I was able to figure out a way to make it happen!
As far as supplies go, I would have needed to purchase the quarter round anyway if I had kept the original base. So the cost was in the new mdf stuff for the room. I’m pretty sure they are around $8 for an eight foot piece.
I LOVE the look of the thicker trim – it’s just so much more substantial. This is a big room so it fits it much better. Have you tried any tricks to beef up your baseboards? Or are you lucky enough to already have the thicker trim?

beautiful! would you mind sharing the new paint color? :)
ReplyDeleteThe paint color you see in the pics is called tornado watch from Lowe's. The new color is a lighter gray. :)
DeleteI love the look of your new baseboards! Ours are small and wimpy and it's really noticeable in our living room and dining room. I may have to try out your MDF trick instead. Love it!
ReplyDeleteI might need to copy-cat your ingenious baseboard solution! The hardwood floors in my entire main area were installed the same way, covering part of the baseboards :( They are tinier than they were before! I love your solution and yeah, it looks awesome!
ReplyDeleteYES! I couldn't believe how much smaller they looked. I didn't notice it as much downstairs.
DeleteSarah,
ReplyDeleteI love the way you beefed up your baseboard, and how you dealt with the brittle wood. I have a question for you. In our house we have shoe molding, which is a slightly different shape then quarter round. Did you use shoe mold or quarter round, which is slightly bigger and wider than the shoe molding? Again you did an awesome job but, I wanted to be sure which you purchased because, that can make for some frustration.
Yes they are slightly different. I went with with quarter because the base of the quarter round was half an inch. It just depends on what would match the thickness of your original boards -- shoe might work too! But just measure to make sure. :) Oh and I forgot to mention in the post that I turned the quarter upside down so the flat side was up.
DeleteLove that look of the higher baseboards, reminds me of the older homes my great granny and granny lived in. Nice job.
ReplyDeleteI love it all ~ the new baseboards, flooring, paint color and curtains....beautiful! :)
ReplyDeleteThey look awesome! I didn't realize how much of a difference base boards can make in a room. Great job!
ReplyDeleteI can't even begin to explain how we fixed our floor moulding going up the stairs! The section of the stairs called the "stringer" was the problem as it had "levels" to the (beat up) moulding. We needed it FLAT to set MDF on for board and batten. I racked my brain and one day after many frustrating brainstorms, picked up a piece of moulding, flipped it and TADA! Exactly the right size, gave us a flat top to set our boards vertically on, and looked so much better to boot! We even spent forever on a chewed up section of moulding and somehow made it look square and straight! I feel your love for all things moulding and getting it beefed up and straight. It looks great!
ReplyDeleteLooks great! Quarter round trim has saved my butt a few times :)
ReplyDeleteOur house was built in 2000 so it's sort of still stuck in the 90s with lighter oak cabinets and oak trim everywhere. I'm totally over it. I'd love to replace it all and seeing how you tackle things as you can, when you can, when you have the budget..I think we can do this too. I LOVE your baseboards, we'll just go slow, do a room at a time as we remodel other things and eventually we'll replace it all, right? :) Thanks for the inspiration.
ReplyDeleteGorgeous Sarah!! I love the look, and also do not use quarter round. I find that I need that little bit of space when scooting furniture against the wall. I have been fighting with thin baseboards for a while and planned on changing to reclaimed trim form the old house here, but it is so thick I have to change all the door trim, so I just painted it for now. Love your wall color!
ReplyDeleteI'm the same way about the furniture against the wall! I can't stand any space behind it. :)
DeleteI LOVE beefy baseboard and I think you're a genius to come up with the idea of making your baseboard wide without tearing out the old!!!
ReplyDeleteBertie DeWane
I'm kind of astounded that your hardwood installer would put the new hardwood right up against the existing baseboards - that is a total no-no for hardwood installation. Wood expands and contracts with the seasons and needs an "expansion gap" around the perimeter so it doesn't cause buckling in the floor during an expansion time of year. We installed 1500 sf of our own hardwoods last fall so I researched the heck out of the process. We had wimpy 2.25" baseboards that we removed before installing our hardwood. They were dry and splintery and some of them were ruined in the demo (although we'd thought about adding some trim molding to beef them and reinstalling them) so instead added new 3.25" baseboard AND shoe molding as those two items were needed to cover the width of our expansion gap - I'd prefer the look of no shoe/quarter round, but would rather not have a buckled floor. I love the look of your new baseboards, but the installation of the hardwood is leaving me shaking my head at the installers' shortcut.
ReplyDeleteThere were no shortcuts -- there is a 3/4 inch expansion space between the floors and the base, which is standard. The floors are 3/4 inch thick, so to get the baseboards out was too difficult without damaging the floors. In order to get ours out I have to be able to get the crow bar underneath the base to wiggle it out.
DeleteSorry, the expansion is 1/2 inch, not 3/4.
DeleteOK, thanks for clarifying. I couldn't see an expansion gap in any of your photos and because we just went through it, I'm hyper-aware so thought I'd chime in with an unsolicited Public Service Announcement regarding expansion gaps! Not trying to pick on you at all, just would hate for someone to DIY their own floors and come across one of these pics and interpret it the wrong way.
DeleteI am totally with you on the snowball. Last fall when we decided to rip up the carpet and lay our own hardwoods in our 1500sf upstairs, and replace all the stair treads, it snowballed into painting ALL the ceilings, ALL the walls, ALL the closets, AND installing new base and shoe and painting all the trim in four beds, a hall and a bonus room. Plus sanding, staining and finishing our own floor! It's five months later and we're just now coming up for air.
Love your site, thanks for responding to my comment.
No problem, this guy is awesome, he warned us against certain things because they would cause us trouble down the road so I get what you're saying! And you sound just like me with the projects!!
DeleteWe put MDF baseboards and trim in our new construction because I wanted that beefier look and the cost was much less than wood. Unfortunately, I have to say that I hate it. After 5 months in the house, we already have two large chunks taken out of two door trims and I have a 2" crack in one baseboard from simply dropping a bottle of nail polish on it. They are not holding up well for us:( Way, way, way down the road, we plan to change out all the baseboards and trim for wood.
ReplyDeleteOh no, I hope ours hold up OK!
DeleteI love the look. We are too planning on changing our baseboards (and door frames) to a larger craftsman style. We are going with wood instead of mdf though. Our 1/2 bath downstairs leaked a few time and it went through the walls and into our kitchen. Now the baseboards in our kitchen are warped too. So all are getting replaced soon.
ReplyDeleteVee
Looks great! I love the higher baseboard. I spy the shiny new rug!
ReplyDeleteI am curious about your thoughts.......so my husband and I are planning to build and have seen several model homes with a thicker base board that has the plug in the baseboard instead of the wall. What do you think of that?
ReplyDeleteInteresting! I googled it to see what it would look like and I like the idea! If they are horizontal and not vertical that is -- or as long as the whole thing is on the base. I kind of like that the outlet would disappear in the white trim you know? It would make changing them out in the future more of a pain but you probably wouldn't need to do it anyway.
DeleteOne of the best parts of DIY is finding new ways to use materials. Great job on finding a relatively cheap and easy fix to your dilemma! I will keep this issue in mind if/when we decide to upgrade our carpet to hardwood.
ReplyDeleteI love this!! I want soooooooooo badly to beef up the trim (& add crown &...&...&....) in our 1973 split level but am afraid it will look funny - like it didn't belong w/the age of the house...
ReplyDeleteLovely! Nothing better than some nice thick baseboards. Totally adds an air of sophistication. Will def be giving this a try in a few rooms where my home's original thick baseboards were ripped out in the 70's and replaced with cheap paneling and trim. Yay awesome project!
ReplyDeleteWe put similar molding in the kitchen after my husband put up bead board. At first he thought I was crazy (I think so too) but now he is very happy with the way it looks. We are starting 3 bedrooms upstairs and the molding will be just like this. Great job!
ReplyDeleteWe were lucky to find a home that already had good baseboards. *happy dance* I love your simple steps to creating these baseboards. Even I would be able to follow your tutorial - and that is saying something! ;)
ReplyDeletePlease do a post on your new rug!
ReplyDeleteJust wondering if you are planning to add shoe molding too, so there isn't a gap between the floor and the bottom of the base molding?
ReplyDeleteI love the beefy baseboards. They look great. I love your BR floor. I would love to know the brand and color stain you selected, please?
ReplyDeleteI have to agree with another poster above about the mdf. This is our third and most expensive home. Our first home two homes had wood trim. This new house is new construction, and we are sooooo disappointed in the way the mdf trim has dings everywhere. Our first home is where we had toddlers and preschoolers learning to walk, driving their toys into the wall, etc but no damage to any trim. Our second home is where we got our first dog and where our youngest son was all-boy along with the countless neighborhood boys who traipsed in and out of our house, roughhousing all the way:) By the time we moved here, we have two kids in college (living in dorm) and a high schooler who is either studying AP coursework, playing lacross, etc. Bottom line is that we have less traffic & less "wear" on our house than any house we've ever lived in, yet the trim around the doors looks as if we had a war in here. My opinion is that mdf is fine for areas that get minimal moisture and minimal wear. Of course it is great for crown molding. The baseboard has held up fine in our formal dining room and formal living room b/c of the minimal use of those rooms. It has held up fine in our bedrooms but bear in mind that 2 bedrooms are for college students who are only back home for visits and one high school son who is also not home much and does not have friends hanging out in his room. As for the hangout rooms and the doorways---they show lots of wear. I will know to be aware of that on the next house I buy. I have also been told by our painter that the mdf is more tricky to patch than wood------the wood filler or putty or whatever you are trying to use just doesn't adhere to it as well, and then when you go to sand the wood filler, you have to be careful to not sand the mdf board b/c it is essentially sawdust held together by glue, and if you sand it much it will crumble apart. So they say that sometimes trying to patch the dings can make it look worse instead of better. I would say to just be careful in the areas where you have already installed the mdf board. In places like your master bedroom you should be fine. If replacing trim around doors or in high traffic areas, my unsolicited advice would be to go with wood. Even cheap paint-grade wood will have MUCH more durability than the mdf based on my own personal experience. Sorry to post as "anonymous" but I don't have a google or gmail account:)
ReplyDeleteI think I must have misspoke -- all our door trim is wood, not mdf. (But it does ding up anyway.) I was thinking about this and realized I've used mdf base in a ton of places and haven't had any issues -- yet. I used it on our staircase years ago and have used it for all of my board and batten walls and it's still looking good. I installed mdf baseboards throughout our whole basement and they've held up great (other than one spot with a small water issue). Those like I used in this post have been in our powder room for almost a year and again no issues. So -- so far so good! We have one kiddo and a small dog who doesn't do much damage (at least to the trim!)so maybe that helps. :) That's weird about him saying the mdf is hard to patch because I think it's almost easier than real wood -- it's a bit softer so the nail holes and all blend in a lot better. I just use a sponge sander, nothing to heavy so maybe that's why?
DeleteI also found the dings hard to patch. I could not get the filler to adhere at all.
DeleteI think your solution is genius! However, after reading the previous posters, I think when and I i ever have to do this, I will go slow and use wood. All our kids are grown and out of the house, but now the grandkids are here!! :) Your bedroom looks absolutely beautiful! Love your floors, the base, the wall color(s) and the curtains. And I think I see a soft, comfy rug peeking out.
ReplyDeleteYes the rug is awesome!! I will share more soon. :)
DeleteSarah your home is beautiful, I have been following you for about the last year and you have inspired me in so many ways (debt clean up, decor on a budget, making home beautiful, and the list goes on)! I know you're a very busy gal, but if you have time I would love if you'd be willing to check out my very new and beginner blog, HomeSweetHull. Any advise or tips would be greatly appreciated. By the way, love your beef-cake base boards :-)
ReplyDeleteSoooooooo beautiful! I'm so inspired by all the work you've done!
ReplyDeleteAshley
Looks great! I've copied a bunch of your projects in my house already and appreciate you sharing them with us! If you do any more rooms - I wouldn't hesitate to rip the old stuff off. It's not hard at all and would probably save you time vs. covering up the old stuff. I've replaced almost all of the "builder grade" trim in my house now with the tall decorative MDF. I'm no pro, but I've gotten good enough at coping the corners that a little caulk covers up all my shortcomings and it looks as good as what you see in a new house! Keep up the good work!
ReplyDeleteVery creative! I love the way the larger baseboards look.
ReplyDeleteSo glad I came upon this. Ingenious but makes so much sense. Very impressed by your quick, MacGuyver thinking! ❤️ Think I will try it!!
ReplyDelete