
Budget Friendly Curtains and Drapes That Look Custom
These affordable, extra long curtain panels look GREAT and are well under $100! If you've ever shopped for window treatments, you know t...

These affordable, extra long curtain panels look GREAT and are well under $100! If you've ever shopped for window treatments, you know t...

This pasta dish with sausage and spinach is SO easy to make and has tons of flavor! This one is a crowd pleaser and so easy to throw togeth...

Common design and decor dilemmas and how to fix them! Over my 18 years of blogging and content creation, I've received so many design d...

Easy tricks to make store bought curtains look more high end. There are so many great ways to update store bought drapes to make them lo...
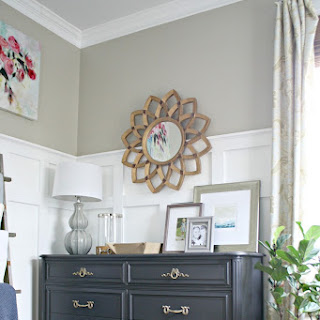
How to make furniture look more expensive with a few coats of black paint! Black is one of my favorite colors to use in a room because it...

Twelve cute and simple 4th of July crafts, decor and entertaining ideas. I've gathered a few quick and easy patriotic projects and recip...

Making your own strawberry jelly isn't nearly as hard as you'd think! Yay, it's strawberry season! Years ago a friend shared he...

Home, garden, DIY and beauty: My absolute favorites Amazon list. It's that time again! The annual Amazon Prime Days are here! Instead ...

A "thank you" summer giveaway! {Fresh, fun home finds and self care items.} It's time to thank you all again! This time with a...

Summer decor staples to get that relaxed, timeless Nancy Meyers charm. I'm a sucker for the Nancy Meyers look any day of the year, but e...