
How to EASILY Restore Brass Decor and Make it Shine
May 11, 2022
Share this
Testing the easiest ways to remove tarnish from vintage brass decor.
I always keep an eye out for solid brass items when I'm shopping second-hand or antique shops. My brass finds are some of my absolute favorite home decor pieces!

I didn't used to mind that look...it made it feel more vintage to me in a way. But now more often than not, the tarnish creates a dirty looking patina that I'm not particularly fond of: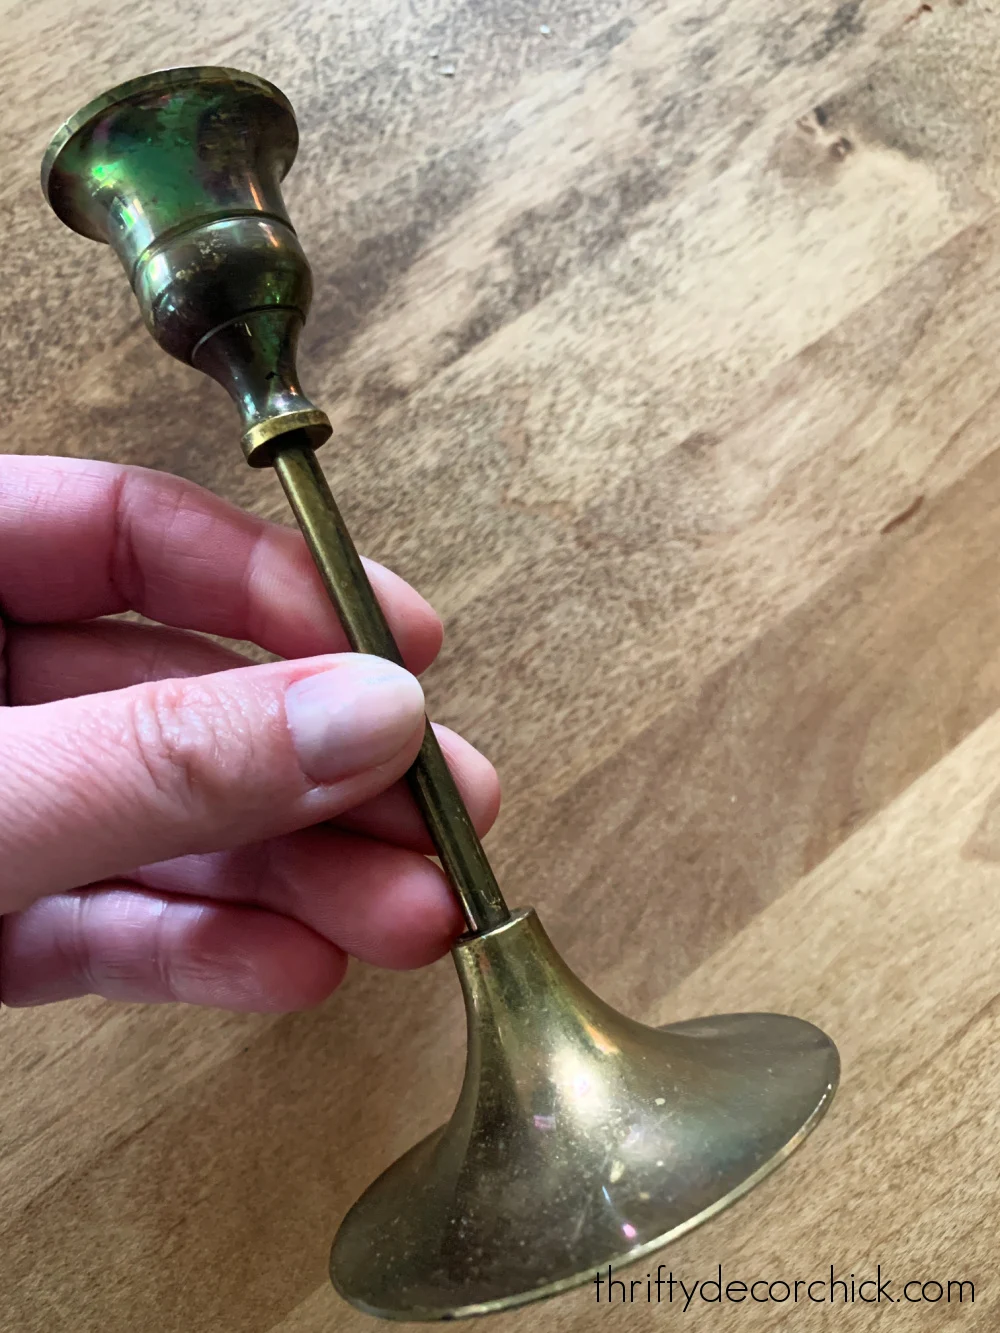


I used to use a polish to remove tarnish -- it did a decent job and I was able to get to some of the beautiful original finish with it.
And then I discovered a product that blows even that out of the water! Before I shared that with you, I wanted to test some tarnish removal methods I've heard about over the years.
Before you start to clean any tarnished brass, check to make sure it's solid and not just brass plated. Use a magnet to check -- it will not stick to solid brass, but will attach to plated brass. If you rub or polish too much the plated brass will wear off over time.
Testing DIY tarnish removal methods
There are quite a few ways to remove dark tarnish and clean brass decor -- I tested the three easiest using household items we had on hand. I figured they would all be too good to be true.
Spoiler: They WERE. :)
TEST a spot on your item before moving ahead with these methods (or any product)!
I tried the following brass cleaning methods:
- Ketchup (tomato sauce and paste work as well). The acidity of this condiment is supposed to help remove the tarnish.
- Vinegar, salt and a bit of flour to create a paste mixture. I used about a cup of vinegar and a teaspoon of salt.
- Toothpaste
- Boiling the hardware first
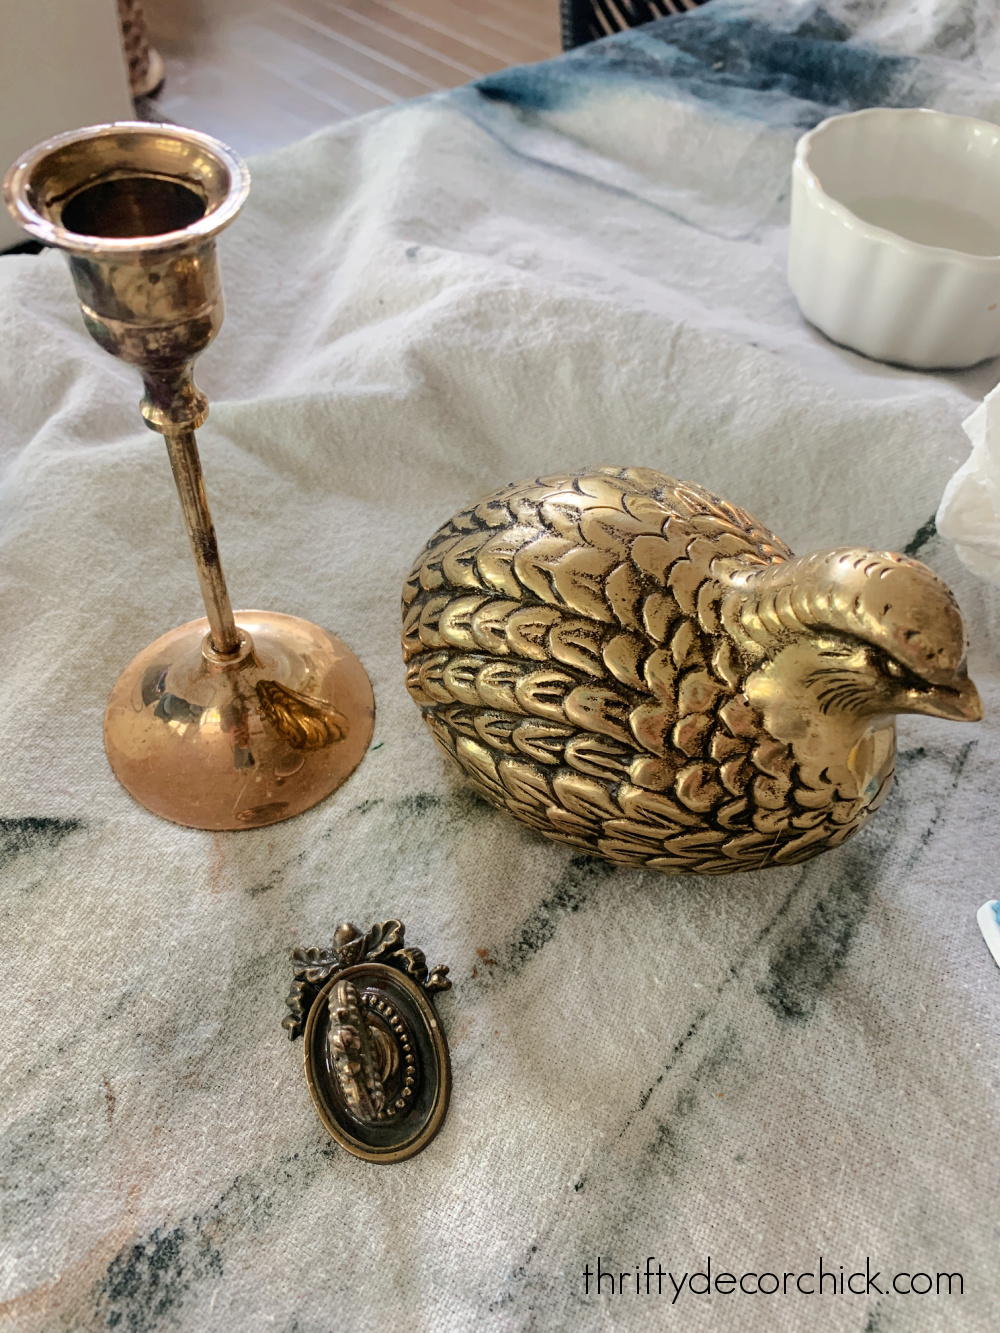
I gathered a few items that needed to be cleaned up -- one of my brass candlesticks, a decorative bird figurine and a couple of the pulls from a vintage dresser. I tried one of these methods on each item:

This post may contain affiliate links for your convenience.
See my policies and disclosure page for more information.
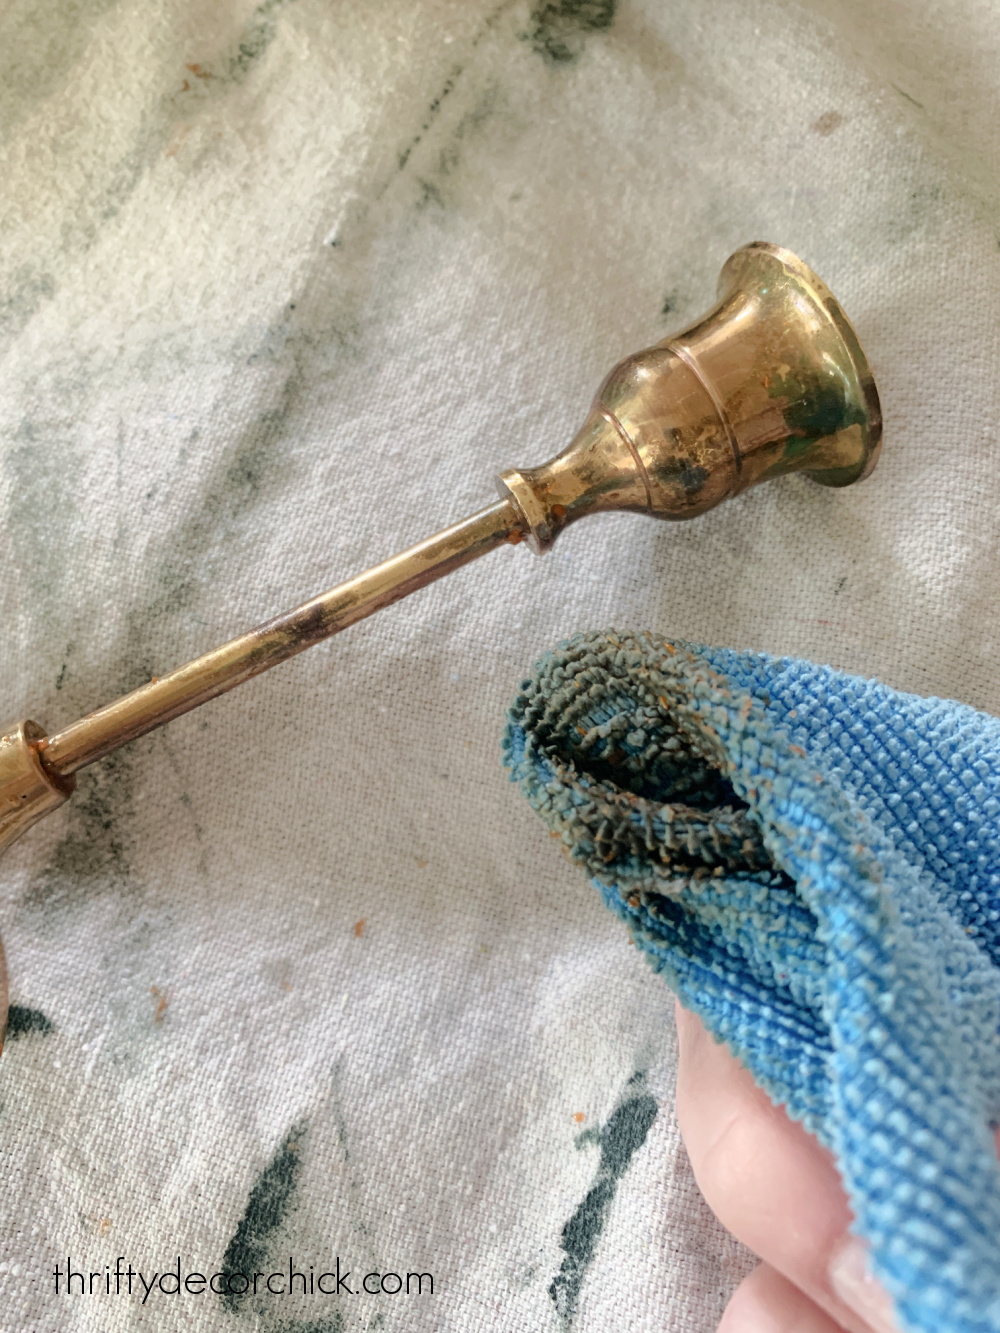
I let each one sit for about five minutes and then started buffing well with a soft cloth. I also use a soft bristled toothbrush to work the substance into the brass, especially on pieces that have a lot of detail.
The tarnish on each item was in varying degrees, so keep that in mind. But I didn't find any of them worked very well.
The ketchup definitely worked the best of the three: 


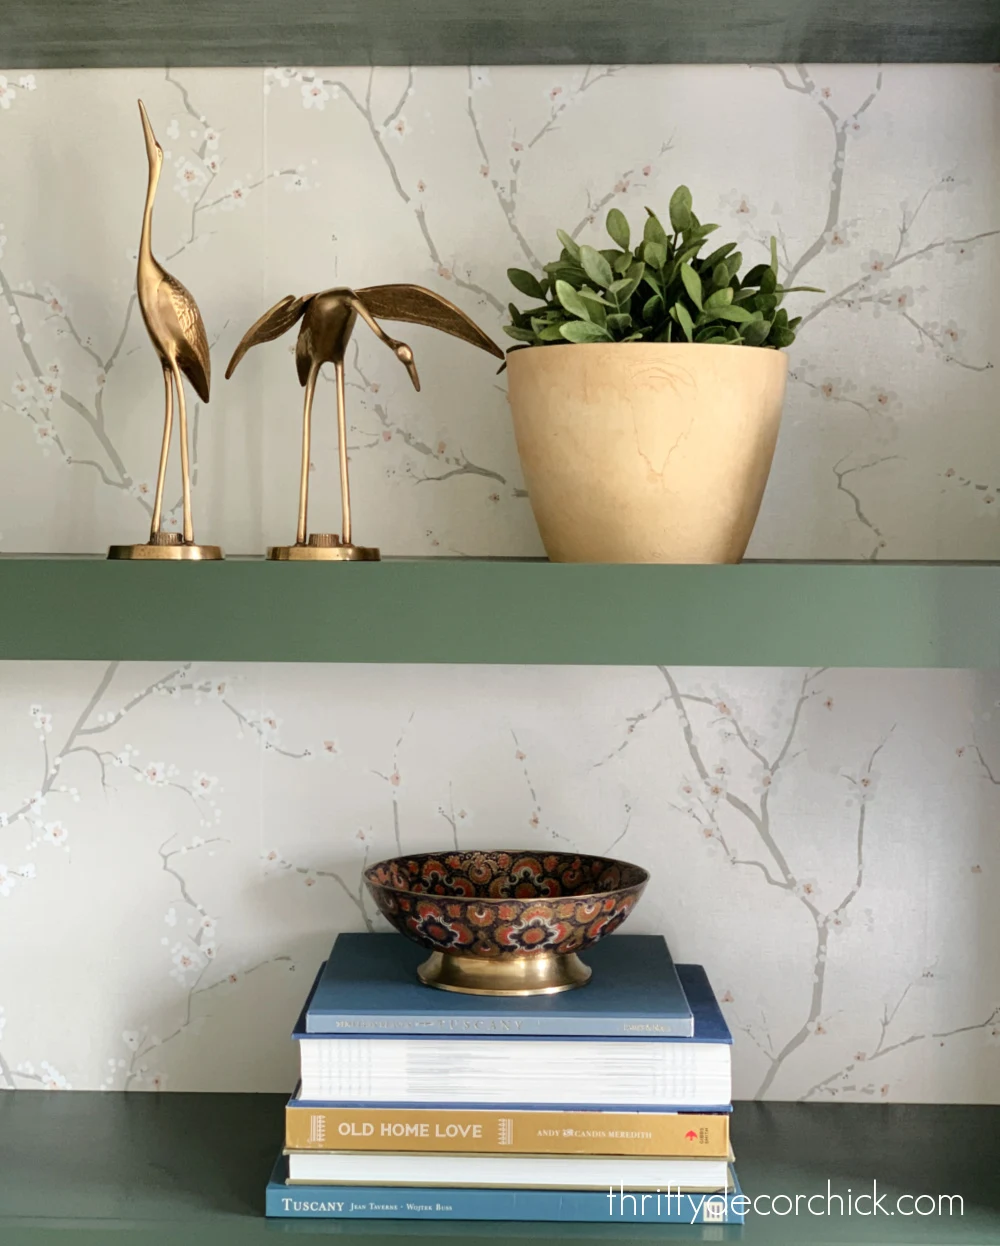
I had finished cleaning all of my items when I noticed the brass vase on our mantel. This is one of my all time favorite vintage finds...I love it!:


I've had these vintage brass cranes for as long as I can remember. The finish was so lackluster from all of the tarnish, I wanted to give them a new start:
You can see how much came off on the microfiber cloth. (Of course some of that is actual ketchup, but it did clean this up a bit.) Those dark marks would not budge.
The vinegar worked the second best -- the little bird wasn't horribly tarnished to start and still the cloth had a bit on it. *I didn't add the flour to make it into a paste, so that may have helped.
Lastly, the toothpaste option fared the worst...even after quite a bit of scrubbing with the toothbrush and buffing with the rag, it didn't look much different after:
I was a bit surprised -- I thought at least the toothpaste or ketchup would work better.
Make sure to rinse your items in warm water after any cleaning!
But NONE of them came close to this cleaner I found a few months ago. I got this BioClean hard water stain remover to clean some hardware stains off a few outdoor items:
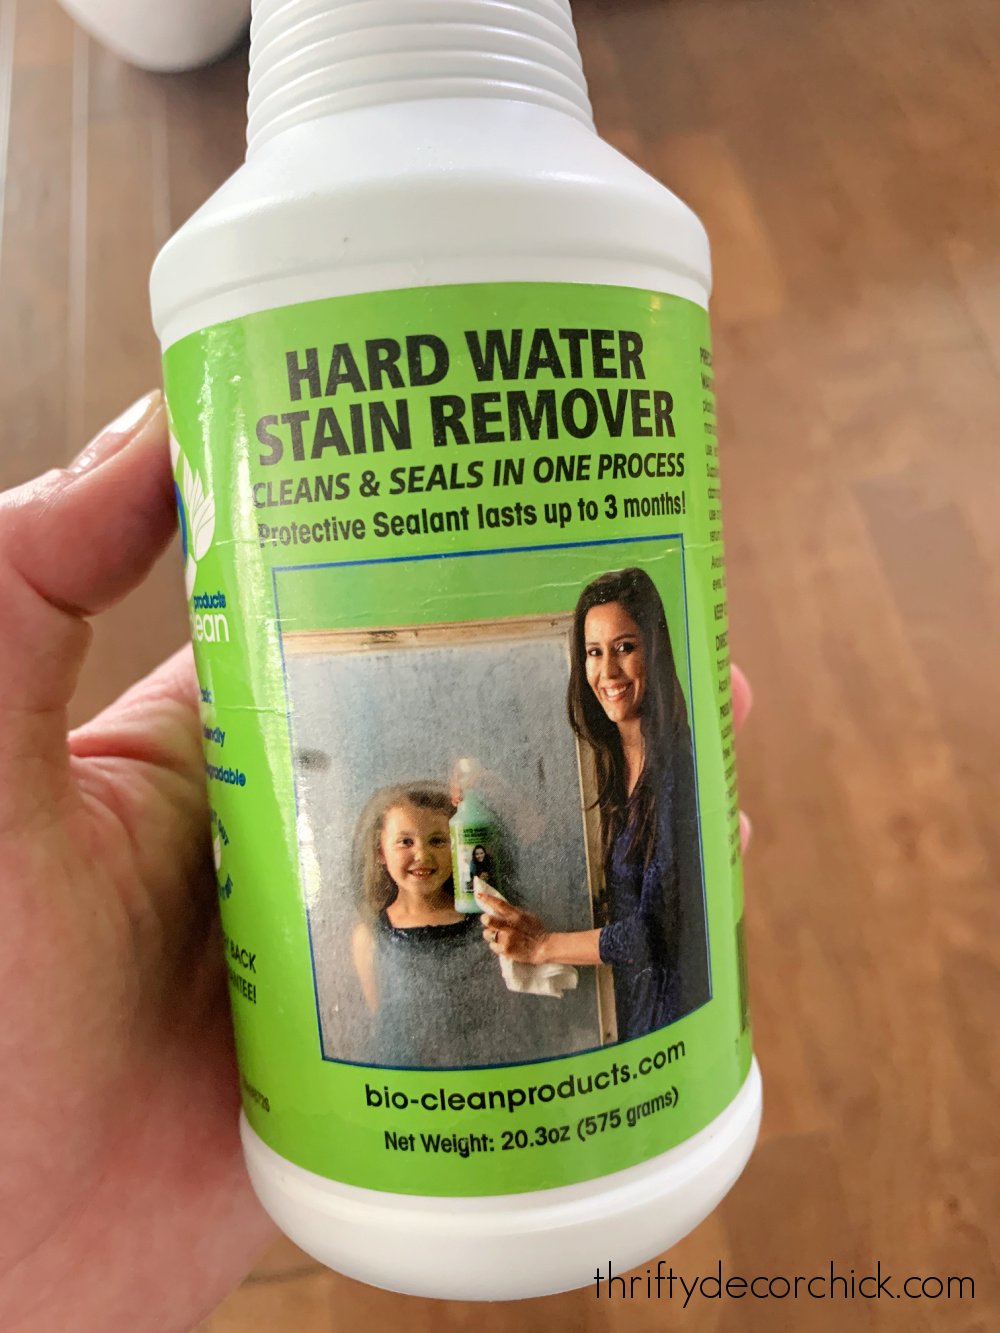
Within the first use I was hooked. This stuff is AMAZING. I'm truly impressed.
It removes hard water, calcium and soap scum on everything I've tried. Everything. On most items it literally melts off...some take a little more elbow grease.
It works for metal, glass, stovetops, outdoor decor...I mean, you name it, it will do it. I've never used anything like it!
I don't even remember how I thought of trying this on my brass items, maybe I read it somewhere? I don't know, but the first time I used it, I was shocked at how well it removed the tarnish from my brass decor.
So I cleaned a few more items with it to show you all. Again, a toothbrush is helpful when getting little crevices:

This stuff has the consistency of toothpaste (and kind of smells like it), but doesn't scratch or leave marks.
Just take a look at the difference!:

And it works almost immediately. On stubborn items like that hardware, I let it sit a little longer. On smoother spots you can wipe it on and buff it off right away.
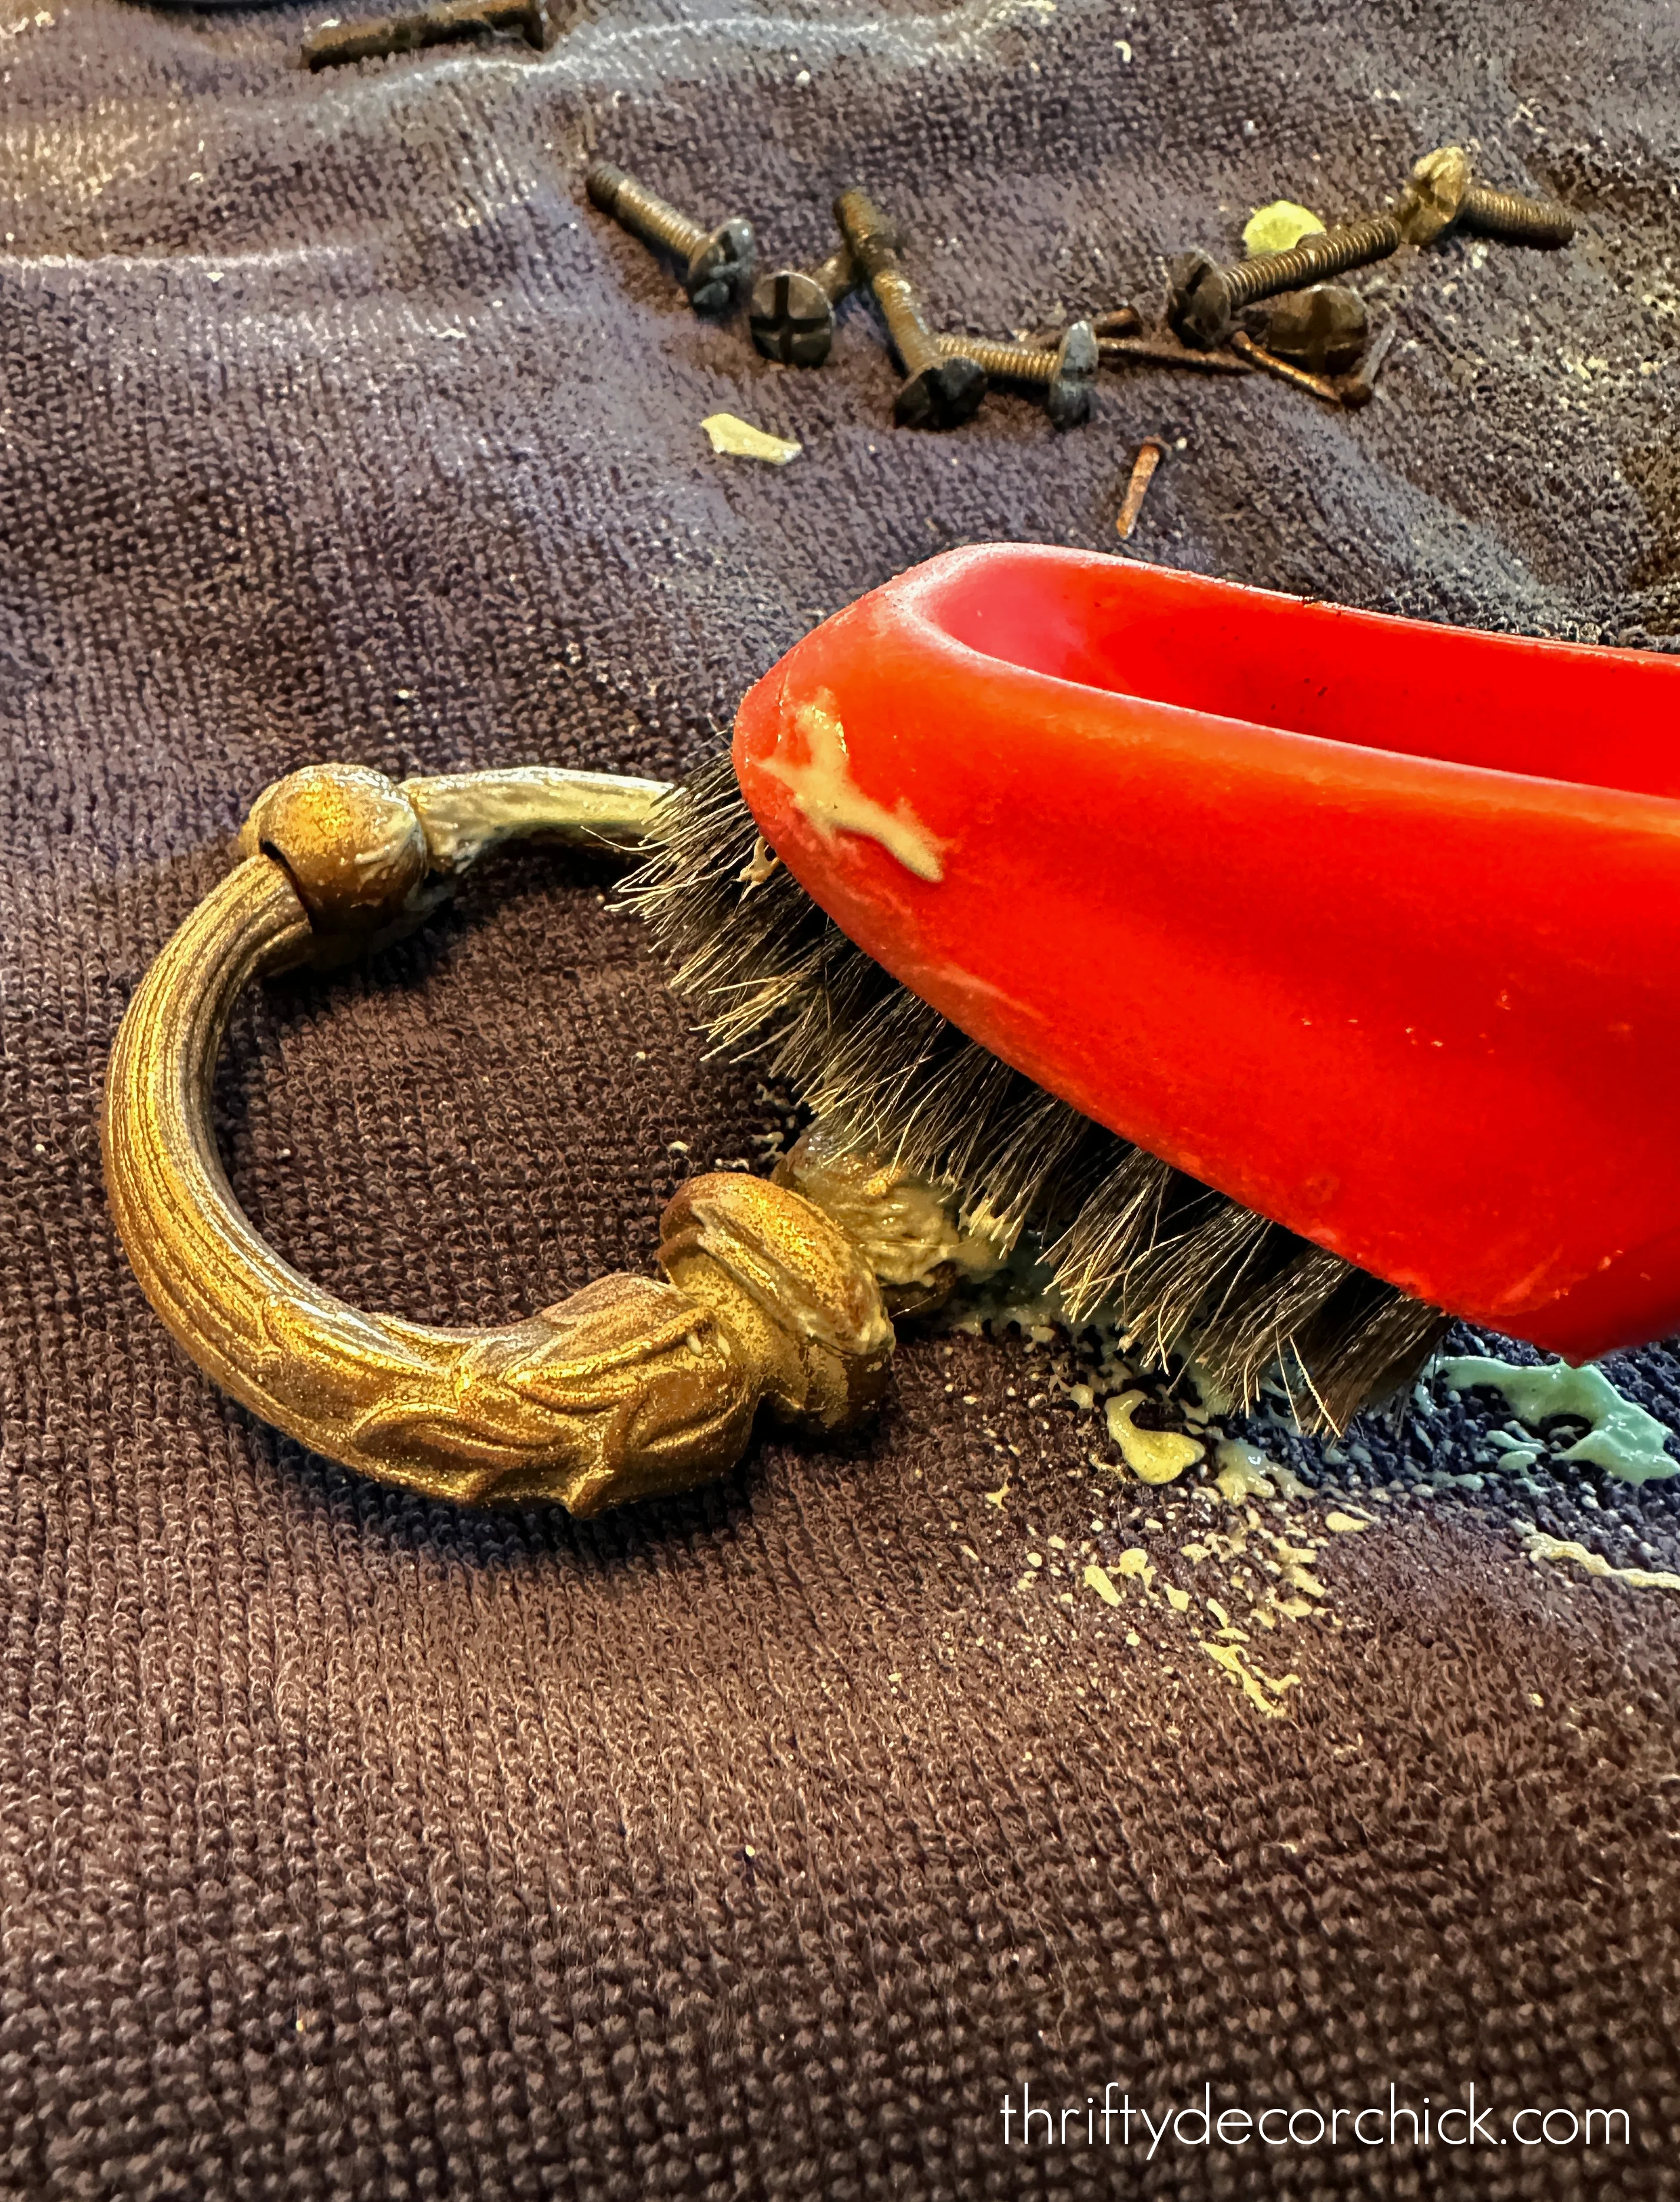
A little tip for items with more detail -- you can use super fine steel wool (I use grade 0000) to get into those spots. It makes a big difference! I wouldn't use anything more coarse though...stick with a fine grade.
It made everything shine!

But WOW, look at it now!! This stuff is truly amazing:

Look at all that detail and color we were missing out on!
It's funny, because many want to age newer brass quickly so it looks more worn and used. But many of my items were SO dark I could barely even tell they were brass anymore. And as you can see, when you give brass a good cleaning, you'll see so much more of the detail and beauty!
I can't believe the gorgeous color and design that was hiding under all of that tarnish!
Let me remind you of how dark my brass candlesticks were:
Look at the stunning brass underneath!:

It was kind of fun to clean all of these...seeing the beautiful glow revealed so easily was quite satisfying. :)
They are SO gorgeous now!:

I found a set of 12 of those candlesticks at an antique shop years ago -- I just love them.
My big bowl is still on display on the mantel:


Now they truly shine!:


If you love your brass with a little patina, don't fret! You can use a brass polish to clean it up and give it a bit of shine.

There is a way to get this result with a little less elbow grease. I tried this for the first time recently and was pleasantly surprised at how well it worked.
For this method, I brought a pot with water and a little bit of vinegar to a boil, then soaked the hardware in the boiling water for 15 minutes:

Be sure to use tongs to remove the hardware...obviously it will be very hot!
This really helps to loosen up any grime and makes them much easier to clean. Look at that dirty water!:

After letting these cool a bit, I used a wire brush and the hard water cleaner to scrub the hardware:

I put them back in the pot to soak in lukewarm water for a little bit -- they will be pretty gross as all of that comes off.
Be sure to rinse the knobs and pulls well and then let them air dry.
Look at this difference! The finish before:

And after the soaking and scrubbing:

Check out how beautiful these look on our painted dresser. :)
But the tarnish will continue to darken over time, so I do recommend cleaning them up every few years. Even when you clean brass as I showed here, the metal will start to darken right away.
Some of the pieces I worked on a couple months ago are already darker than these.
If you like a warmer brass patina, don't worry -- it will come back quicker than you think!
Even if you don't have brass around the house, the hard water cleaner is a miracle worker! We've been thoroughly impressed with it.
There's also a whole set of this cleaner with scrub brushes that attach to your drill. We have those and love them!
Wow! Great tip!
ReplyDeleteGreat post! Love the way you take us step by step!
ReplyDeleteI have used Brasso for years and it works amazingly!
ReplyDeletePenny Brite - Lowe's/Home Depot, cheap, easy and you can use on other things too
ReplyDeleteGot mine in over the weekend and tried it. Amazing!! I have several vintage pieces and could never get them all the way clean with Brasso, but this stuff got them completely clean. I'll probably only use it every few years and will clean with Brasso in between. It does seem to etch or scratch the surface a bit, but I prefer the warm glow to a shiny finish anyway. Plus what good does it do if you feel like you can't use something because it always looks dirty? Better to get it clean and use it (and nothing I have is too precious anyway).
ReplyDelete