
How to Build DIY Heavy Duty Floating Wood Shelves
November 05, 2021
Share this
FIVE ways to build DIY open shelves in your kitchen for both light and heavy duty needs.
Floating shelves add a lovely custom touch to a space, but you'll need to make sure to use the correct tutorial if you're building these yourself.
I've installed these numerous times over the years, and open kitchen shelving (especially!) needs to be sturdy enough since it's typically used for heavier dishes and serving items.
I recently built the thicker, open shelving in our kitchen that I've imagined in my head for years! I'm sharing how I built those and four more ways of building floating shelves for any room.
When we were building our home, I knew I wanted to create a little spot in our kitchen where I could add some decor and fun touches.
In our last kitchen, I removed some of the upper cabinets and replaced them with a gorgeous wood hood vent and a couple open shelves with metal brackets.
I LOVED them!:
I know open shelves aren't for everyone, but I love them in small doses!
If you have enough cabinet space elsewhere, they are a great spot to keep items like plates and bowls that you reach for most.
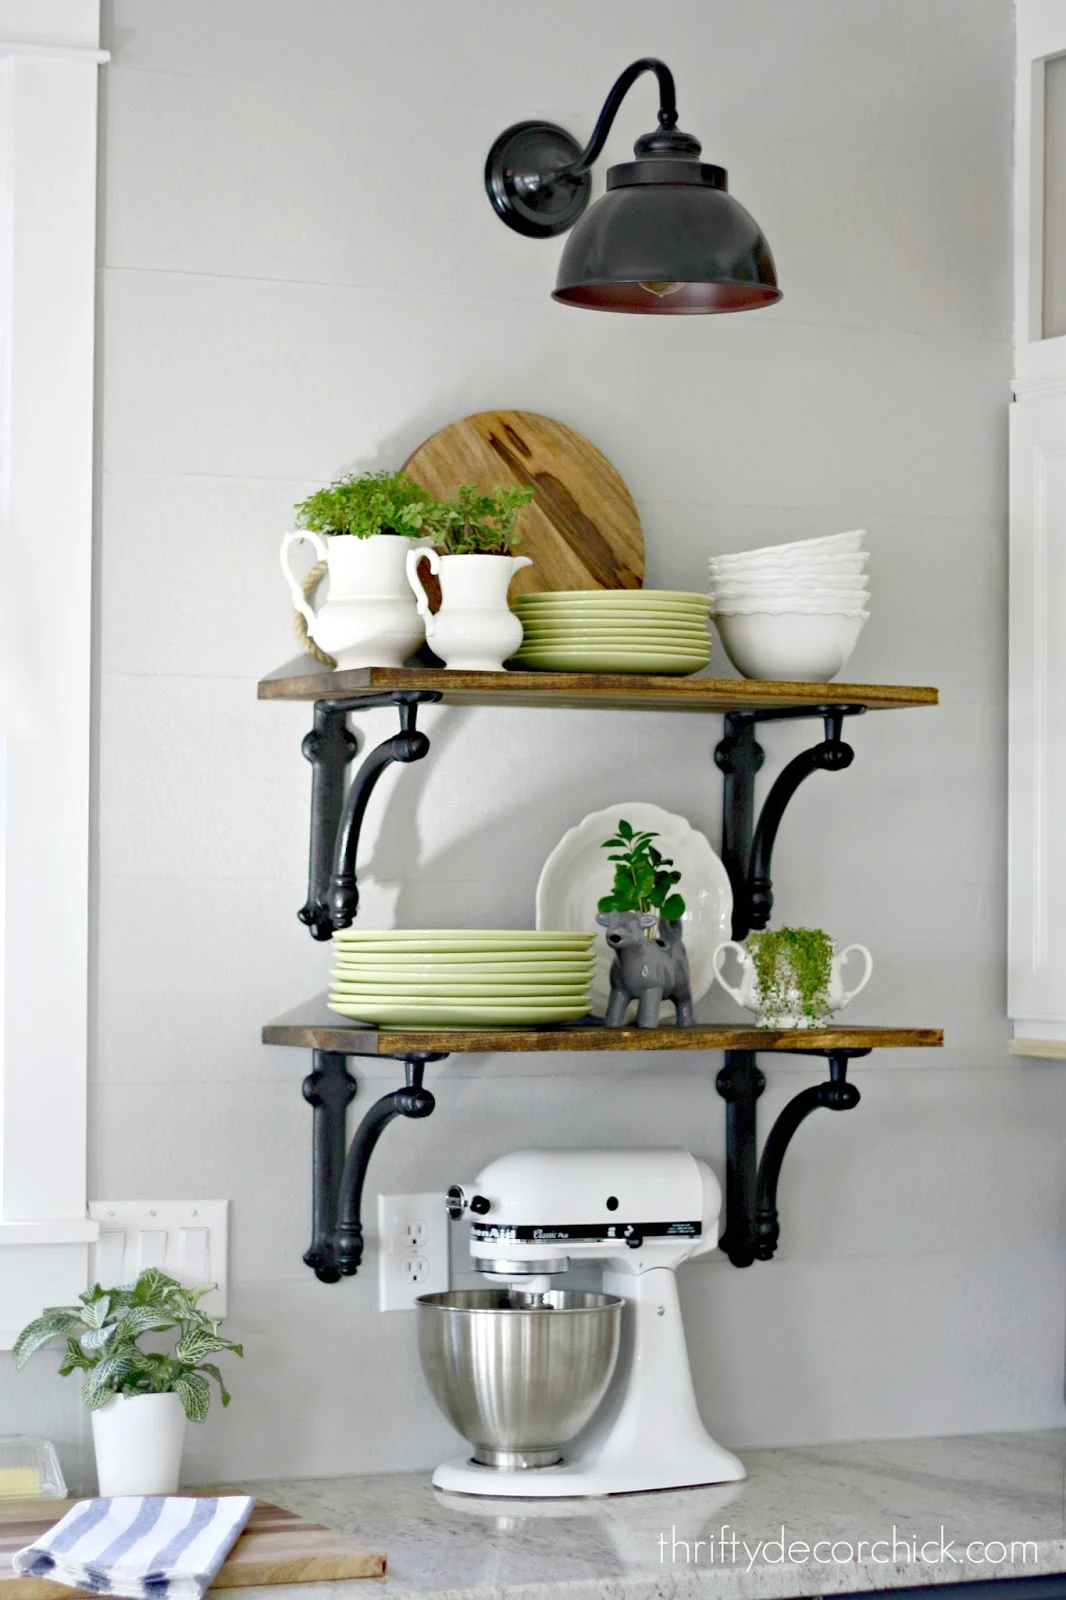
Now we have the perfect spot next to our fridge -- so instead of a set of upper cabinets, I had the builder leave this part open. I just a sconce installed instead.
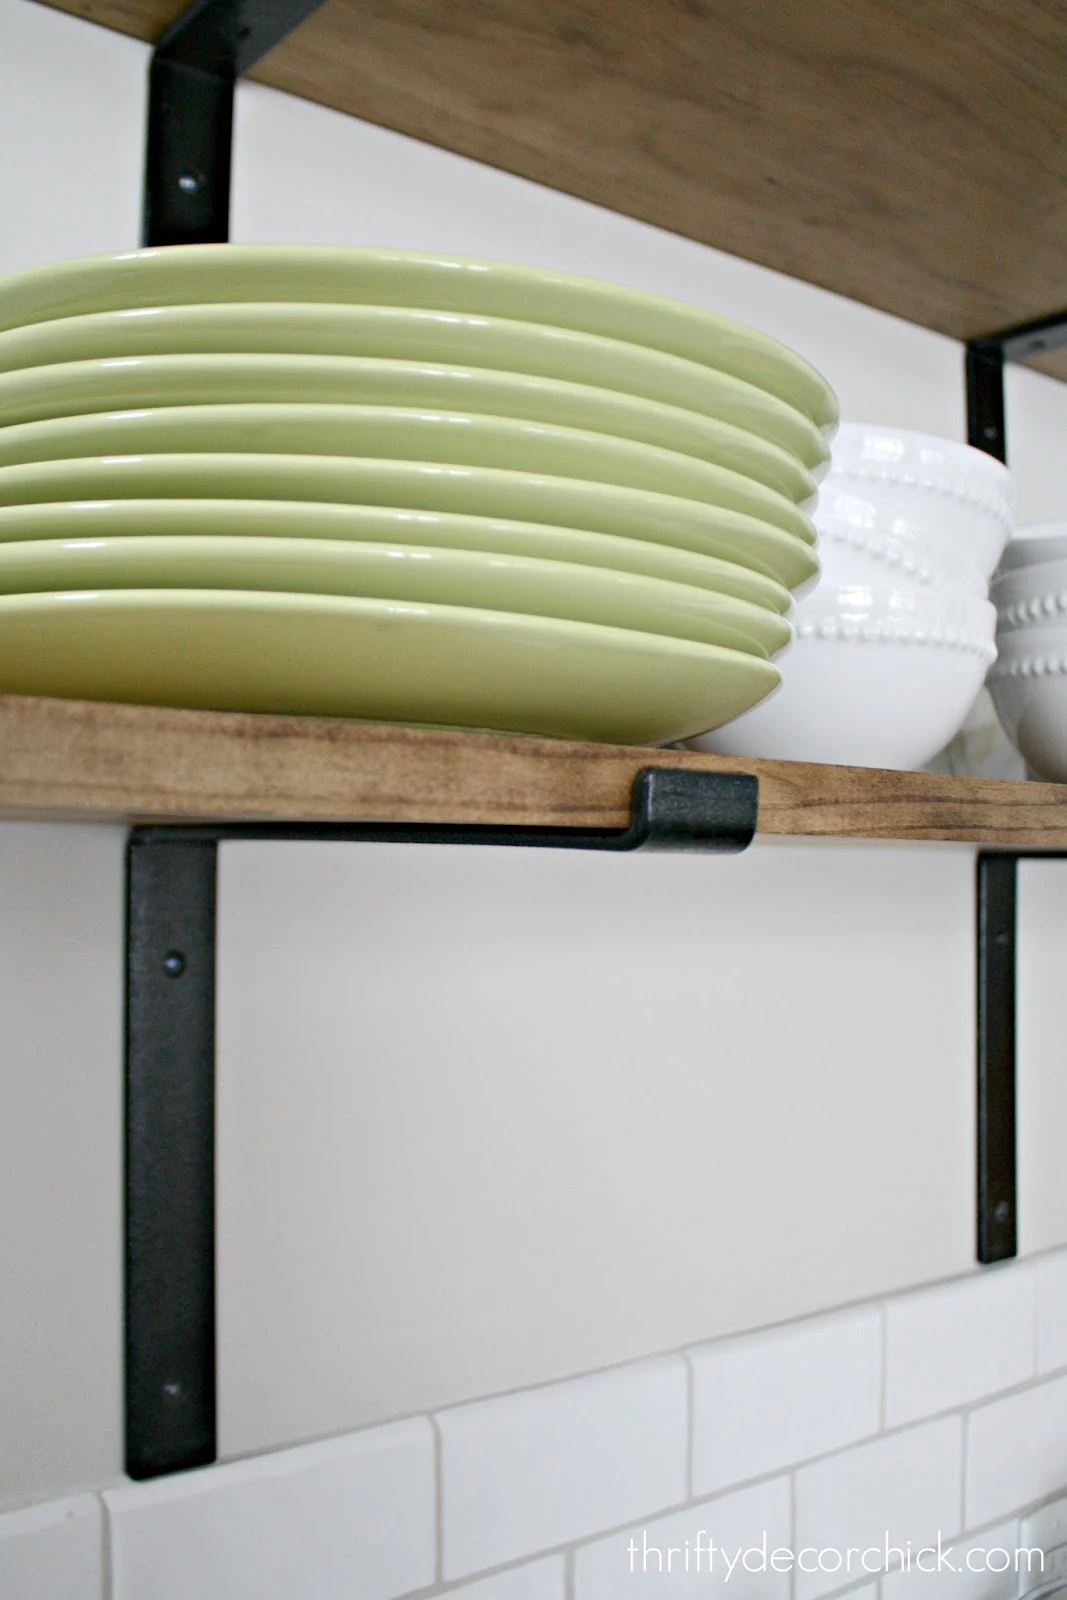
I later added these super simple shelves made with 1x12 wood boards and some strong metal brackets:
This post may contain affiliate links for your convenience.
See my policies and disclosure page for more information.
Over time, we realized we could use just a bit more storage for our wine glasses. When we entertain, those are one of the things we reach for most often.
We considered adding skinny cabinets in that spot, with a couple small shelves in between.
But it was going to be SO expensive. It's not as simple as hanging cabinets, since we have the uppers with glass and lighting inside.
We'd have to have more electrical run for the upper cabinet lighting, plus with the cabinets and crown, it was way more than I wanted to spend.
Plus, I have an idea for big project I've been thinking about for YEARS...and cabinets there would make it impossible.
SO. I set off on a mission to build new shelves, but this time I wanted them much more substantial. And SUPER strong.
I've built open shelves in many ways over the years. Before you start this DIY, you'll want to figure how how you're going to use them.
What kind of wood shelves to you want?
There are tons of options when it comes to building wood shelves -- the right method depends on a few details:
- Would you like to see decorative brackets? Or do you want a simpler, more streamlined look?
- Do you have a wall on one or both sides? Or do you want them to be true "floating" in the middle of a wall?
- Do the shelves need to hold a lot of weight? Will you be using heavy materials to build them?
- How deep do you want your shelves? Shelves that are six inches deep won't need as much support as those at that are 12 inches.
- How thick do you want them to be? Do you just want a piece of wood, or do you want them chunky?
*******************
Hanging shelves with decorative brackets is by far the easiest DIY option!
If you want thicker wood shelves made with just a piece of wood, you can use thick wood from a lumber yard. Most large "box" hardware stores don't carry quality options bigger than 1.5 inches.
Keep in mind wood labeled "one by" is really 3/4 inch thick, not one inch. This goes for a 2x board and so on...
A board labeled one inch thick is actually .75 or 3/4 inches. A two inch board is really 1.5 inches, and so on.
One of my favorite examples of wood shelves like these in a kitchen is Nicole's from The House Diaries:

There are so many beautiful options for the shelf brackets! You can spray paint them any finish or color you want.
This option is by far the easiest! You'll want to use wall anchors if you can't get into a stud, but otherwise hanging the brackets is not difficult.
*******************
For shelves made with a piece of wood that will need to hold a lot of weight, metal rods are your best bet.
If you want a simpler look and want to hang a shelf with no visible supports, you can use hidden steel brackets like these.
They come in various lengths, and allow you to drill the supports directly into studs, so there are no worries about weight or stability.
Those brackets also come in individual options, so you can place them into studs wherever you want and drill into your shelves accordingly. (More on that in a bit.)
Pros and cons of using these metal rods for your shelves:
- Pro: They will allow for that "floating" look that is so popular, and will hold a ton of weight!
- Con: The steel supports will increase the cost of your project.
- Con: You need to be dead on with your measurements and drilling to ensure that your shelving will install exactly where you want and stay level.
- The wood will need to be at least 1.5 inches thick to use most supports like these.
*******************
If you have two walls on either side, this project is super easy!
Try this method...
I prefer the look of thick shelves that make more of a statement.
If you have two walls or cabinets on both sides, this is a great beginner DIY project!:
 |
| Easy shelves above toilet |
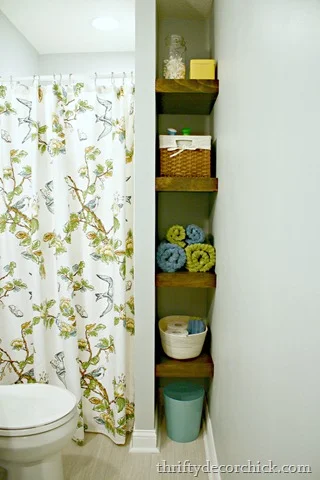 |
| DIY floating shelves in bathroom |
I like this method because solid wood this thick is CRAZY expensive (especially with the cost of lumber now).
It's also easy and cheap. It doesn't take much DIY know-how, and you can customize the shelves to any size/thickness you want.
This version is heavy duty and won't budge! These can hold a ton of weight if you use my tutorial.
*******************
If you don't have side support and don't need to hold a ton of weight, use this one!
If you want chunky shelves that don't need to hold a ton of weight, or don't need to come out from the wall a large distance, this is a great option!
I've also used this method when I have support on one side, like a cabinet or a wall.
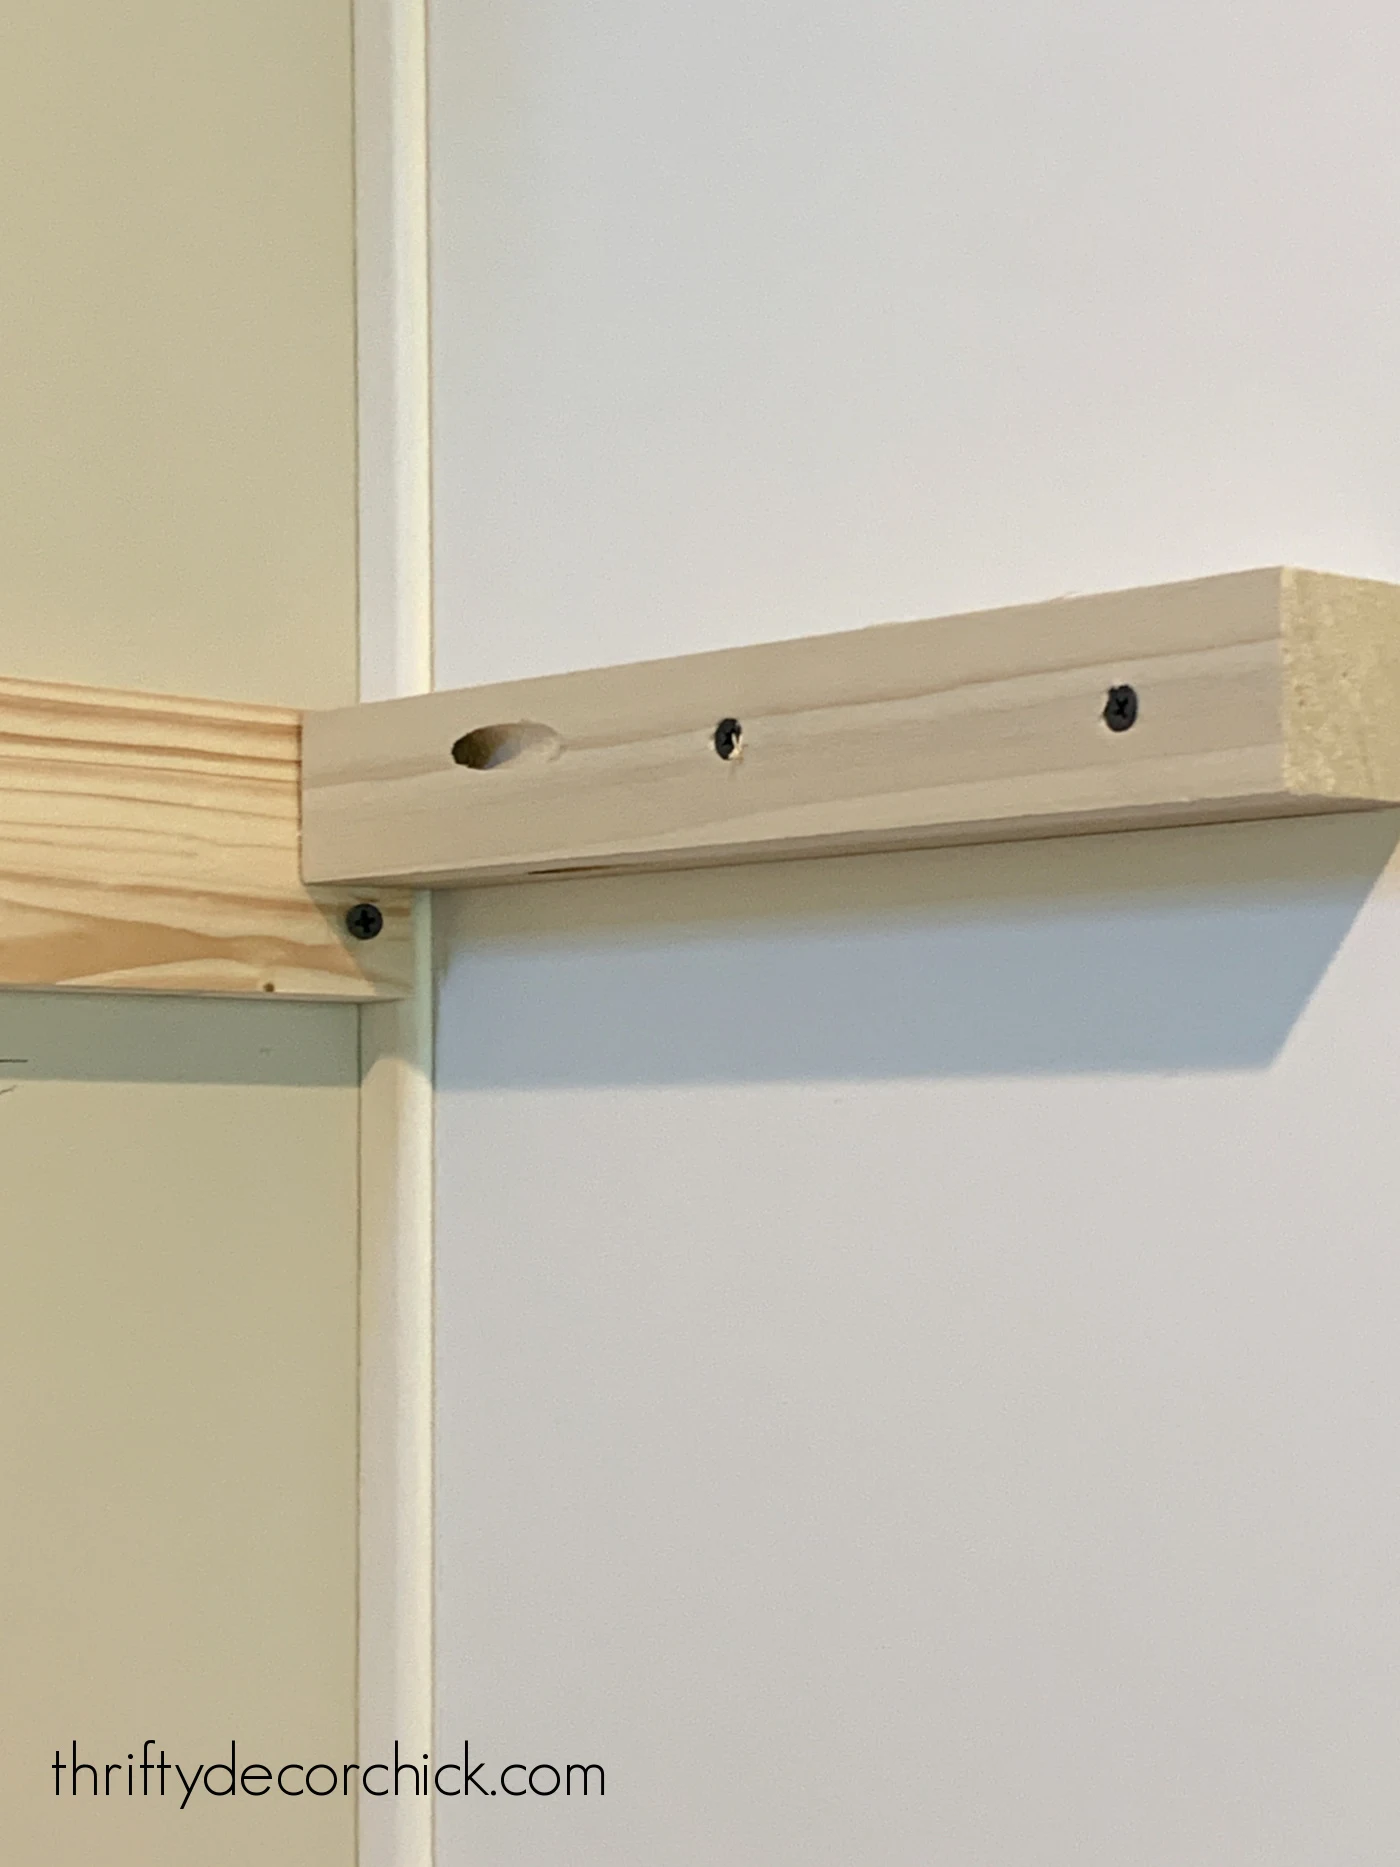
For this one, I add supports coming out from the wall like so:

You attach the supports to the part that goes against the wall before hanging.
Those hold up beautifully as well!
Click the link below the photos to see how I built each one:
 |
| DIY floating shelves with no walls |
 |
| Floating shelves above washer and dryer |
Those work especially well if you don't need your shelves to be super deep.
If both sides don't have support, I wouldn't go much deeper than 8 to 10 inches.
*******************
My current kitchen project called for a method that makes them incredibly sturdy!
I wanted to make these much deeper (you'll see why in a moment) and even stronger than what I've built before.
So, I set out trying to figure a way to make these thick open shelves crazy strong...and I found it!
Instead of metal brackets, I used 1/2 wood dowels, and a bit of additional support as well. The combo made these deep shelves for our kitchen super strong and stable!
1. Figure out the thickness of your shelves
You'll need to do some math (sorry!). Decide on how thick you want your shelves to be first.
Then you can figure out the wood sizes you'll need.
I took some pictures to give you a visual of what I'm talking about.
I wanted my shelves to be three inches thick. Typically I would use a standard pine board for the top shelf and the bottom:

You can find these ready to go at the hardware store in various lengths and depths. You can see more about how I build bookcase shelves here!
You don't want to see anything peeking out from the front trim, so your support piece and shelf/bottom can't be more than that size of the front.
For three inches, it's an easy one -- I would just need to use a 1x2 against the wall for my support:
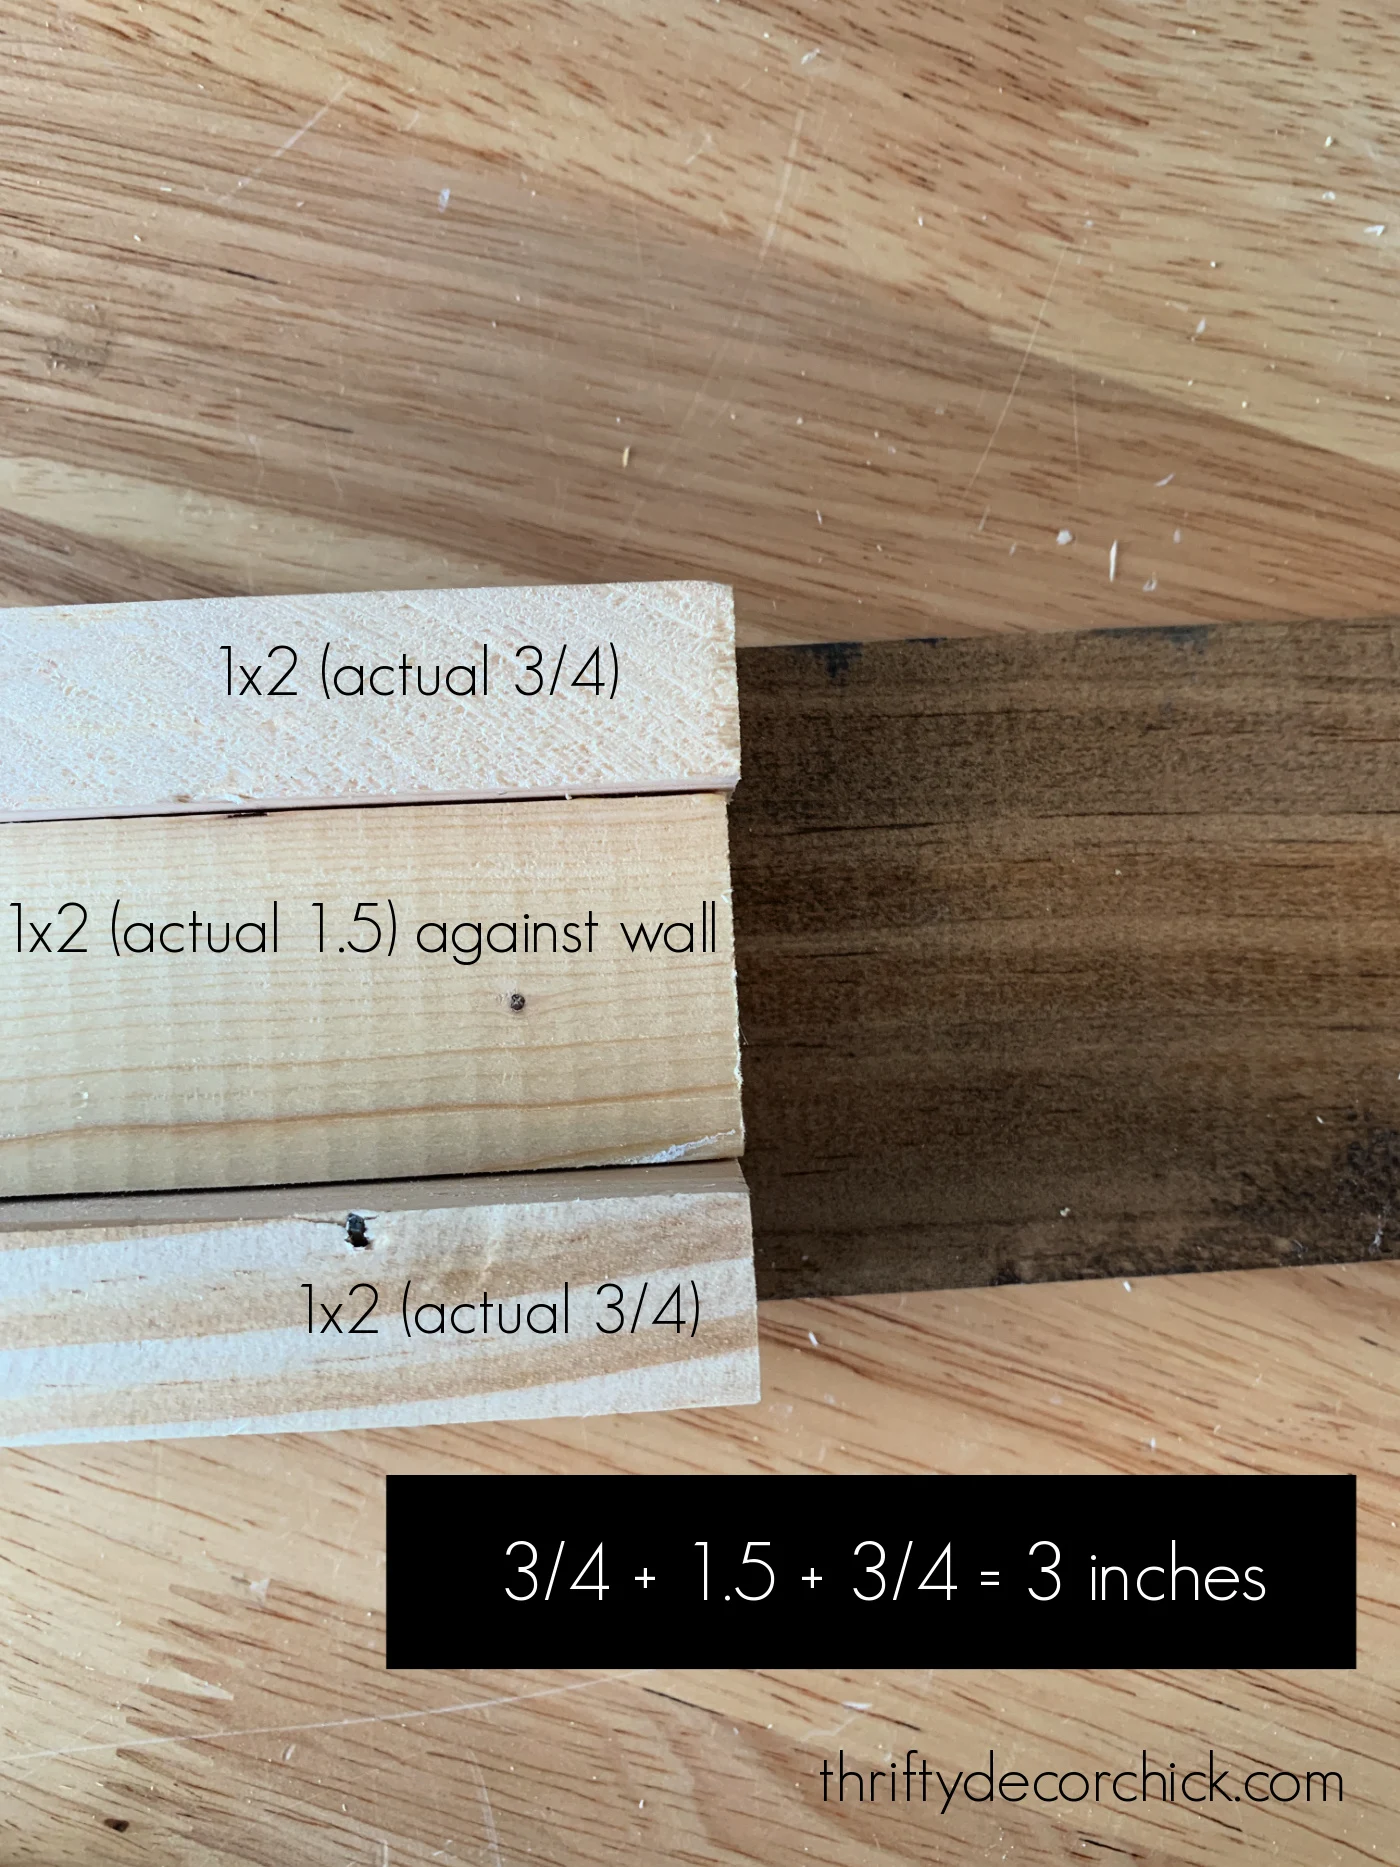
But I wanted these shelves to be as lightweight as possible, so I decided to use some scrap luan I had for the top shelf and bottom, instead of the thicker pieces I'm showing above.
The really thin plywood that comes in large 4x8 sheets would work as well!
The luan still works, because I could use a 1x3 as my wall support and then use the luan as the top and bottom:

If you're building floating shelves that have support on both sides, or won't be holding a ton of weight, this option would work great as is!
You'll see below that I added a bit more since my shelves were going to be 12 inches deep and needed to hold a good amount of weight.
Secure your support pieces to the wall
I used a stud finder and marked those locations on the wall to hang my 1x3 support board with long wood screws:

I took advantage of the fridge surround being right there and added a support on the side as well:
Use a level to make sure it is perfectly straight!
I know drilling into your cabinets is terrifying...be sure that these are staying! :)
If you do have to take them down, you can always cover the holes with decorative trim.
Prepare your shelf supports for dowels
I ended up changing the design just a bit. Because I was going to use dowels inside the supports, I wanted to use thicker wood than a 1x3.
(Because remember, it's actually only 3/4 of an inch!)
The dowels are 1/2 inch wide and I didn't want to split the wood when I pounded them in.
I could have used 2x4 framing lumber, but that stuff is heavy!
Instead I found these 1.5 by 1.5 square dowels to use as my supports:

They worked perfectly!
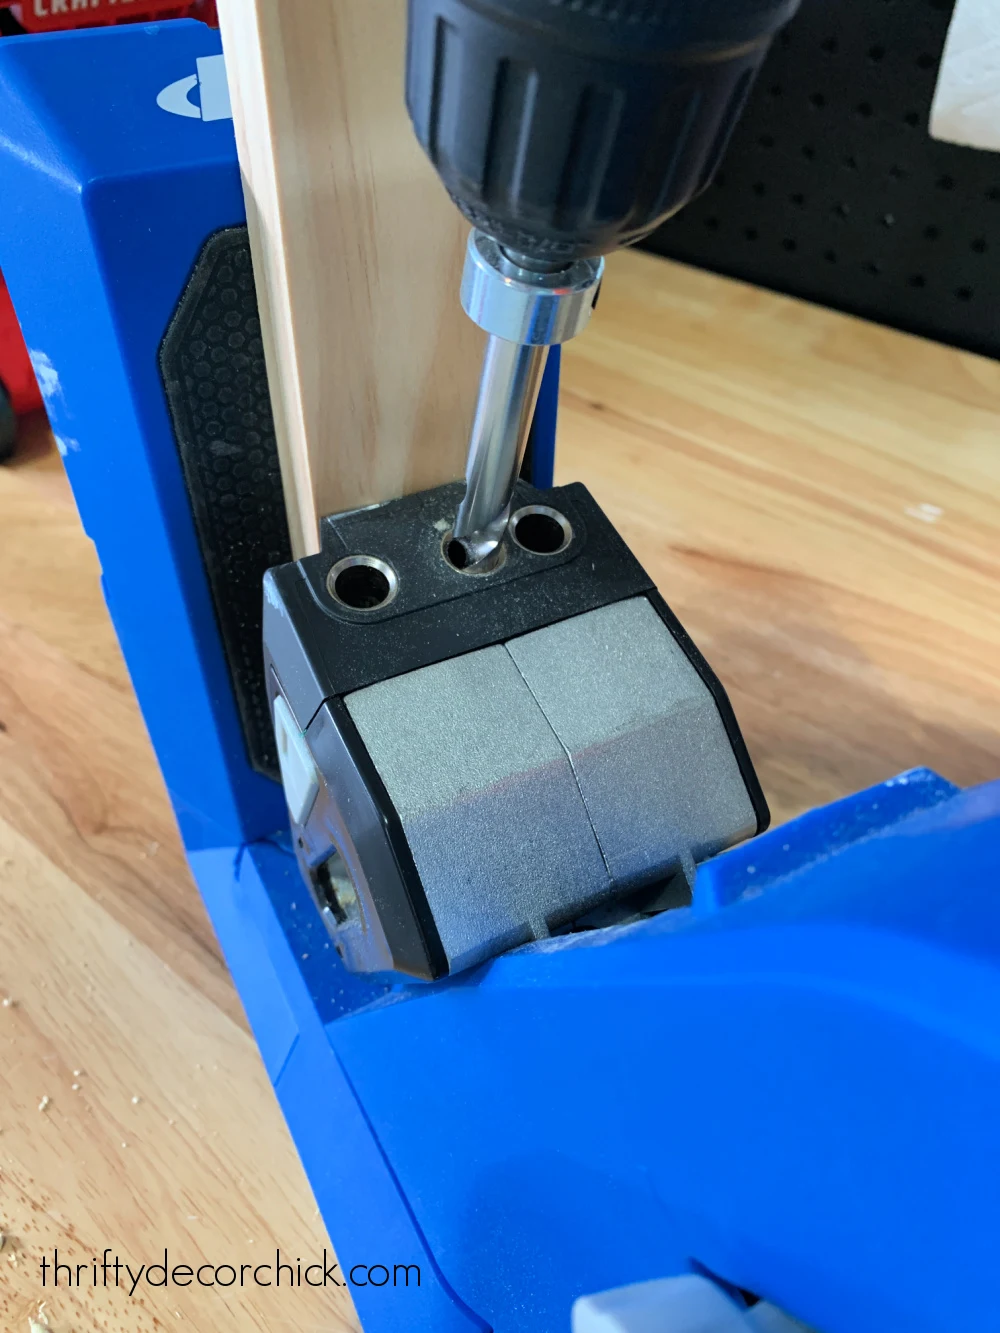
I cut them to the length that I needed, then used a 1/4 paddle bit to make a hole in the middle:
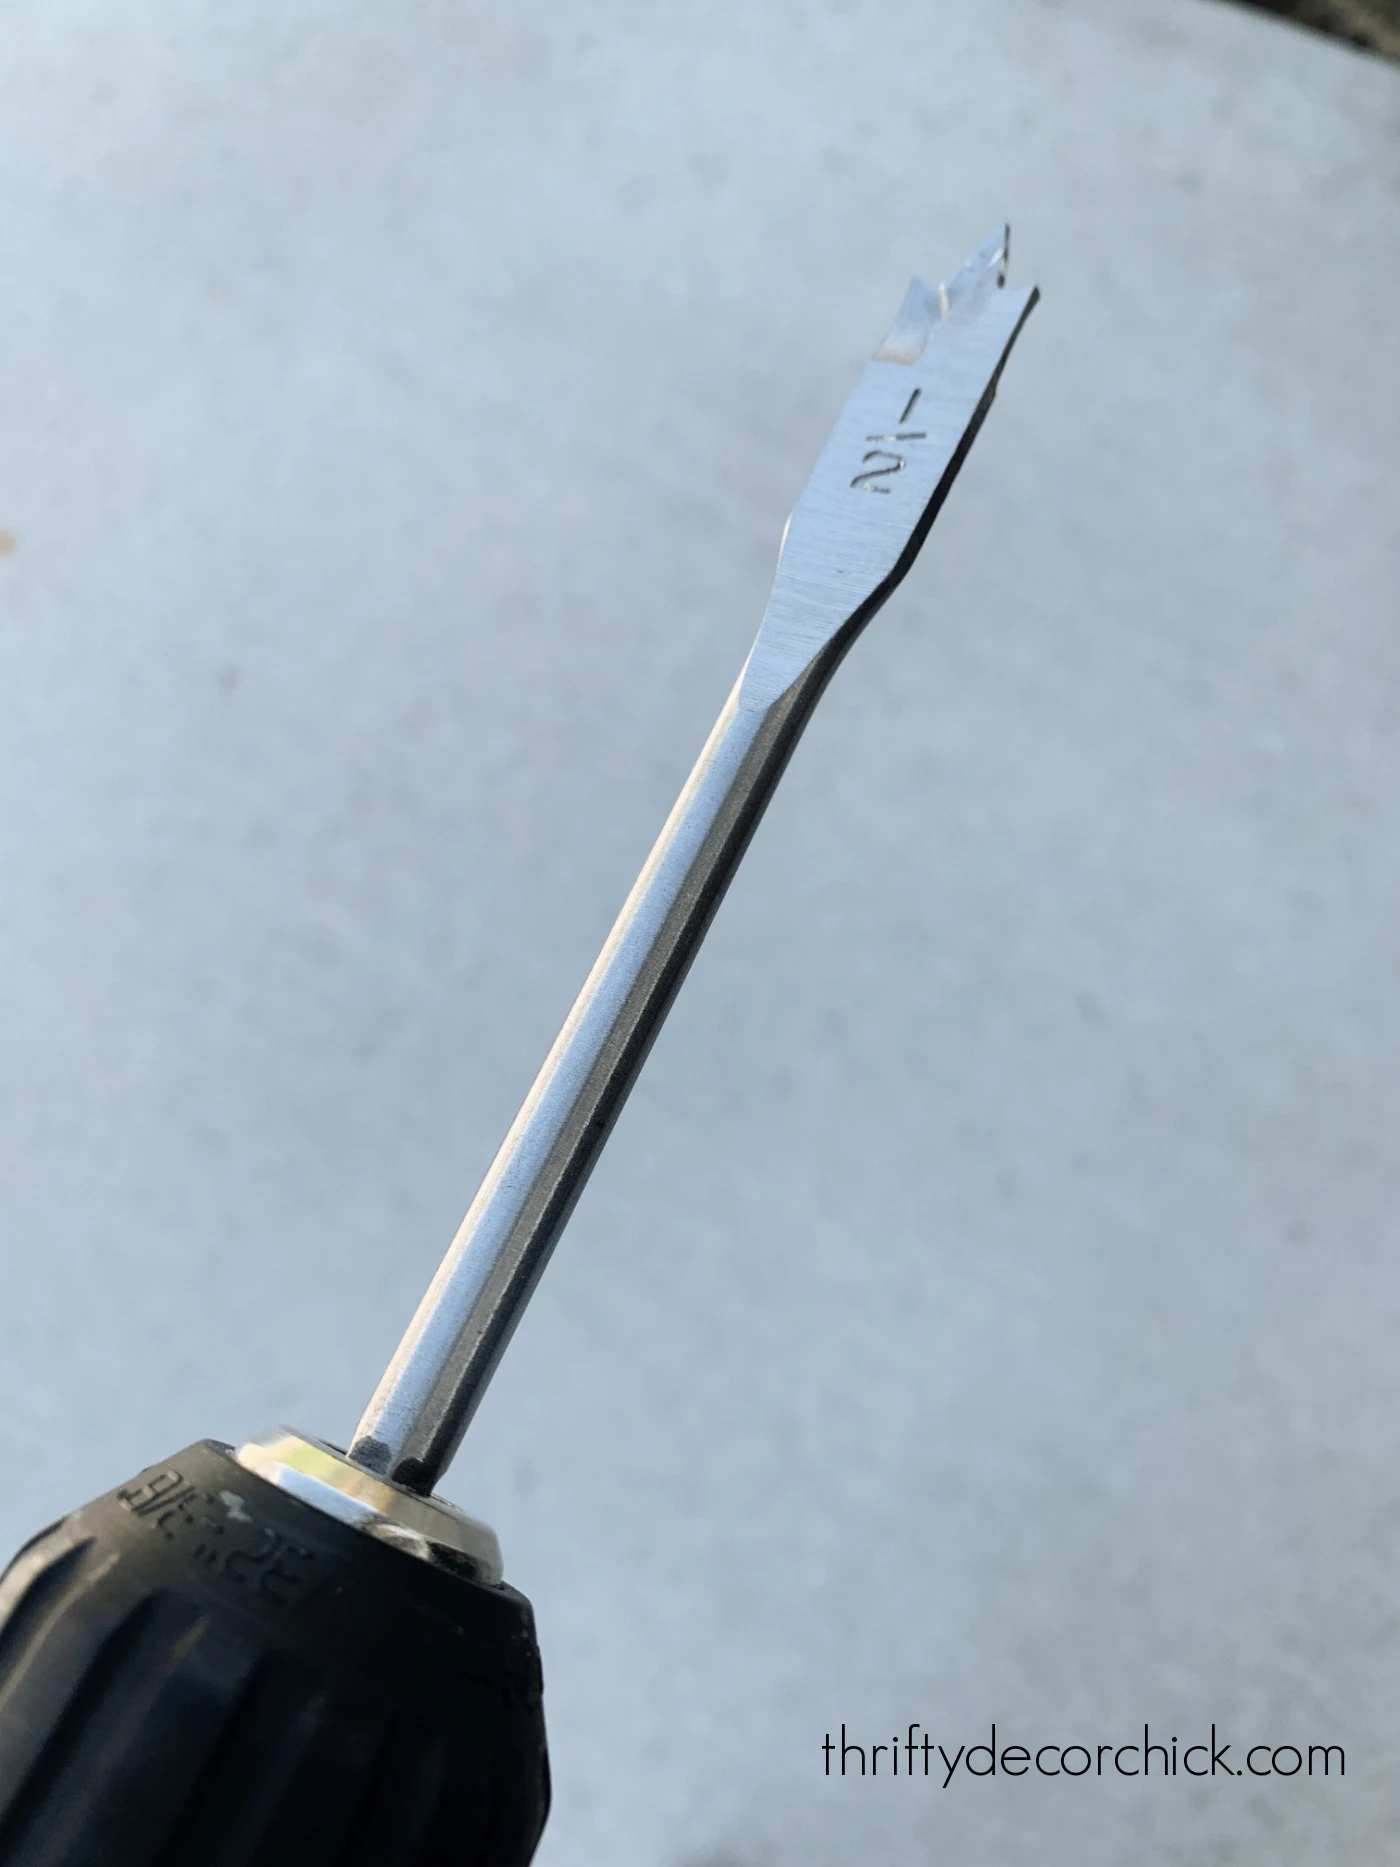
Do NOT attempt to hold the wood while you're drilling. It will spin out.
Instead, use clamps to hold it in place:

Those little quick grip clamps are so easy to use!
Go slowly and make sure to keep your bit going in as straight as you can. I prefer these paddle bits because I think they drill through much easier than other options.
If you have a drill press this part will be even easier!
This is where the round dowels come in! These act similarly to the steel brackets I shared above.
Cut your 1/2" dowel to size -- you'll want it as deep as the hole down the middle, plus about 3/4 inch sticking out:
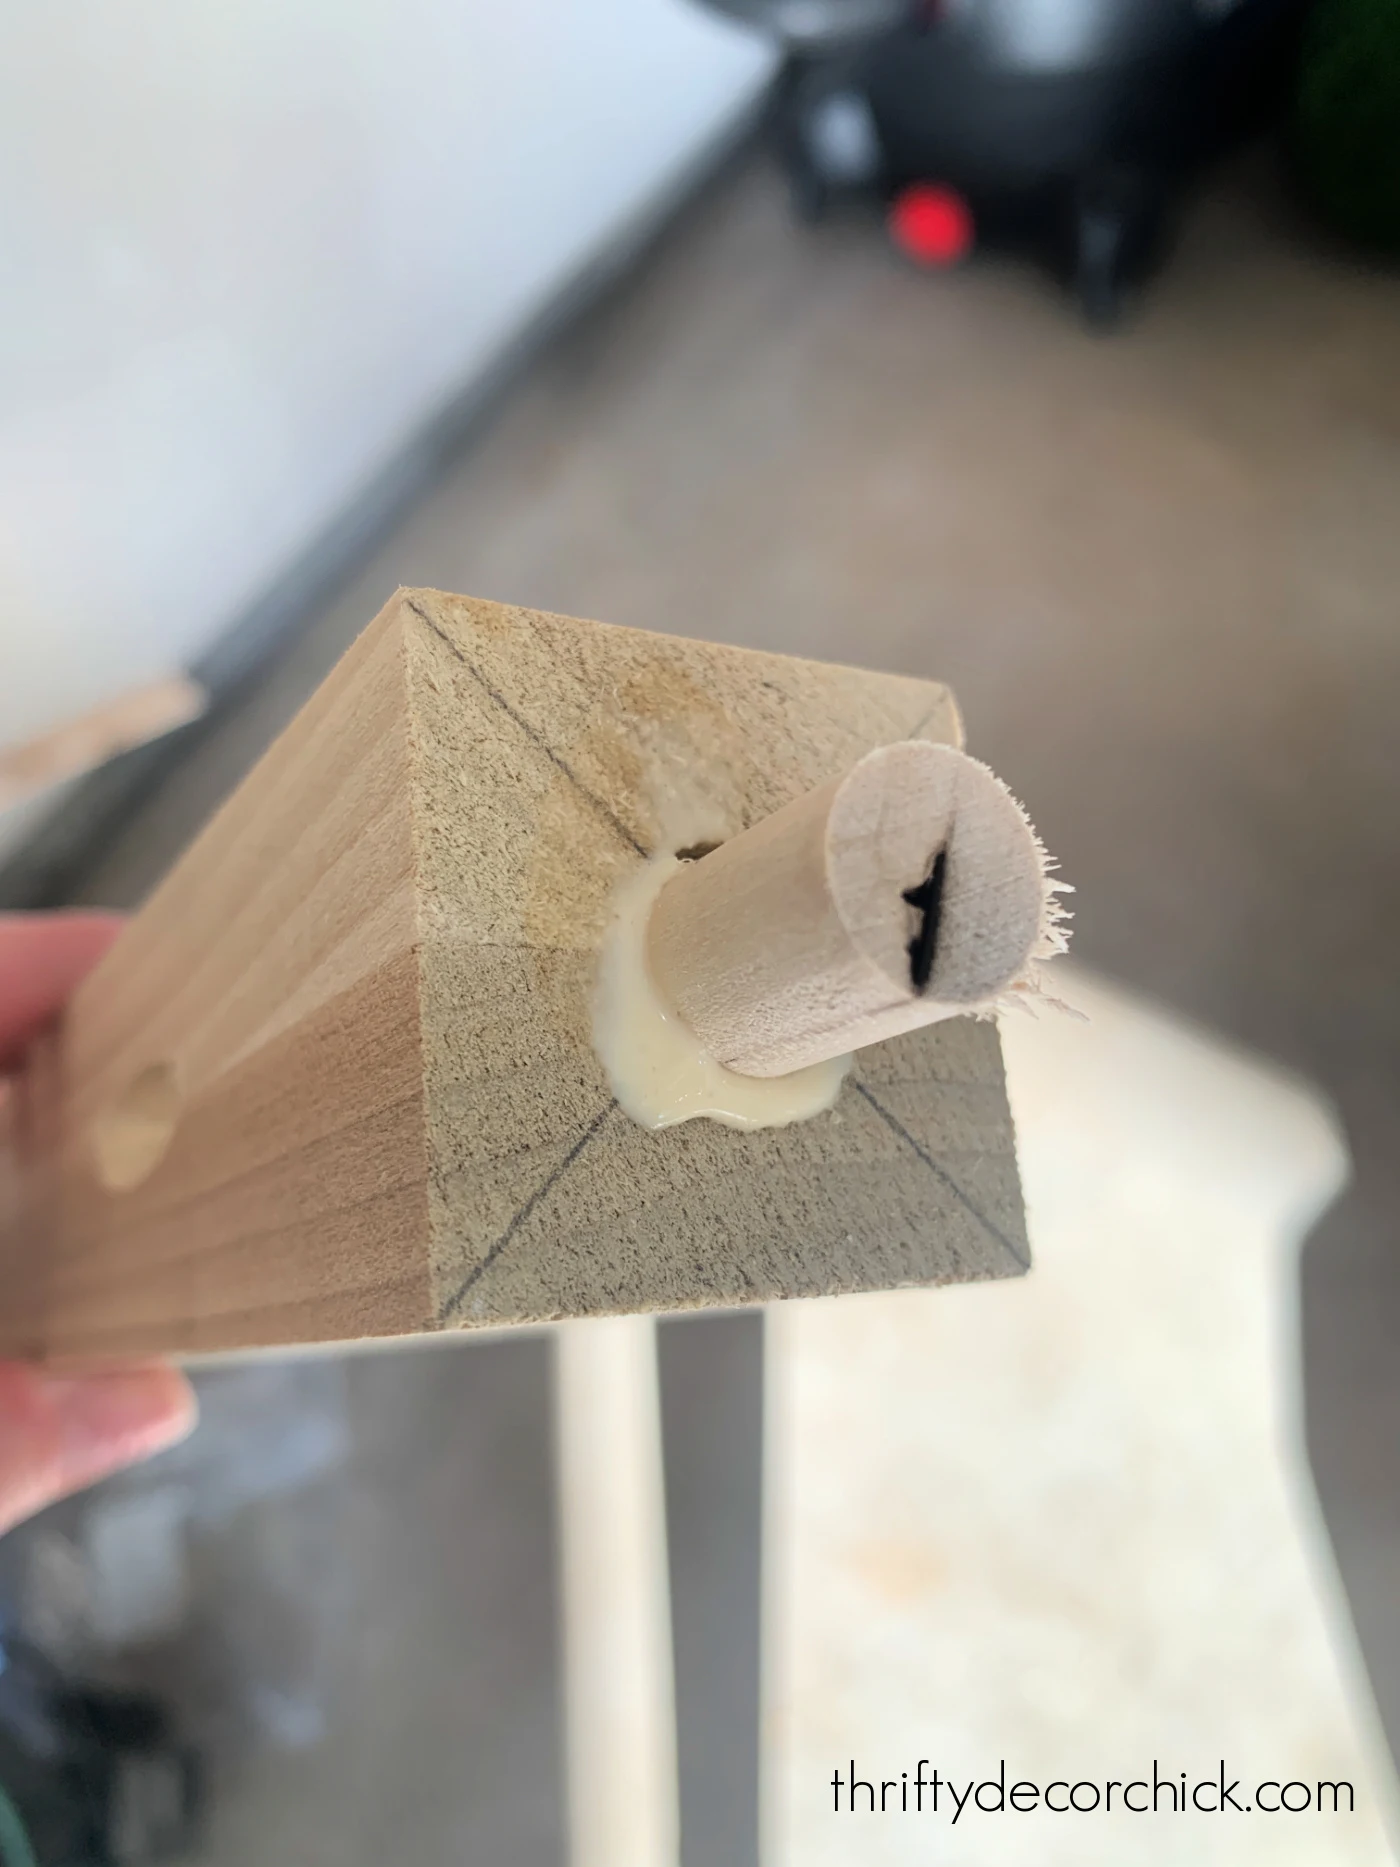
These don't have to be perfect since you can easily cut the dowel down with a saw after they're inserted.
I added wood glue first and then pounded them in with a rubber mallet.
I used my Kreg pocket hole jig on each one so that I could also screw each support into the wall as well:
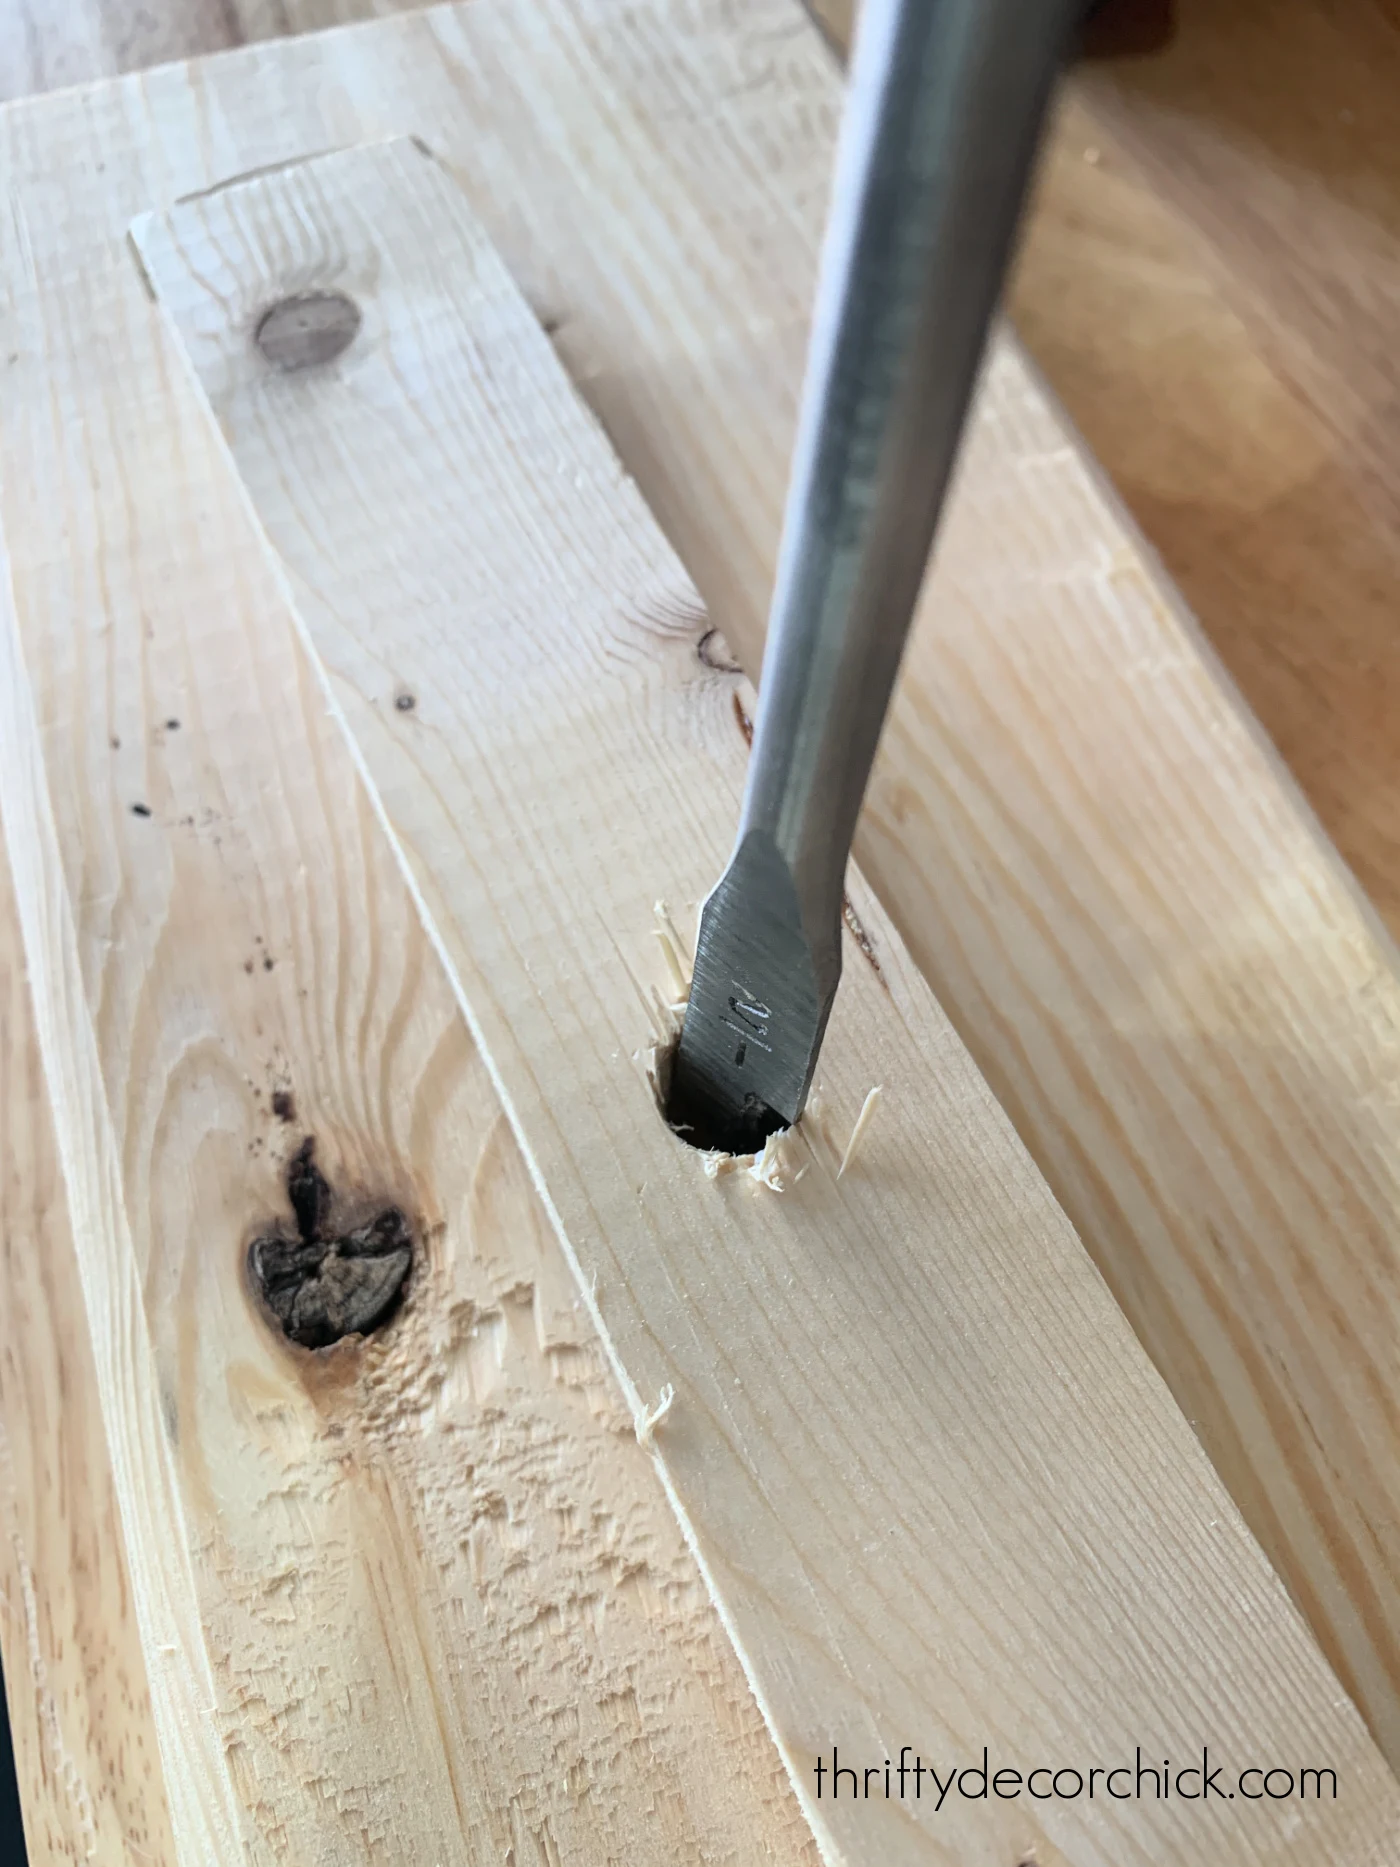
Install shelf supports with dowels and screws
Figure out where you want your supports, then use the 1/4 paddle bit to drill holes into the board where they will go.
I didn't take a picture of this part, so this is a workshop pic to demonstrate:
Grab more wood glue and dab some on the end of the dowel before installing it into the matching hole in the wall support.
Keep going until you have them all in!:

I ended up adding one more support in the middle of the shelves because the luan is so thin. It can bow a little if the spacing is too wide.
I used long screws through the pocket holes and into the 1x3 on the wall. In some spots, I got them all the way into the wall studs.
This helped to make things even more sturdy and I'm glad I did this extra step!
Be sure to check the level of your supports as a whole as you go! If they were off at all, I loosened or tightened pocket hole screws to adjust them.
Remember...it does not have to be perfect! You can hide a LOT with the front trim and caulk.
If you don't have a Kreg jig, you can insert long screws at an angle into the supports to mimic the pocket holes. Use a drill bit to make your hole first, then insert your long screws.
This won't be quite as strong, but will help!
(This mini Kreg kit is affordable and will make the same holes!)
Install the top and bottom of the shelves
I measured the depth of my shelves -- from against the wall to the end of the supports -- and copied those measurements onto my luan:

Use a table saw, circular saw or a jigsaw to cut your long cuts.
A few dabs of wood glue and a nail gun with finish nails are all you'll need to install the top and bottom of the floating shelves, no matter the thickness.
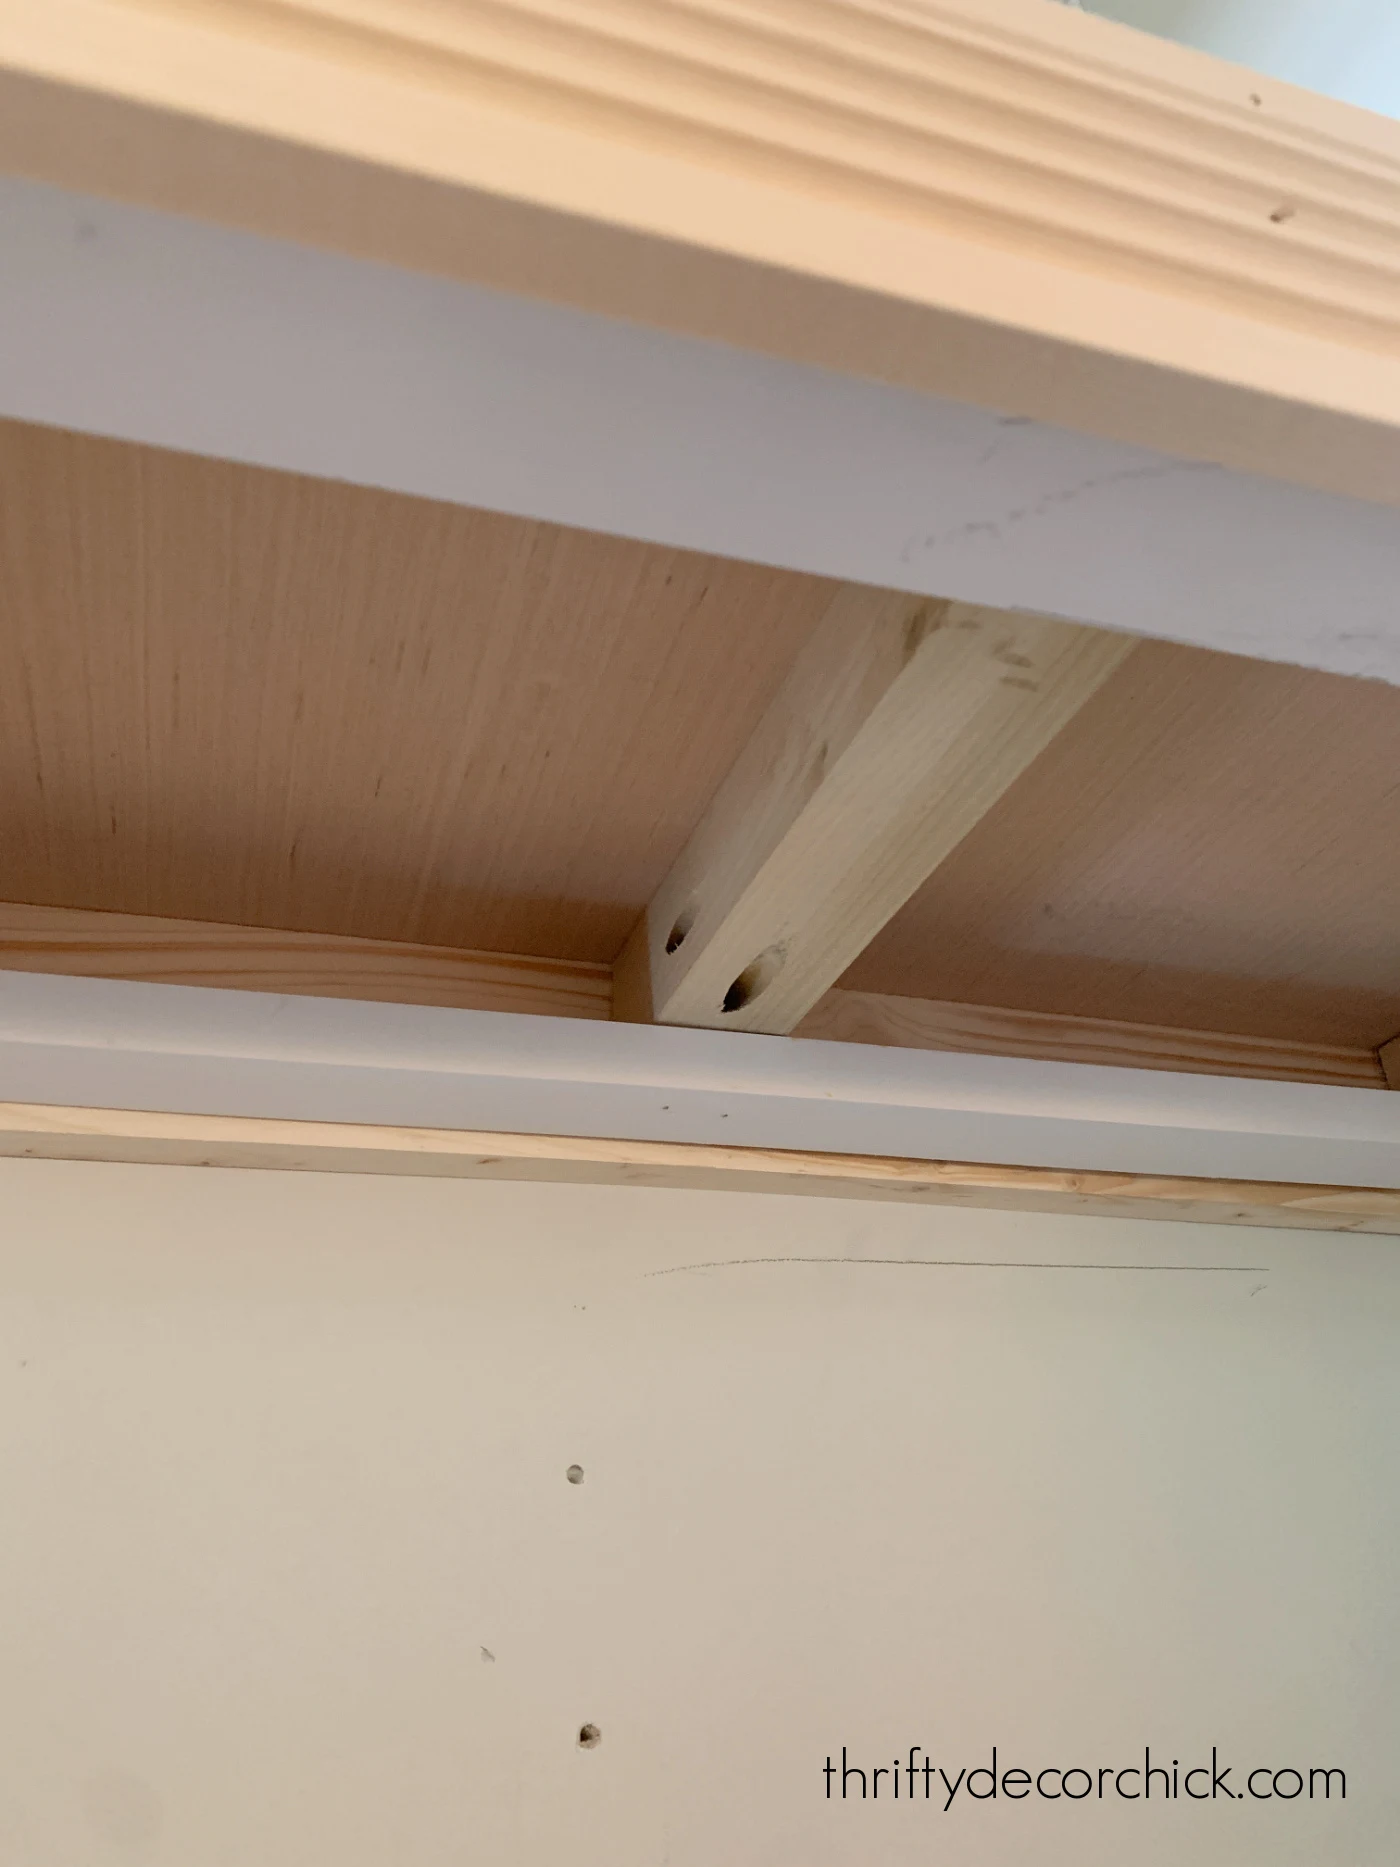
It was then that I realized using the square dowels as my supports (instead of using a 1x3) threw off my measurements a bit.
Remember this photo from earlier?:
Since my square supports weren't quite as thick as the one along the wall, I had to fill in some space before I put the luan on the bottom.
Otherwise it would have sat up underneath quite a bit, about an inch. It's not a bit deal though! I actually like a little bit of reveal, especially underneath.
But an inch was more than I wanted, and I figured a little extra support wouldn't hurt. So I used some scrap 1x2s along the front and back underneath:
Mine happened to be primed, but the inexpensive common pine will work fine.
It ended up being a happy accident, because that added some additional security from left to right. These things do not budge!
Add trim or wood to the front of your shelves
I chose a fluted wood trim for the front of the shelves and added that to the front and left side.
You can install this before or after your bottom piece is in -- I chose to add the trim first this time.
When I'm doing a project for the first time (in multiples), I iron out any kinks with my first one and then take photos of the second. :)
I was SO excited when the first shelf one was done -- the difference was huge!:

My plan all along was to stain these. I wasn't positive I would like the look, so I waited until they were installed before starting the finishing touches.
Turns out I HATED the stain on that trim -- it didn't stain up well at all, even with a conditioner. I loved it on the luan (yes, you can stain luan!), but the trim is what we see the most.
Instead I went with a light gray paint the color of our island and DIY hood cover.
Before stain or paint, be sure to fill any nail holes and sand everything down with a fine grit sandpaper.
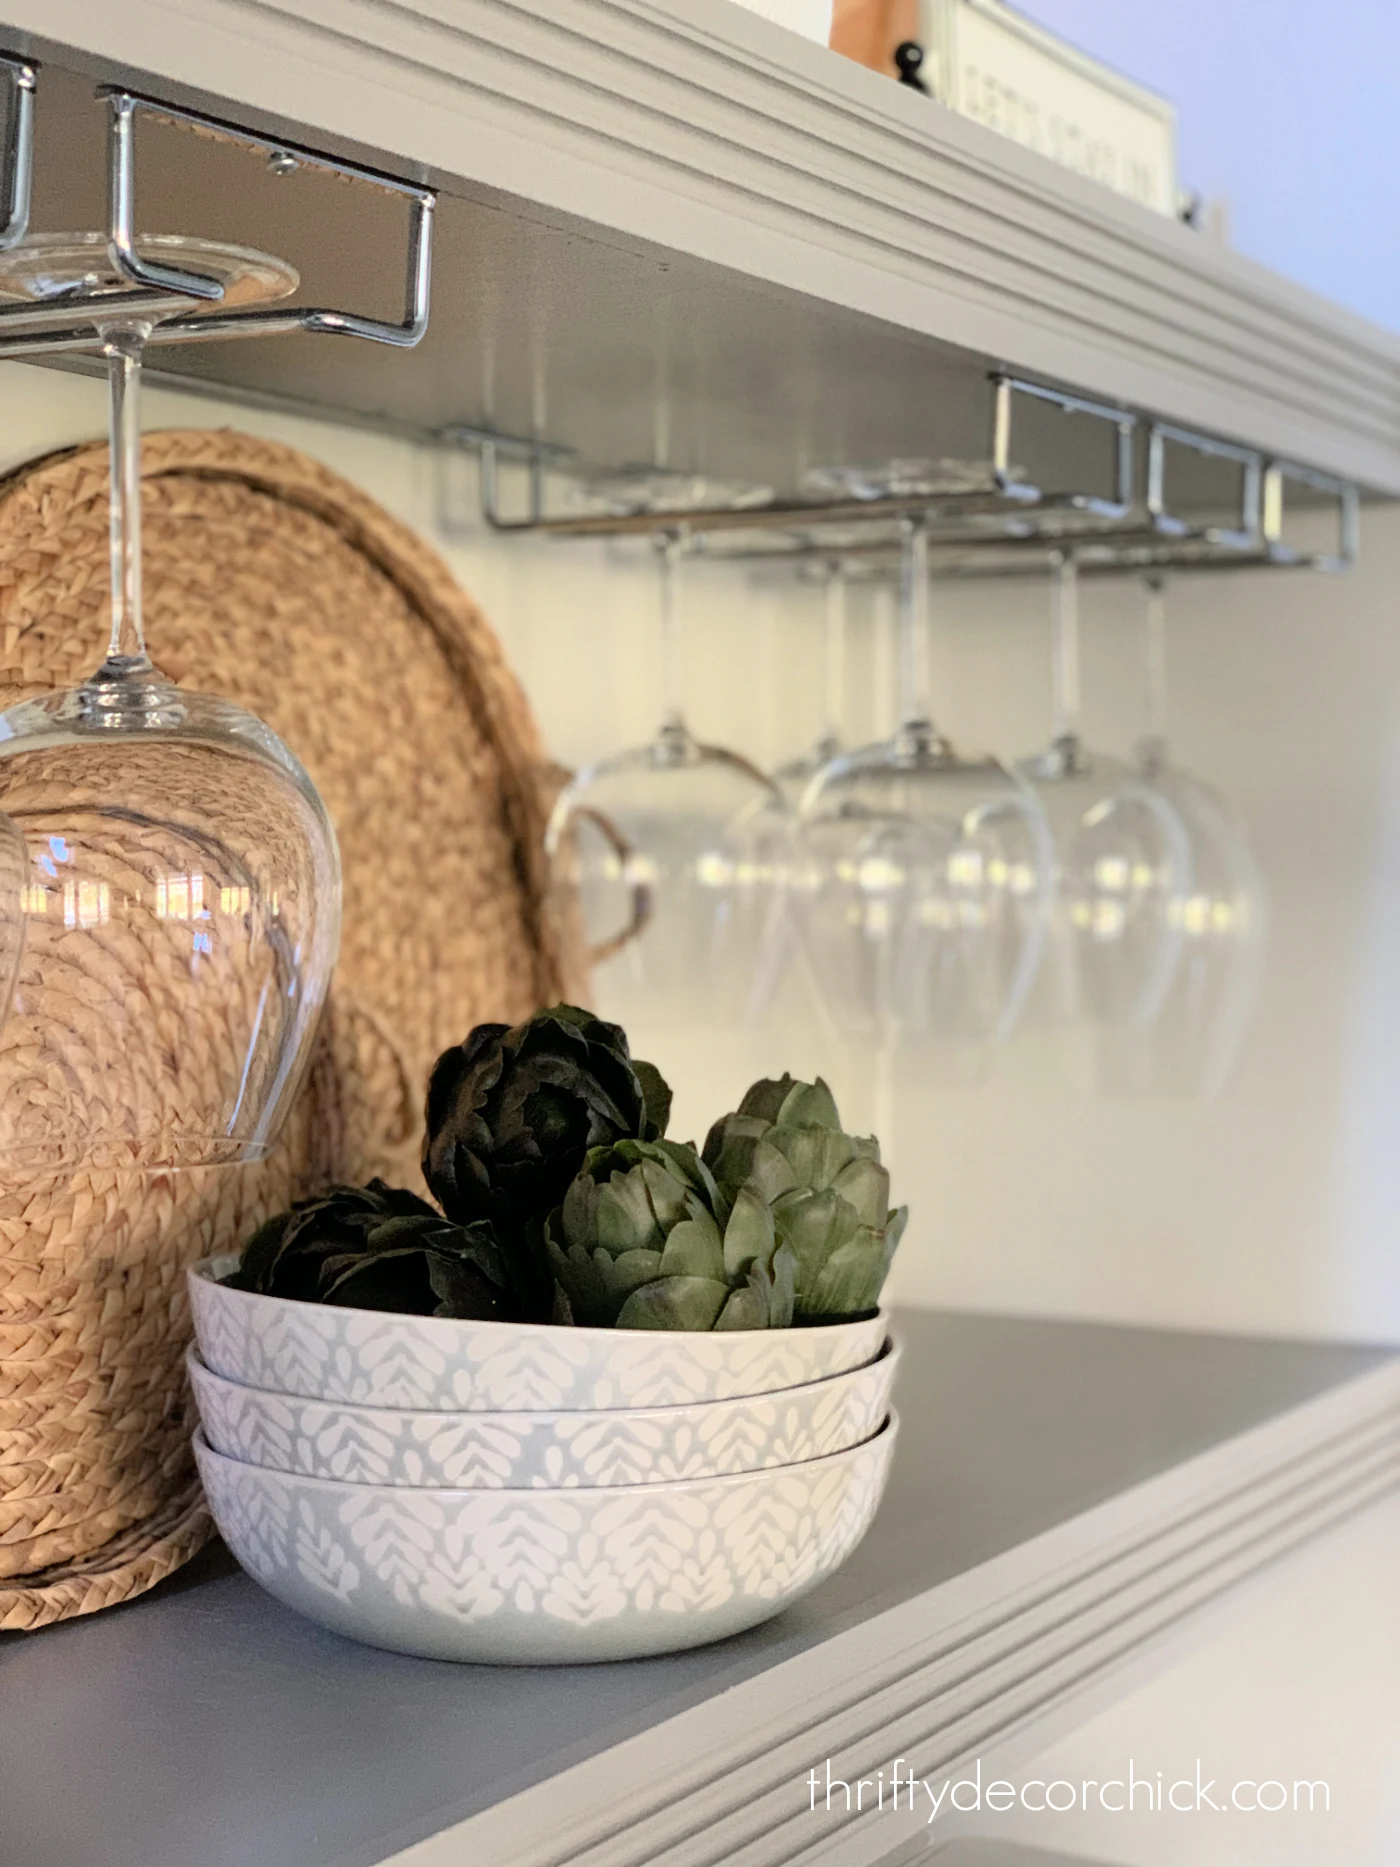
The main reason I wanted these shelves so deep (at least 12 inches), was because we wanted to add storage for our wine glasses:

I found those individual wine glass mounts at Lowe's -- they were the only ones I found nearby that were wide enough for the base of our glasses.
*Be sure to check that if you do something similar for your glasses!
I've been transitioning this little area to a beverage area of sorts. My husband started drinking coffee recently and he uses all kinds of stuff that needed a "spot":
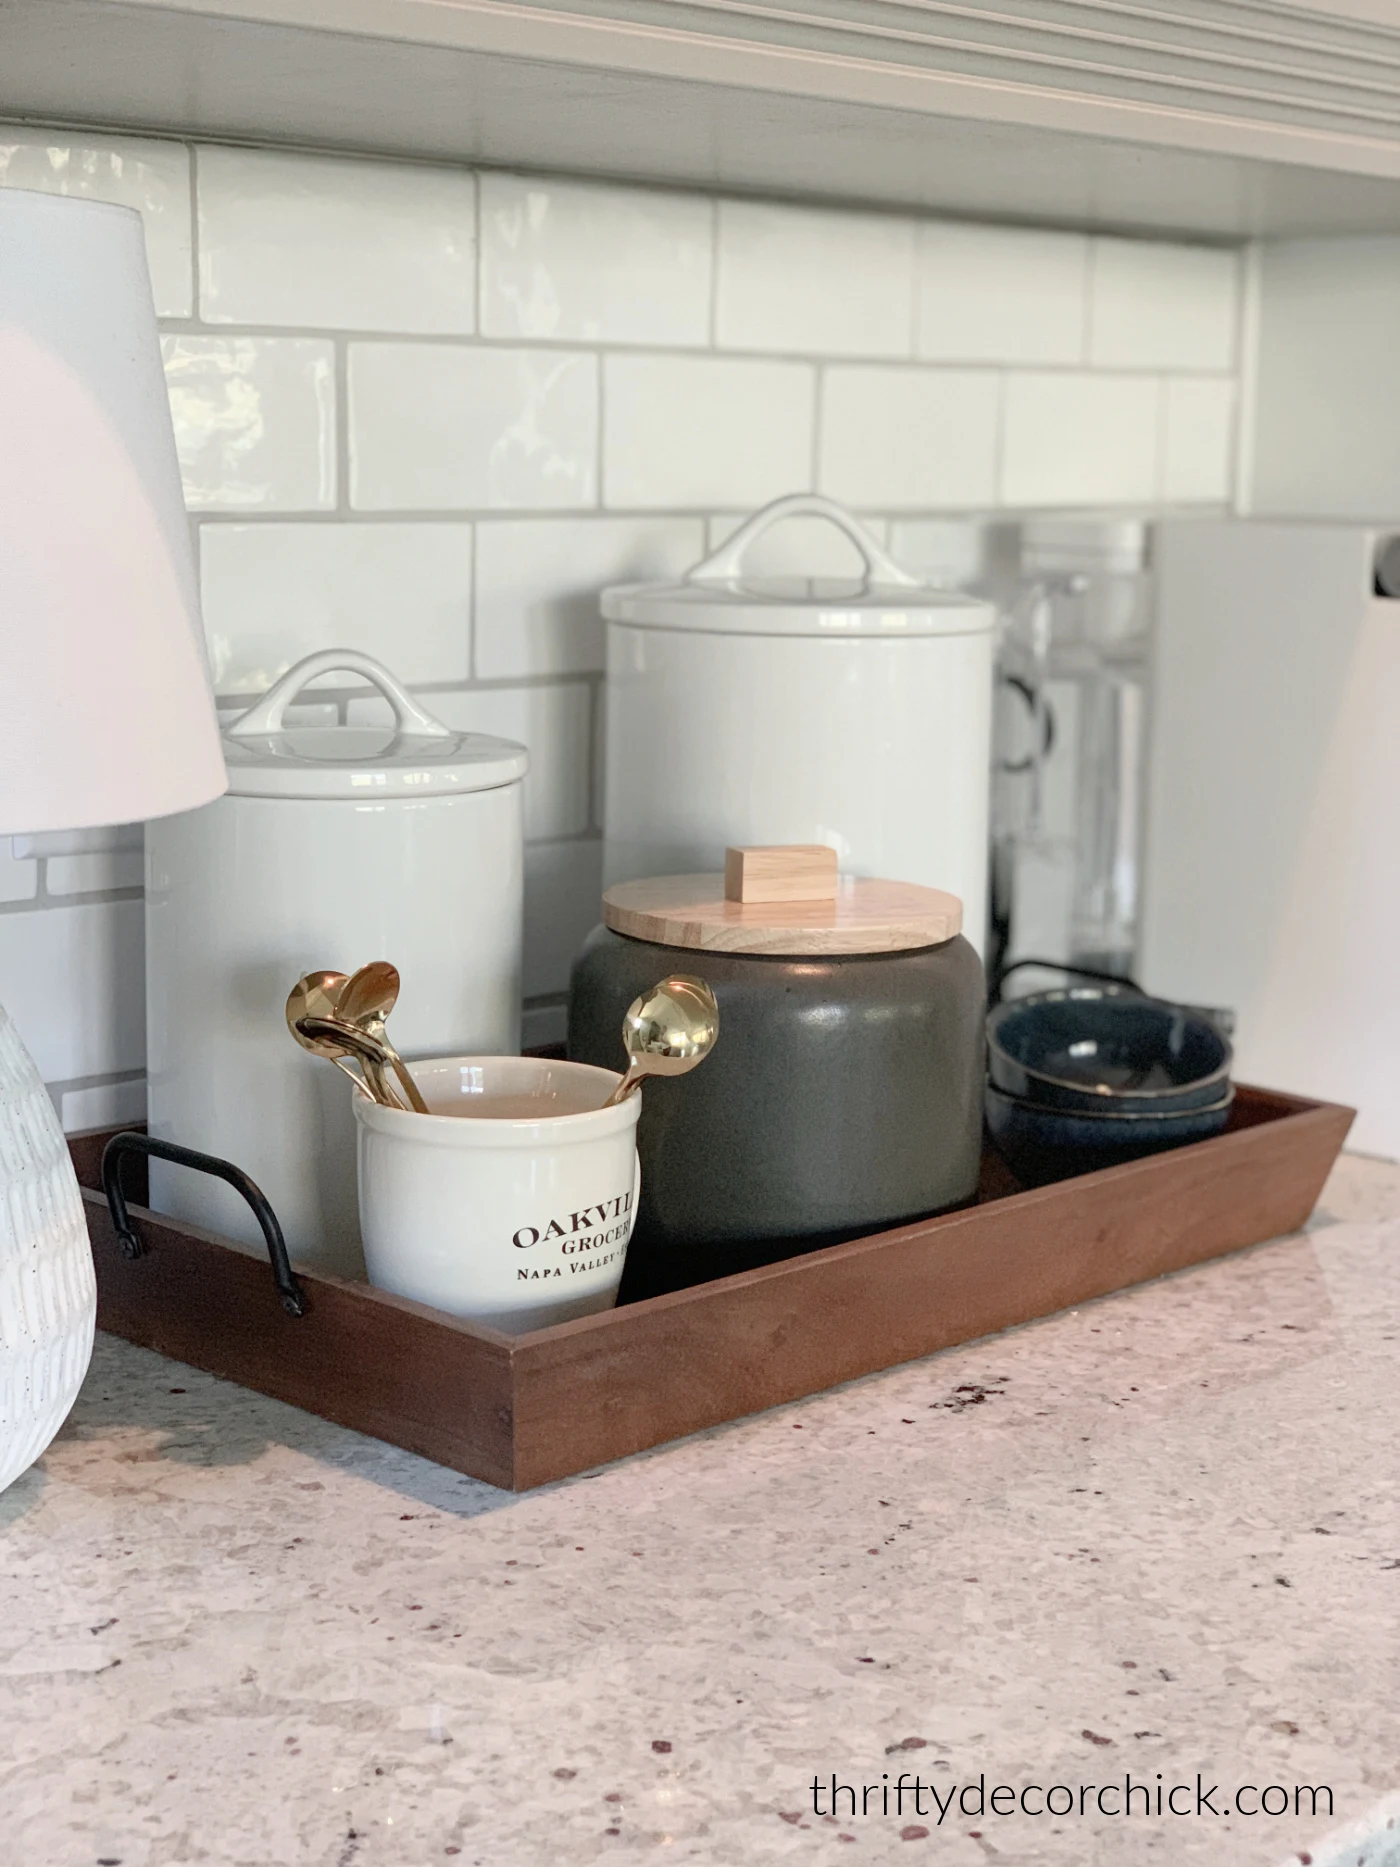
Now we have all of his coffee supplies, hot chocolate needs and our wine glasses/openers all in one spot!
This area was mostly wasted space before, now it solves a few problems for us:
We absolutely LOVE how it turned out!
I love that I still have space for pretty things, but it adds storage and functionality as well:
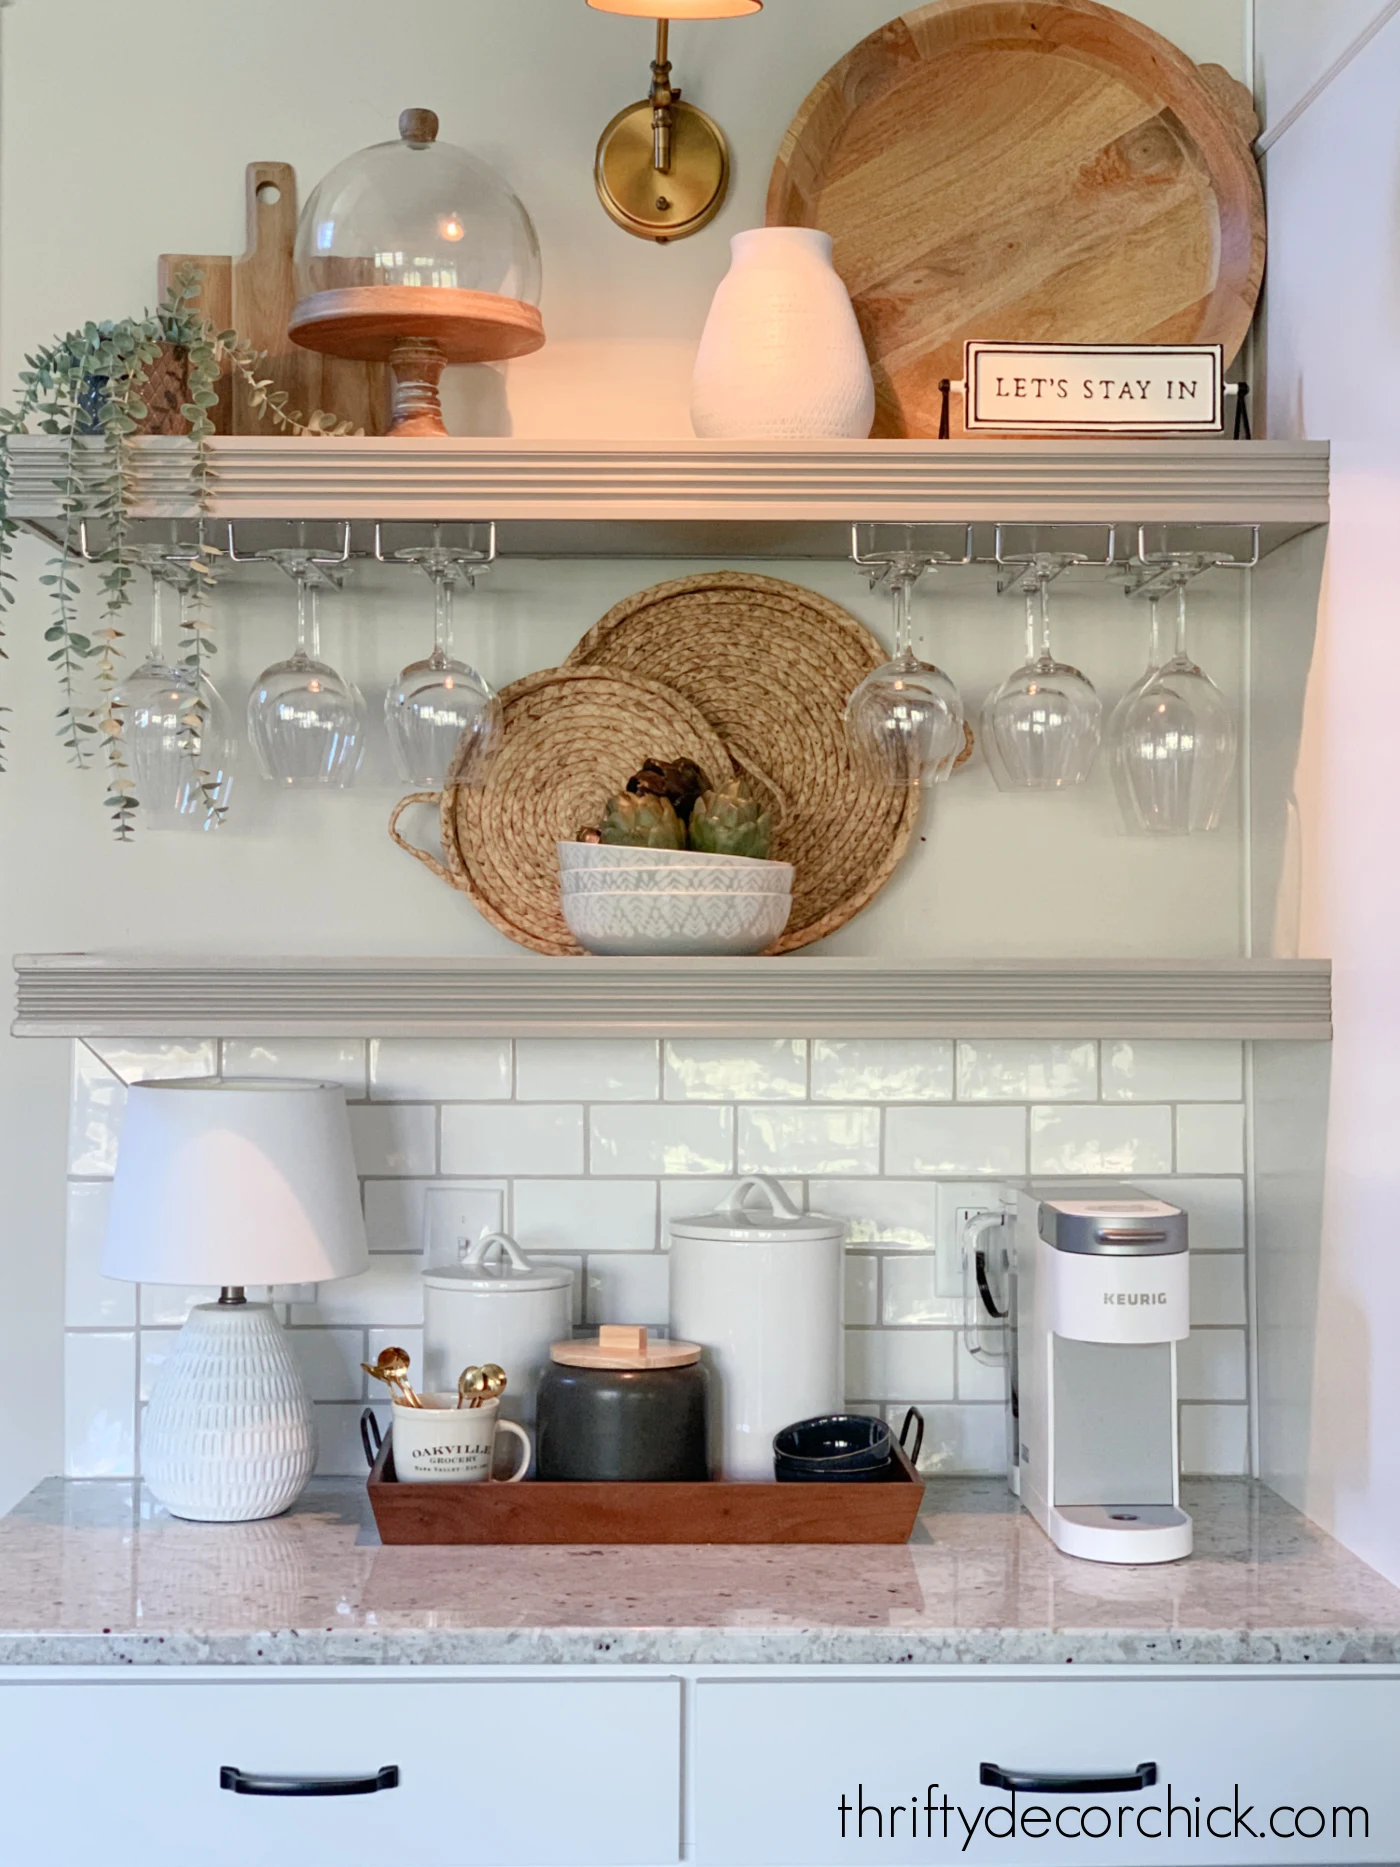

The wider, more substantial shelves look SO much better here!
It looks like it should have always been like that, which is the sign of a good project for me:

But wait, there's more! Well...there will be! :)
I'm extending the white tile backsplash all the way up the wall between the new shelves. It will give it all a more finished, custom look and I can't wait to get that done!
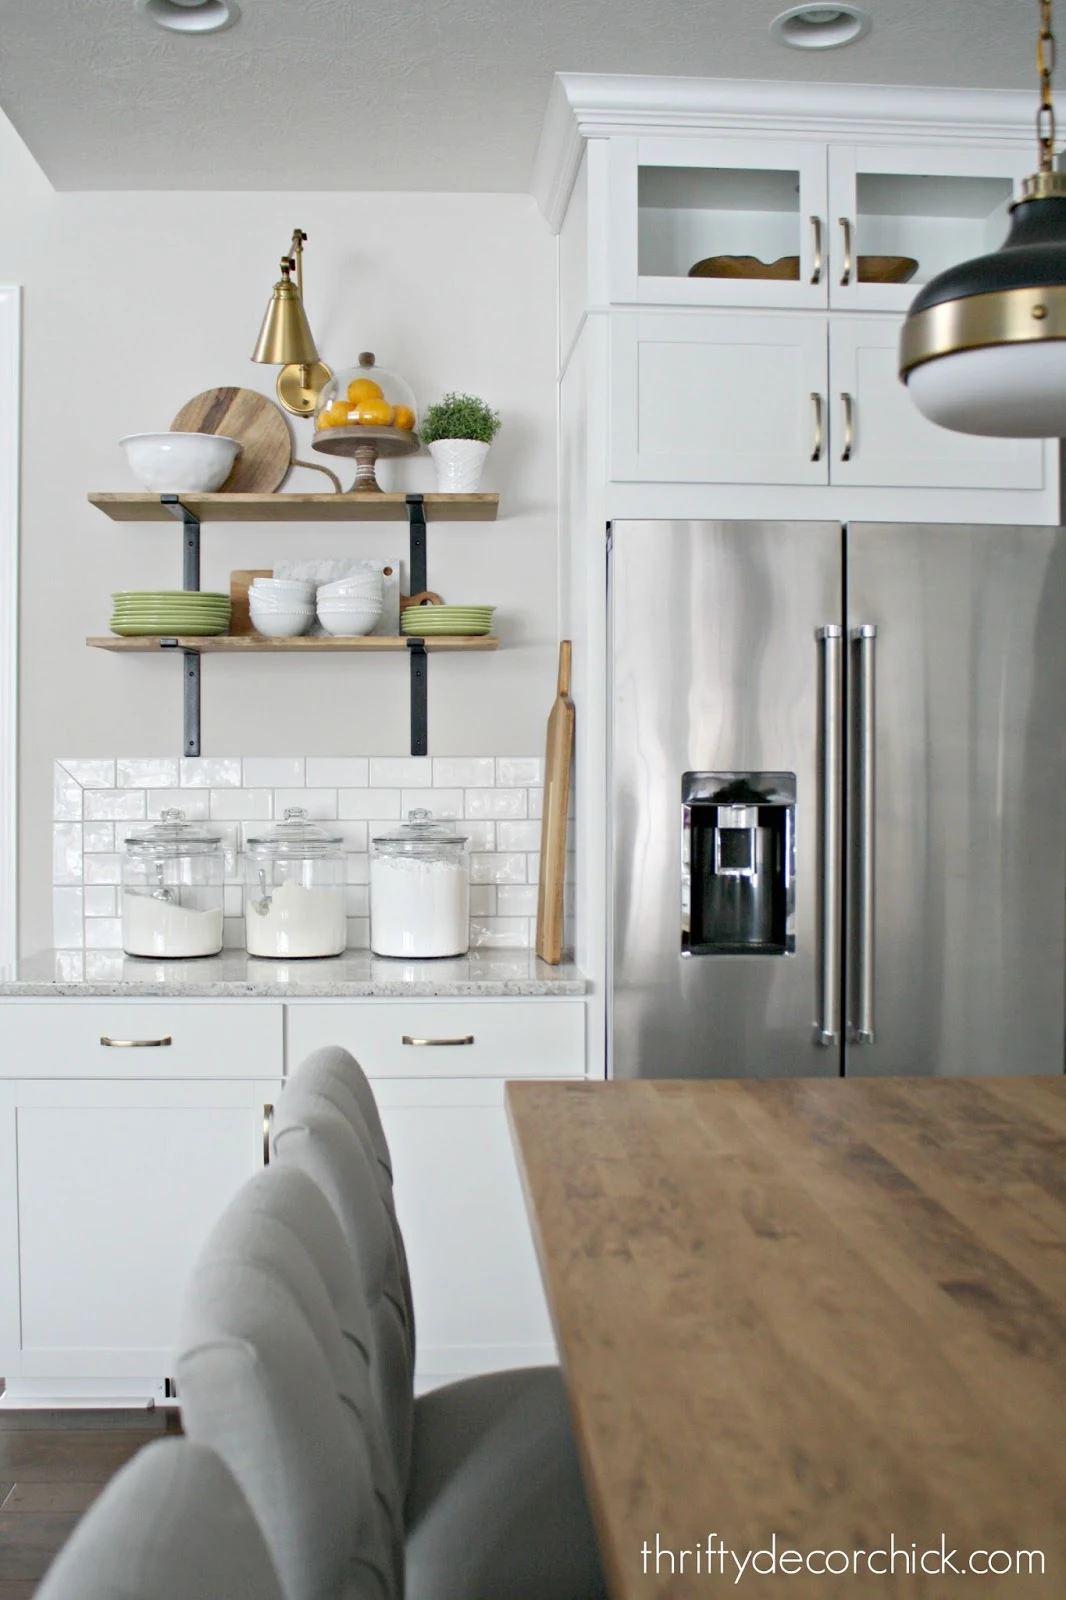
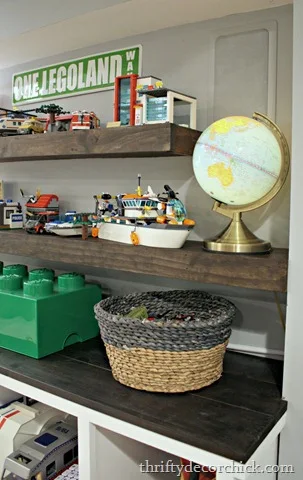
Whoohoo, I love how this came together! Here's a reminder of how the shelves looked before:
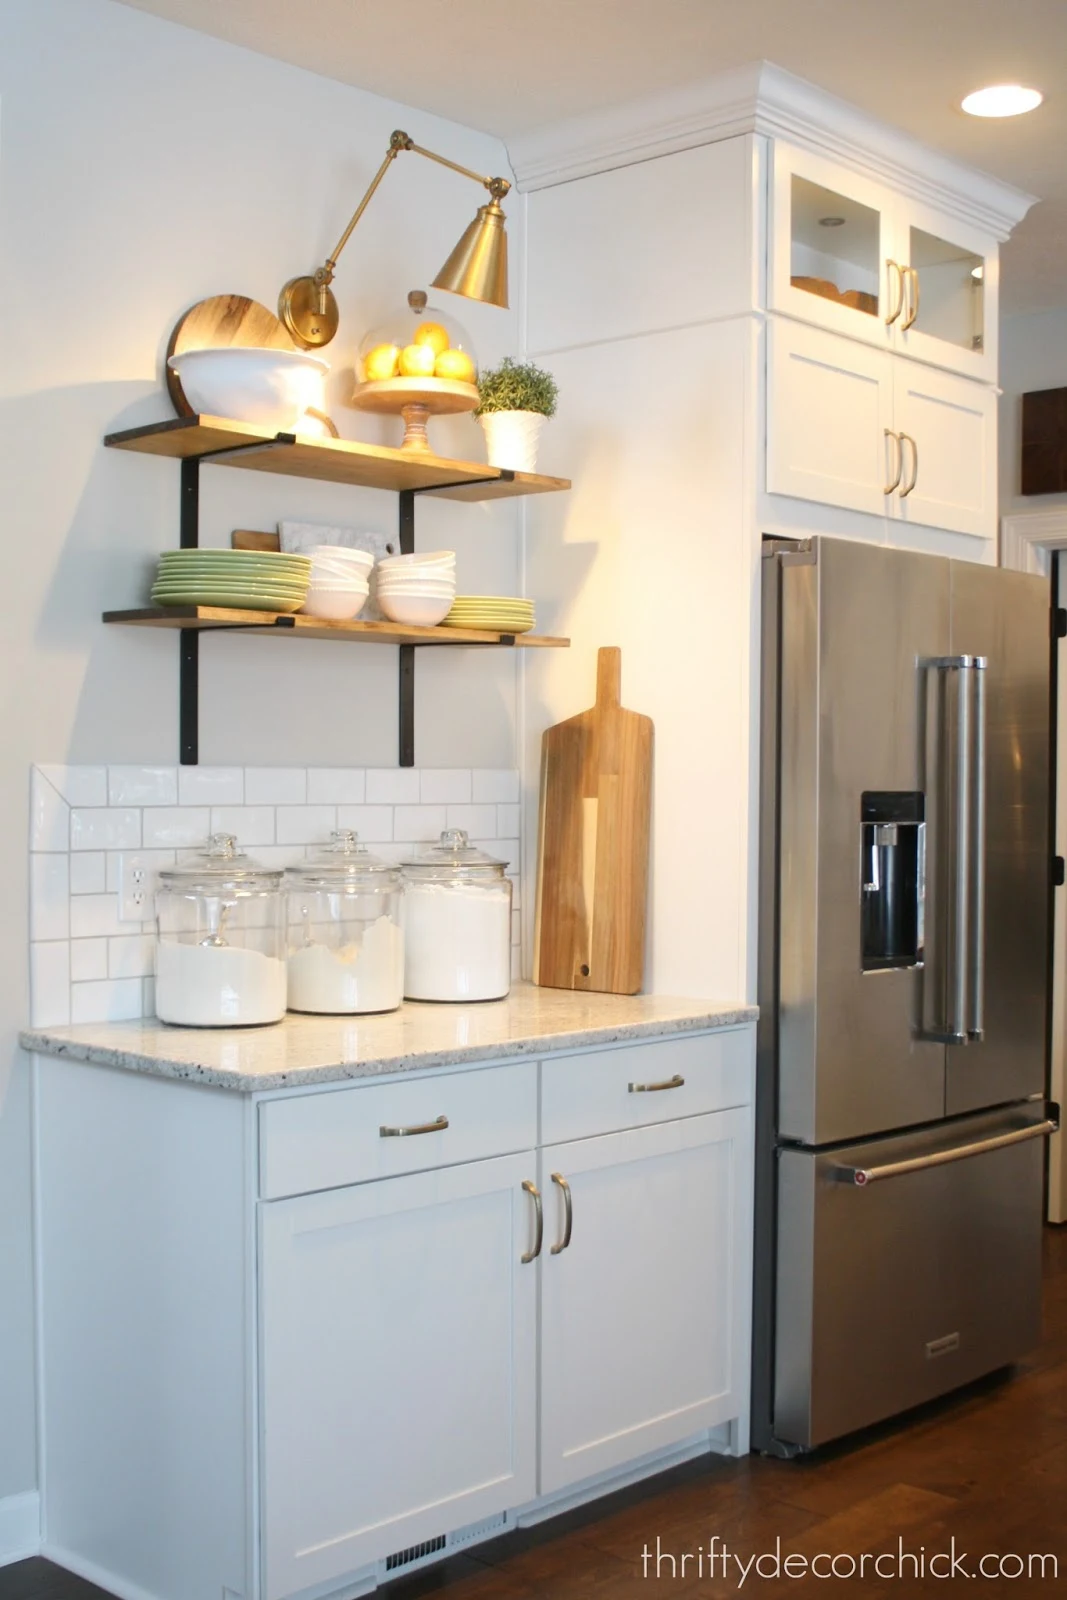
I eventually moved the dishes back into cabinets near the dishwasher.
And how they look so far, with the bigger, longer built in shelves instead:

I can't wait to see how it looks with the subway tile!
Solid wood shelves can cost a fortune...I've seen them for as much as $700 for this width. You'll save a TON doing this on your own, no matter what method you choose!
I know I threw a lot of information at you in this one! If you have any questions, please let me know in the comments.
You can find the wood tray for the coffee supplies here!
Never miss a post by signing up to get posts via email.
It looks really nice!
ReplyDeletePerfect. Those things look like they *grew* there. Great idea, too, taking the tile on up. That will say "always there".
ReplyDeleteAnother beautiful project! Thank you so much for the tutorial and the links to the past tutorials. I think I had already saved them in Pinterest but just in case, saved them again!
ReplyDeleteYou provide so much inspiration. I love it when I see your posts in my inbox. Hope you and yours have a great Thanksgiving!
Beautiful work!! I appreciate the detail on how you did it. And I'm so glad you didn't add a cabinet instead. I love the whole area, and it will be fabulous with the fully tiled wall.
ReplyDeleteAwesome as always!
ReplyDeleteQuestion, do you always use finish nails in your projects? Looking to purchase either a cordless brad nailer or cordless finish nailer. I know in your easy DIY picture ledges you use a nail gun but curious which one. These new shelves you use a nail gun. I have read a finish nailer is better for trim work since you can use heavier nails, you attached trim to your new shelves. Curious!
Good question! I have a brad nailer that uses 18 gauge nails and I find that sufficient for all of my projects.
DeleteI've never used a finish nailer since I use pocket holes and/or screws for anything that will need to hold a lot of weight over time. I find that for nearly all DIY projects, the brad nailer is plenty!