
How To Easily Paint Furniture {NO Sanding!}
March 14, 2024
Share this
How to paint furniture the easy way...no sanding needed!
You do not have to sand furniture before painting. If your piece is
in good condition, this method will save you a ton of time and mess.
For the past few weeks, I've been working on a makeover in our bedroom that
has completely transformed the space! I can't wait to show you the whole
room.
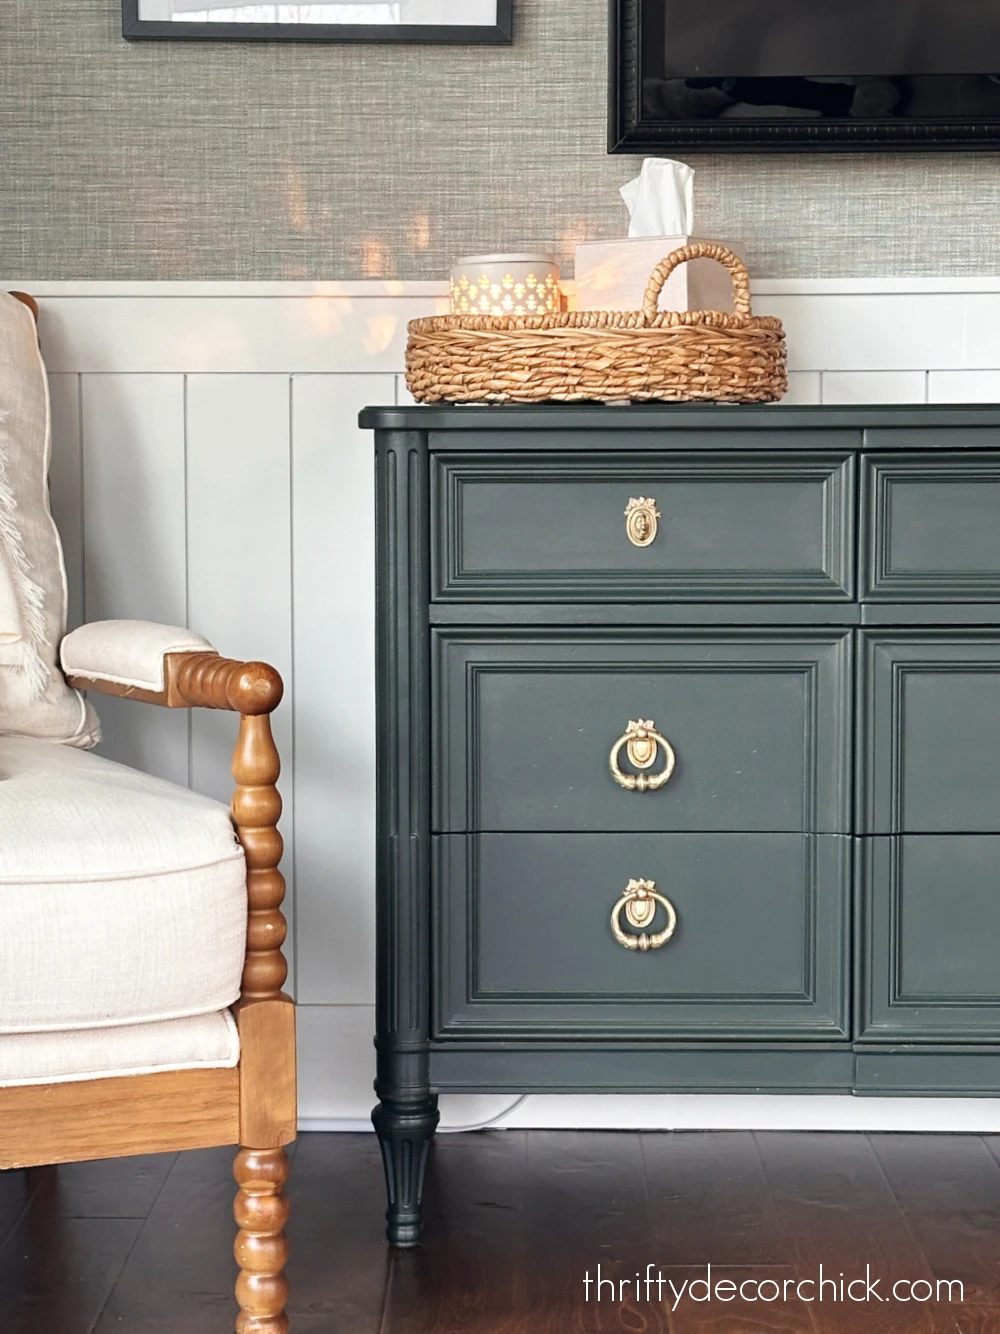
The last big project in here was painting this dresser, and it turned out so
beautifully!
I've had this lovely vintage Henredon dresser for years. I love the quality
(dovetail drawers!), pretty trim details on the fronts and the ornate brass
hardware.
The finish has never been my favorite though...it had an orange tone to it
that seemed to get more orange with time. Also, it had an odd splatter kind
of finish that I didn't love:

I've toyed around with painting it for a long time, but didn't want to
rush into a color.
But I finally made a decision! I shared how I
installed vertical tongue and groove planks
on the walls in our room a few weeks ago. The bright white on the walls
has made such a difference!
I've painted a TON of cabinets and furniture over the years, and have
tried many ways along the way.
Typically, sanding or priming are options to prep furniture for paint, but
I have found that cleaning the pieces well before painting is the most
important.
Cleaning furniture thoroughly works as well as sanding before painting in many instances.
My favorite product for doing this is TSP, or trisodium phosphate.
This product, also known as liquid sandpaper, is what I've used for
years. But phosphate free options are now available. (Phosphate is not
good for the environment and can be very irritating to skin.)
This
M-1 TSP substitute spray
is what I picked up for this project:

Before I could start, I needed to remove all of the brass hardware. This
hardware is so old, there are little nails on a few of the pieces. I
very gently pried those off with a flat 5-in-1 tool:

The cleaning spray was so easy to use! I grabbed a microfiber cloth, sprayed
the deglosser generously onto the cloth and got to work wiping down the
dresser.
I paid a lot of attention to the grooves along the drawer fronts:

I used my finger nails with the cloth to really get into those spots. There
were many years of grime hiding in there!
I couldn't believe how much of the finish came off on the cloth!:

It was absolutely filthy! (And yes, I have cleaned this dresser many
times.)
After cleaning, I made sure to get all of the TSP substitute off with a wet
rag, then let it dry completely before painting.
With the dark gray walls gone, I have more options for accent colors. I've
been working off the colors in our rug and adding a lot of green tones in
the room.
I had plenty of green paint (called Jasper from Sherwin-Williams) leftover
from our basement fireplace project, so that's the color I went with.
Because this cleaner works so well to prep for paint, I didn't even use
primer! If your furniture will get heavy use, it never hurts to do a coat of
BIN primer
before starting.
When I paint furniture or doors, I always start with a brush on the grooves
and smaller details first:

Then I immediately follow up with a
foam roller
on the flat parts:

Other than prepping well, the other key to a durable paint job is letting
each coat cure (dry) long enough before adding another.
I did three coats of paint total, letting each coat dry overnight.
OK, OK...there is a
little bit of sanding
involved, but nothing crazy! I highly recommend doing a very light, very
quick sanding in between each coat of paint. This ensures you'll have a
super smooth surface.
While I waited on the paint to dry, I worked on cleaning the brass hardware.
I've shared the
various ways to clean brass
and this one is by far the best!:

I can't believe how great the hardware turned out! Just gorgeous!!:

I don't usually add a protective coat to my furniture projects, but since I
was using paint I had on hand, (and it wasn't a glossy finish like I'd
normally use) I will be doing a coat or two on the top of the dresser.
This room is a breath of fresh air now, I don't think I could love it more!
I'll share the full tour very soon, but here's a look at this spot
before:

And now after, with the pretty wall paneling, new drapes and the painted
dresser:

This is turning out to be one of my favorite transformations yet! I still have
a few little projects to do, including figuring out the art in the
frames:

But it is well on the way! :)
I love a great wood finish, but sometimes it's just not quite right. This
rich, dark green is so beautiful, and really lets the brass hardware
shine.
Have you tried this easy method for painting furniture? It doesn't get much
easier! This painting method is
how I paint our interior doors
as well.
Never miss a post by signing up to
get posts via email.
Stunning color and great job! That looks like a $1000 sideboard now!
ReplyDeleteThank you!!
DeleteI have black interior doors that were here when we moved in. They don't seem to be ideal because they get chipped or hit and the under coated white door shows thru. What can I do?
ReplyDeleteYou'll need to give them a good sanding, and then I'd recommend a coat of BIN primer before painting them again. The doors either weren't prepped well or they were painted with latex over oil-based.
DeleteBeautiful!!!! What is the paint and the color? I need that for my laundry room makeover.
ReplyDeleteThank you! It's called Jasper from Sherwin-Williams. :)
DeleteGorgeous as always!
ReplyDeleteGreat article! Thank you
ReplyDeleteLooks great! Did you use a oil based or latex based paint?
ReplyDeleteThank you! I always use latex.
DeleteAmazing - i cannot tell you how much time we wasted sanding down our furniture! Thanks for the tips xxx
ReplyDeleteBeautiful thanks for posting
ReplyDeleteThat looks so lovely. Goes so much better and love your kitty. Two questions: what grit sandpaper between coats and what protective coat will you recommend using.
ReplyDeleteGreat questions! A very fine grit is perfect (just a light sanding is fine) and I used a polyurethane for this dresser top.
DeleteI want to do something very similar on my 80s dressers and nightstands. What if I had already painted the brass hardware with spray paint? Any tips on removing that? Or should I just re-spray with a brass color for even coverage?
ReplyDeleteA paint remover like Citristrip should work to get that off!
DeleteBeautiful! I need sources for this whole corner - the lamp, drapes, pillow, chair, items on top of dresser, etc! You have true talent!
ReplyDeleteThank you!! The lamp was from Target I believe, the chair was HomeGoods. The drapes were from Amazon -- 'll try to find links to everything!
DeleteI have a orange-ish hutch that I have been thinking about painting with a sprayer, is that advisable over a brush?
ReplyDeleteThanks
Either one will work! If you have a lot of detail it will be easier with a sprayer.
DeleteThanks for the reply! Looking forward to the source links! Also need to know details on the cute little light projector/night light on the dresser!
ReplyDeleteTSP is great in your laundry and dishwasher. I use it for that.
ReplyDeleteBeautiful!! Which paint finish did you use for this project? Satin?
ReplyDeleteI believe this one was satin, but I would highly recommend a semi-gloss instead.
DeleteBeautiful transformation! 2 questions: I want to paint my dark brown, somewhat cherry bedroom furniture black. I’m okay if it’s not perfectly black, I just don’t like the reddish tone. Do you think I can get away with one coat since it’s already dark or do you recommend more for durability? Also, if I do a semigloss paint, do you think I need to poly? Thanks so much!
ReplyDelete