Goodbye to my first trim project
March 09, 2016
Share this
Late last year I took down the trim "boxes" I had on our staircase -- they were the first trim project I tried more than ten years ago and the newbie-ness showed. :) They weren't flush with the wall and were kind of a mess, but I was proud of them for all those years!
I usually decide to tear stuff up before big events like people coming over, a big party or major holidays. It's how I do. This one was no exception -- I took the trim down in December and it's looked like this since:
I used to have a darker color in the squares and the old wall color was behind that -- you can really see how pink those walls were!
I didn't think I had used glue on the trim but I was wrong. This is why I tell you all NOT to use glue on your trimwork unless you are 100 percent sure it will never come down. Use studs and caulk if you need to -- but glue leaves a mess when you take it down.
There were hundreds of little divots in the wall where the glue pulled drywall off:
I must have lathered the corner pieces with glue because they pulled entire chunks off the wall. Good times. That's why I put this off for so long! I loathe drywall work.
I used this filler to for all of those spots and then sanded and wiped it all down after it dried:
I had to do a few coats on the corner spots and it still isn't perfect by any stretch. This is a fix until my bigger plan for this staircase comes to fruition -- which will probably be next year. I just wanted to get rid of the mess on the wall for now.
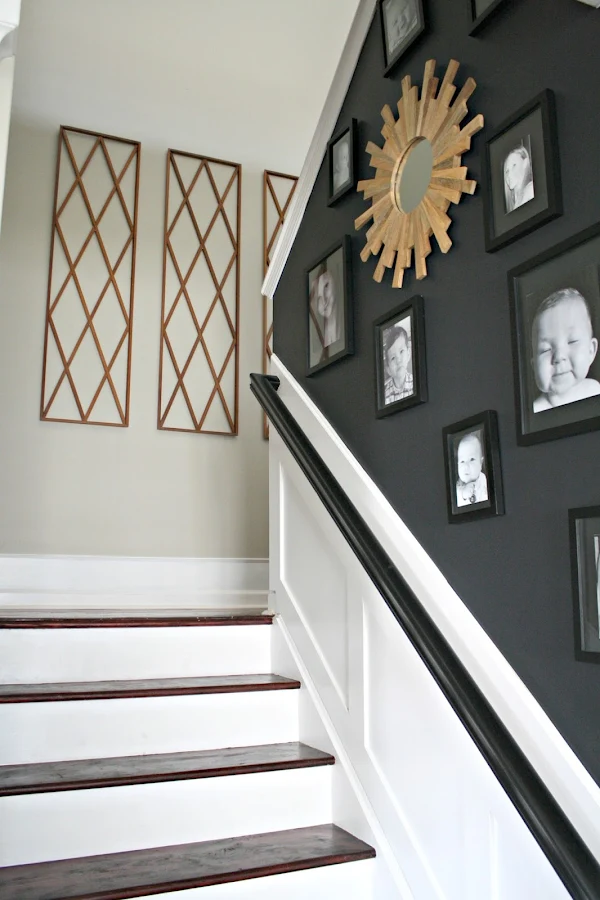
The mirror looked sad and tiny on that big wall after I painted, so I grabbed some old window grids out of the garage. I've had these for six years easy (Goodwill find for $1.99 each!) and they've survived many garage clean outs -- I loved them and knew I'd use them one day:
They had some plastic doodads I pulled out of the sides and other than cleaning them up a bit that was it. They won't stay here forever but I love them until the upgrades happen!
I also painted the dark strip down by the baseboards. It has been a darker accent color for as long as I can remember and I wanted to brighten it up. It gives the illusion of thicker baseboards (which I will beef up later):
I've never been so happy to have a plain, painted wall! I was so tired of looking at that drywall mess all those months.
By the way, these walls are analytical gray by Sherwin Williams -- a great neutral! I love it with the contrast of black and white:
I'm so happy to have another one knocked off that list! I didn't spend anything to finish this up either, which is always a bonus. This staircase has been through many changes over the years, but this will be the last I do anything to it until I start the big project next year:
Here's a throwback to how it looked before I ripped the carpet off and started the transformation:
I know the quality is awful, but it's the only before pic I can find.
And here's how it looks today! The cat posed for you:
If you'd like all the info on how I transformed the stairs, check out these posts:
Removing carpet from stairs
The finishing process
Adding trim below the railing


I love your staircase refresh, those window grids were such a score!!
ReplyDeleteIt looks great! Good job.
ReplyDeleteI love it! Your stairs look gorgeous. The grids are perfect! Julie
ReplyDeleteIt looks so good! Nice job!
ReplyDeleteI love projects like this! Sometimes just cleaning it up can feel SO good. And your kitty - model adorable. So cute.
ReplyDeleteI love how the cat is in most of your pics! He must be as "helpful" as my Uma is. The stairwell looks great!
ReplyDeleteLooks beautiful.. Love the window grids, they are perfect for that space. The stair make over is beautiful too.
ReplyDeleteLooks great! Love those window grids!
ReplyDeleteIt's so HARD to let go of the 'firsts' I have my first DIY dresser from years ago...and good lord..it needs some love...but I cant sell it ive tried...maybe no one would buy it because it was ugly....hahah oh well...its MINE.
ReplyDeletehttp://k-g.us/
Man, every time I read your blog I get super inspired to tackle all of the little things that I *mean* to get done but never get around to. Instead of loading up Netflix I am off to finish organizing the baby gear in the basement. Thank you!!!!! :) :) :)
ReplyDeleteP.S. Staircase looks great!
Did you just use glue just on the corners? Oh my, I have a trim project I did a few years back - the nail gun was forgotten and I wanted it done NOW so I used hot glue. A lot of hot glue the whole way around the trim pieces. I want to remove it and can't imagine the wall damage. :(
ReplyDeleteThe wall looks great. I really like the grid panels.
I LOVE what you did! That darker wall color is amazing!!
ReplyDeleteMel | www.thegossipdarling.com