
How to Install Stacked Stone Tile on a Fireplace
November 16, 2016
Share this
Step-by-step tutorial on how to install stacked stone veneer fireplace.
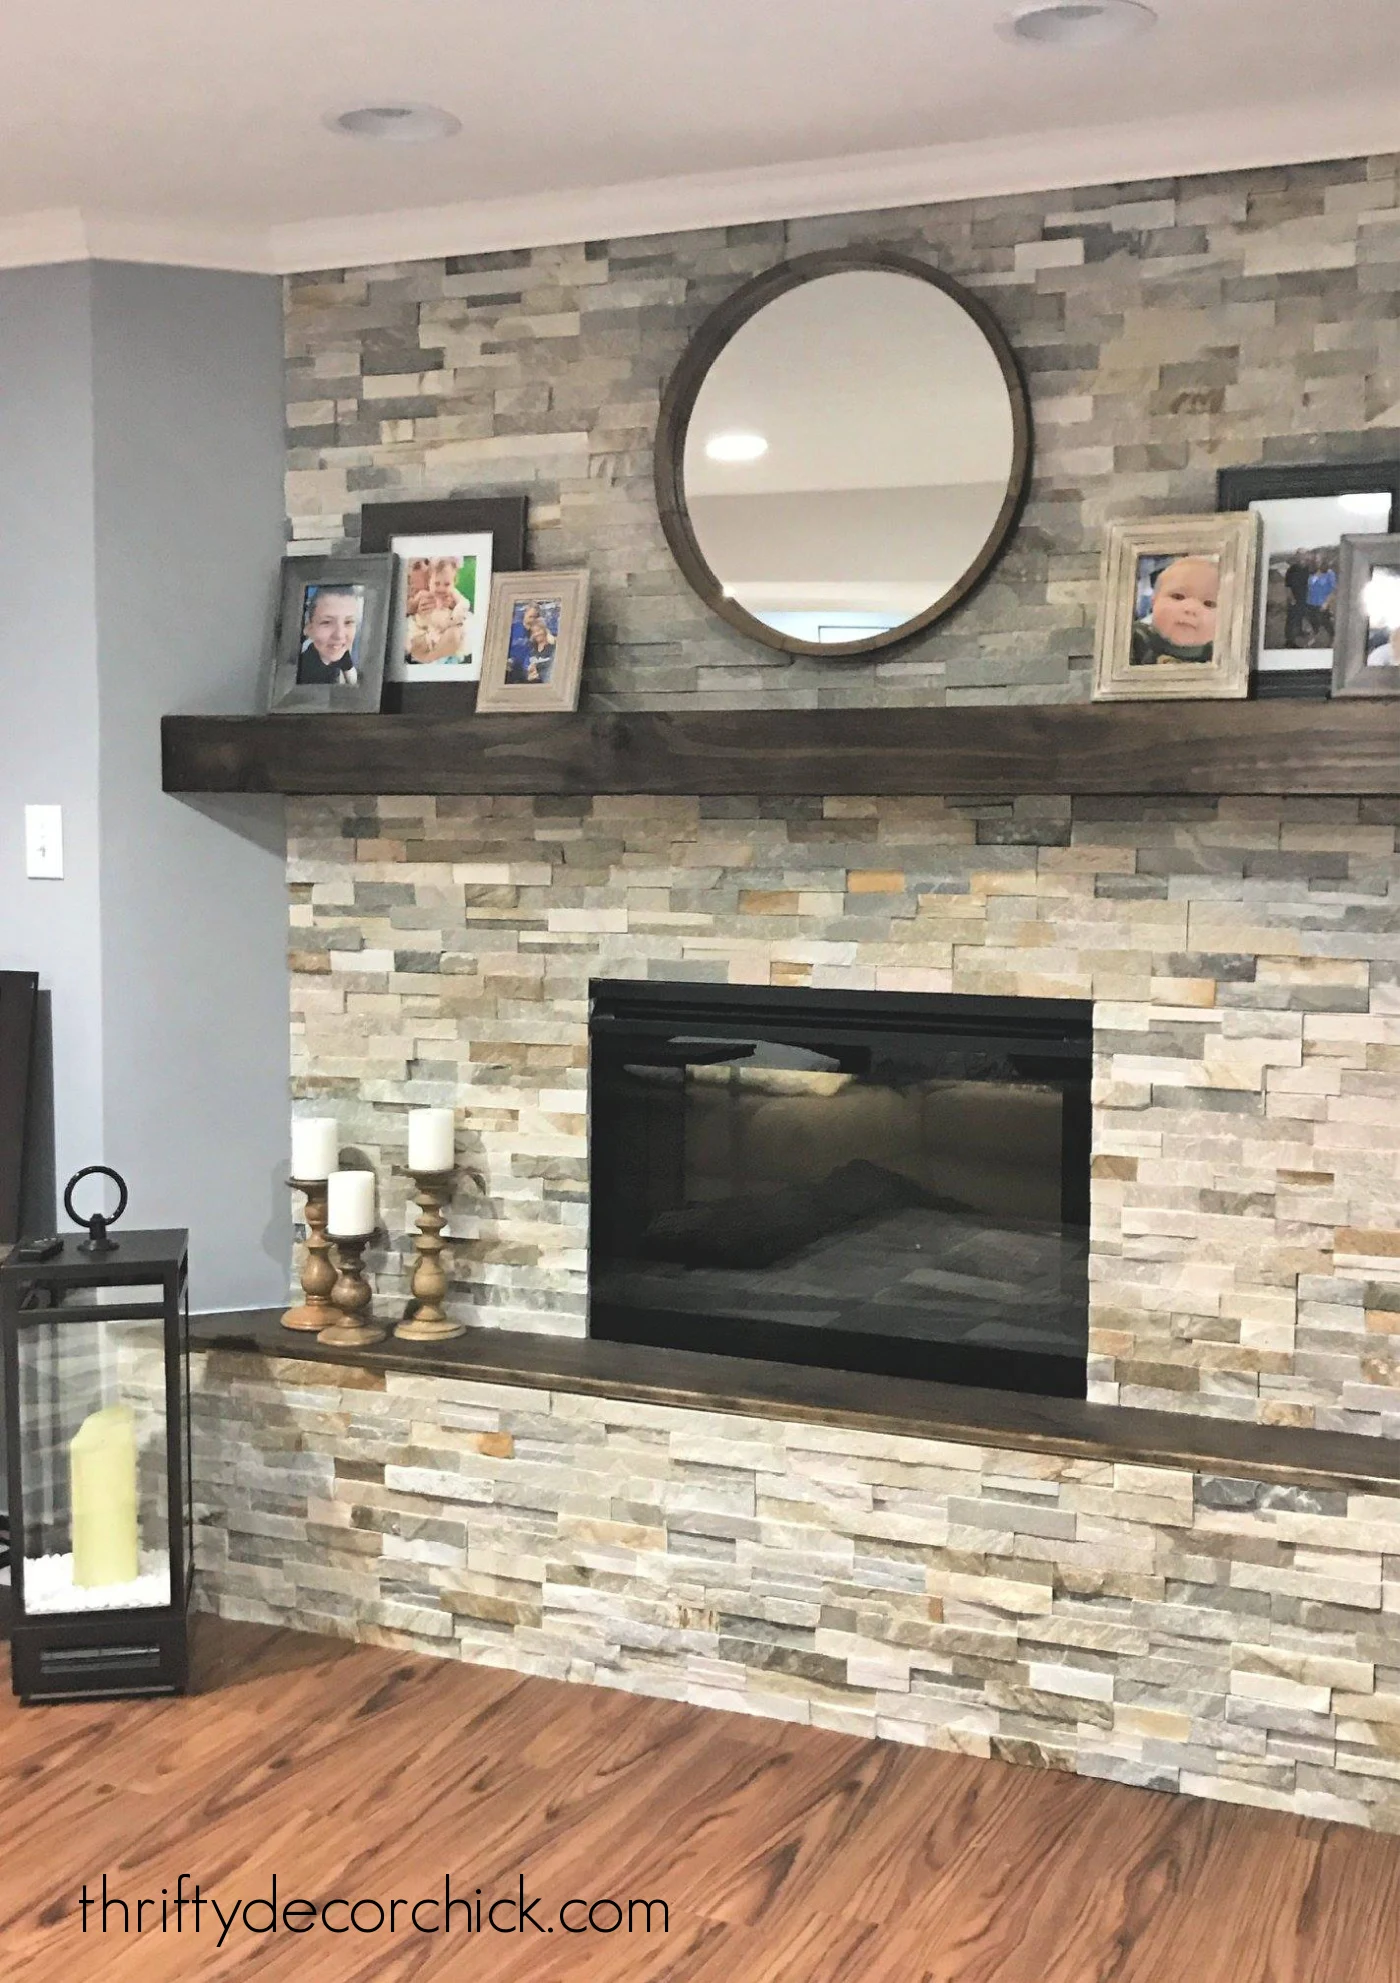
We took an empty wall and created a gorgeous focal point by creating a DIY stacked stone fireplace with a wood mantel and electric fireplace!
This rustic faux stone is a great way to update a dated fireplace, and can be used with both gas fireplaces and the electric option like we have.
This fireplace DIY project in our last basement made a HUGE impact.
We had an alcove that was the perfect spot to create a fireplace where there was none. We had a new mantel and hearth built in our basement living room first:

Those tiles were just leaned up against there so I started with that bottom part -- because it was the easiest. :)
I'm sharing this DIY natural stone tile fireplace how-to with you today!
This is the Desert Quartz Ledgestone tile we used, from Lowe's:

This post may contain affiliate links for your convenience.
See my policies and disclosure page for more information.
Unfortunately they don't seem to carry this exact one anymore, at least under this name. This ledge stone tile is very similar, just with more gray variations.
This natural stone tile has the same texture and a more creamy look like we used.
I've had to visit three different locations to find enough to use because some batches are more pinky shades than others. I prefer the more natural and cream tones so I've had to mix and match boxes.
I choose to take the stacked tile up the whole wall, but this stone would look fantastic just around the fireplace surround as well.
This is the tile adhesive I used from Home Depot:

This stuff is awesome and SO much easier than using a mortar mix. You pay a little more but will save in time and mess.
This adhesive is ready to go and you don't have to worry about getting the mixture just right.
You'll need a trowel -- but make sure you get one with "teeth" that are the right size for your tile.
Mine was the 1/4 by 1/4 size -- the adhesive container tells you which one to use:

After installing a few tiles and realizing not all of them are shaped exactly the same (most are), I started laying them out on the floor to make sure they all fit together OK:

Some tiles are shorter on one end and won't work, and I had to take a couple tiles down because of that, so this part is important.
Tiling itself is actually quite an easy process, especially with this tile. It just takes TIME.
Start by spreading your adhesive on the wall:

Fill in the general size of the tile on the wall -- I've learned over the years that it doesn't have to be caked on.
You're wasting the adhesive if you go crazy with it:

The reason for this is, you'll add more to the back of the stone.
I've found that I waste less if I spread it on with the straight side of the trowel first:

Like frosting! ;) This stuff is so easy to work with.
And then use my trowel and put the notches into it:

The design of the trowel gives some more grip to the adhesive.
And then you just put it on the wall:

I wiggle it around a little and then leave it. You'll have a few minutes to easily work with it but it grips right away -- no worries about them falling off (at least with this particular tile).
Yes, I tiled directly onto the drywall!
- I've tiled many times onto drywall and it holds up great -- you do not need special drywall or backing unless you're tiling a wet location or have a wood burning fireplace.
- A non-combustible material like cement board should be used around a wood burning fireplace.
- Unless your tile is incredibly heavy, this drywall installation is fine. If that is a concern, install cement board before tiling.
As far as the install goes, straight lines go fast and easy with this tile. They fit together like a puzzle so you can go pretty quick.
Areas like the sides of the fireplace took more time because I had to do a lot more cutting.
You can see that sometimes I started on the left side, sometimes on the right, so the seams don't always match up:

The beauty of this tile is it does not have to be perfect! It is very forgiving because the design is so irregular and natural.
To fill in spots I would measure the width I needed and then mark my cut line with a pen or pencil:

I borrowed a tile saw for this project -- I find this tool to be one of the easiest to use.
You check your line with the saw while it's off, then turn it on (make sure water is running) and then run it through slowly:

Tips for installing a stacked stone fireplace surround:
- Think about where you want to start. I started in the middle for my long runs but this tile is so forgiving it's not necessarily needed.
- Always wear eye protection when using the tile saw!
- I didn't have many problems cutting this tile but you do have to watch where your cut will be -- if it's going to leave a little sliver of a piece it will most likely get torn up by the saw. Tiny cuts are very hard to do with a saw like this so make your measurements accordingly.
- Keep all of your scrap tile till you are done -- you never know where you can use a small piece that may be too hard to cut.
- You do not need to grout with this tile, which saves a ton of time! There are a few spots where you can see the wall between the pieces (if you look really hard), so I may fill in a few spots with some tile caulk.

Also, I originally planned to cut the tiles at the ends at an angle so they would fit against the wall.
It was going to take SO MUCH longer to do that though, so I went with a straight edge and I'm so thankful I did. It would be so difficult to get mitered edges to match up perfectly.
I will share the full reveal when I finish the tile, do the final coats of poly on the wood and after I decorate it! I can't wait!
I stained the wood accents before the tile installation so I could get to it all.
But here's an idea of how this stone material looks installed:

This tile has added so much warmth such a warm, cozy feel and we're so excited about this area!
Can't wait to see it decorated for Christmas!:

Have you used this tile in your home?
Many of you shared photos of your projects on my Facebook page and I love it every time I see it used!
Here's an image to pin if you are interested in tiling sometime in the future:

See the stacked stone fireplace reveal here!:
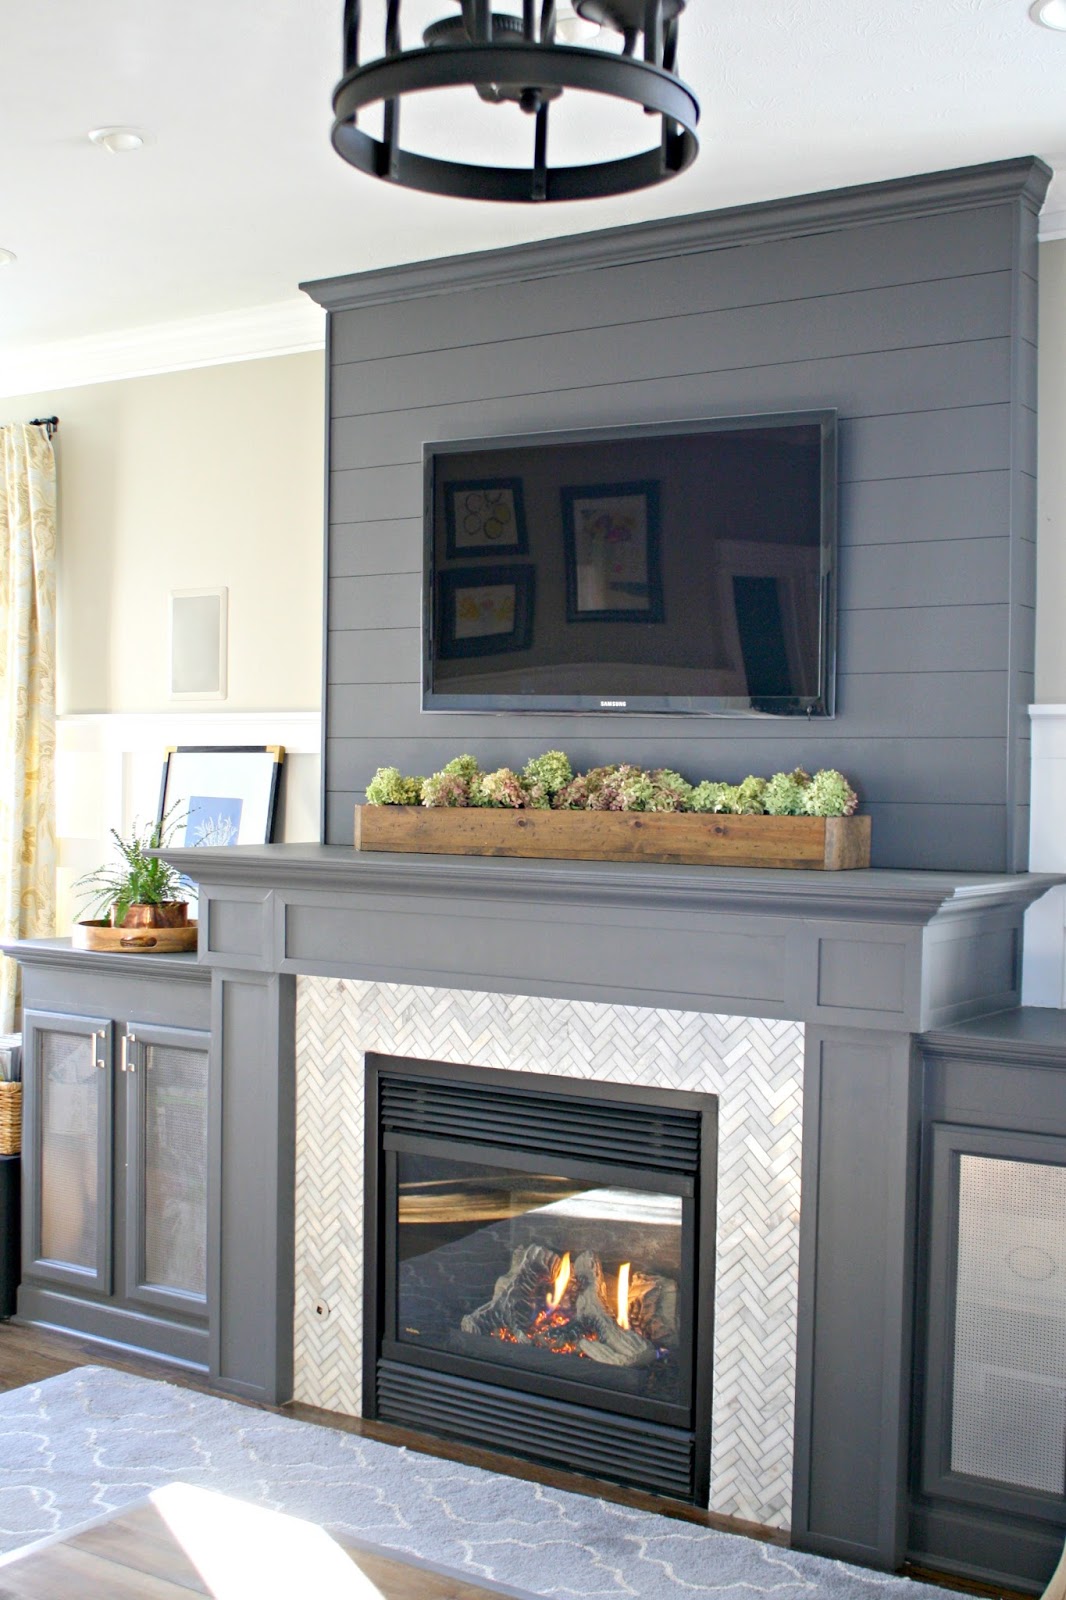
Check out how I tiled a smaller fireplace surround with herringbone marble tile in our family room:
Never miss a post by signing up to get posts via email.
Looking good! I know it will be amazing when you do the big reveal. Can hardly wait! :)
ReplyDeleteIt is going to look amazing Sarah! We used this same stone on our fireplace and hearth makeover! I love it so much. Can't wait to see your reveal, you always do amazing work. ~Sonya
ReplyDeleteFunny story...last night my husband and I were browsing the internet, trying to decide what to do with our fireplace this weekend. I had been pouring over Google images and Pinterest forever and finally thought, "I should just search on Sarah's page and see what her fireplace looks like. I always love her house." Popped over, and this was your most recent post! Ha! I hope Lowes is a sponsor because we're heading there today to buy this tile, so I can be a copycat. ;)
ReplyDeleteAloha,
Charlie
Haha! Love it!! I wish they were. ;)
DeleteYou make it so easy to follow! Love it!
ReplyDeleteAre the stones still holding up after all the years only attaching them to the drywall? I plan on putting the same kind of stone on an 8ft tall wall.
ReplyDelete