
How to Make Fluffy DIY Christmas Bows
November 12, 2024
Share this
How to make EASY Christmas bows for your holiday decor!
Simple instructions to make fluffy DIY bows, from small to big, for your
Christmas decorations.
I searched for "easy Christmas DIY bows" a few years ago and tried at least
three versions (that seemed incredibly easy).
Each time I ended up with a mess of ribbon that looked NOTHING like what they
showed.
I finally found a simple bow that ended up looking pretty cute, so I wanted to
share the easy steps!
You only need two things for this quick tutorial -- wired ribbon
(I think I had 30 yards) and wire of some kind. You can use wire, floral wire,
pipe cleaners...anything like that will work.
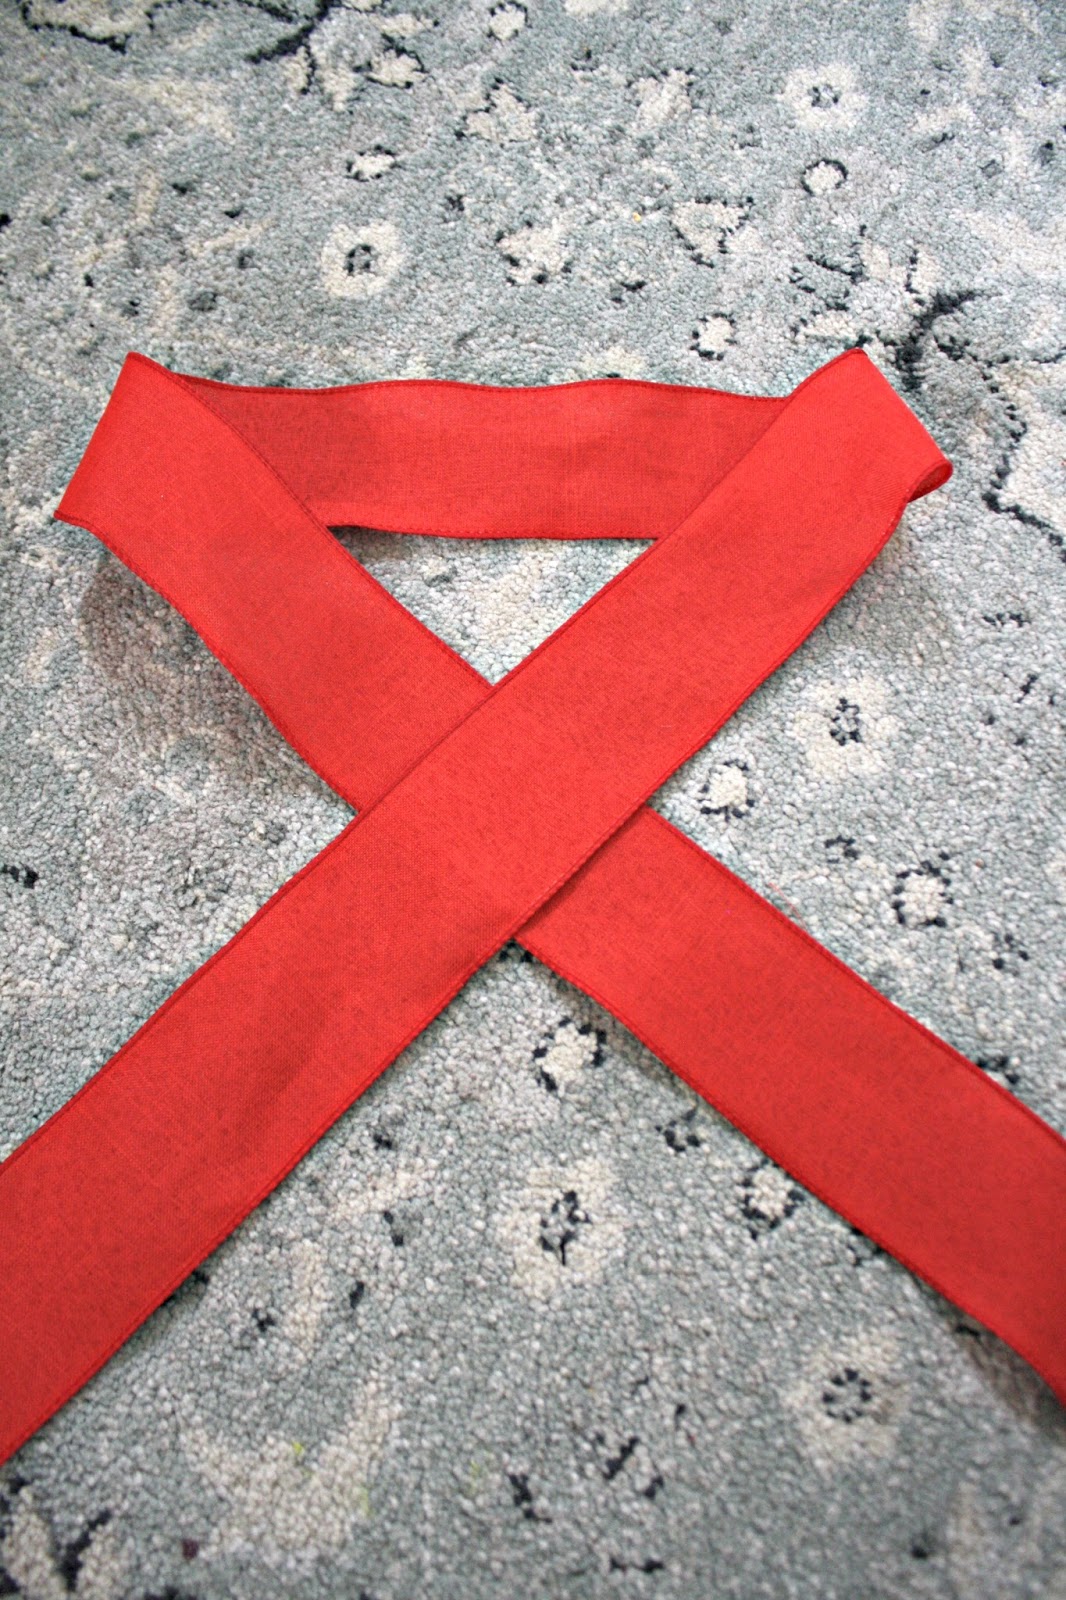
1. Cut your ribbon to long lengths
First up, cut one long piece of ribbon at around five feet (I ended up making
them a bit longer, around 65 inches) and a shorter piece at two feet.
You'll see the size of the bows with these measurements in this post -- adjust the lengths to your liking!
Then place the long one on a surface like so:
This post may contain affiliate links for
your convenience.
I may earn a small commission when you make a purchase through links.
See my policies and disclosure page for more information.
Using wired ribbon
will make this much easier -- it keeps its shape as you go.
I had to study the photo as I did this because I kept doing it backwards. You
just lay it flat and then pull one side over, then the other.
You may want to widen that part at the top as you go, that will be the back
part of the bow.
2. Make your ribbon loops

Grab that piece and flip it over so the solid side is in the front. Lay it on
top of the longer piece:

I didn't show it well here, but you want that piece to be a little less wide
than the one already on the ground.
Then you just kind of scrunch all of it up into one part -- grab the two from
the bottom in the middle all the way up to the top piece.
Don't worry about making it perfect:

Take some
floral wire
and wrap it around to secure the parts together.
I've also used small zip ties or even wired ribbon to secure this part.
You can adjust the bow as you do this if needed:

Your beautiful bow is just about complete!
If you want a BIG, fluffy bow, keep going with additional layers! You can turn and adjust them as you add them to the front of your bow.
3. Time to hide the wire.
I had leftover ribbon from decorating the tree so I just cut small pieces of
ribbon and wrapped them around the wire in the middle.
Then I used a piece of floral wire I already had on there to secure that part
on the back too:

Hot glue would work too! But this method keeps the number of necessary "tools"
down. ;) If you have plenty of ribbon you can just tie that part.
Play around with it -- I used a plaid accent here, but ribbon with sparkles
would look cute, or even a contrasting color.
When you're done you can dress up the ends of the ribbon by folding them in
half and then cutting with a pair of scissors like so:

This gives the tails of the bow that upside down "V" shape at the ends. Fluff
as needed and then hang!
Use the leftover wire in the back to hang your bows!
These large bows went into our stair garland:

This stair garland was so simple and classic with the lights and bows!:

The added smaller layer on top makes these a little more "poofy" and
dimensional, but it's not needed.
I made the cutest little bows for my office tree by using this method, but
skipping the added bow on top:


I wrapped the center with a smaller burgundy wired ribbon.
The wired ribbon is key to making these bows full and pretty!
They can be tucked into the tree pretty easily, but I ran the end of an
ornament hook through the ribbon on the back so I could hang them:

I didn't want to do a lot on this
skinny cashmere tree, and these bows were perfect:

These DIY bows can be used so many places!
- Make a giant bow tree topper for the Christmas tree.
- Add them to your holiday wreaths.
- Use smaller sections to make a bunch of Christmas tree bows in different sizes to fill empty spots.
- Make smaller versions of these simple bows for your Christmas gifts.
- Use for outdoor decorating on the mailbox or fence posts. (I would use outdoor ribbon for this.)
I think they are such a pretty, traditional touch. So easy and simple --
just make sure you have plenty of ribbon!
Have you made these BIG bows or do you have a different way of doing it?
Have you made these BIG bows or do you have a different way of doing it?
Never miss a post by signing up to get posts via email.
Thank you for posting this! It was perfect timing for me as I was just saying to my hubby how I wish our outdoor light swags had bows at the top. I went to Targer and for just $5 bought some beautiful ribbons and followed your technique. They are gorgeous and really add to to the swags! Wish I could post a pic. So much better than the ready made bows at Target.
ReplyDeleteThe step by step tutorial is wonderful, however, i would definitely like to see a closeup of the finished product. Thanks! BTW, your banister looks FABULOUS :-)
ReplyDeleteDid you put your garland at the bannister this year? I was going to try your idea of putting it at the bottom of the stairs…
ReplyDelete