
How to Install DIY Craftsman Door Trim and Casing
April 18, 2013
Share this
How to add Craftsman door casing and headers to doorways.
This DIY project will add SO much old house character to interior doors in a newer house! I also share how to add this trim treatment to your window casings as well.
I’ve been dreaming for YEARS about replacing our thin builder door casing to something like this:

This Craftsman inspired interior door trim can be done in a variety of styles, but I wanted the simplest, most traditional design.
The casing style you choose should fit with the style of your home.
This look is also seen a lot in the more traditional farmhouse style homes as well. Thicker door and window trim adds so much warmth and depth to a space! It's such a beautiful way to add charm to a newer home.
Step one: Take down the old trim
I took a razor and cut along where the trim met up with the door frame (along the caulk) and then did the same on the caulk line by the wall.
I used my crow bar to get under the trim and starting loosening it. You may have to use a scrap piece of wood under your crow bar so you don't damage the drywall as you pry off the existing trim:

I had to pull out a few lingering staples and usually you'll have some nails you can pound back into the wall.

I could tell from my inspiration photos how I wanted to put the new trim up – it’s pretty self explanatory when you look at them.
Adding this pretty Craftsman trim and painting our doors black is one of my favorite updates in a room! This one is on its way:

Here's how it looks after the final finishing touches: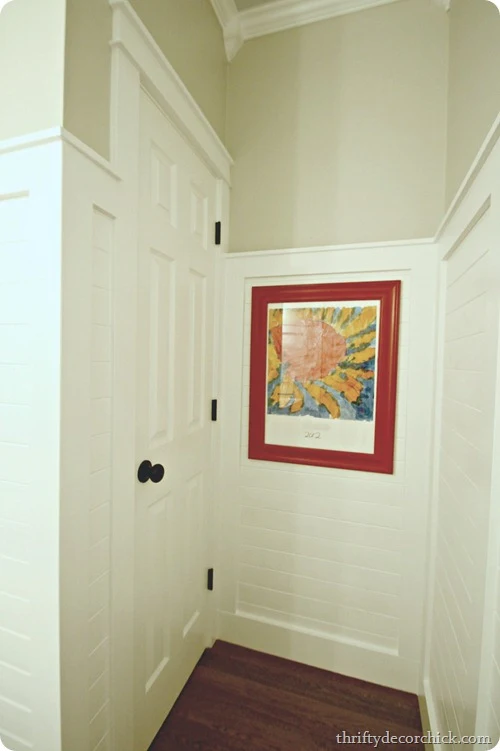
I found this image that shows what I did, and the window frame version as well (ohhhh, how I hope our window sills come off as easy!):

It’s really so easy – it took me longer to take off the trim and sand everything down than it did to install the new stuff!
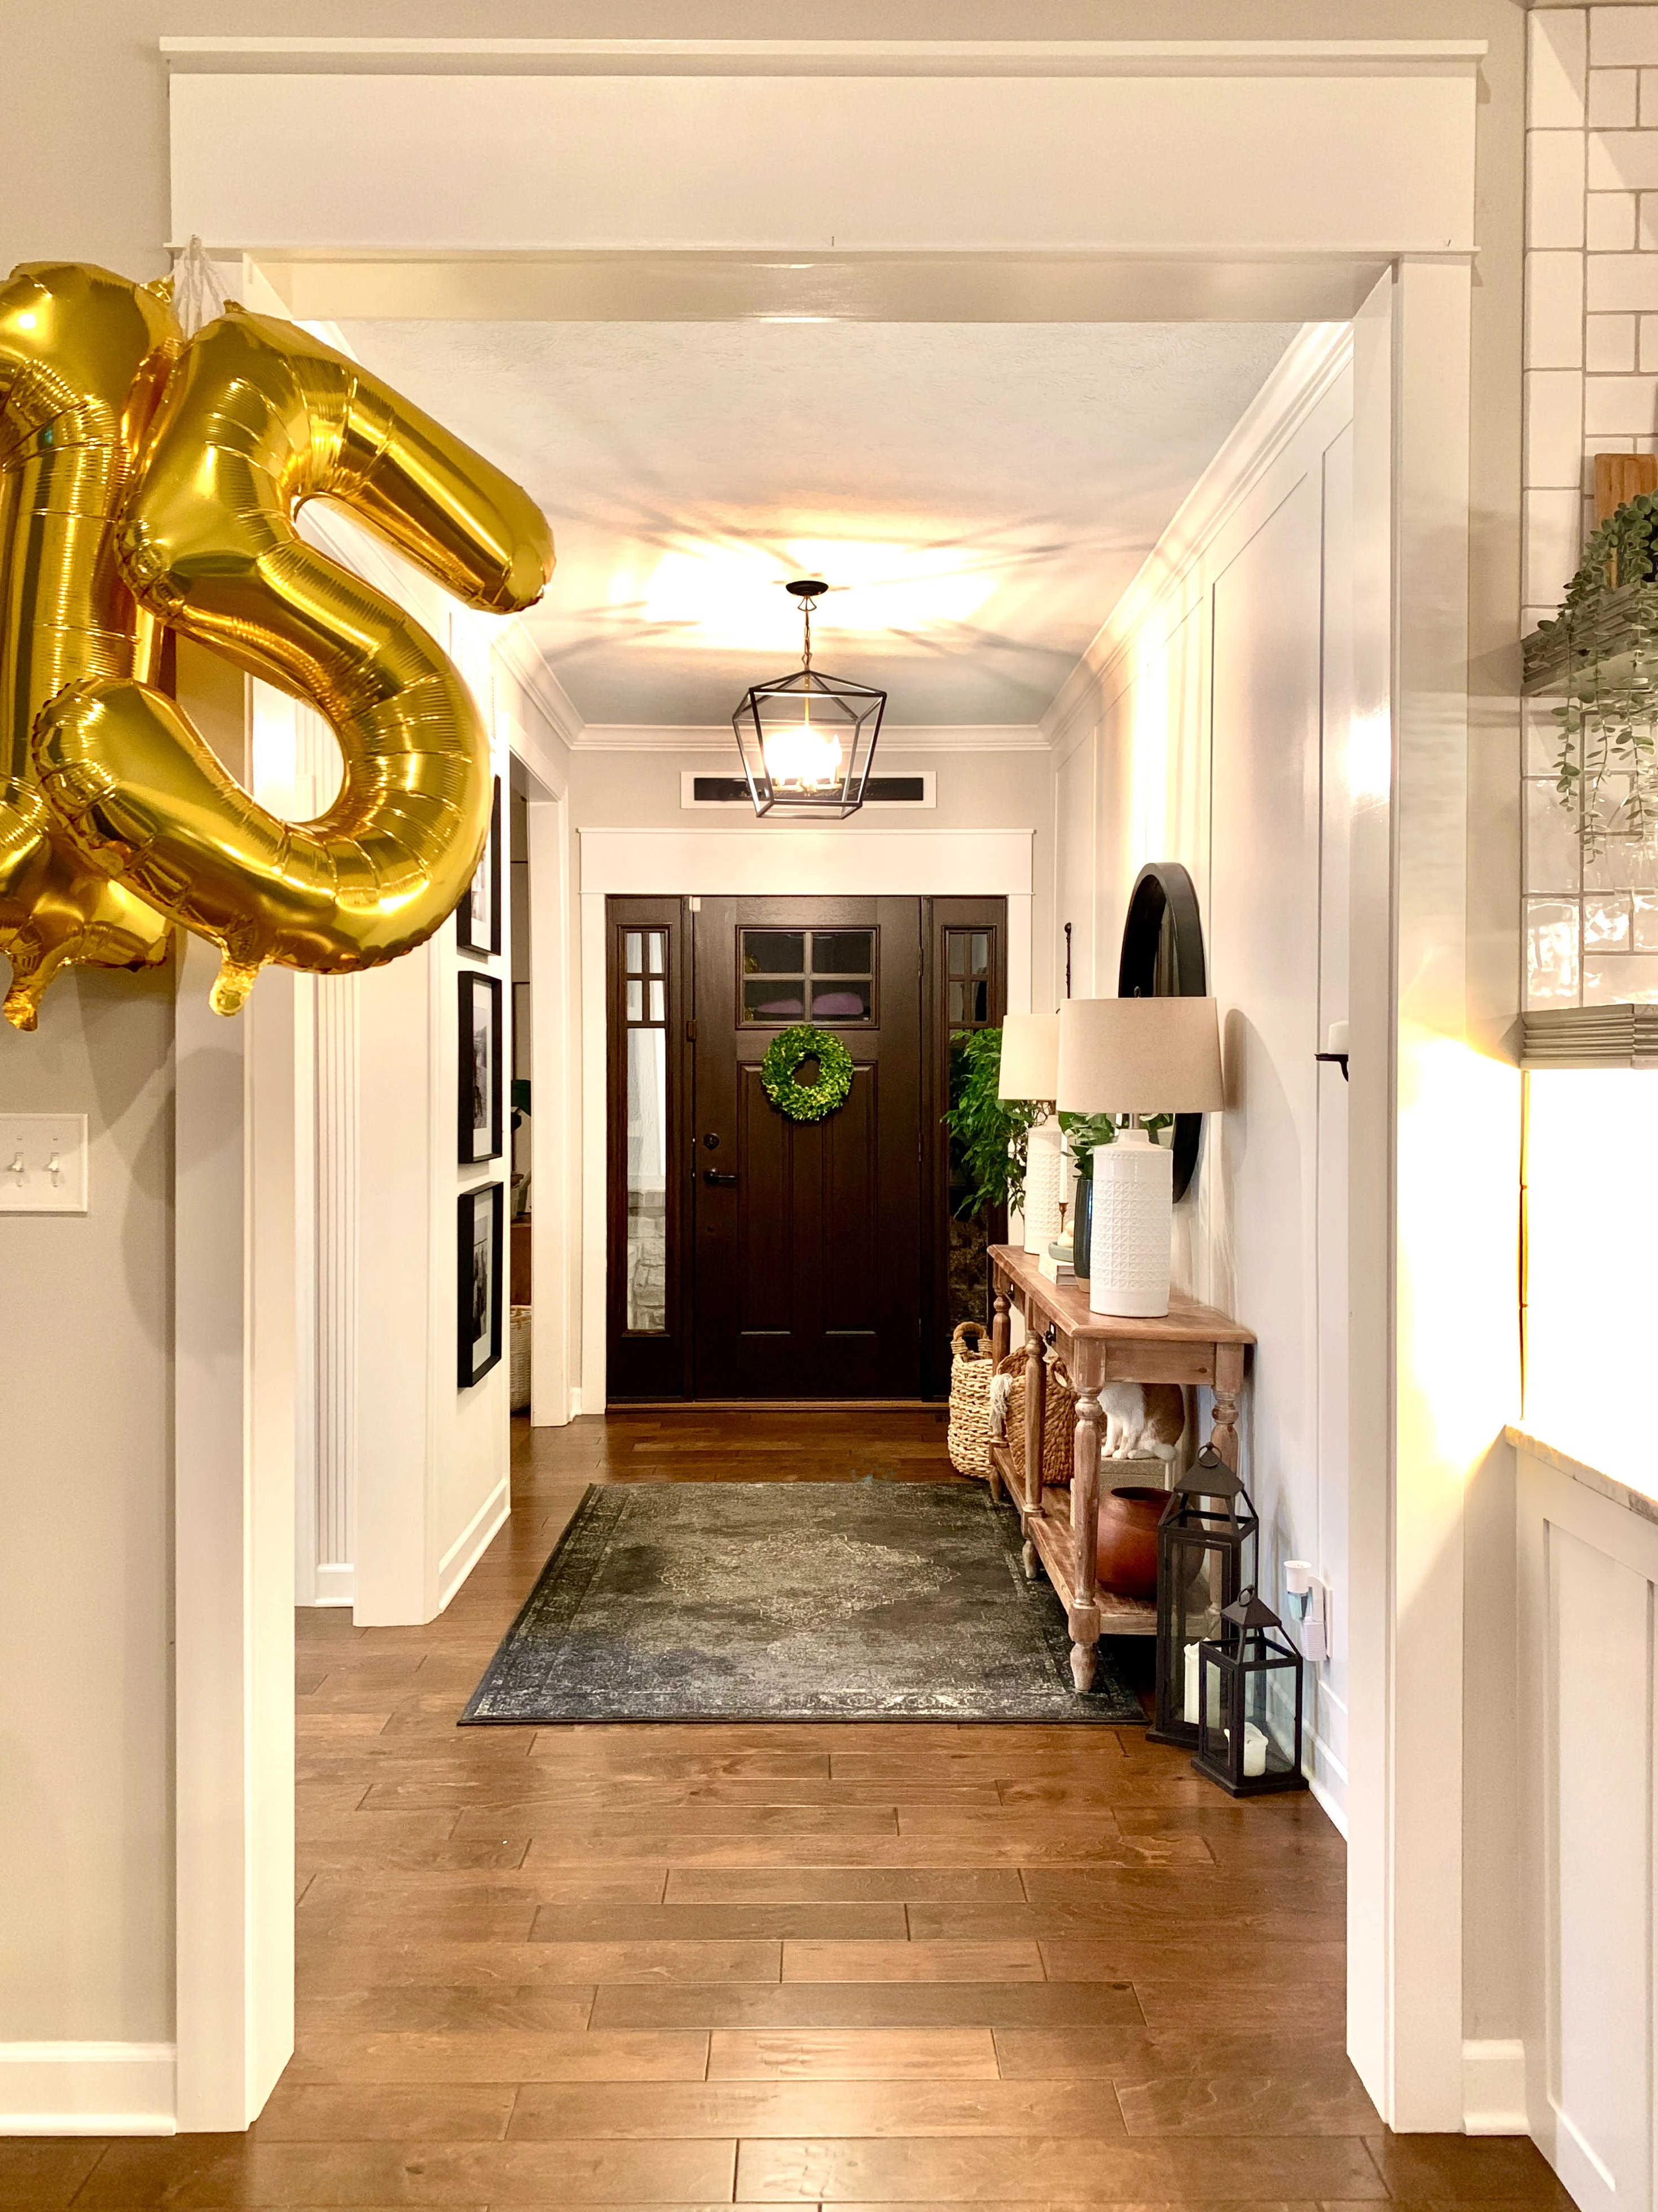
What a difference it makes to a space! Especially when you combine it with crown molding:
So, there you go! You know how you avoid something for years because you think it will be so hard and then it’s totally easy? Yeah, never happens to me either. Except for this time. ;)

I used my crow bar to get under the trim and starting loosening it. You may have to use a scrap piece of wood under your crow bar so you don't damage the drywall as you pry off the existing trim:

This post may contain affiliate links for your convenience.
See my policies and disclosure page for more information.
I had to pull out a few lingering staples and usually you'll have some nails you can pound back into the wall.
I ended up with a trim-less door and I was giddy:

I could tell from my inspiration photos how I wanted to put the new trim up – it’s pretty self explanatory when you look at them.
In total you'll need five pieces of wood for this project -- two boards for the side casings and three for the header.
Step two: Install your new trim
To start, you may have to either remove or cut down your baseboards for the new side pieces.
I started with two 1x4’s cut to the height of the door frame and then nailed them into the sides of the door:

I didn't even need a tape measure for the first piece -- I just held it up and marked where to cut.

I didn't even need a tape measure for the first piece -- I just held it up and marked where to cut.
There's no need for mitered cuts for this project! Nothing needs to be at a 45-degree angle since the header sits on top.
And then it was time for the “topper” or header. Again, it was pretty obvious from the pics on how to do it -- I found it was helpful to assemble on the floor before installing:

I put it together using wood glue and the nail gun. It’s made up of a 1x2 on top, a piece of the 1x4 in the middle and a piece of lattice (1/4x2) on the bottom.
I just nailed that whole piece up when I was done:


I put it together using wood glue and the nail gun. It’s made up of a 1x2 on top, a piece of the 1x4 in the middle and a piece of lattice (1/4x2) on the bottom.
I just nailed that whole piece up when I was done:

You can see that the middle piece meets up with the width of the side boards -- the top and bottom trim is about a quarter of an inch wider. If you use this method, those two pieces of the header will be cut half an inch longer than the middle part.
I couldn’t believe how easy it was! Installing the trim took all of about 15 minutes I think?
I couldn’t believe how easy it was! Installing the trim took all of about 15 minutes I think?
So crazy fast!:

I recommend using paint-grade wood casing for a bathroom -- it will hold up to moisture better than MDF (medium-density fiberboard). I've used MDF on many interior doorways though!

I recommend using paint-grade wood casing for a bathroom -- it will hold up to moisture better than MDF (medium-density fiberboard). I've used MDF on many interior doorways though!
Step three: Prep and paint!
After your trim is up, you'll need to fill the nail holes and caulk between the boards and the wall. Often I'll caulk the header pieces as well, so it looks like one solid head casing.
I recommend using a primer on the bare wood, and then finishing off with a couple coats of semi-gloss paint. Of course you can stain it as well if you like the wood grain showing!
Adding this pretty Craftsman trim and painting our doors black is one of my favorite updates in a room! This one is on its way:

Here's how it looks after the final finishing touches:

See the final reveal of this bright powder room makeover here!
A few tips for installing this interior trim to your doors:
- I used my razor blade to get the caulk line off the wall where it met the paint. This was so the new trim would lay flush against the wall.
- I sanded the door frame before I installed the new trim to knock down the caulk/paint that was there.
- I had to cut down the light switch plate a bit to make the new trim work. No biggie – I did it with the miter saw. :)
- I caulked up all the visible gaps in preparation for paint. (Using this awesome caulking gadget.)
- I recommend a thinner header for standard ceiling heights (eight feet) and a bit thicker for high ceilings (nine feet and up).
I found this image that shows what I did, and the window frame version as well (ohhhh, how I hope our window sills come off as easy!):

What a difference it makes to a space! Especially when you combine it with crown molding:

So, there you go! You know how you avoid something for years because you think it will be so hard and then it’s totally easy? Yeah, never happens to me either. Except for this time. ;)
I share how to replace your window sills and add this same trim molding to your windows here!:

See all of my molding and trim ideas here!
Never miss a post by signing up to get posts via email.
Love the new door trim! Great tutorial! Have a safe and wonderful trip.
ReplyDeleteThat's exactly what we did to our doors around our house. Starting three years ago...they're still not done!! Aaaah!! Love it.
ReplyDeleteThat's exactly what I want to do to my doors and windows! Thanks so much for the diagram and how to. It looks great... and so easy!
ReplyDeleteI wanna paint my doors black too... but I'm kinda scared. LOL
Karen, I am in the exact same boat! This post couldn't have come at a better time! I LOVE the way the black doors look, but as I am getting for resale in a year, I am wondering if it might be safer to stay with white? If it was my forever house, I would totally go for it!!
DeleteThis is so awesome! Until I married my husband, I had no idea about all this kind of stuff. We changed out our trim when we first moved into the house and I can't believe the difference it makes! I'm excited to see what color you paint it/stain it :)
ReplyDeletegorgeous trim and looooving the idea of black doors throughout. We have almost identical door/window trim, but it is (gasp) natural fir, not white. Whilst I love me some white trim and am in no way a wood type of gal, I do love our natural fir doors and trim. It fits our home perfectly =)
ReplyDeleteThank you so much for this! Every night I look at all the doorways and windows and stare with hatred at the trim the previous owners went with....I think this has given me the push I neded to make the change!
ReplyDeleteLooks great. I love the craftsman look. We had that look in our old house, one of the things I miss about a newly built home. But that's great that you can just DIY the look you want. Thanks for sharing.
ReplyDeleteThat looks awesome! BUT a little daunting... great job! I'm in love with black doors too, just have to convince my hubby! :)
ReplyDeleteGreat look! You're so handy!
ReplyDeleteSusan
http://simplymodernhome.com/
You are so going to get me in trouble with my husband. LOL I now have a new project to add to my ever-growing list.
ReplyDeleteThis is just fabulous and looks so easy!
You've inspired me! I've got similar trim in my house, and am getting new windows soon. I can do this!!
ReplyDeleteWow, what a difference something so small can make! I may do this around the doors in my new studio, I love it!
ReplyDeleteWhen we bought our fixer upper there was chair rail around the living/dining area and all the way down the hall (who puts chair rail in a hall??) I knew it all had to go and James said that would be easy. Wrong! It was caulked so thick under there! Imagine when you start to spackle, like that thick! He did the living/dining area, put big gouges in the walls, it was a mess. Suddenly the chair rail in the hallway wasn't so bad. lol, it's still there 8 years later!
Oh my gosh! I have ALWAYS wanted that kind of trim! It looks amazing, Sarah!
ReplyDeleteLove your site, I have been reading since at least 2009! I had one suggestion though, have you thought about painting before you install? It might save you time in the end and the project would be (almost) complete by the time you install. Can't wait to see the rest of the doors!
ReplyDeletelove!! We're moving into an ooold Craftsman house with that delicious thick molding - all dark wood - and we're SO excited :) :)
ReplyDeleteLooks so professionally made Sarah!!!!
ReplyDeleteBTW, like I mentioned about your drawer pulls, I already finished my craft room, check it out if you have the time. Again, thanks for introducing the drawer pulls to me!!! :-)
It looks great! We started replacing our trim 1 1/2 years ago and we're almost done. It's been a lot of work to tackle all the doors and windows in our house, but it is one of my favorite features. I haven't told my husband yet, but we're moving outside when we're done to put trim up on the exterior of the house. He should just run when I say,"I have an idea..."
ReplyDeleteThat looks great! It is exactly what I have been trying to explain to the hubby that I wanted done. Now I can just show him this post. Thanks!
ReplyDeleteLoving the new trim!
ReplyDeleteWhat great detail...love how it looks, Sarah!
ReplyDeleteNow that makes the door stand out! I like the width.
ReplyDeleteThis was eye-opening for me! For some reason, the trim around several of the interior doors is different from the rest of the trim in the house, which is driving me nuts (every single door knob is different too, which is also very annoying - example: on one door, one side is brass and the other brushed nickel, ahhh!). For some reason, I thought the trim around the door was part of the frame and could not be removed. THANK YOU for showing me that I was wrong. I can now standardize the trim in the house!
ReplyDeleteI'm always encouraged to read trim posts! It seems these days directions are becoming far less difficult. Compare this to something in Woodworking mag? N way. I have 15 pocket doors, 8 windows and 2 regular doors to trim. I just gotta figure out the jam part and I'll be fine! Thanks for the clear instructions.
ReplyDeleteGreat project Sarah, I love the DIY decor you come up with! I only have a few hours when my kids are out. How long could this project take, and what was the cost?
ReplyDeleteIt only took me 15 minutes or so to get the wood cut and up, but if you don't have as much experience you will want to plan for longer for this project. I can't remember how much my wood was -- I went with slightly nicer pine but regular pine is super cheap. Good luck!
DeleteWhat are you using for base and crown? Thats where I'm stuck!!
ReplyDeleteI have the same question as Kandace, especially re: crown. I am going to go with a 1 x 6 for the baseboard, I loved it's clean look. Also, what type of nail gun do you use and size of nails? Thanks so much for posting this, you give me the courage to forge ahead!!
ReplyDeleteOh my goodness, this is genius! It totally transforms the look, adding a whole new level of depth & solidness. Thank you!
ReplyDeleteDid you have an issue with the strike plate on your door? Mine is shorts and it’s hitting the 1x4 when it closes. Did you replace with an extended one?
ReplyDeleteDid you have to alter the position of the hinges or the latch plate thing to make this work? We have tried to do ours, but they don’t line up correctly. Thank you!
ReplyDeleteNo I've never had to change anything there! Make sure your trim sits away from the door frame just a bit -- it is installed like that (usually about 1/4 inch away) originally, so make sure to put the new wood in the exact same spot. That may help!
DeleteI'm in the throes of trimming 18 single doors and 3 double doors. (15 of these singles pocket doors with split jams.) 37 windows. I used the Kreg angle finder to put 1/4" reveal on everything. Its edge is created for just that measurement.
ReplyDeleteTo qualify for a refi, I have to have this done, or I probably wouldn't have tackled this for 10-15 more years. It's amazing how restful having trim is for the eye, though. Particularly a style I've admired forever. The Kreg tool makes for some really nice shadow lines, too.
Anyway, I've had your page saved forever. I referred back when I started to get overwhelmed and needed a reminder that it's all worth it.
Thanks, as always, for taking the time to share.
Please, what size baseboard trim did you decide to use?
ReplyDelete