
How to Update Basic Cabinets With DIY Furniture Feet
March 24, 2026
Share this
How to add decorative furniture feet to cabinet toe kicks with this DIY hack!
I've made so many small updates to our kitchen over the years, and this simple
DIY detail is one of my favorites!
I gathered a list of all of my smaller kitchen projects that pack a big punch here!
I love the look of furniture feet on bathroom and kitchen base cabinets -- they add
a custom touch and make them look so much more expensive.
Years ago I came up with this hack to make them for much less, but never
implemented it. When I added trim to our end cabinet panels, I knew it
would be a perfect time try it out! I was
left with a straight edge on the sides of the cabinets that made this even easier to implement.
You can also add these decorative "feet" where your cabinets meet a wall or another cabinet.
Instead of buying expensive pre-made feet for the cabinets, or jigsawing them out of
wood (the jigsaw is my least favorite tool...I avoid it at costs 😂), I made
some easy changes to these wood corbels:

This post may contain affiliate links for your convenience.
I may earn a small commission when you make a purchase through links.
See my policies and disclosure page for more information.
I've used both the medium (7x7 inches) and the large (ten inches) for my DIY cabinet feet projects.
Before you do anything, I recommend removing the metal hanging brackets that come installed on the corbels:

I say this because you'll be cutting these with a saw, and you definitely don't want to hit that metal bracket with your saw blade.


Wood glue or Liquid Nails would work as well (as long as you have no plan to remove them!).
To secure the new cabinet feet, I nailed from the side (where I could), from the top through the cabinet (right up against the lip of the cabinet, so you can't even see the nail holes) and through that little stopper piece from the front.
They aren't going anywhere!:

I can attest that they don't budge -- I recently removed these to simplify the design a little bit. It was a STRUGGLE to get them out!


If you have any questions let me know! I just love these DIY cabinet feet and the softer touch it adds to our kitchen! There are a lot of hard lines in here and I wanted to add some pretty, softer details with these curves.
The first time I did this little hack, I only made one cut on the corbel at the height of our kitchen cabinets. More
specifically, the height of the toe kick.
I measured from the floor to the bottom of the cabinet frame (or toe kick) to figure out the height of my "feet."
I marked that measurement on the bottom of the corbel and cut it down with a
miter saw. Then I gave them a few coats of the cabinet paint color with light
sandings in between:

I took one of our kitchen cabinet doors to the paint store to get a color matched to our cabinets.
Do you see my vision here? They are now cabinet "feet!"
This could be a super quick project -- just painting and
attaching the corbels. But I did one extra step that added a just a little bit of time.
I wanted to make sure no crumbs could get back behind them (it would be
a pain to clean back there), so I added a block of wood that closes it
off in the back.
I cut pieces of scrap wood the depth of the open space behind the
corbels, and then painted one side the cabinet color:

Then I attached it to the base of the cabinets with a nail gun:

Wood glue or Liquid Nails would work as well (as long as you have no plan to remove them!).
I checked the spacing before nailing it in --
making sure the depth of these back pieces were right on so the new feet
would meet up with the front of the cabinets perfectly.
This little addition prevents crumbs from getting behind them, and it allowed me to secure them even more by nailing into that from the front.
This little addition prevents crumbs from getting behind them, and it allowed me to secure them even more by nailing into that from the front.
Because I did this I had to cut down the quarter round before install, but it was worth it!
To secure the new cabinet feet, I nailed from the side (where I could), from the top through the cabinet (right up against the lip of the cabinet, so you can't even see the nail holes) and through that little stopper piece from the front.
They aren't going anywhere!:

I can attest that they don't budge -- I recently removed these to simplify the design a little bit. It was a STRUGGLE to get them out!
Since first trying this project, I discovered I like a simpler look for these feet (that only takes one more cut). Instead of leaving the long, curved end of the corbel, I cut it off for a slightly more modern look.
The first version involves cutting off one side of the corbel, this time I cut both. I was left with the curvy ends removed:

I've added these more simplistic versions to our mud room cabinets and recent pantry revamp as well:


You can still customize this version a bit -- I cut the mud room feet very close to the curve and left a little length on the pantry feet.
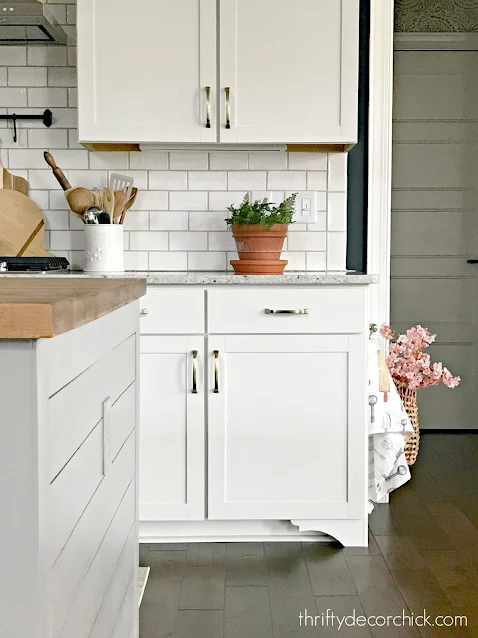
I've been working on adding a few more of these decorative cabinet feet to our kitchen island. I recently finished up a huge makeover on the island that I'll share later this week!
The final detail was adding two more sets of these to the "working" side of the island where our sink and cabinets are:


This time I mostly glued these -- as long as the height is snug, the glue will be more than enough to attach them to the underside of your cabinets:


Wood glue is incredibly strong and is more than sufficient on its own!
You can only see where they meet up with the cabinet if the doors are
open, so I didn't add any decorative trim along the bottom to hide that
seam. If the seam bothers you, a wood filler or caulk should be plenty.
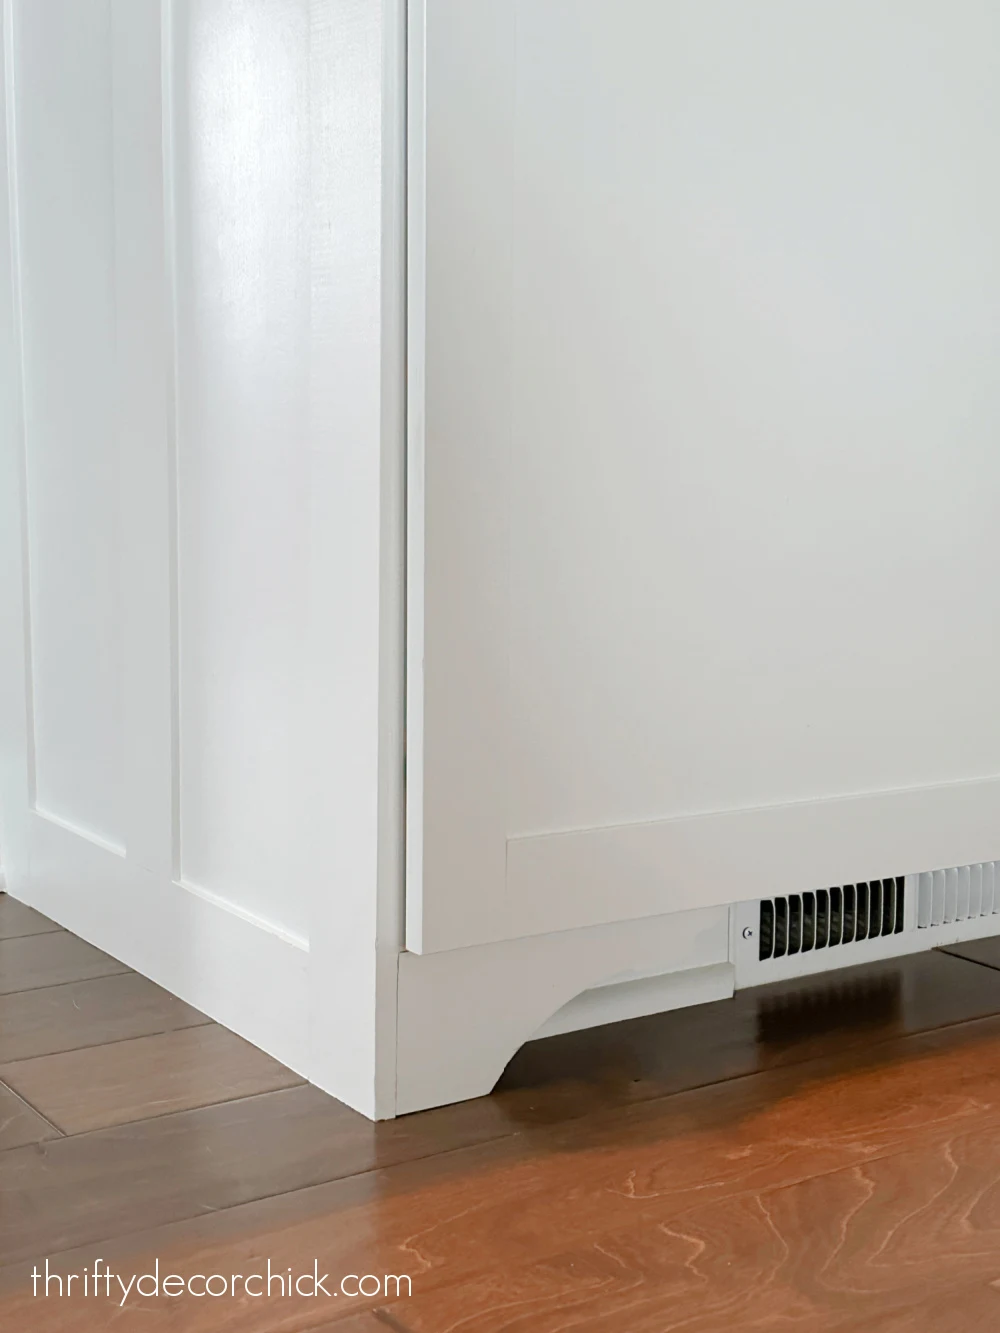
Here's a view of the side of the cabinet (with custom trim) and the DIY
feet:

I'm thrilled with how they turned out! They add another detail to the
kitchen that doesn't scream at you, but does enhance the whole look of the
space.
These little projects layer on one another and are adding a lot of
character to our kitchen! Here's how the longer, original feet looked:

And here's how they look with the simpler cuts:

You can get either look with these wood corbels!
I researched a ton of kitchens that have cabinet feet and they range from
this simpler look like this (just at the ends) to each cabinet having a
set -- so anything goes.
It just depends on your preference!

If you are skilled with a jigsaw you
could make less expensive custom versions of these. I prefer the thickness of the corbels compared to
what I would make on my own. This method is MUCH quicker too.
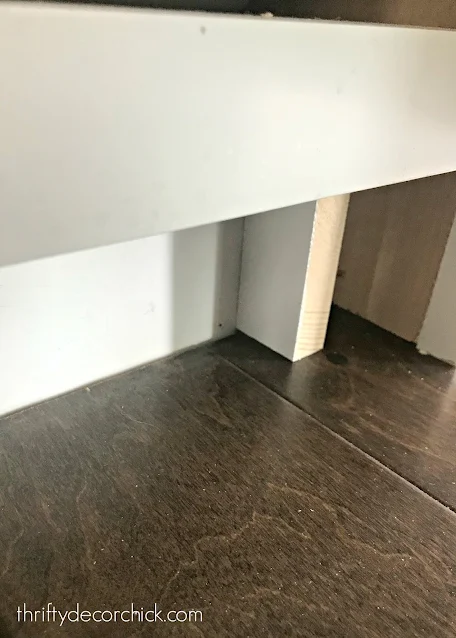
You could still do this if you have the standard toe kick at the end of your cabinets, but you'll want to add a backing to them that hides that bracket cut out on the backs. (Pictured above.)

Colby looooves to lie in front of the vent under this cabinet. :)
You could still do this if you have the standard toe kick at the end of your cabinets, but you'll want to add a backing to them that hides that bracket cut out on the backs. (Pictured above.)
If you have any questions let me know! I just love these DIY cabinet feet and the softer touch it adds to our kitchen! There are a lot of hard lines in here and I wanted to add some pretty, softer details with these curves.
Never miss a post by signing up to get posts via email.
Lovely!
ReplyDeleteWow .... nice !
ReplyDeleteLovely. Simply a great design
ReplyDeleteWow...such a small detail that makes such a big difference!! I also like to add small molding under the upper cabinets...just gives them that "finished" look!!
ReplyDeleteWhat a fantastic idea. They went from “blah” to “custom” with little effort!
ReplyDeleteSo pretty!
ReplyDeleteI love this! Did you add these feet to the front of the island as well?
ReplyDeleteNot yet but I think I may add one set!
DeleteThis does look cute, but I would probably stump my little toe a million times, as I do all furniture legs!
ReplyDeleteGirl! I am so inspired by you! Seriously!
ReplyDeleteTwo years ago I bought a house that was built in 1915 and I am slowly refurbishing it. We had to completely rebuild the bathroom - including the floor, which meant there was just a big hole there for a while. The kitchen will probably be the last room to get done. The cabinets were built in the house, and are made of solid wood. I would love to jazz them up a bit with feet like these. Thanks for the great idea!
ReplyDeleteSarah, how did you finish this project ? With caulk then paint? Has the caulk held up over the years? Your idea has been on my list for a long while now. Thanks for responding.
ReplyDeleteHello! I only painted these, no need for caulk. But if the small seams bother you, you could caulk those and then paint. :)
DeleteHi Sarah! I'm going to attempt this is my kitchen, but I have a corner in my cabinets. How would you account for that? Skip the corner, or have a corbel going each way?
ReplyDeleteI would try doing two, one going each way! I think that would look lovely. :)
Delete