
Saving a damaged wood {outdoor} table
May 01, 2020
Share this
Hello there! I'm continuing to knock out DIY projects around here and it feels good! (By the way, remember this is my JOB and I love it...but that's why I get so much done around here!)


If you have a real wood table (inside or out) that needs refinishing -- a quick sanding job should take care of it! You can do another stain or just use a protective coat like I did. :)
Now we know to get this thing covered before any snow this year! But I can continue to refinish it for years as long as the wood is still looking good.
You can find most of the items pictured below -- let me know if you have questions about anything.

See more of our home here. To shop items in our home, click here! Never miss a post by signing up to get posts via email.
I've been meaning to tackle this one for awhile. You may remember that we had a patio installed last year, go here to see the whole concrete patio reveal with all kinds of DIY projects.
I found our wood outdoor table on Amazon for a really good price. The reviews were mixed -- some said the wood buckled over time in the elements, but we have not had any issues with that. The finish looked GREAT all fall. It wasn't until it was left out (uncovered -- we got a cover too late) for one or two snows that it started looking bad:

This post may contain affiliate links for your convenience.
See my policies and disclosure page for more information.
We covered it for the winter and I knew I could address it when the weather got nicer. The original stain and finish were almost completely gone:

So on a nice day recently I decided to get after it. It didn't take long at all to sand it down -- I used my Bosch sander with a 220 grit sandpaper:

The stain came off easily because it was such a mess.
I did this late one evening and it got dark, so I had to leave it. My plan was to restain it and then protective urethane.
But a funny accident happened -- it rained the next day, and when I looked out at the wood while it was wet, it looked SO pretty. It was then that I knew I'd just protect the wood instead of staining.
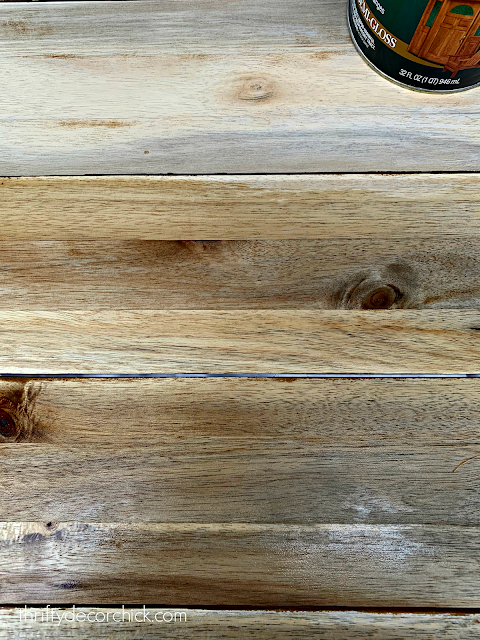
After it dried out, I grabbed this outdoor protective urethane from a past project and used that:

I did two coats -- the instructions called for a brush, but I prefer using a foam brush for products like this:

The only problem is, they don't hold up great and fall apart quickly. For the second coat I used a brush. They both work well, but I will say it was easier with the brush to really get the coats on there well.
You can see how it warmed up the wood:

I let it dry for the time instructed, then sanded it down with a fine grit sandpaper very quickly -- just to get any raised texture off. After that I added one more coat and let that dry.
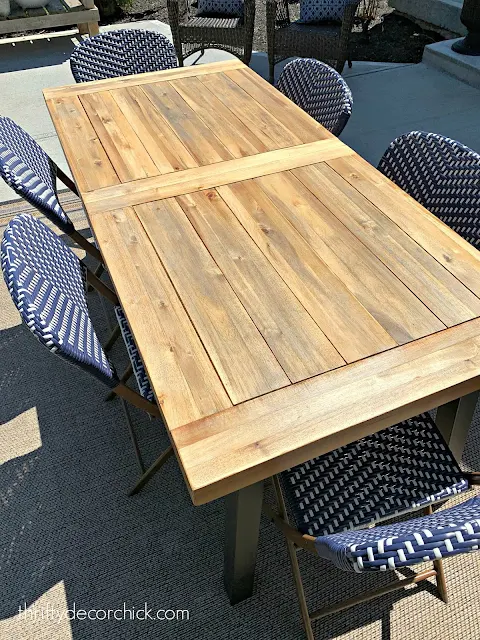
It turned out SO beautifully! We love it!:

It's exactly how I wanted it to look from the beginning! The wood is in really good condition, so I was happy to save this table.
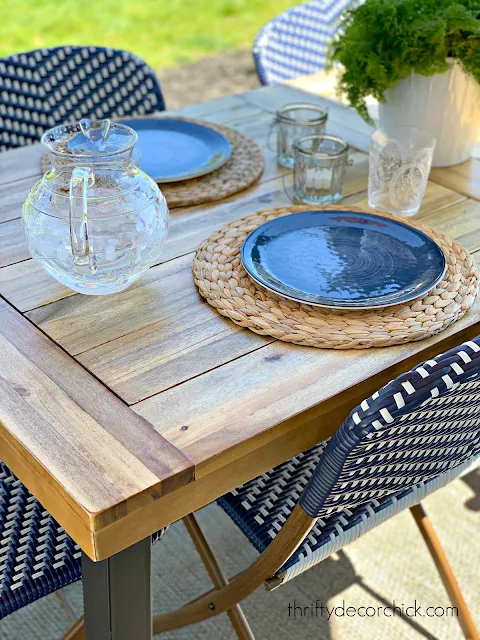
I brought out some pretty stuff and styled it for a quick shoot. (I'll share all of the sources at the bottom of the post).
This is a better look at the finish in the shade:

I'm so pleased with how it turned out! I'm looking forward to sitting outside this summer in our little outdoor sanctuary:

We LOVE this patio and use it so often! I can't wait to add more trees and plants out here:

If you have a real wood table (inside or out) that needs refinishing -- a quick sanding job should take care of it! You can do another stain or just use a protective coat like I did. :)
Now we know to get this thing covered before any snow this year! But I can continue to refinish it for years as long as the wood is still looking good.
You can find most of the items pictured below -- let me know if you have questions about anything.
See more of our home here. To shop items in our home, click here! Never miss a post by signing up to get posts via email.
You can make anything look beautiful!
ReplyDeleteI love your outdoor space! It looks so good, especially under the sunlight! ❤️✨
ReplyDeleteCharmaine Ng | Architecture & Lifestyle Blog
http://charmainenyw.com
Gorgeous!!!
ReplyDeleteIt does look nice! Just wondering if the open area of the joints are filled in so water and dirt would not accumulate in them.
ReplyDeleteSo pretty. Great job on restoring your table.
ReplyDelete