
How to Make a DIY Christmas Lettered Sign
December 14, 2021
Share this
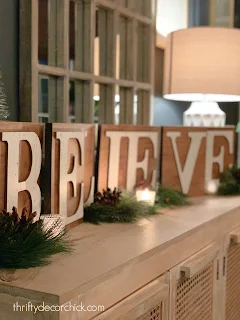
How to make your own DIY Christmas wood sign using craft letters.
I used inexpensive craft store letters to make this pretty "BELIEVE" wood
art. This project is so easy to customize for your own holiday decor!
These cute DIY Christmas letters have been a long time coming! I've had
these chip board letters that spell out "believe" for years...I think
it's been almost ten years now.
I've held on to them figuring I would come up with a cute idea for
them...one day:

You can find these wood letters at most craft stores -- they usually come in
a few different sizes and fonts.
I got these for a couple bucks each (a decade ago 😂), but I'm guessing I
got them half off!
Because it had been so long, the labels wouldn't budge. If you ever
have a problem removing a sticky label, a hot shot with a hair dryer will
loosen it for you:

This post may contain affiliate links for
your convenience.
See my policies and disclosure page for more information.
My goal was to NOT visit the hardware store for this whole project, so I had
to get creative with my supplies.
I found these wood shelves from our kitchen in my scrap pile:

I recently replaced those with these
thicker floating shelves and tile:
I love the color of them! The wood stain is called Provincial.
I wanted the look of this project to be fairly neutral -- I found a red
spray paint in my stash but it wasn't look I wanted.
I tried a glossy white paint, but it was too shiny and bright.
Then I found one of my old favorite spray paint colors,
Heirloom from Rustoleum. I decided to go with that one...then the nozzle died.
Went back to the white...that nozzle died.
Tried the red one more time...that one did as well.
Cool, cool.
I decided to dump the spray paint idea and found something even better --
the birch wrapping paper I recently showed you when I shared my
DIY glass candleholder projects.
I grabbed my favorite spray adhesive:
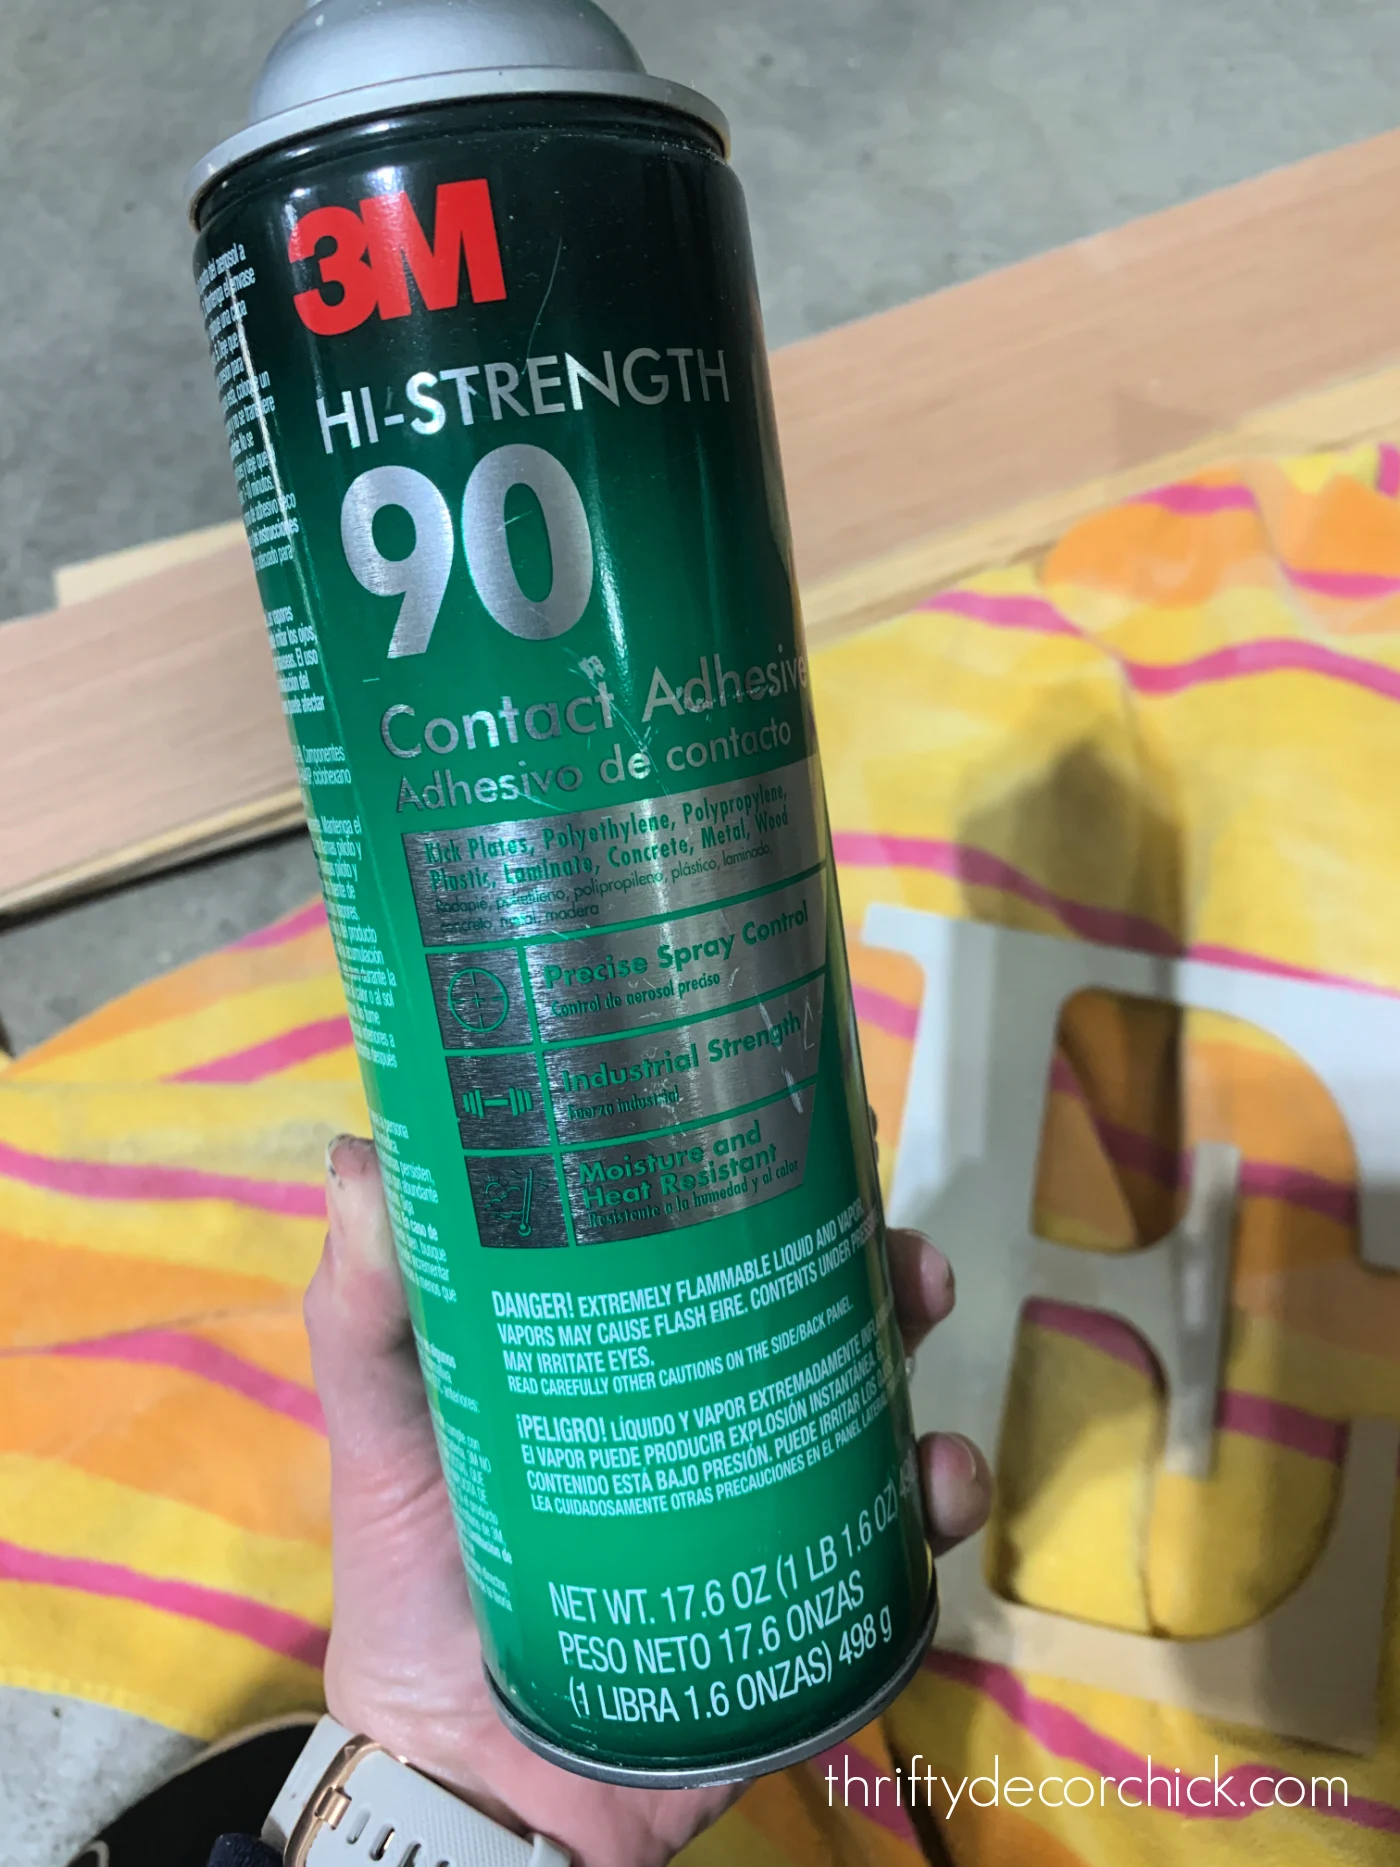
And sprayed the front of the letters with it:

You can see how thick this adhesive is -- but it doesn't leave any bumpy
texture under the paper.
To get the best adhesion, spray the back of the paper you're using as
well:

I did my best to make sure the letters were straight to match the lines on
the paper.
Press the wood letter face down onto the sticky paper and then push to make
sure they connect well. You can put something heavy on top for a few minutes to ensure they
stick.
It doesn't take long! This adhesive is STRONG!
If you don't have a spray adhesive, I would suggest Mod Podge over a regular glue.
Afterwards, you'll need to use a sharp razor blade to cut the paper around
each letter:

I recommend
these smaller X-acto knives
-- they are the perfect size for getting the detailed spots!
I later touched up the sides of the letters with some brown paint -- I
forgot, otherwise I'd usually do that first.
Then it was time to cut the wood kitchen shelves down to fit each
letter.
I wanted to be able to stagger the letters for some interest, so the wood
slices were a different width for each one:

I added some wood glue on the back, but also put a couple short nails into
them as well:

The glue gets slippery so the nails will hold the letter in place until it
dries.
Hot glue would also work for this step!
The glue will dry clear, but I did wipe away big globs with a wet rag.
I knew these wouldn't stand up on their own, so I cut thin strips from the
same wood and attached them to the back on the bottom:

This gives the boards some stability so you can stand them up!
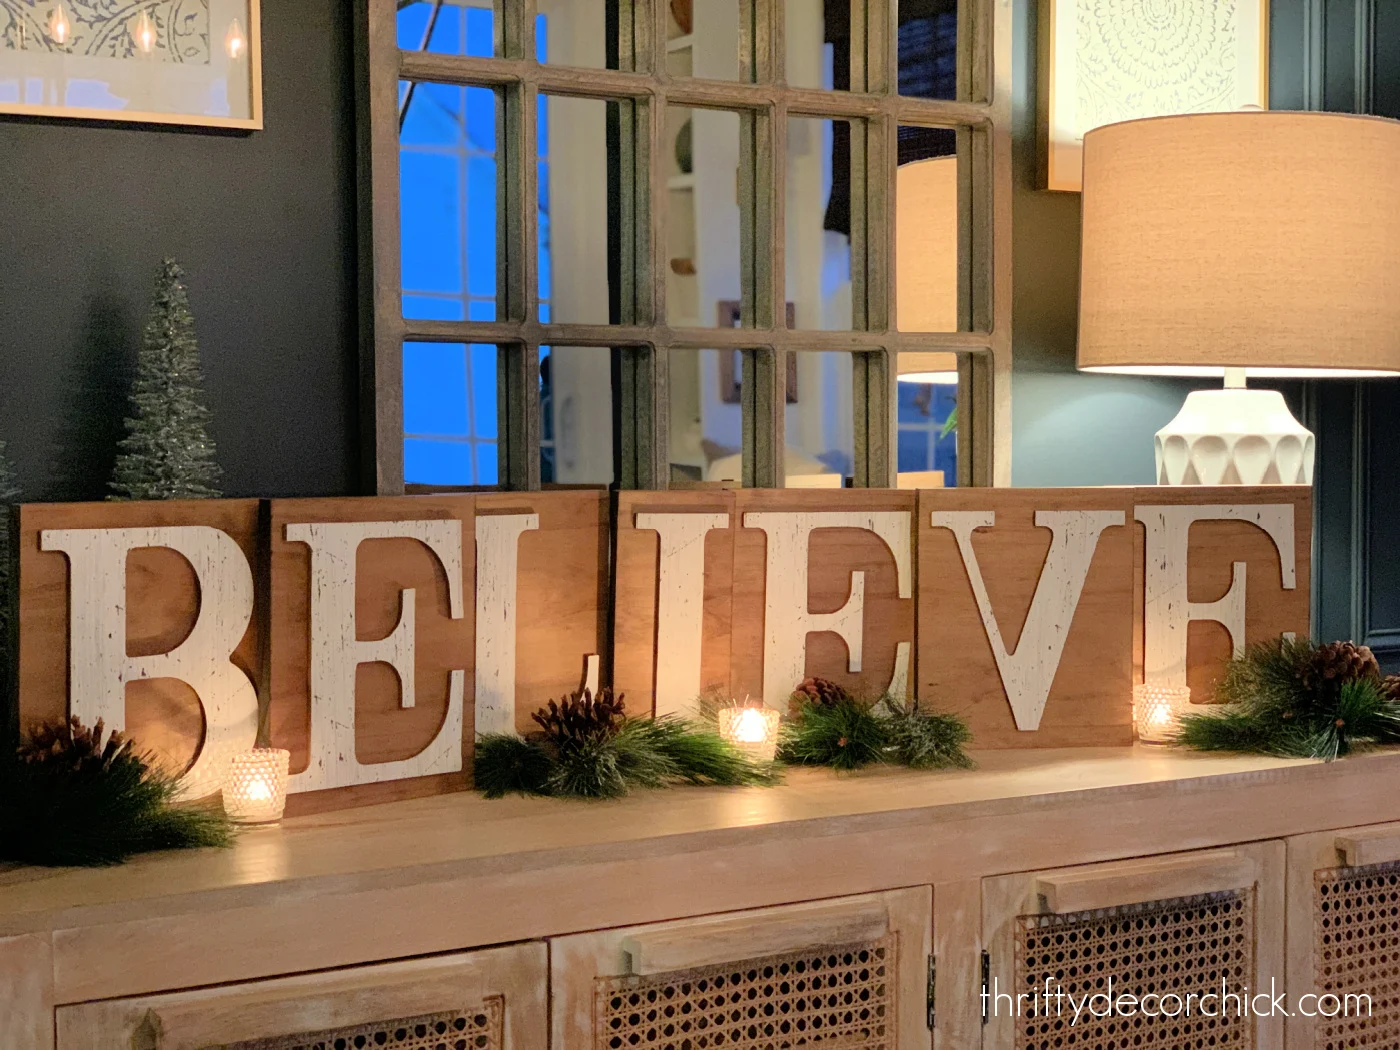
They turned out even better than I thought they would! The wood tone and
birch paper give them just the neutral vibe I was going for:

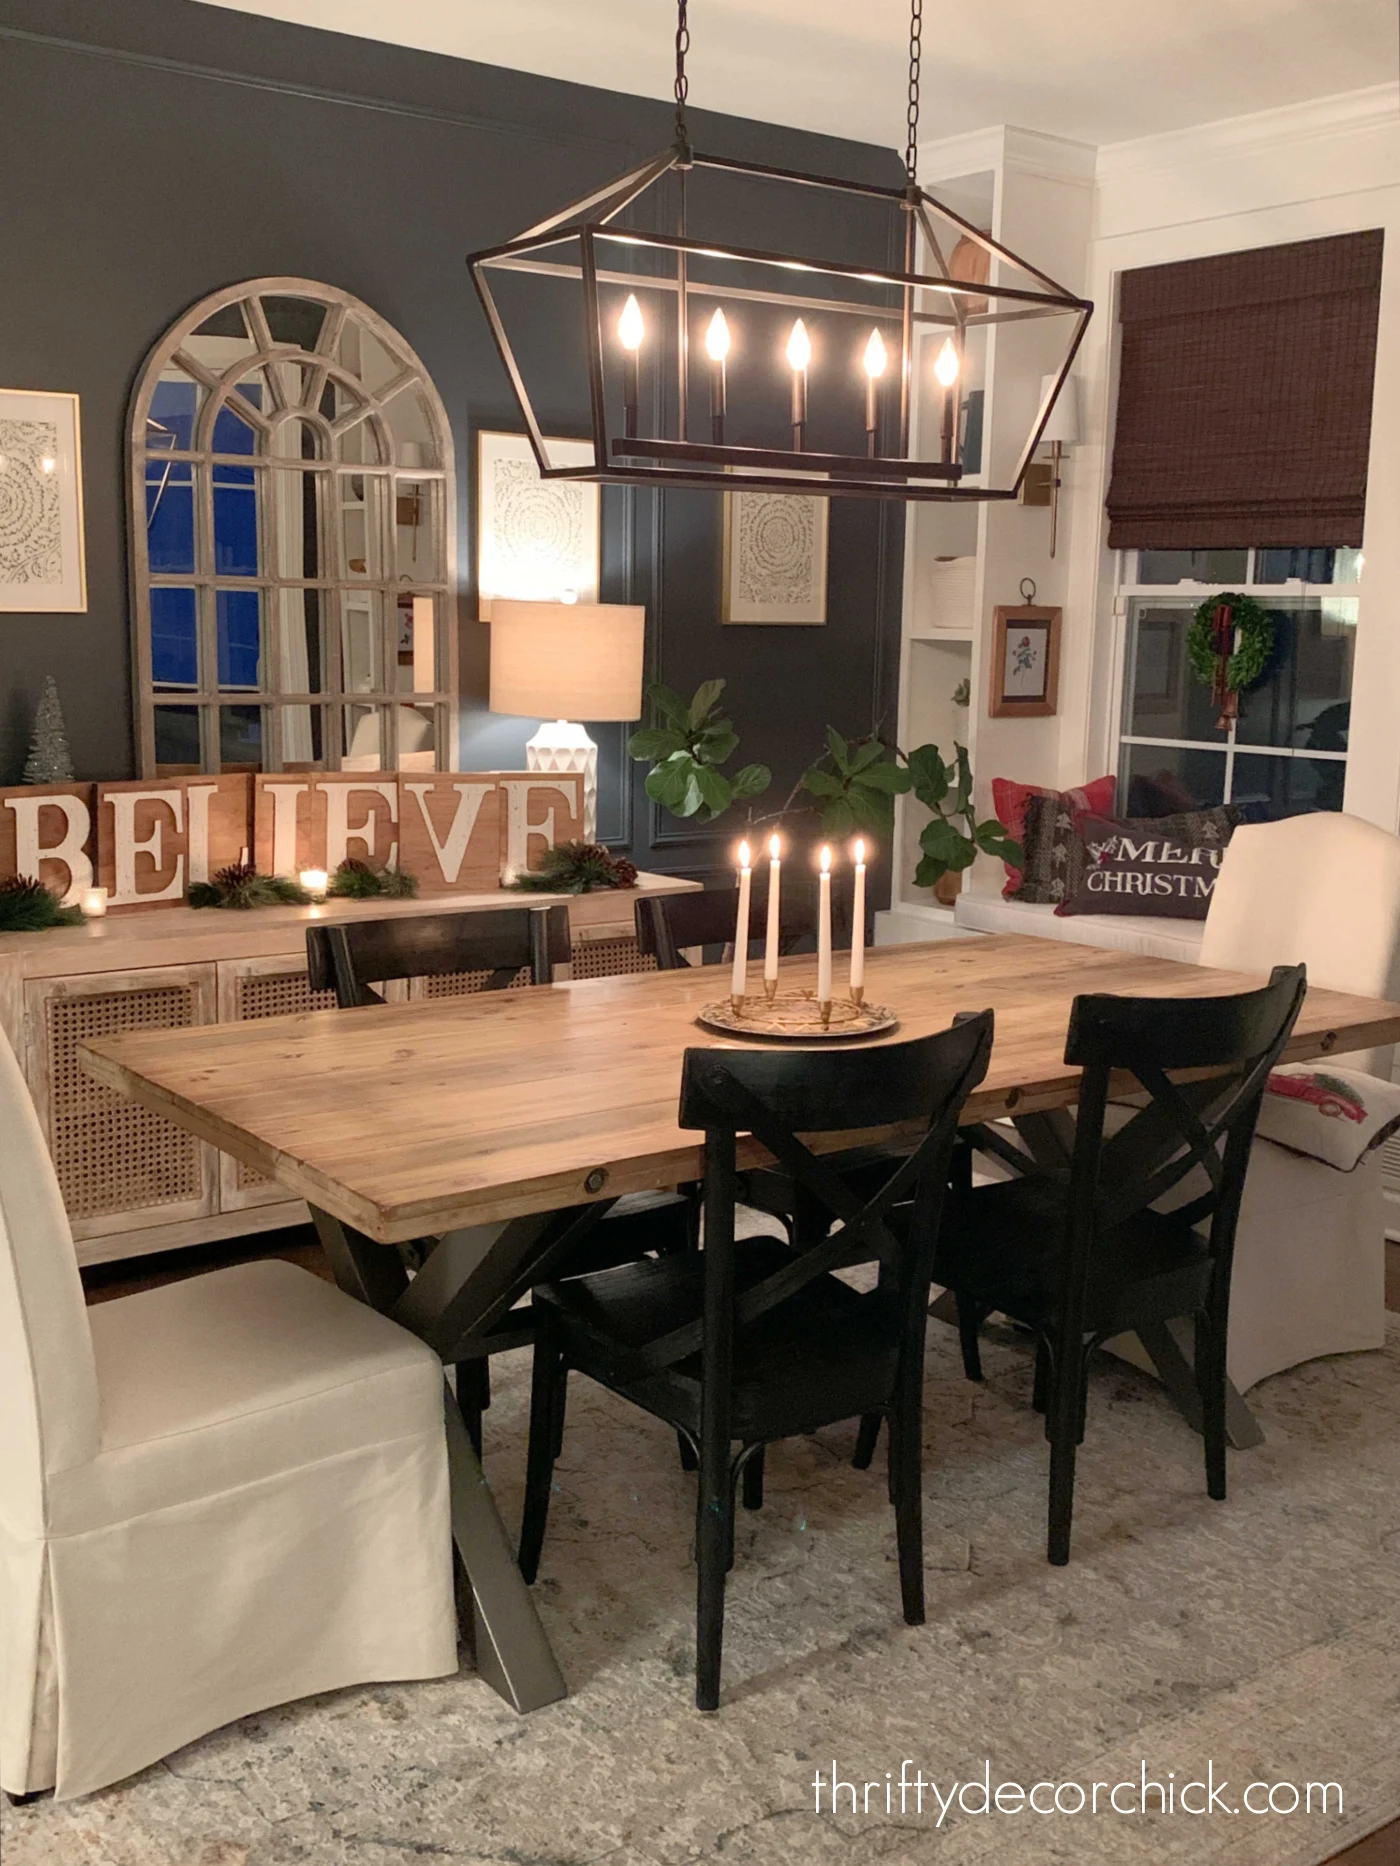
I layered them on our dining room console table:

The votive candles and greenery are the perfect additions with the new
sign!:
I was going to put these on our mantel this year, but didn't make them in
time. :)
I think they would look SO cute up there though! They would also look great
on a kitchen counter or hall table as well.
I love that their subdued look will work anywhere in the house:


I went super simple in
our dining room
this year -- just some wreaths in the windows and cute Christmas pillows on
the window seat:
Of course these DIY Christmas letters could be changed up SO many
ways.
You could paint your wood pieces any color and add pattern or sparkle with
the paper.
A red background with white sparkling scrapbook paper would be so fun!
You could use patterned holiday craft paper or wrapping paper, or just use
spray paint like I was planning to do.
But I do love the simplicity of the light stain and paper I used:

|
| Find similar cane consoles here, here and here! |

Have you tried a craft using these inexpensive chipboard letters? They are
such a cute addition to your Christmas decor. I've used them many times over
the years!
This DIY isn't just for the holidays -- you can spell out names and words that will work all year round.
If this was a permanent addition to your decor, you could also skip adding
the wood on the back and just hang these on the wall. They'd be extra cute
hung with some ribbon or twine.
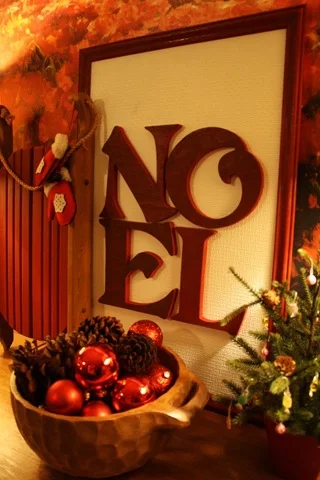
Check out my
knock off Noel art tutorial using wood craft letters here!:
Never miss a post by signing up to
get posts via email.
I like the birch paper for this project. I can just imagine your teenager rearranging the letters periodically to make his parents laugh. Or maybe that's just my house. haha Do you have any clue if the white lamp behind the sign is still available? Merry Christmas, Sarah! Chrissy
ReplyDeleteThese are darling Sarah!
ReplyDeleteLove this! Will keep in mind for next year since I haven't shopped or gotten the tree up yet!
ReplyDelete