
How to Make an EASY No Sew Bench Seat Cushion
February 06, 2026
Share this
How to make your own NO SEW bench seat cushion.
You don't have to know how to use a sewing machine to make a beautiful cushion for a bench seat!
Custom foam bench cushions and covers are not cheap -- this tutorial shows you how to make one in less than an hour for way less.
Whether for your mud room, the dining table or a window seat, it's really not hard to make your own. And you can customize in any color or fabric you want!
This quick project was an update in our laundry/mud room combo. It's been awhile since I've made a cushion for a bench, but it came right back to me.
Years ago I shared how to make a similar DIY bench cushion -- be sure to check that post out for another example of this project.
I found a couple upholstery fabrics I absolutely LOVED at Joann Fabrics years ago (RIP Joanns!):

I'm working with the lower fabric for this DIY cushion (the stripes look black in the photo above, but they are a lighter blue/gray).
For this project you'll need a bottom piece of some kind to staple the fabric into.
I found the plywood I needed in my trusty scrap pile and cut it to the dimension of our mud bench top:

This post may contain affiliate links for your convenience.
I may earn a small commission when you make a purchase through links.
See my policies and disclosure page for more information.
Notice the slightly rounded corners -- I like to do that so the fabric isn't stretched across anything pointy. Over time it wears at the fabric.
You can check out this bench cushion tutorial to see the next couple of steps in detail, but here's my BIG secret -- I use egg crate foam instead of thicker upholstery foam from the craft store.
It's cheaper (especially in the fall during back to school sales) and does the job just as well. (Plus you'll have much more to work with!)
First up, cut your foam to the exact size of your wood base.
Tip: Using an electric carving knife or bread knife makes easy work of cutting your foam!
If you use layers of the thinner egg crate foam, regular scissors will cut it just fine as well.
I like to use a spray adhesive on both the wood and the foam to stick it in place just a bit before wrapping. Lay both items on a drop cloth or the grass outside before spraying.
After securing the foam to the board, you'll want to wrap it with a light fabric like muslin to hold everything together well. If you want it extra cushy, you can use batting as well.
Make sure the width and length of your bench seat fabric is at least six inches more than the wood base. Even more if you're making your cushion extra thick.
You want to make sure you'll have plenty of fabric to work with as your wrap the wood base and foam!
Place the top of the fabric face down and use a basic staple gun to secure the fabric to the bottom of your board.
If the staples don't go in all the way, just pound them in with a hammer:

Take your time when using a striped fabric -- you'll really notice if it doesn't line up well!
Helpful tip!: Do not to pull the fabric too tight around the sides of the cushion.
If you do it will pucker up along the sides and you'll see where you added each staple.
I usually leave the corners for the last step, and fold them as cleanly as possible to give a box corner look on the short ends of the cushion:

It's just like making a bed -- pull the excess fabric to the side, then pull that flap/folded edge down and secure to the wood underneath with the stapler.
The corners are the hardest part of the whole project!
The underside doesn't look great -- but who cares?:

Not me! ;)
When you're done, cut off any excess fabric and thread. That's it!
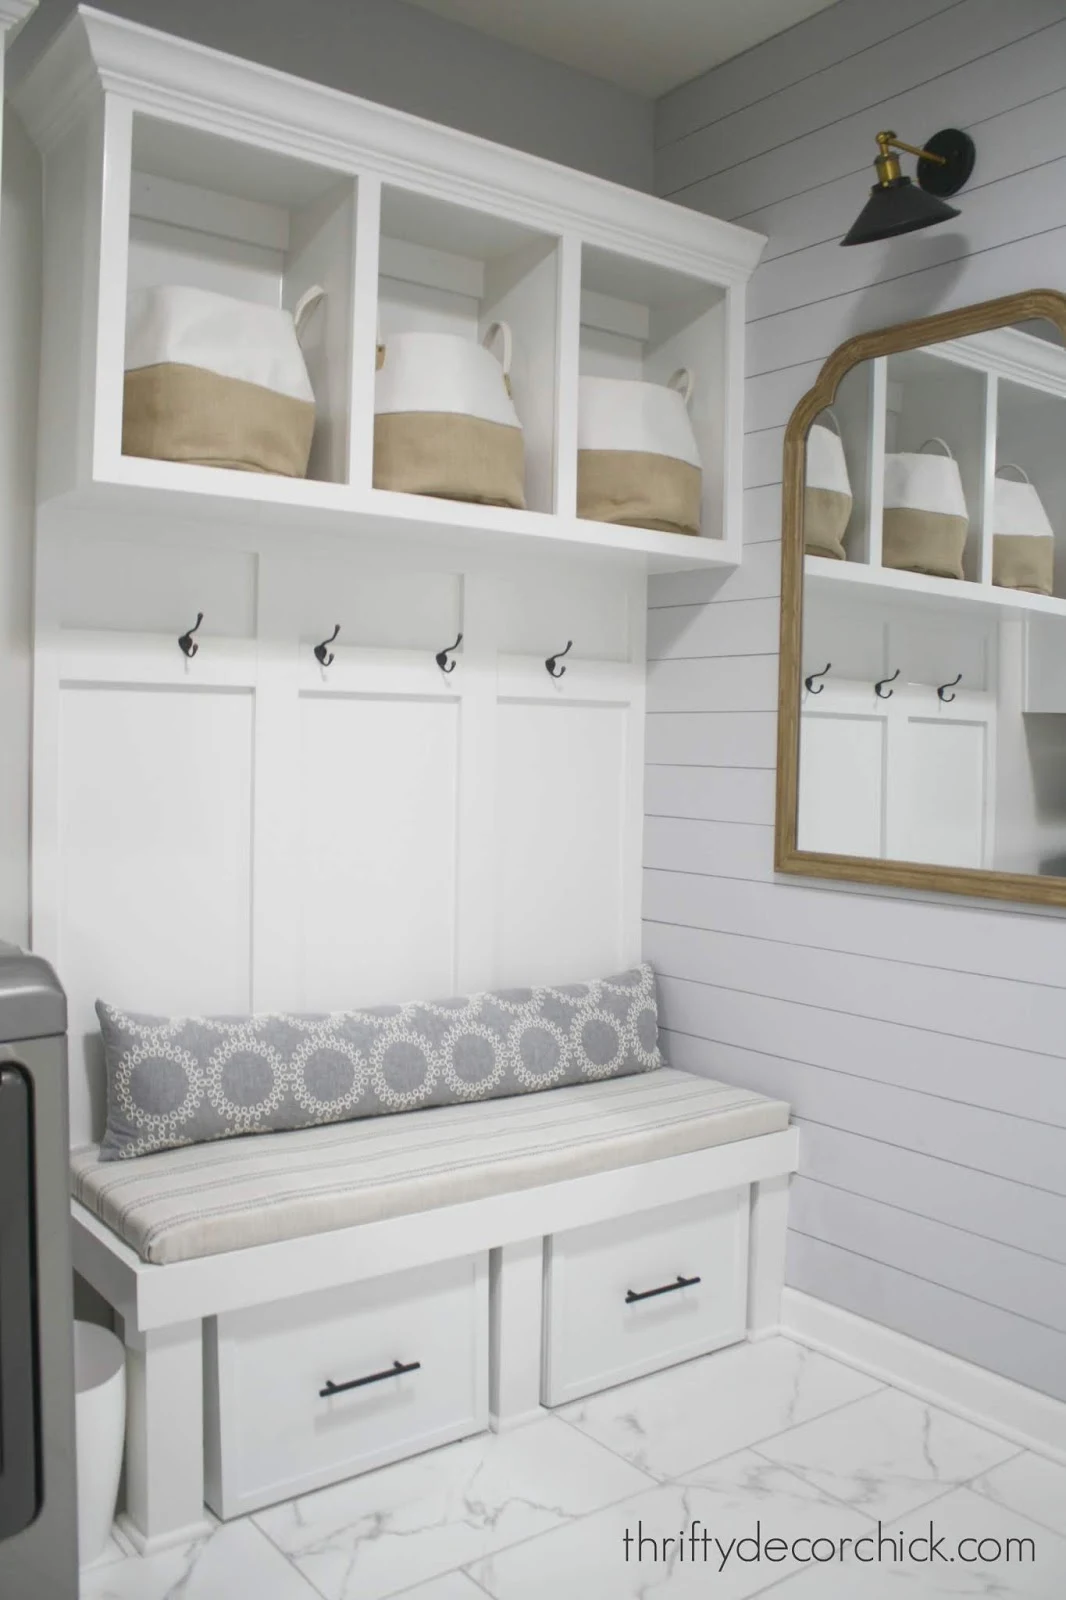
I'm so pleased with it -- the striped fabric is PERFECT in here with the new wall color (see all my plans for this room here!):


Have you ever tried this DIY cushion project? On the easy to hard scale it falls more towards the easy -- it's a great one to tackle if you are new to the do-it-yourself game!
I also added DIY sliding shoe storage cubbies underneath that function so much better!:
I'm so pleased with it -- the striped fabric is PERFECT in here with the new wall color (see all my plans for this room here!):

I almost went with something more modern for the fabric, but I'm glad I found this instead.
It's more "me" for sure:

It's so classic and pretty. And yes, I will be spraying it with Scotchgard!
I never have problems with my bench cushion sliding around, but if you do, try this easy couch cushion sliding hack. It is an inexpensive and quick fix!
I can't WAIT to replace those shoe baskets with something sturdier.
Once I finish up the wall next to this bench that will be my next project:

You can also tuft your bench cushion easily with a long needle and thick wax cord. Or add some decorative trim with a hot glue gun to add more detail!
You can use ALL kinds of materials for your bench cushion cover:
- Curtains and drapes work great!
- Drop clothes are a nice, neutral color and durable enough to hold up to all kinds of wear and tear.
- Table clothes are easy to clean and you can make easy throw pillows out of placemats!
- Shower curtains are crazy inexpensive and the perfect size.
I also added DIY sliding shoe storage cubbies underneath that function so much better!:
Looks great - love the fabric!
ReplyDeleteShelley
What does the Scotchguard do?
ReplyDeleteIt keeps liquids from soaking in and makes cleaning up easier. :)
DeleteIs the blue fabric part of there home decor line fabrics? Do you know the name/pattern? It's so pretty!
ReplyDeleteYes they both are in the home decor fabrics. :) I don't have a name unfortunately!
DeleteWaverly Multi-Purpose Fabric-Ready to Roll Embroidery Thunder. ITEM # 16537474
DeleteLOVE! I have everything I need to convert an old square bar table into a cushioned ottoman but haven't been brave enough to tackle. Thank you for the inspiration...I think that will be my weekend project.
ReplyDeleteLooks good - I think I would put a layer of something on the bottom so the staples don't scratch the actual wood bench.
ReplyDeleteYes if you can't get them hammered in well enough you'd want to! Otherwise the fabric is enough of a buffer.
DeleteWhat are you planning to replace the shoe baskets with? We're about to do built-ins and a bench in our mudroom and I was planning on putting baskets under the bench. Maybe not if you have a better idea!
ReplyDeleteI'm planning to build wood boxes on wheels. They'll hold more and be more sturdy. I think if the baskets were thicker they'd work better, so yours may be fine!
DeleteYour cushion looks fabulous! I've been looking for a striped fabric for drapes and love the one you chose. Do you think it is also a Waverly fabric? Maybe someone will know the name of it.
ReplyDeleteLove it! Really like this fabric choice- great job!
ReplyDeleteThis is genius! My husband built a window seat (after I saw yours from previous house) and it has been naked ever since. It’s a large window seat and quotes for a cushion have been high. Now I will finally have a cushion! Thank you!
ReplyDeleteSuch a great choice of fabric! And kudos for keeping the lines super straight. Fabulous.
ReplyDeleteLooks great. I have a different take on my bench fabric install. I have rarely used a wood back, or spray glue on the foam. I simply buy the width dense foam I desire, cut foam to size bench but not short in diameter. If I can I like to leave a little extra width like a 1/4 inch or so. I want that foam snug. I think a thicker width foam is better look on a bench. I sew a basic fabric form much like a pillow case leaving a section in the back of bench cushion open to fold and insert the foam. You will hand stitch the opening closed later with a needle and thread. The 4 corners I sew slightly clipped at an angle versus pointed. On the width of the seams I bring the width in narrower from the actual foam size to make for a tighter fit, if you sew exactly to size foam I find they are to loose in fit. If I need the bench fabric not to slide I add a tiny tab of Velcro on back cushion and bench where it is needed. The thicker fabrics stand up better to use versus a thinner cotton fabric. I don't do the wood backer version on my benches because I find they ruin the finish on the bench below with wear and use. Most of my benches have been sprayed white by builders in a various types paint, and some stained wood benches scratch as well. I often take the bench cushions with when I sell the homes. Now for any dining chair cushion with a backer board, I do exactly as you showed with your bench. Just thought I would give you my take on how I do my cushions. Love your bench fabrics!
ReplyDeleteWhat's up with all the reposting of old posts? I hope all is going well with you and your family!
ReplyDeleteAll is good! I have 14 years of content so try republish past posts a few times a month. :)
DeleteWonderful! Thank you!
ReplyDelete