
How to Remove Peel and Stick Wallpaper Without Damage
January 20, 2022
Share this
How to remove peel and stick wallpaper with no wall damage.
Does adhesive wallpaper really come off the walls as easily as they say? See how well two versions I used came off the walls and my tips for easy removal!
I've hung peel and stick wallpaper many times over the past few years. I've become quite obsessed with a fan of it -- it's such a fun and inexpensive way to make a BIG impact in a room!
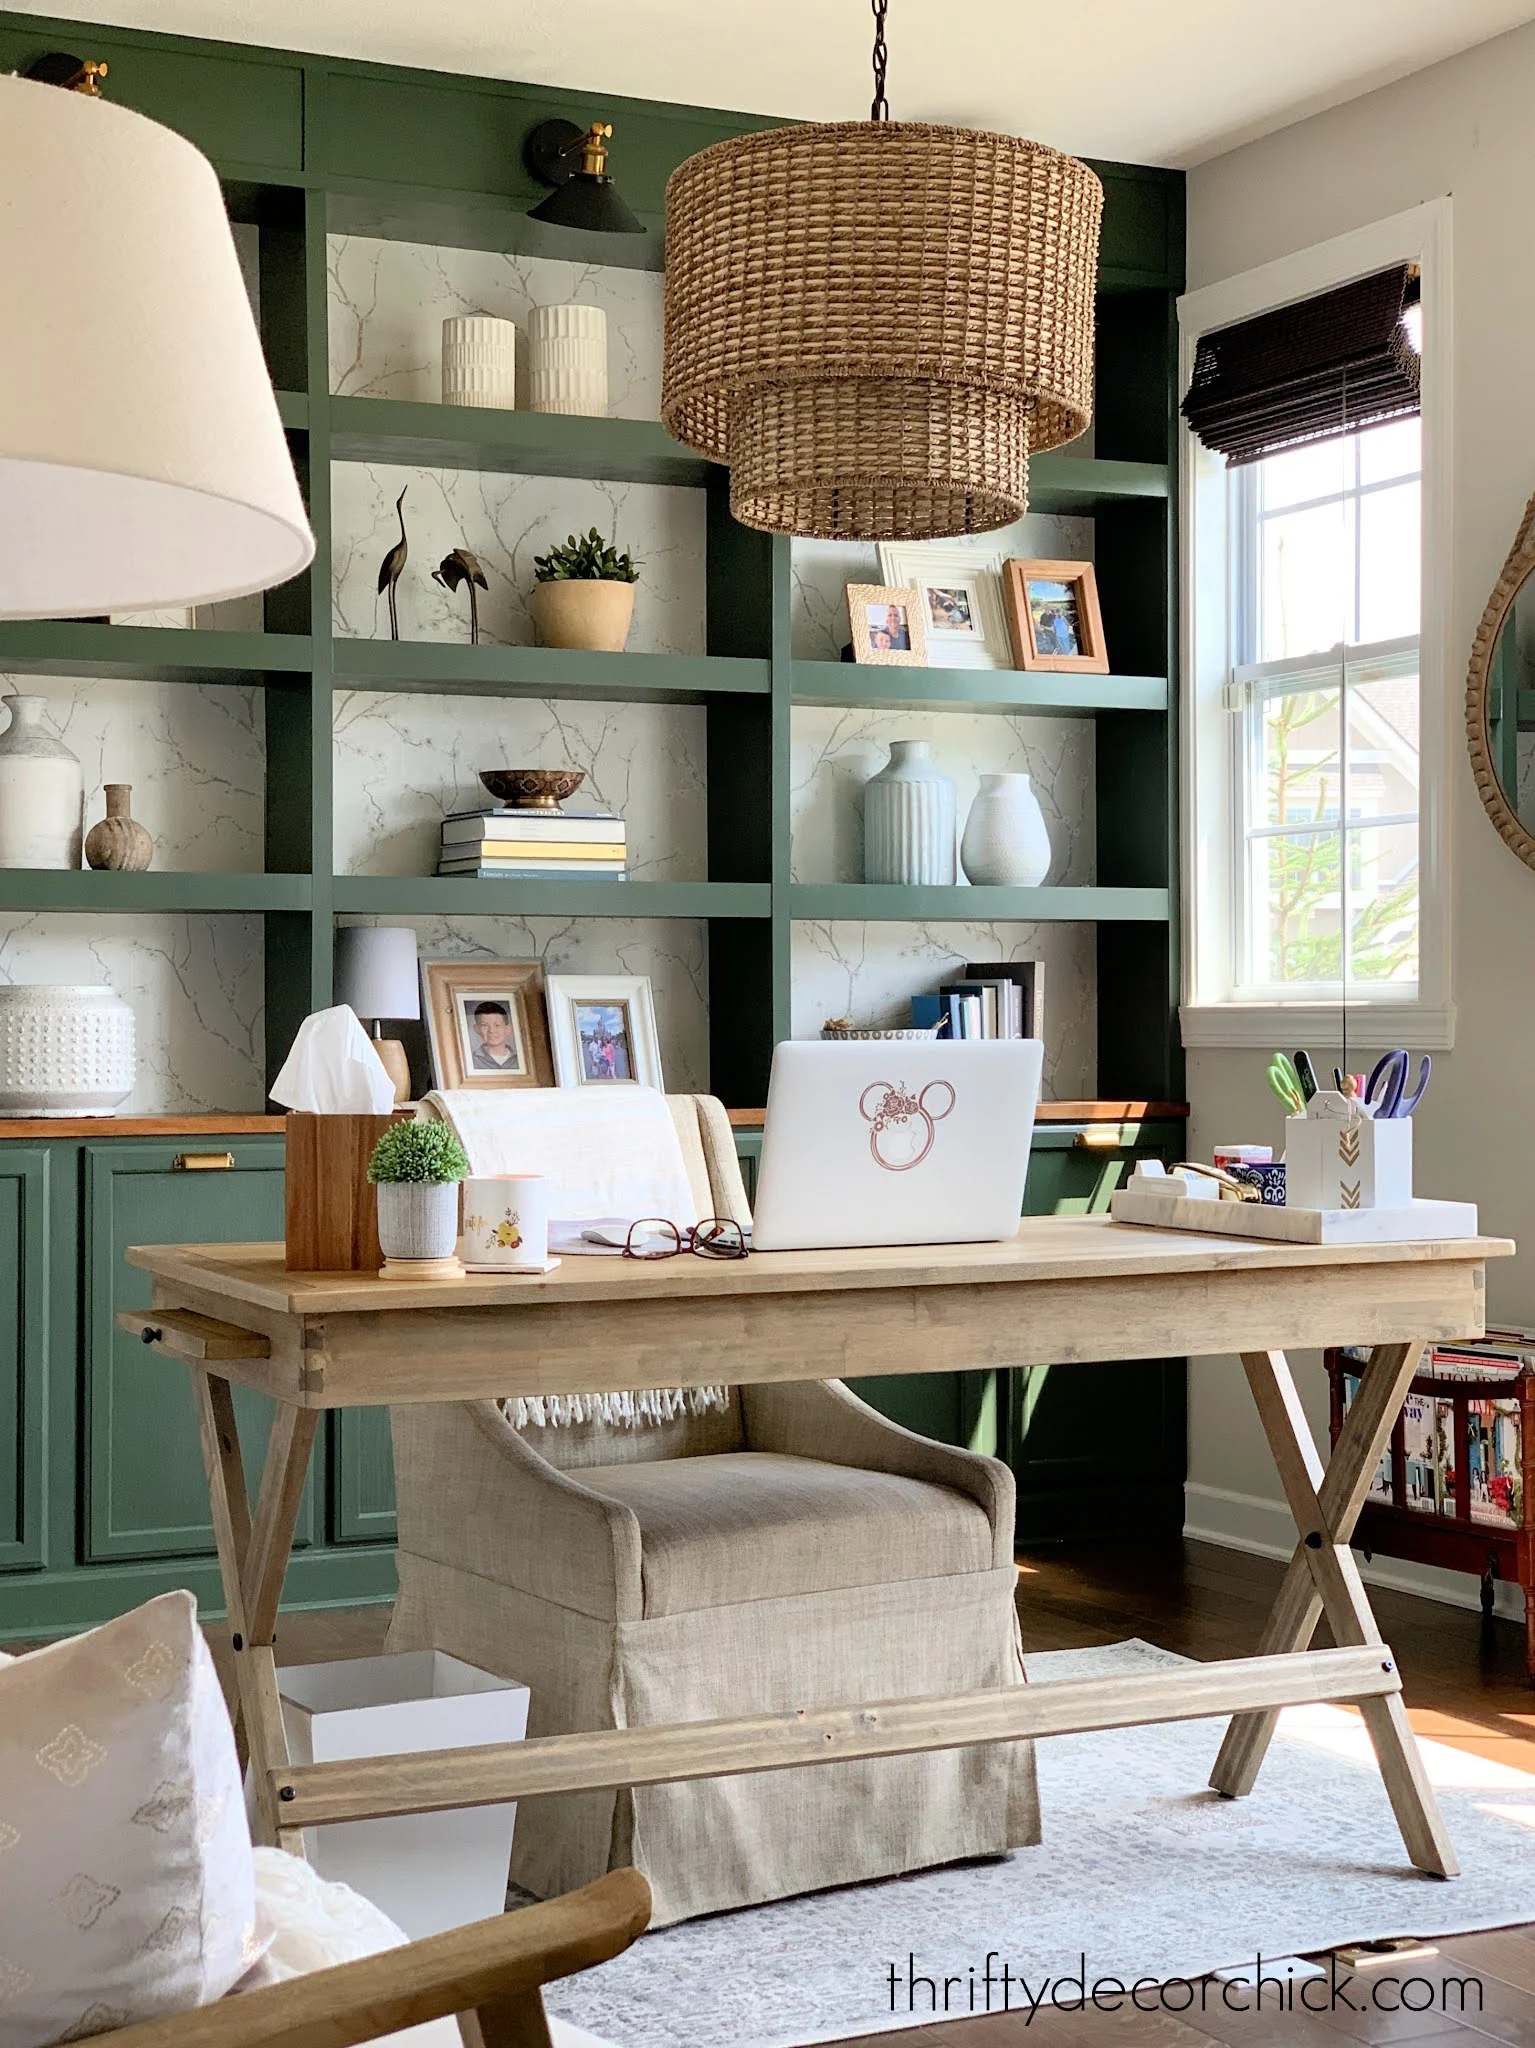
You can see how I used a cherry blossom version in my office:
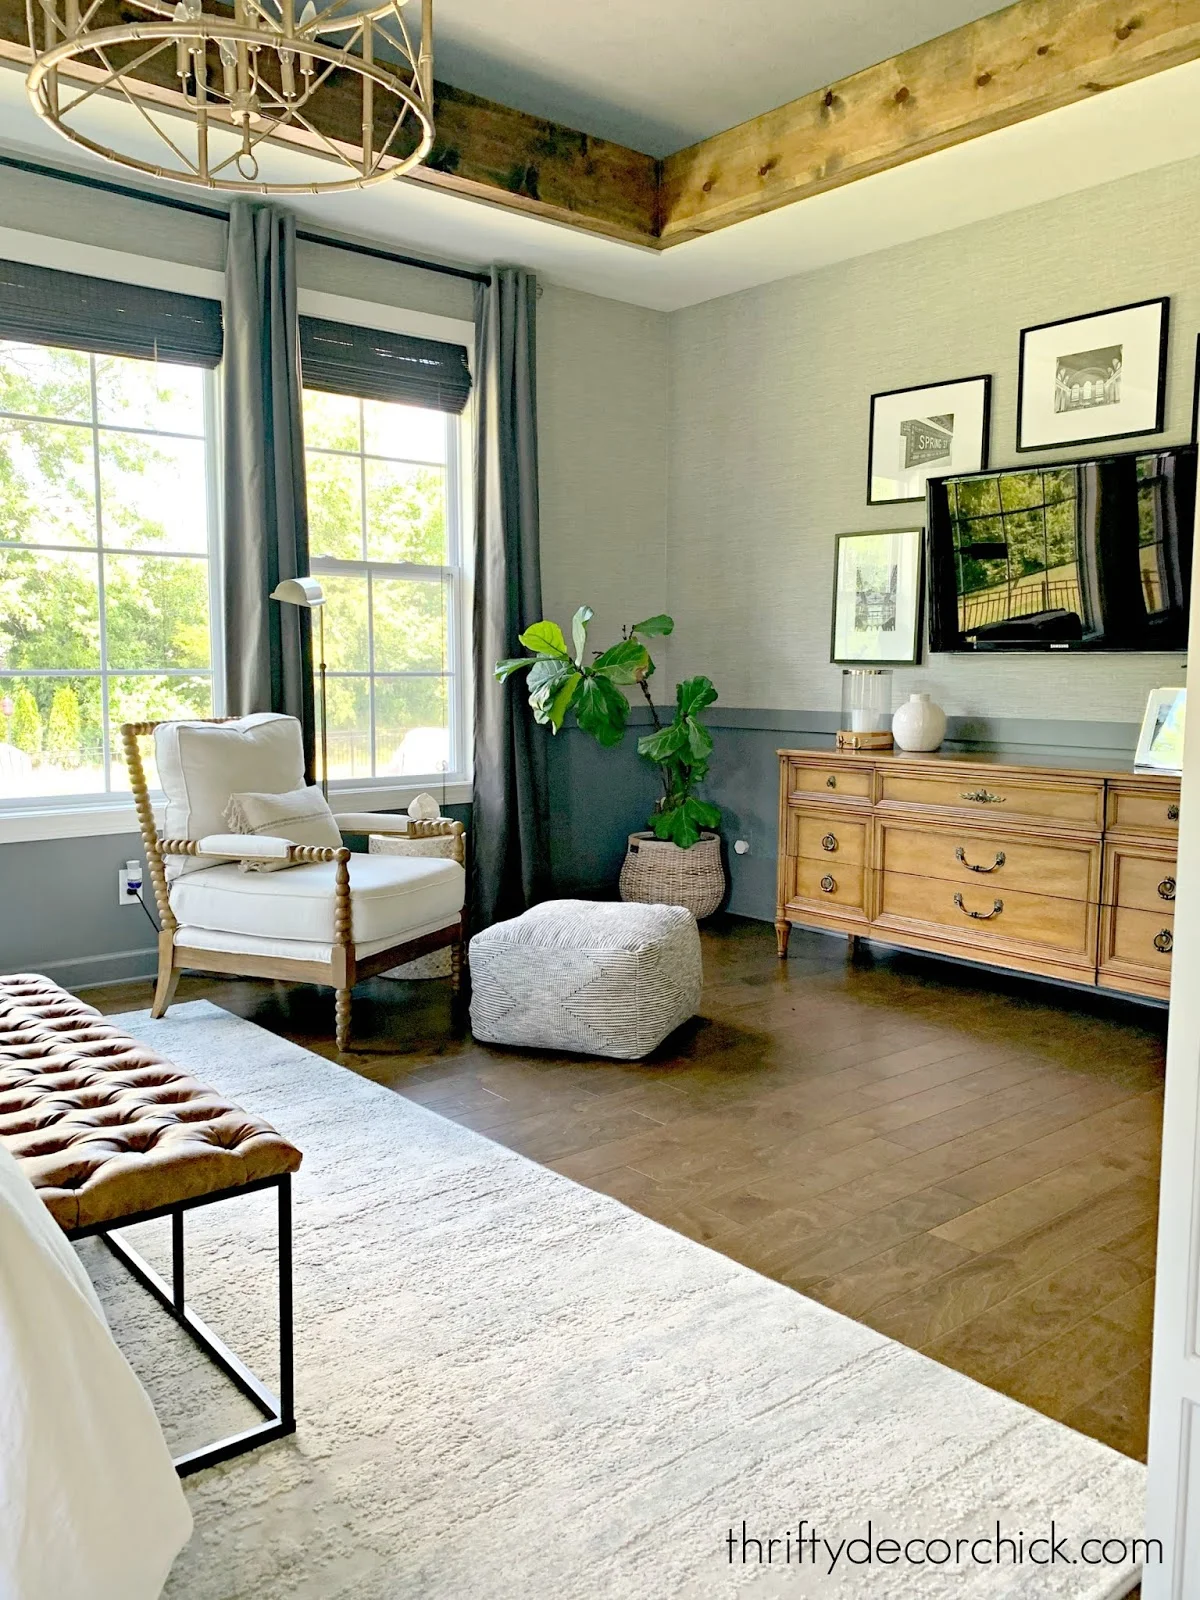
The textured gray grasscloth peel and stick in our bedroom:
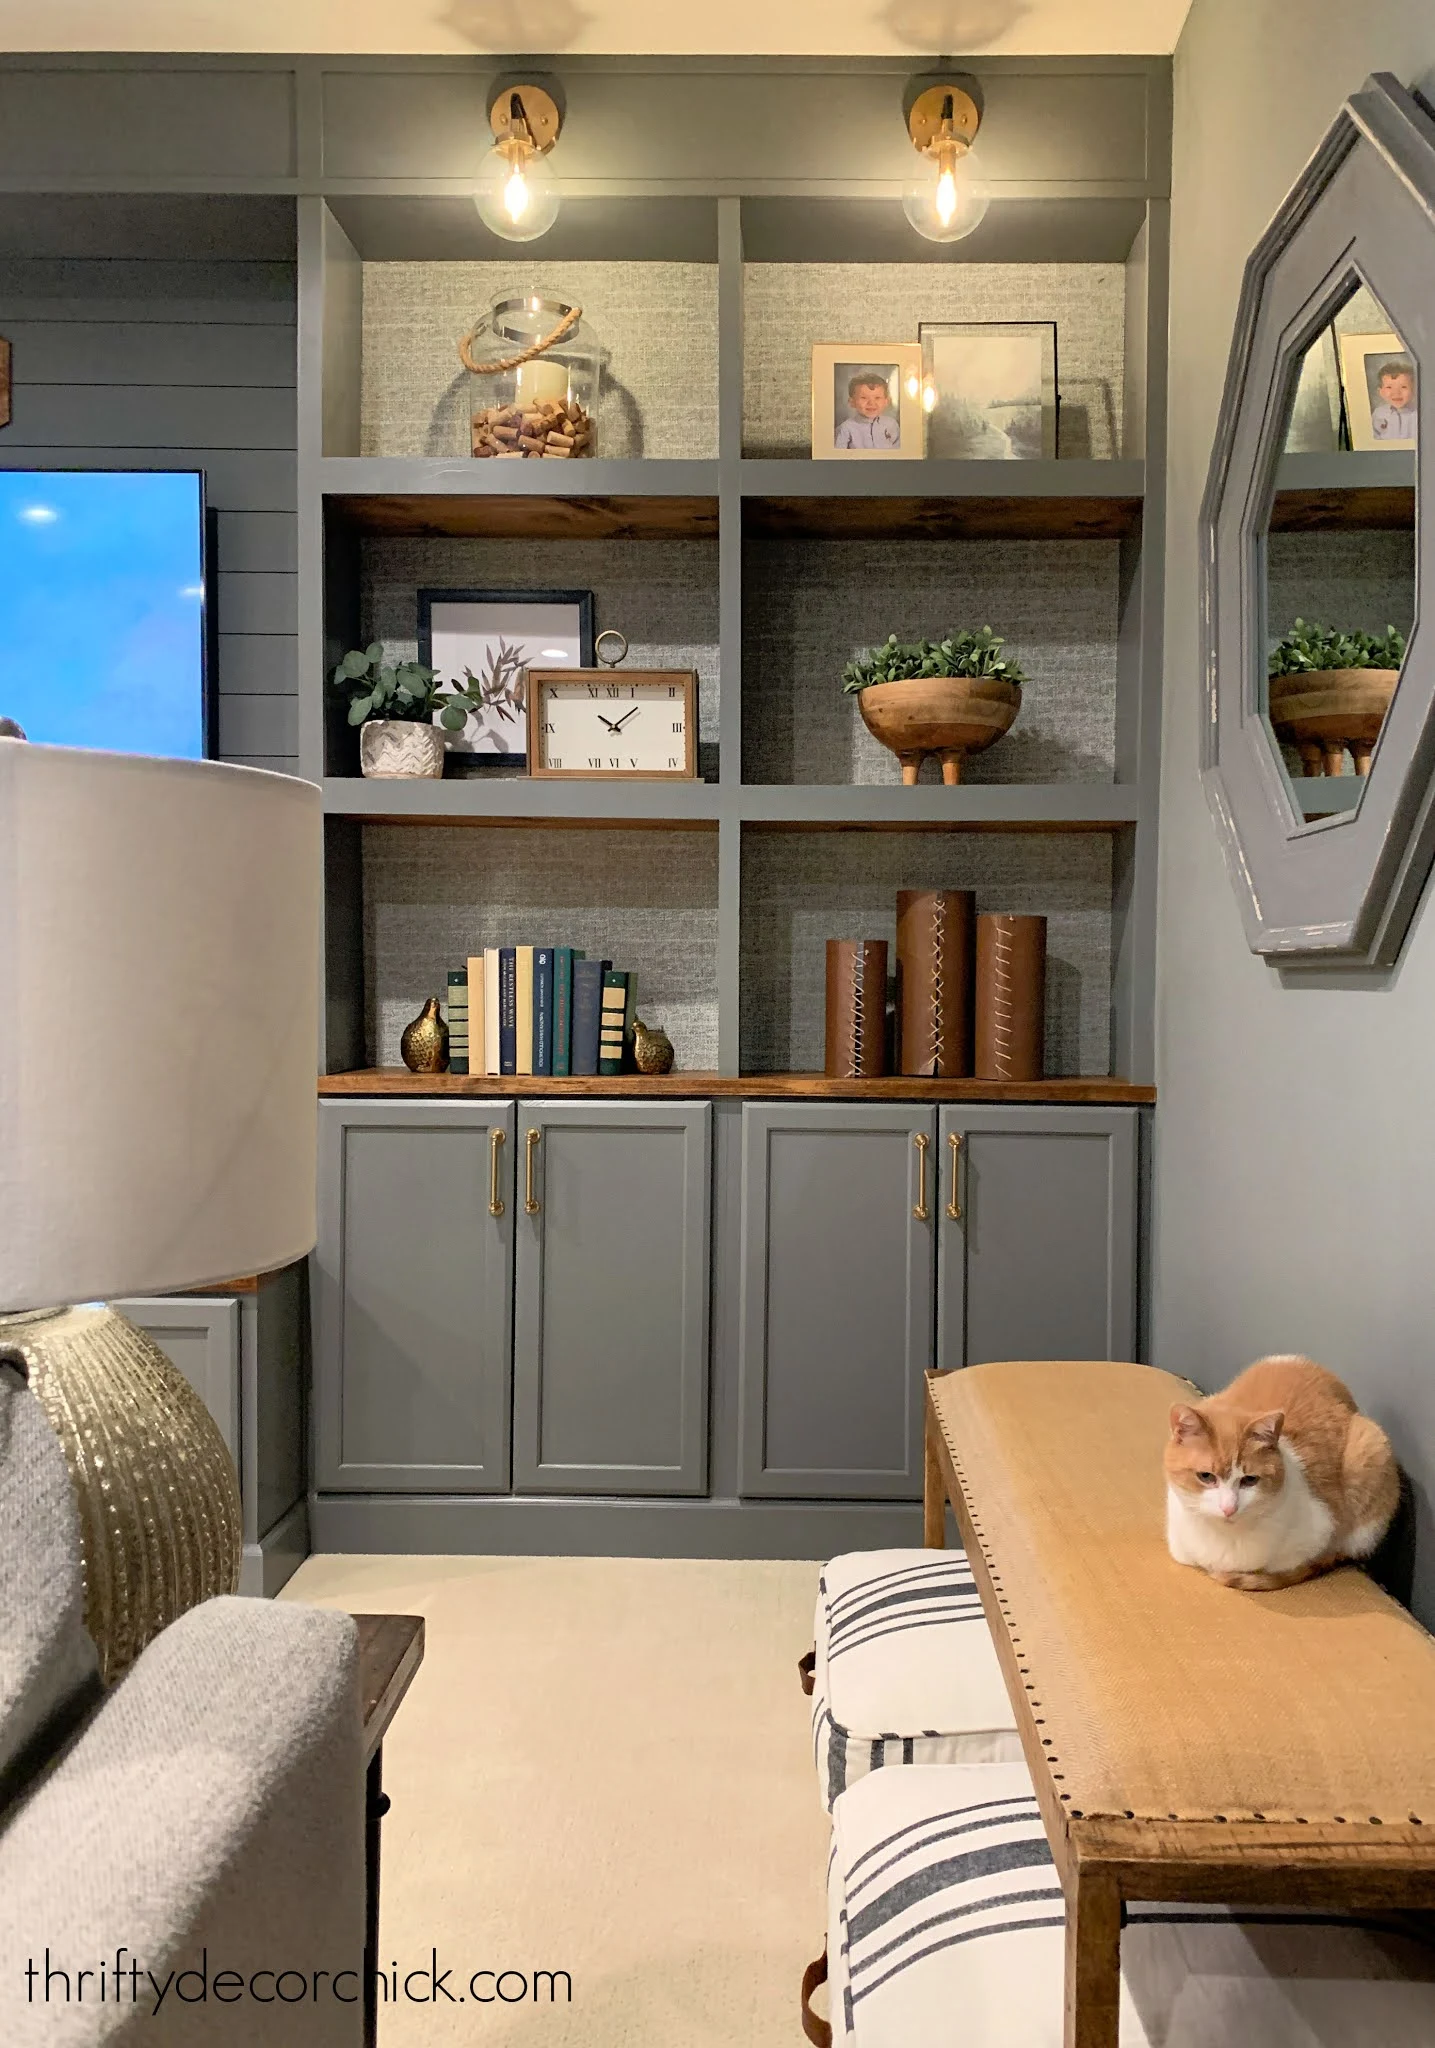
And the fun tweed fabric lookalike on the backs of the basement built ins:
This removable wallpaper is fairly new to the DIY world, and I shared a tutorial on how to install this peel and stick version a few years ago.
Unlike traditional wallpaper that uses wallpaper glue or paste to adhere, this vinyl wallpaper is supposed to be easily removed. I haven't had to remove any of it until recently.
The first time was in my closet that I made over with the IKEA Pax system:

Initially I had covered that back wall with a pink wallpaper with a bit of a metallic sheen:

I liked it at first, but it began to feel too heavy pretty quickly. I knew I wanted something lighter in there (I'll share that with you soon!).
The bonus with this sticky wallpaper is that it's supposed be easily removed (and not damage the walls during the process).
It had only been on my closet walls for a short time, so I figured it would be easy!
Was it hard to remove? Nope. Did it damage the walls? Yep!:
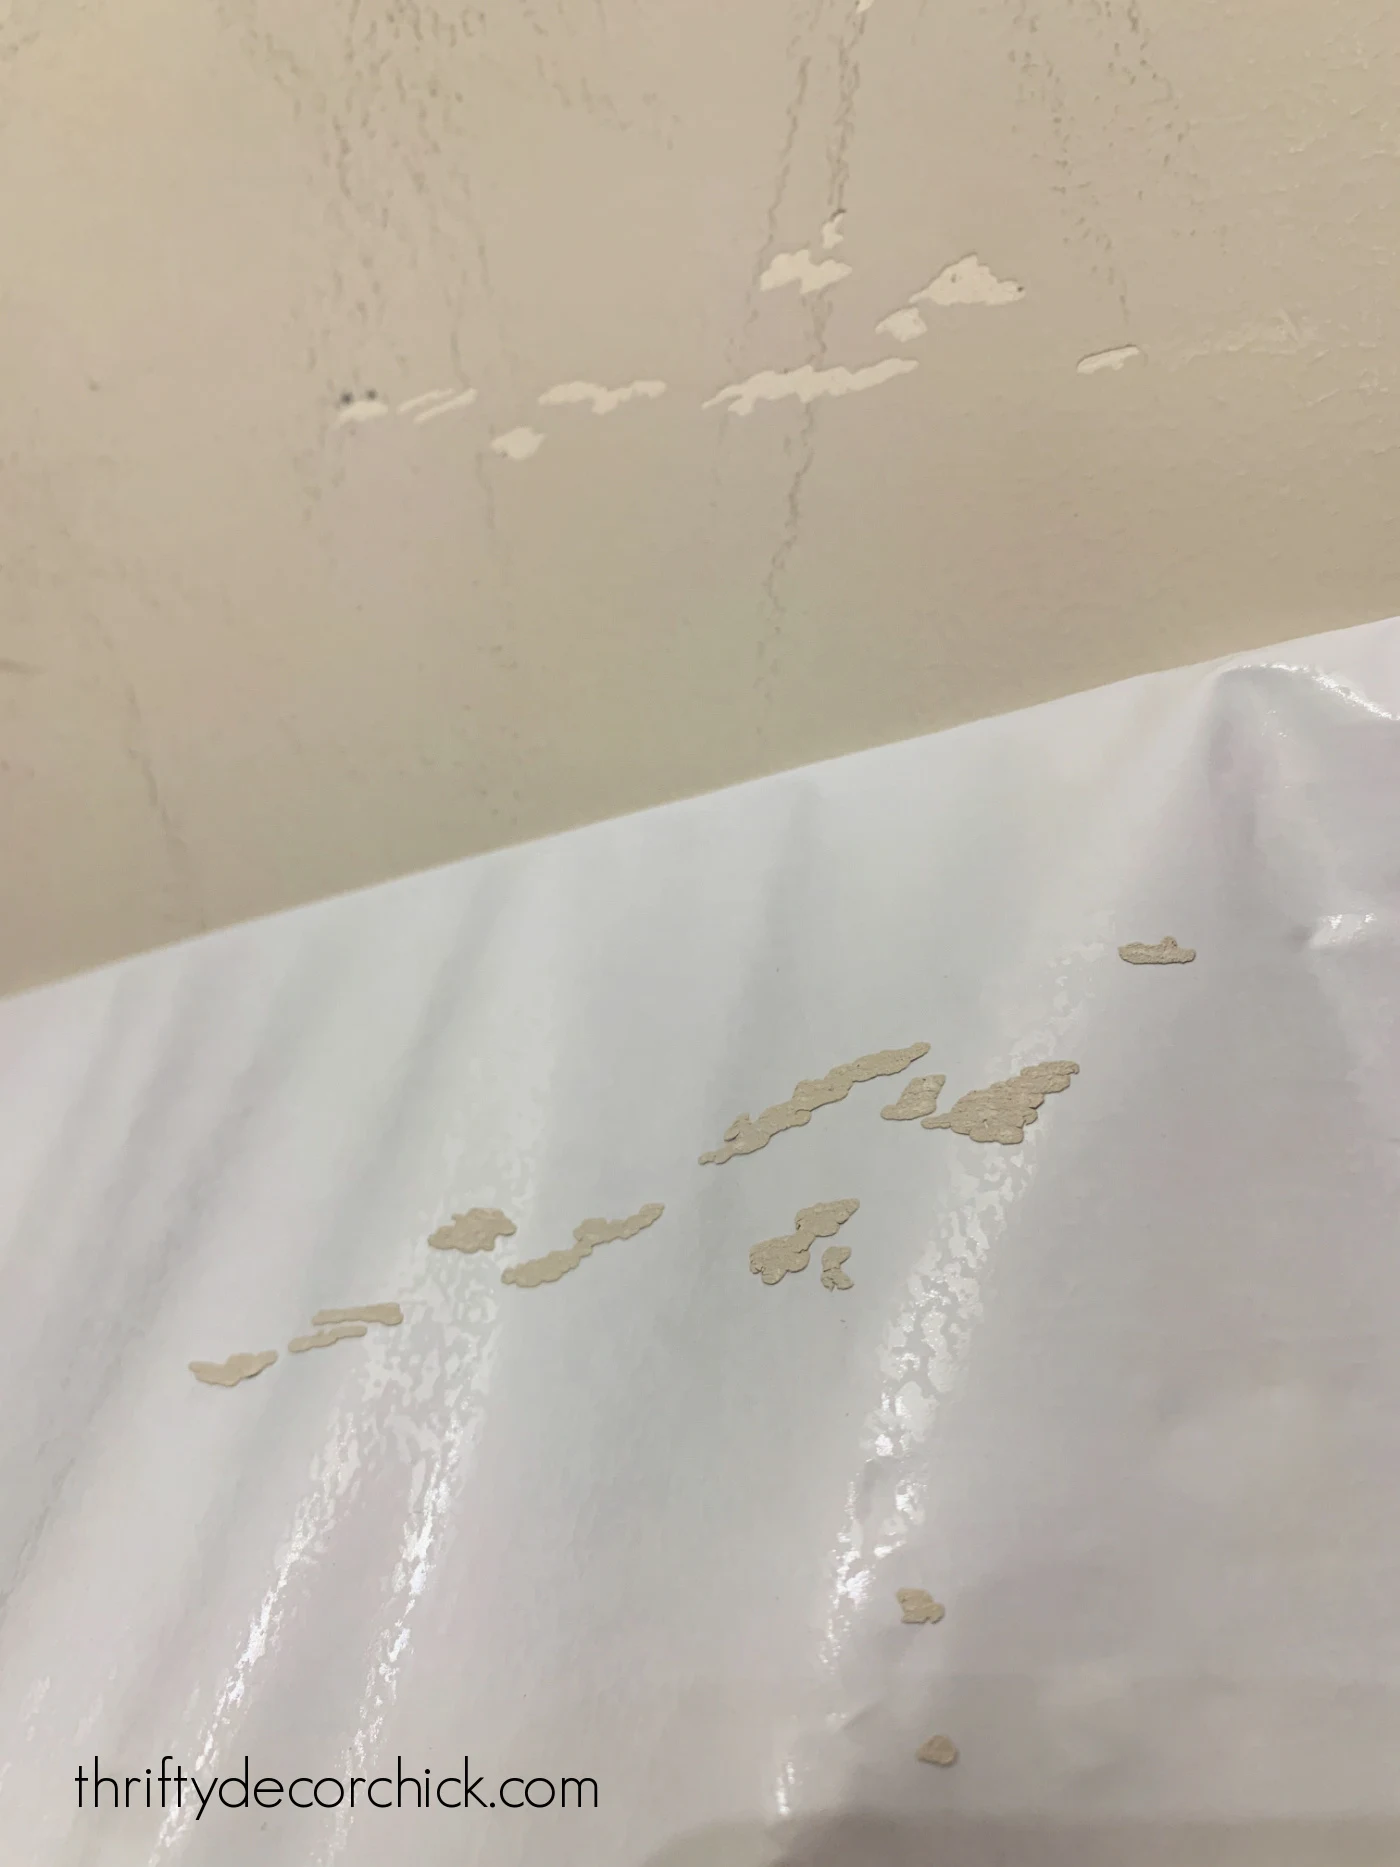
Yikes!
As I worked on this, I realized there are probably two reasons for this.
One...this particular brand (from Target) needs to be removed verrrrrry slowly. Painstakingly slow.
It made a HUGE difference in the removal and drywall damage when I took my time:
This post may contain affiliate links for your convenience.
See my policies and disclosure page for more information.
I also think the quality and thickness matters, because I had a completely different experience when I tried removing the wallpaper from another room.
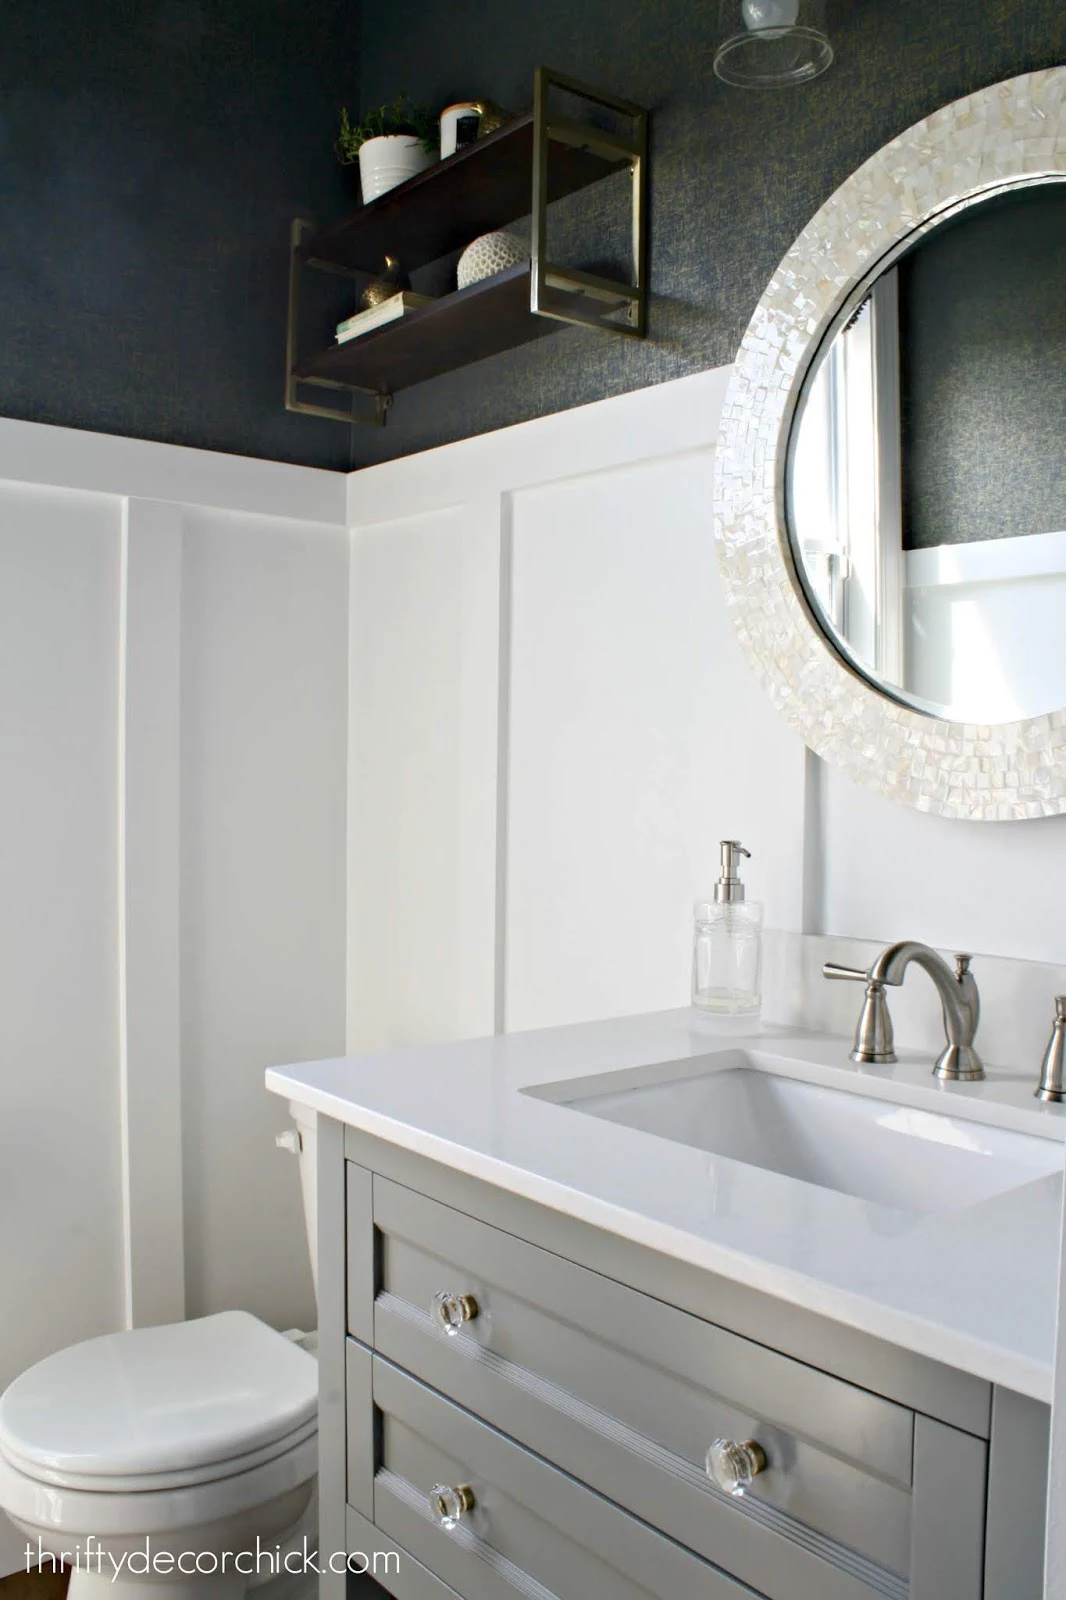
This time it was in our small powder room:
That gold and blue self-adhesive wallpaper was one of my very first DIY projects in this house more than four years ago!
It's served us well -- we've had absolutely zero issues. It still looked great!
But I feel head over heels for another design that incorporates more of the colors throughout our home (and even some gray to tie in our bathroom vanity).
I'll show you that soon, but before I could hang the new paper, this had to come down. I was nervous after the debacle in my closet, so I started out super slow.
When I applied this wallpaper years ago, I hung it before I installed the trim. I know many of you wondered why I would do that, but it just makes for easier installation.
I didn't have to worry about perfectly straight cuts because everything was covered.
I promised you then it would be easy to remove, even with the trim on top!
All you need is a VERY sharp (brand new) razor blade or craft knife to score the wallpaper at the top and bottom of the wall:
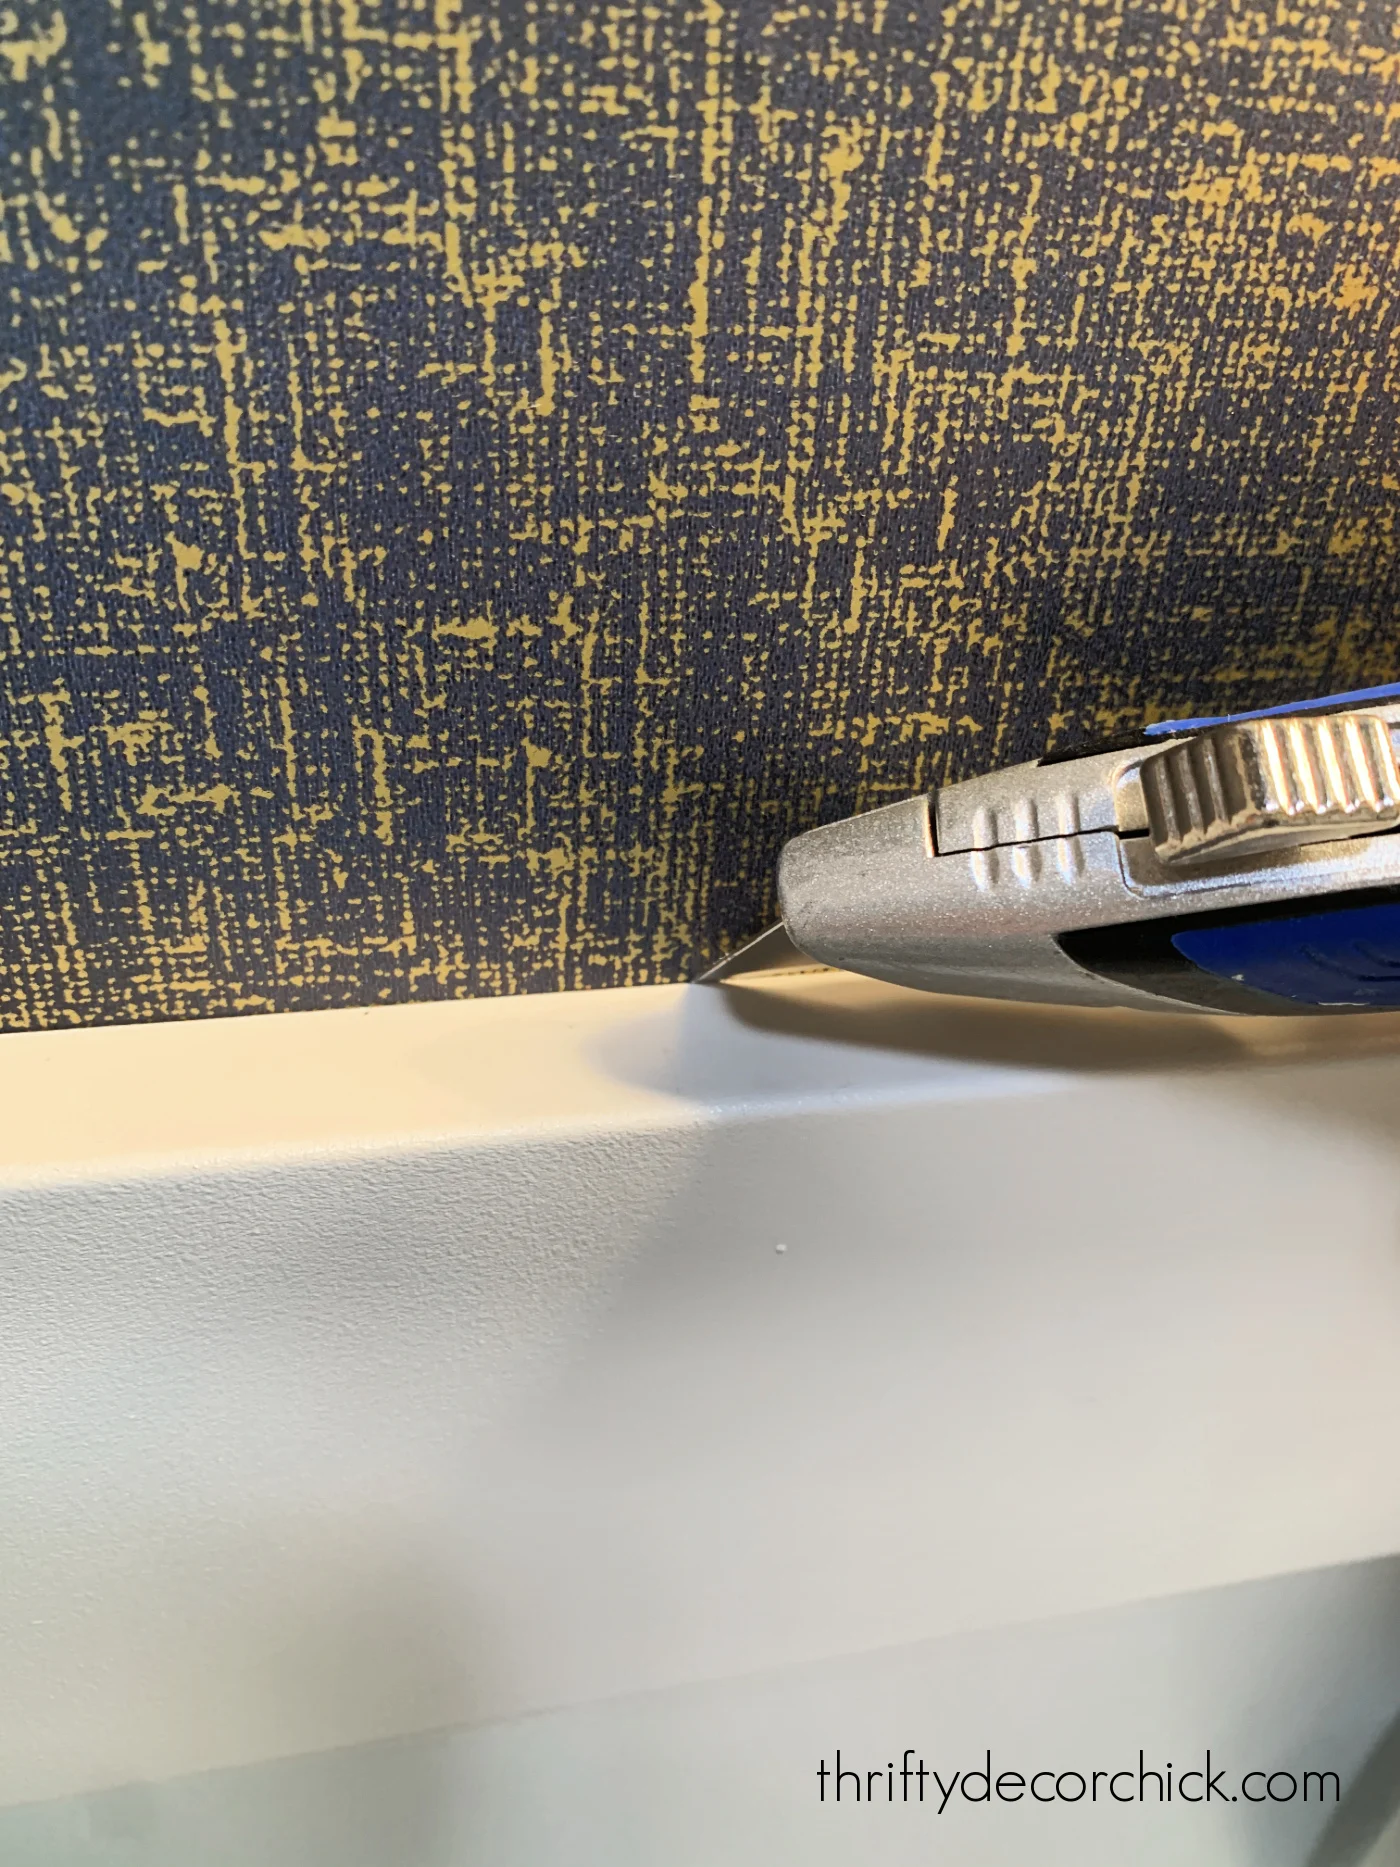
You can see there how I angled the blade down so it was scoring the paper slightly behind the trim.
Because this board and batten is up high, I didn't even caulk along there. If you have caulk on top of the wallpaper, it will need to be removed.
This removal process was so much easier and quicker than the other one! I was able to get entire panels down in one piece no problem:
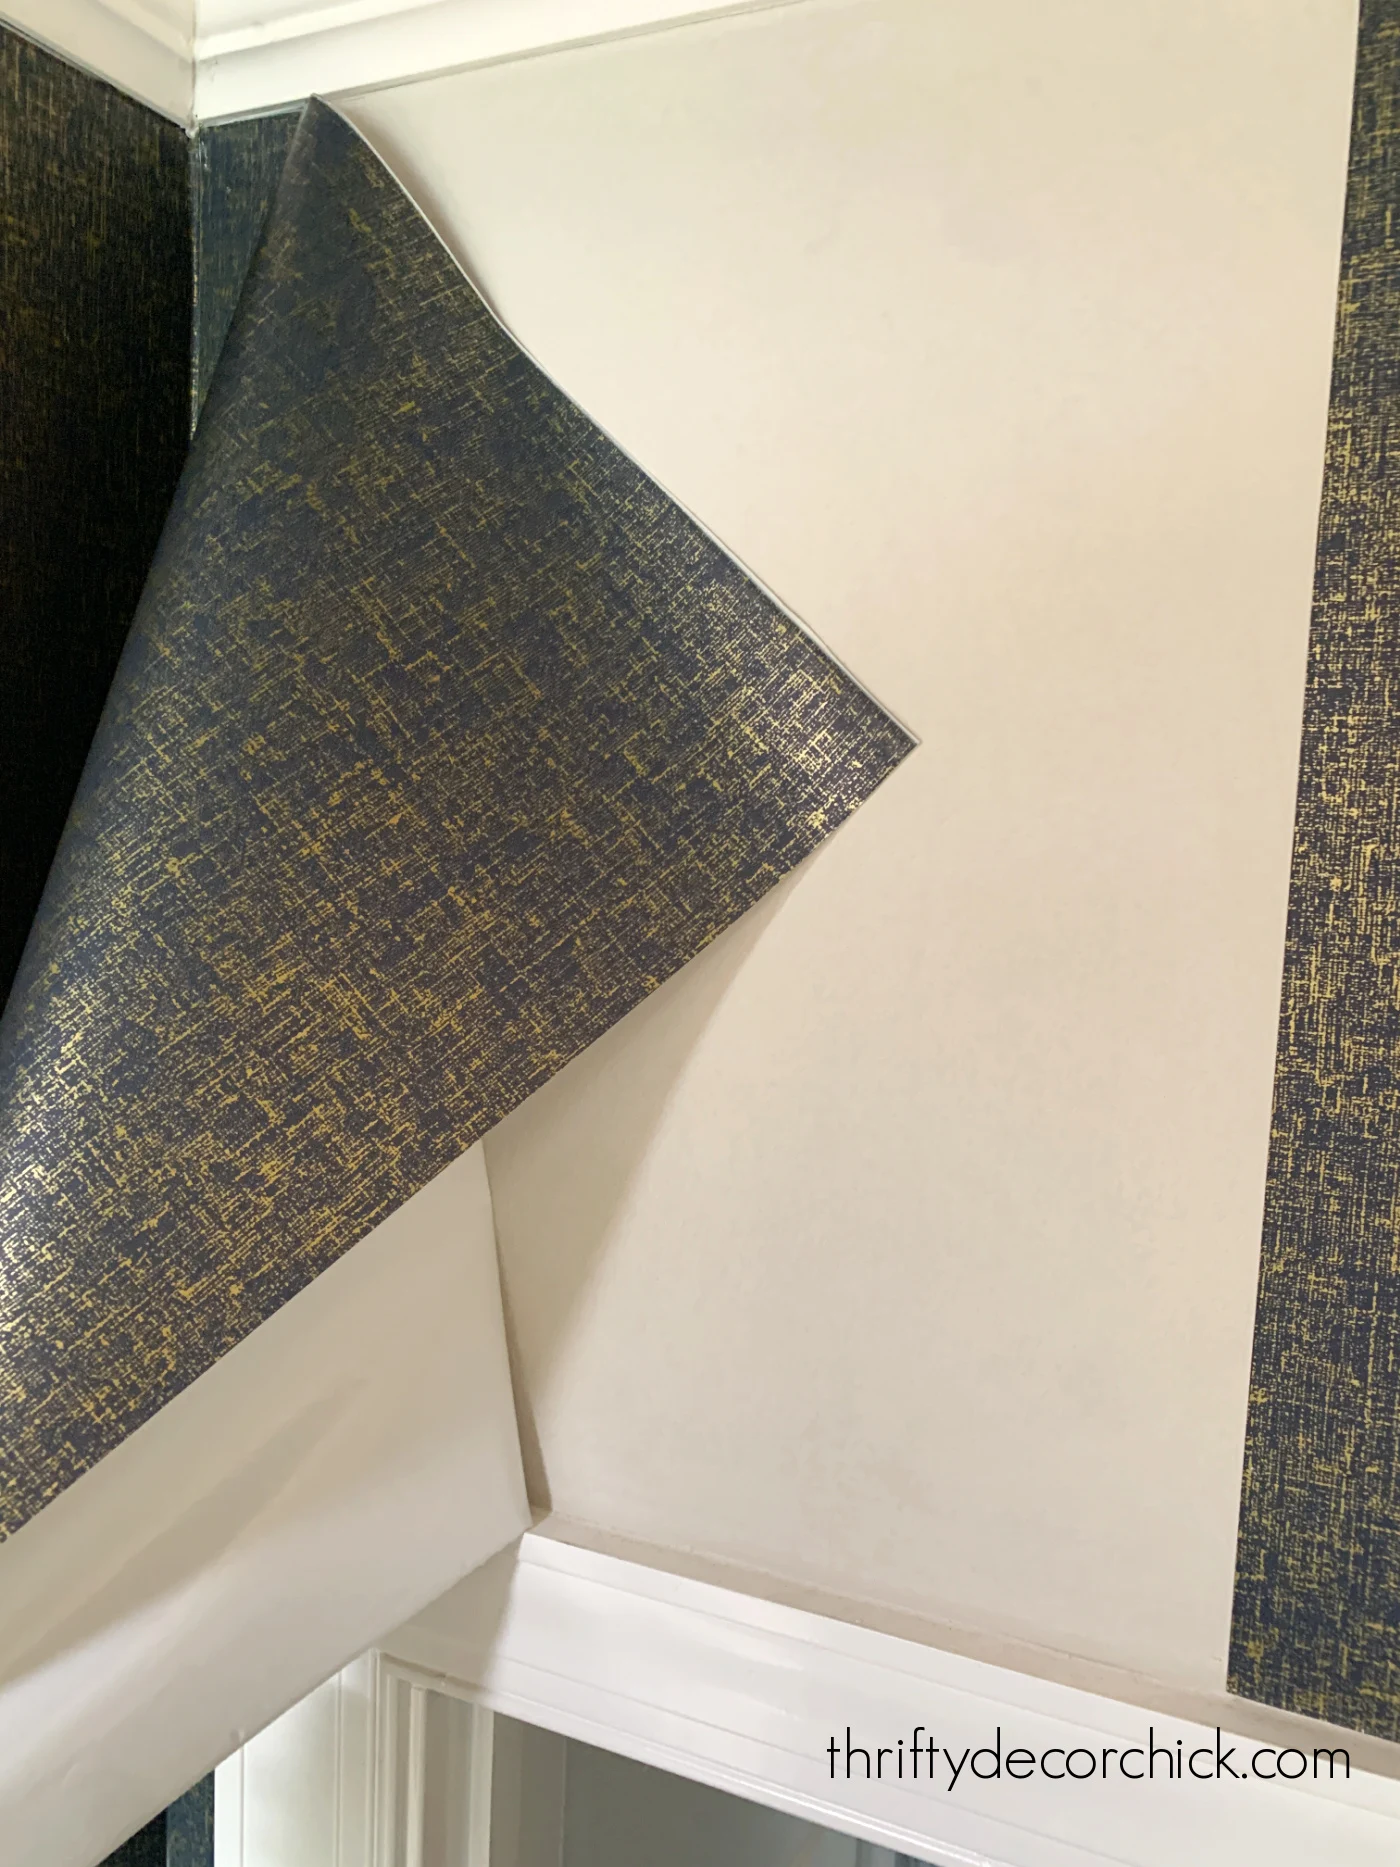
And I didn't have to baby this one either -- I moved pretty quickly. I got all of it down in about 30 minutes!
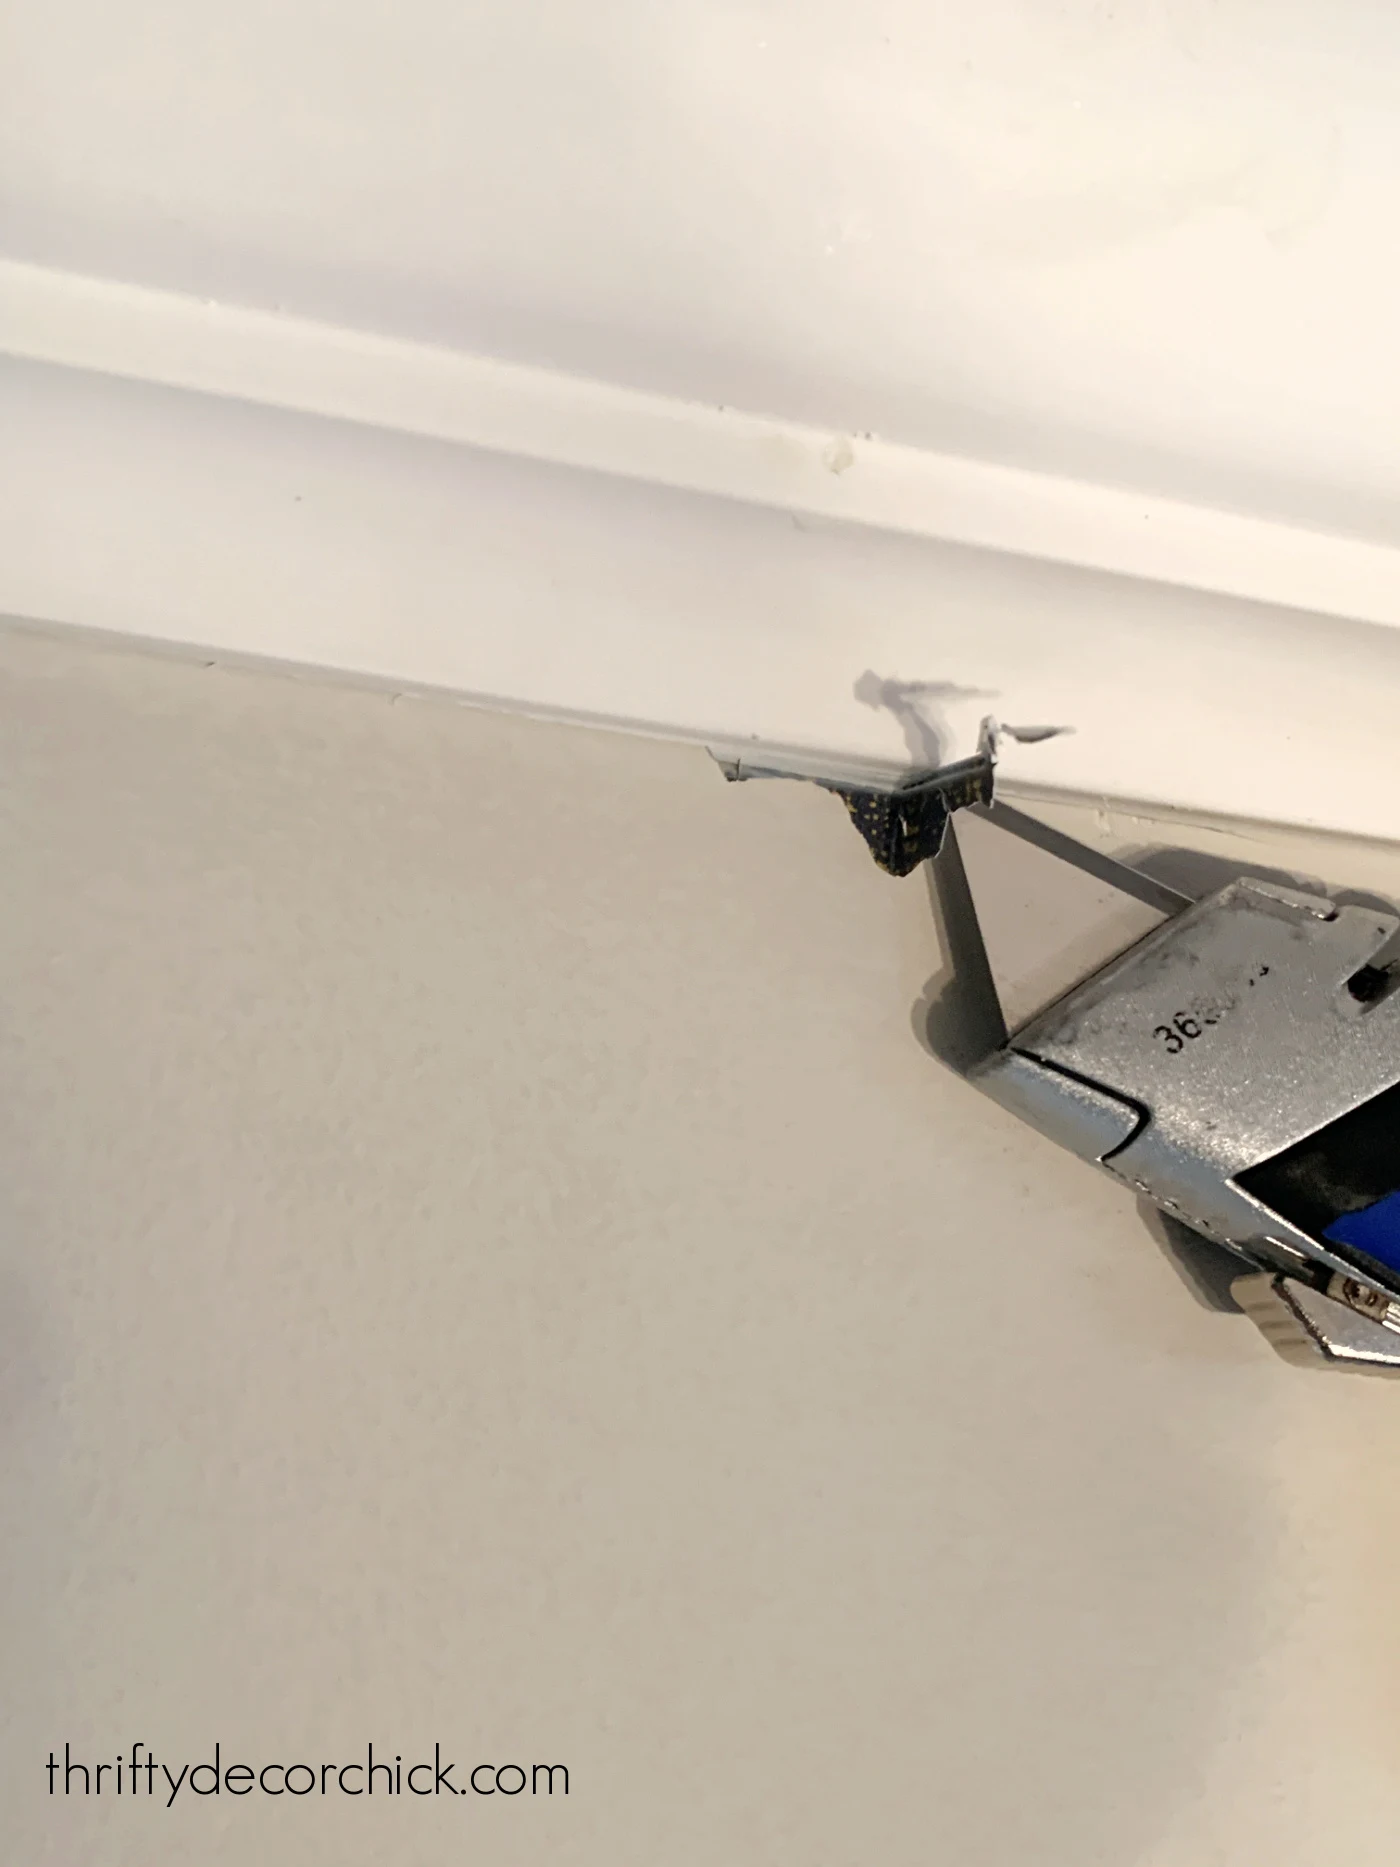
There were a few stragglers that didn't score well at the ceiling or base:
Just swipe again with the blade and then use it to grab the little piece from underneath:
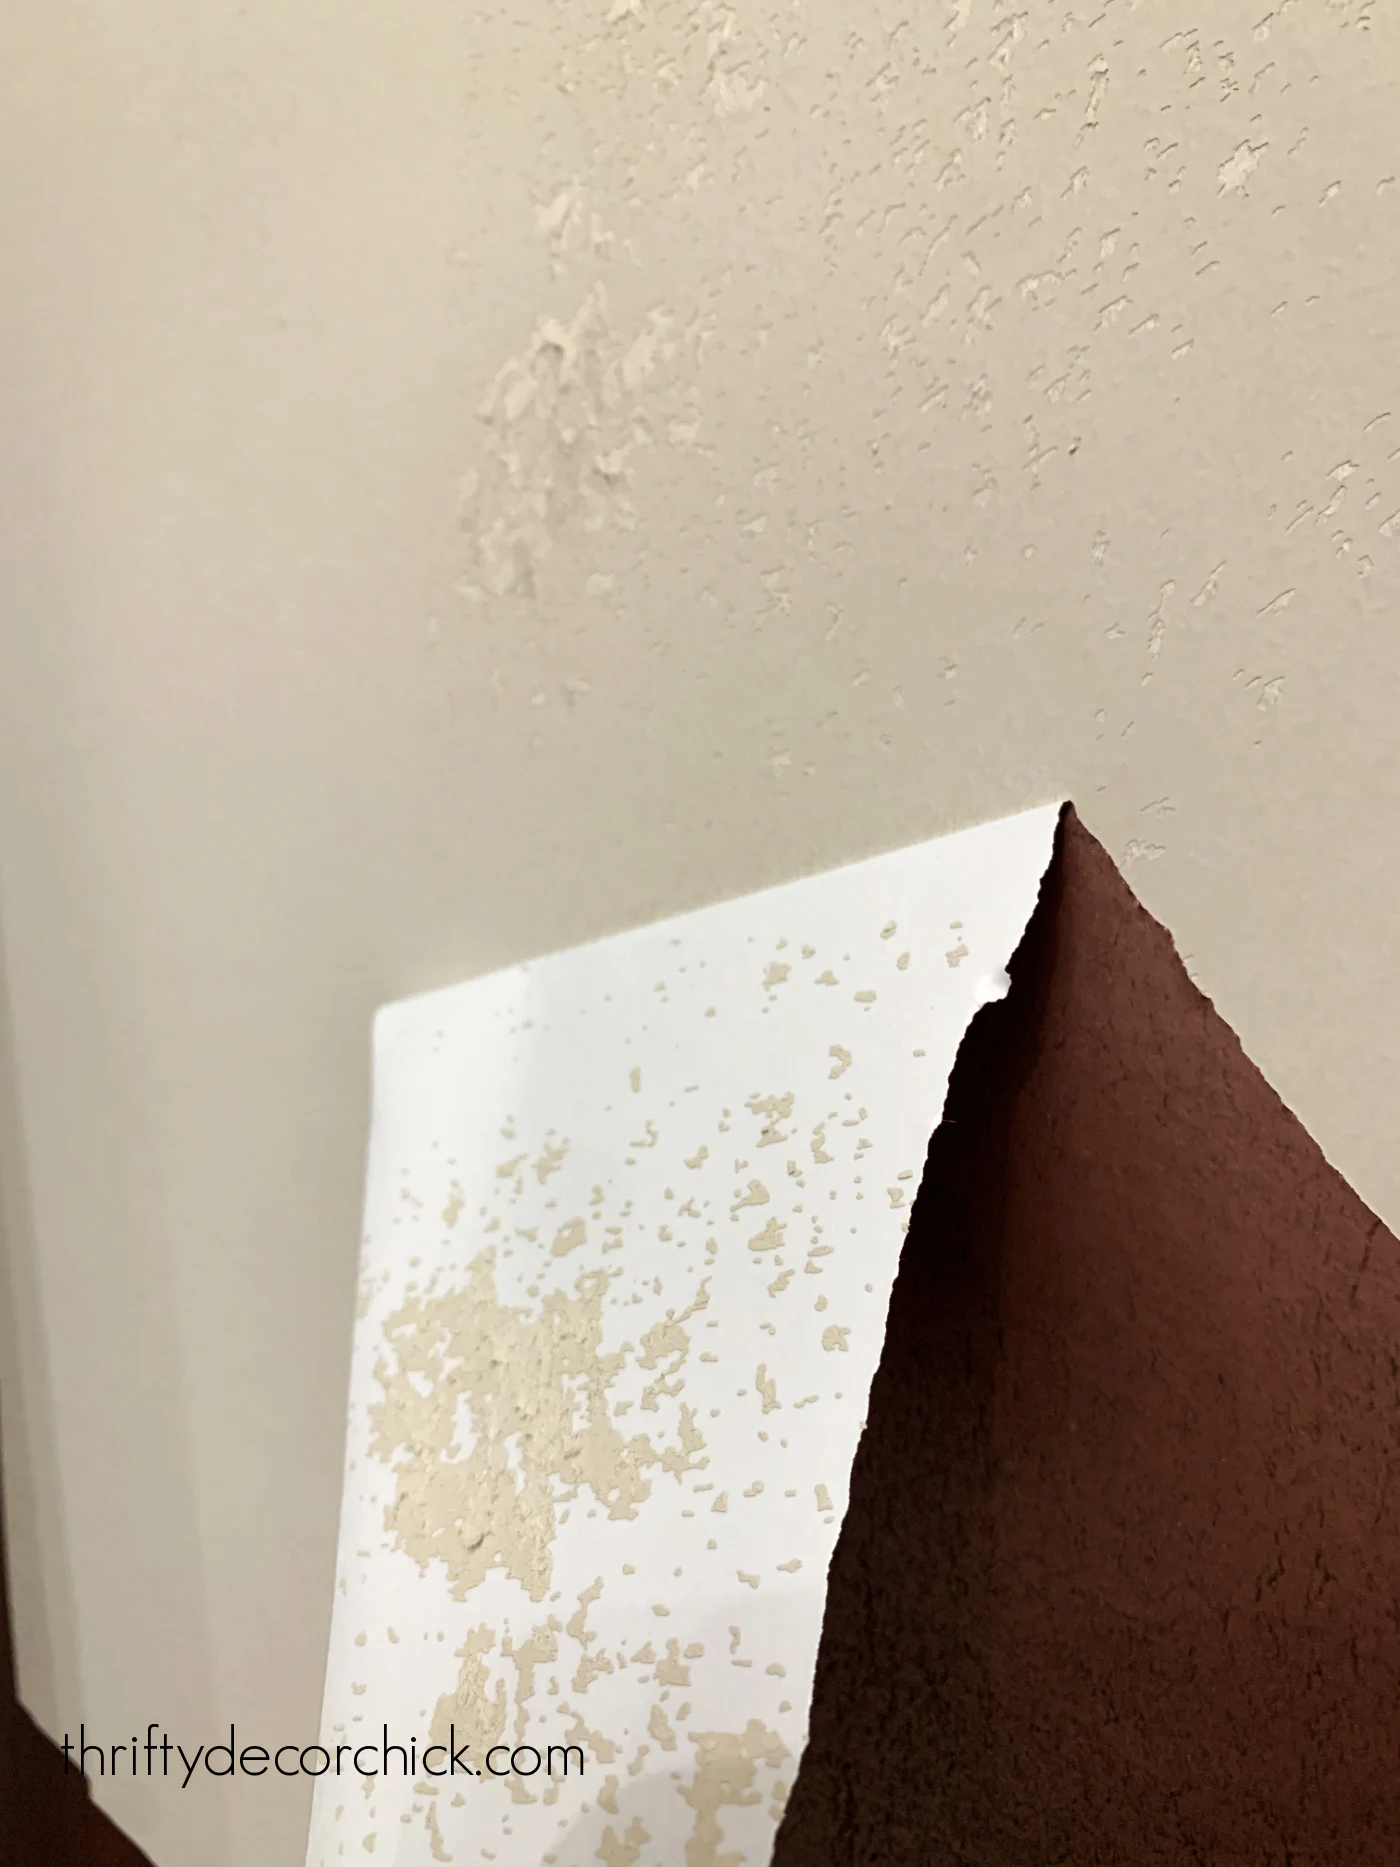
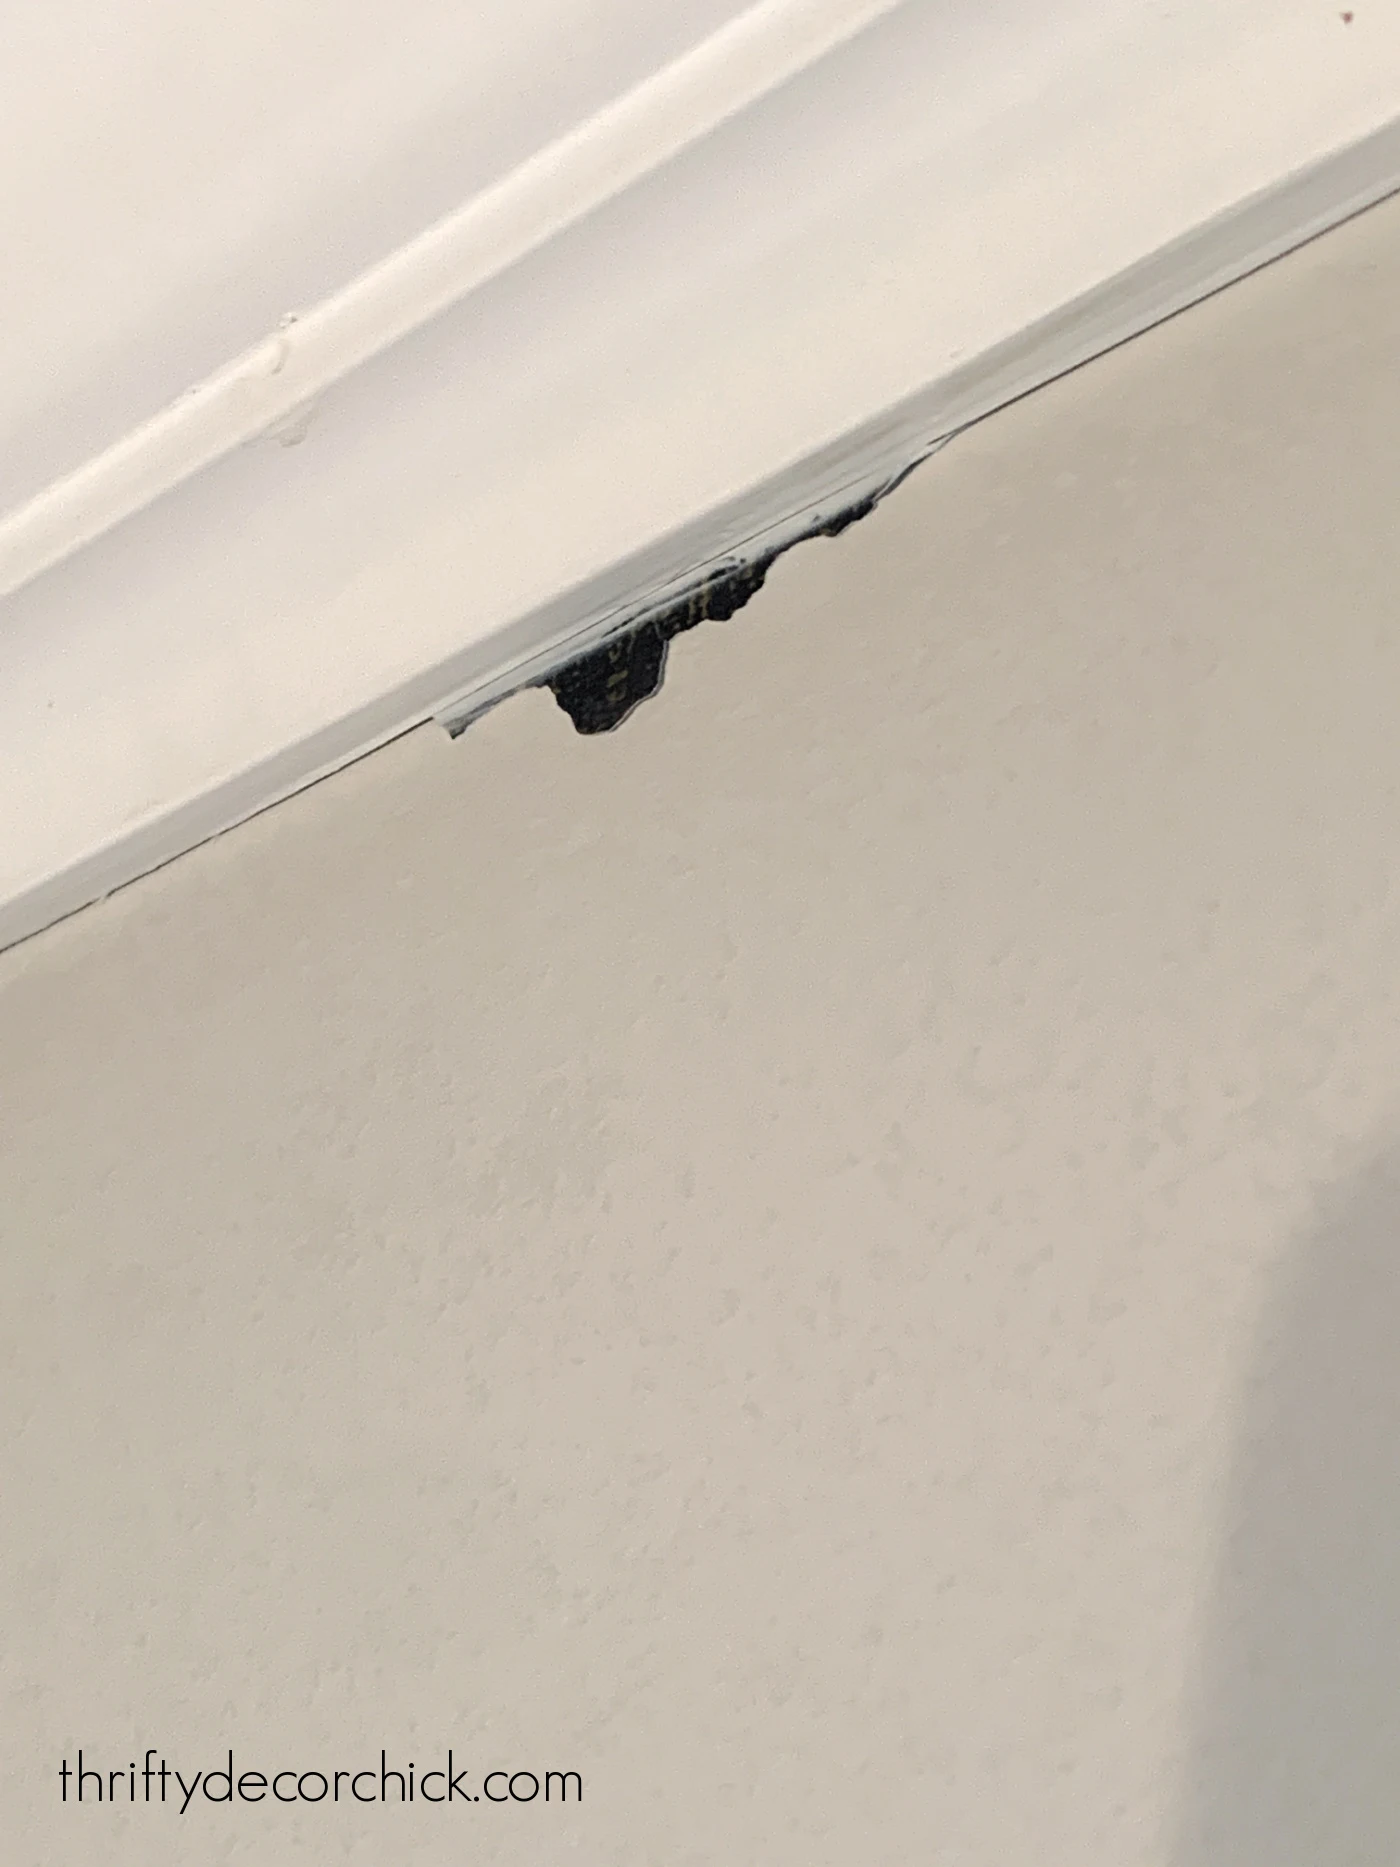
There was only one spot on the wall with any damage -- I don't know why these random spots tore away from the drywall:
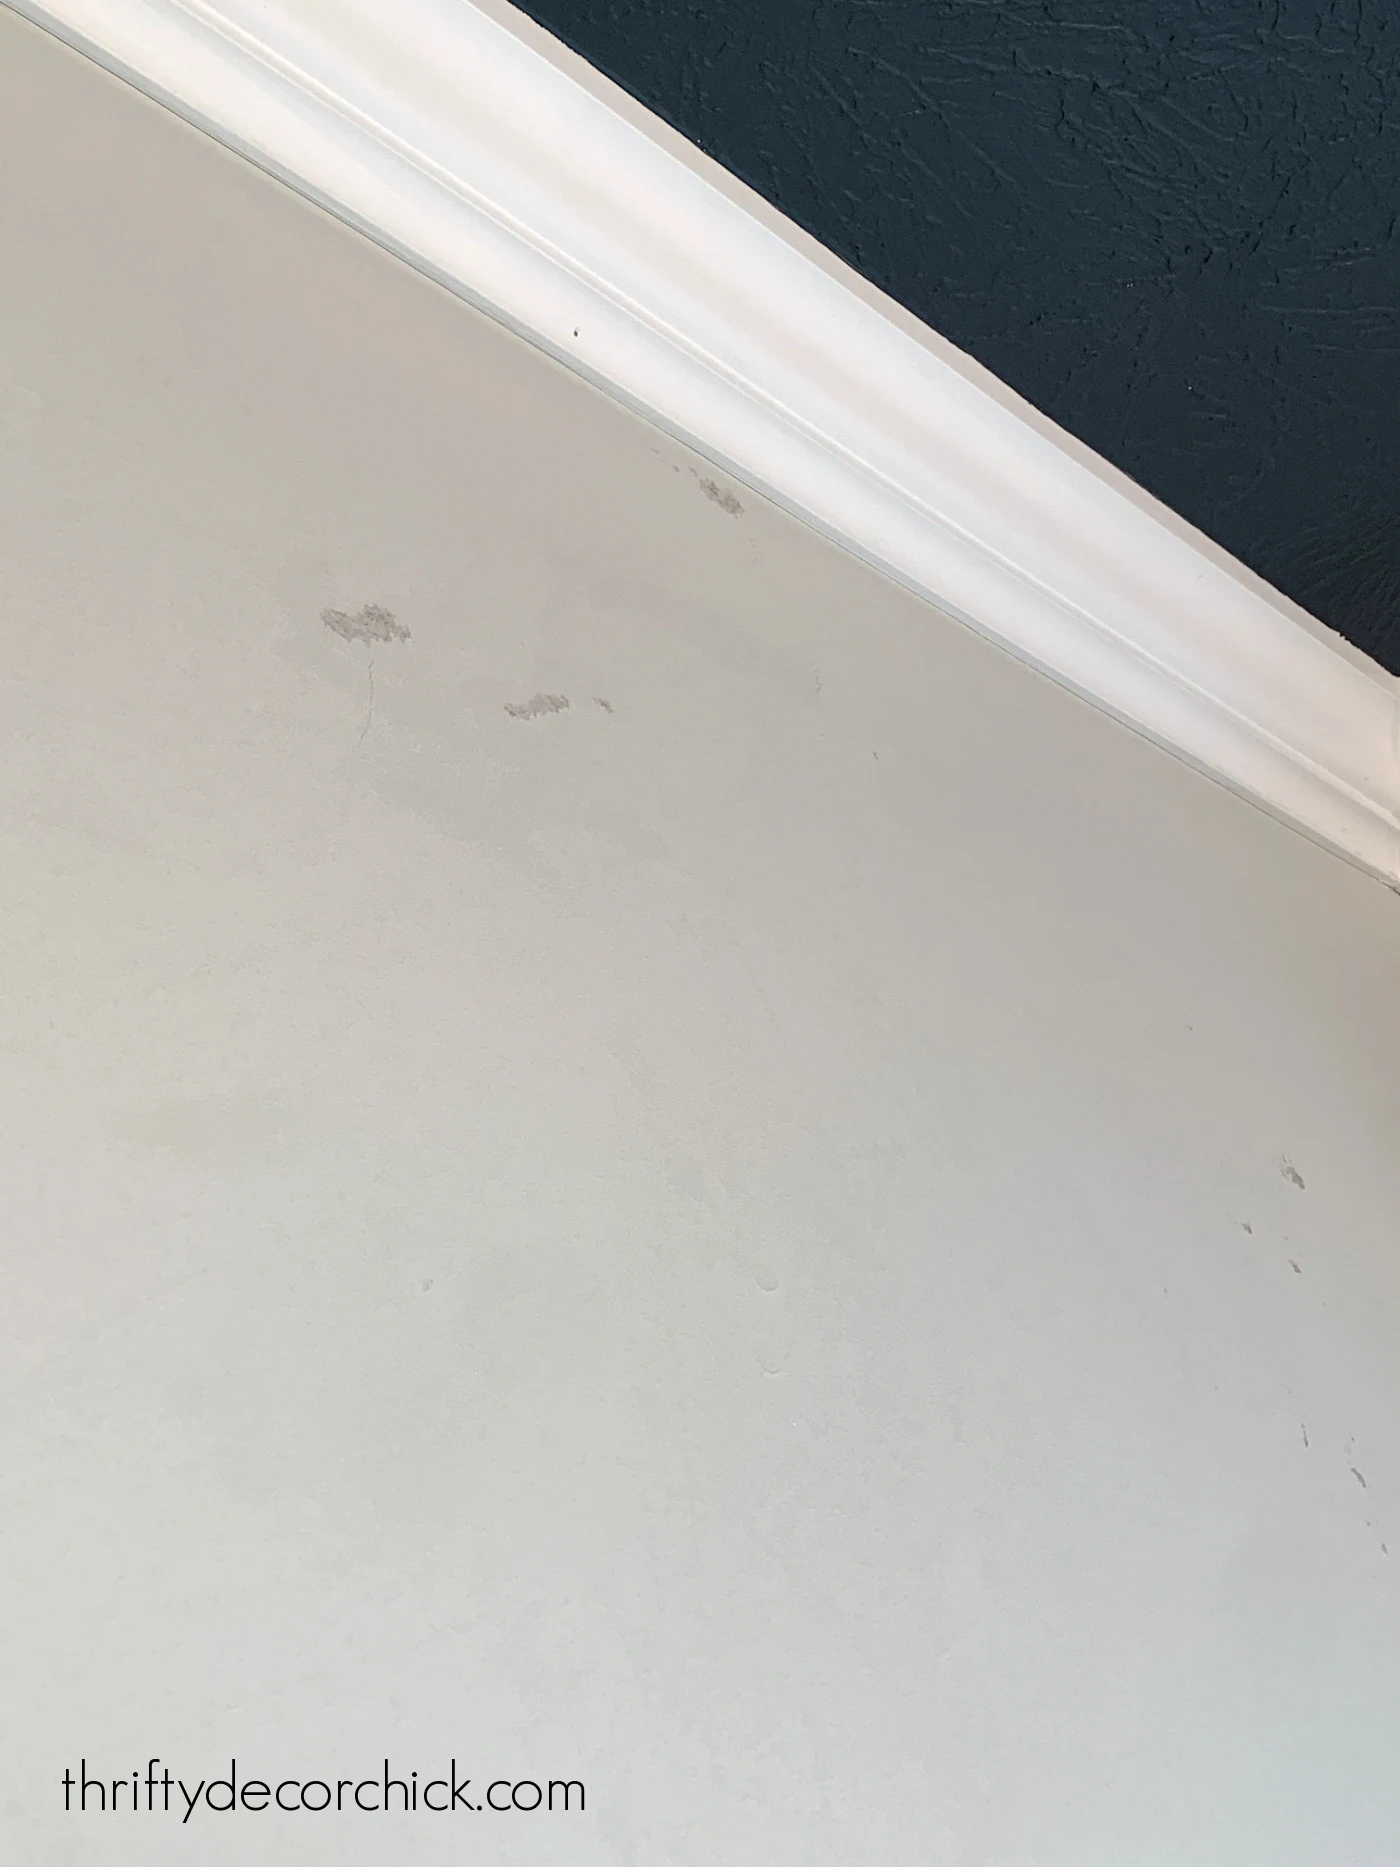
It's very minimal though, and not nearly as bad as in my closet!
Those small imperfections could be easily touched up, but I'm not worrying about it since I'm hanging new wallpaper. (Those minor spots won't be noticeable.)
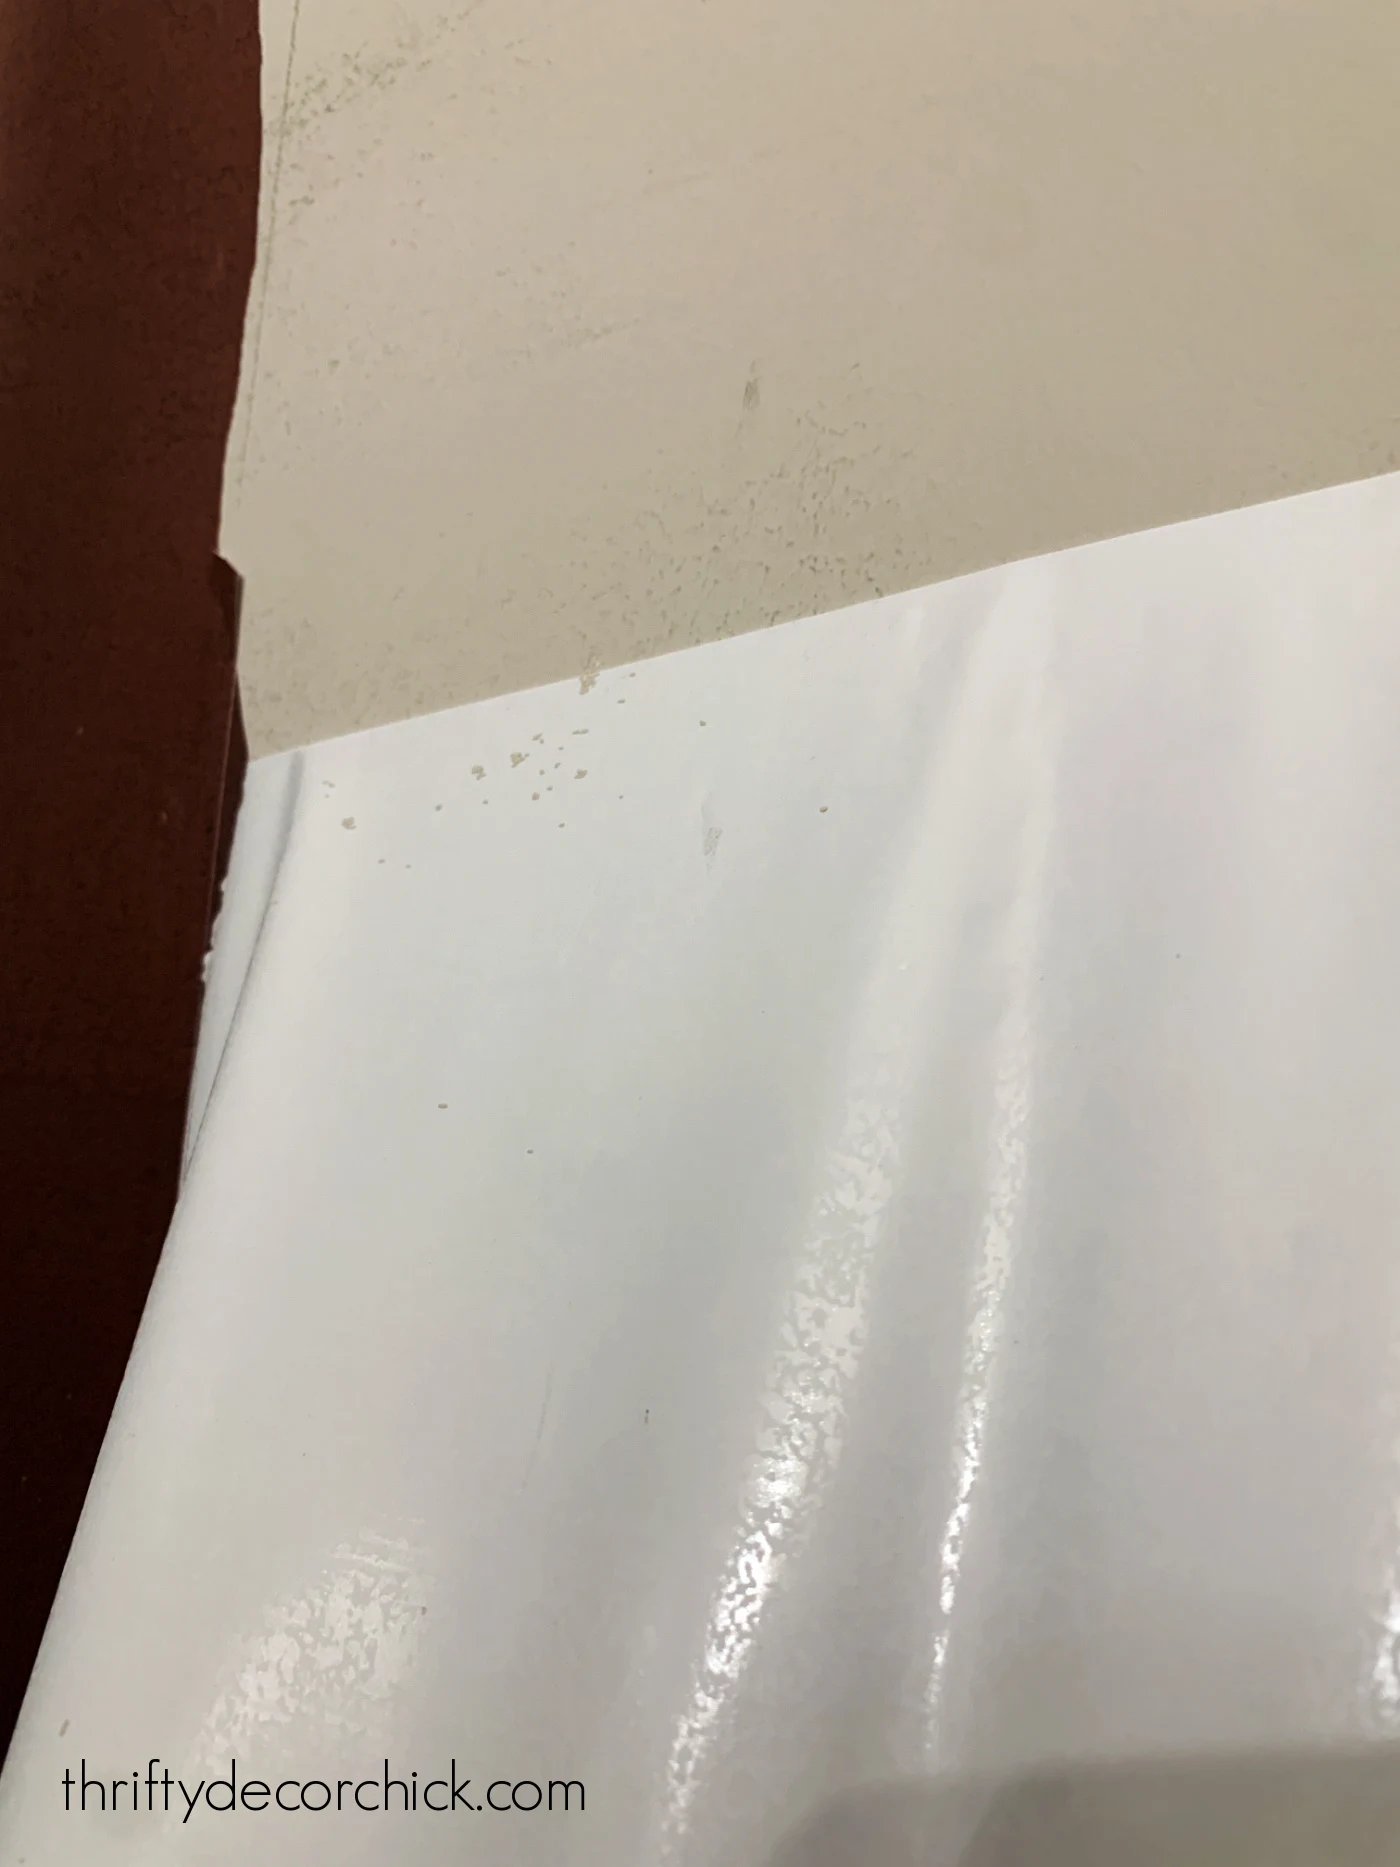
Here's the thing though -- there was an odd residue left ALL over the walls:
I guess I shouldn't say residue, because it's not tacky or sticky at all. But it looks dirty for sure. (The wallpaper is white on the sticky side so it's not color transfer.)
My only guess is that it is from rubbing the wallpaper to get the air bubbles out? I used my hands for the most part, but a smoothing tool may create the same look.
It's not super noticeable, but it's enough that I would want to repaint.
The bottom line is, you'll most likely need to repaint a wallpapered wall, even if there's no drywall damage.
I say this because you need to use those pencil lines (pictured above) to install the paper correctly. So you'll either be scrubbing that off or painting a fresh coat anyway.
Also, I like to paint the corners of the room the same color as the wallpaper, so again, I'd need to paint no matter what.
Both rooms where I removed the wallpaper had the exact same original paint, so the only difference I can figure is in the wallpaper.
And the room that had far more issues only recently had the wallpaper installed (it was only up for a few weeks). The bathroom paper has been up for years and was installed within months of the walls being painted.
The most important tip is to be patient as you start your wallpaper removal process! You'll be able to gauge how quickly you can move along as you work on it.
Even with the few minor issues, I still stand by this product -- it's such a GREAT way to add a custom touch for a space, for both renters and homeowners.
More on the replacements for these two wallpapers soon!
Have you removed any adhesive wallpaper in your home? I haven't tried to take down the pasted kind yet and hope I don't have to for a VERY long time! 😂
Never miss a post by signing up to get posts via email.
Good to know. Thank you for your insight.
ReplyDeleteThank you for this I've been wondering how the removal would be. Do the walls you've used this on have any texture? The instructions always say use on untextured walls but my wallboard has an orange peel texture...
ReplyDeleteI have not, but this wallpaper liner is supposed to do wonders covering textured walls for wallpaper.
DeleteLove the Cherry Blossom paper in your office. Do you remember where you got it?
ReplyDeleteYes! You can find it on Wayfair -- I shared a link to it in this post.
DeleteI have tried to remove my peel and stick wallpaper that has been up for about two years. It is the stickiest, hardest job I have done in quite a while. I thought for sure this would be an easy removal but nooooo!
ReplyDeleteThank you for the honest review & pictures! This was helpful information as I begin to decorate my home.
ReplyDeleteThe first time I used peel-n-stick wallpaper was in my laundry room and it was fantastic, although a pain to manuever if I didn't place it "just right." The 2nd time was in my 1/2 bath and it was a disaster. Definitely marred the walls when trying to readjust. The third time, I got 1/2 way through the room and gave up. I'm now trying to remove and it's painstakingly slow. It's pulling up the paint and some drywall. All in all, I won't do peel-n-stick again. Pre-pasted is definitely easier going on and coming off!
ReplyDelete