
Our Cozy Bedroom DIY and Organizing To Do List {DONE!}
April 20, 2022
Share this
Crossing off the to do list in our cozy bedroom with grasscloth wallpaper and dark gray walls.
I'm continuing my get it done week -- tackling my to do lists for a bunch of rooms in the house. I shared the DIY fixes and organizing I finished in our bathroom earlier this week.
I have less than ten things on my list for each space, but I'm determined to do them well...so it's taking me forever to finish up each room. 😂 I thought I'd get through a room a day, but that hasn't happened yet.
Oh well...the whole point of this is to get the little things off my list that have bugged me for months (and years!), so I want to do them right.
My next project was our bedroom:
After decluttering and organizing my husband's bathroom vanity and our linen closet earlier this week, we had a ton of travel toiletries and supplies to go through. My husband used to travel a considerable amount of the year, but like so many of us, that changed for a bit!
He would go through travel items SO fast before, but then the items sat for more than a year. We had some expired stuff I tossed and a few items we don't need had piled up, so I gathered all of those to take to a local shelter.
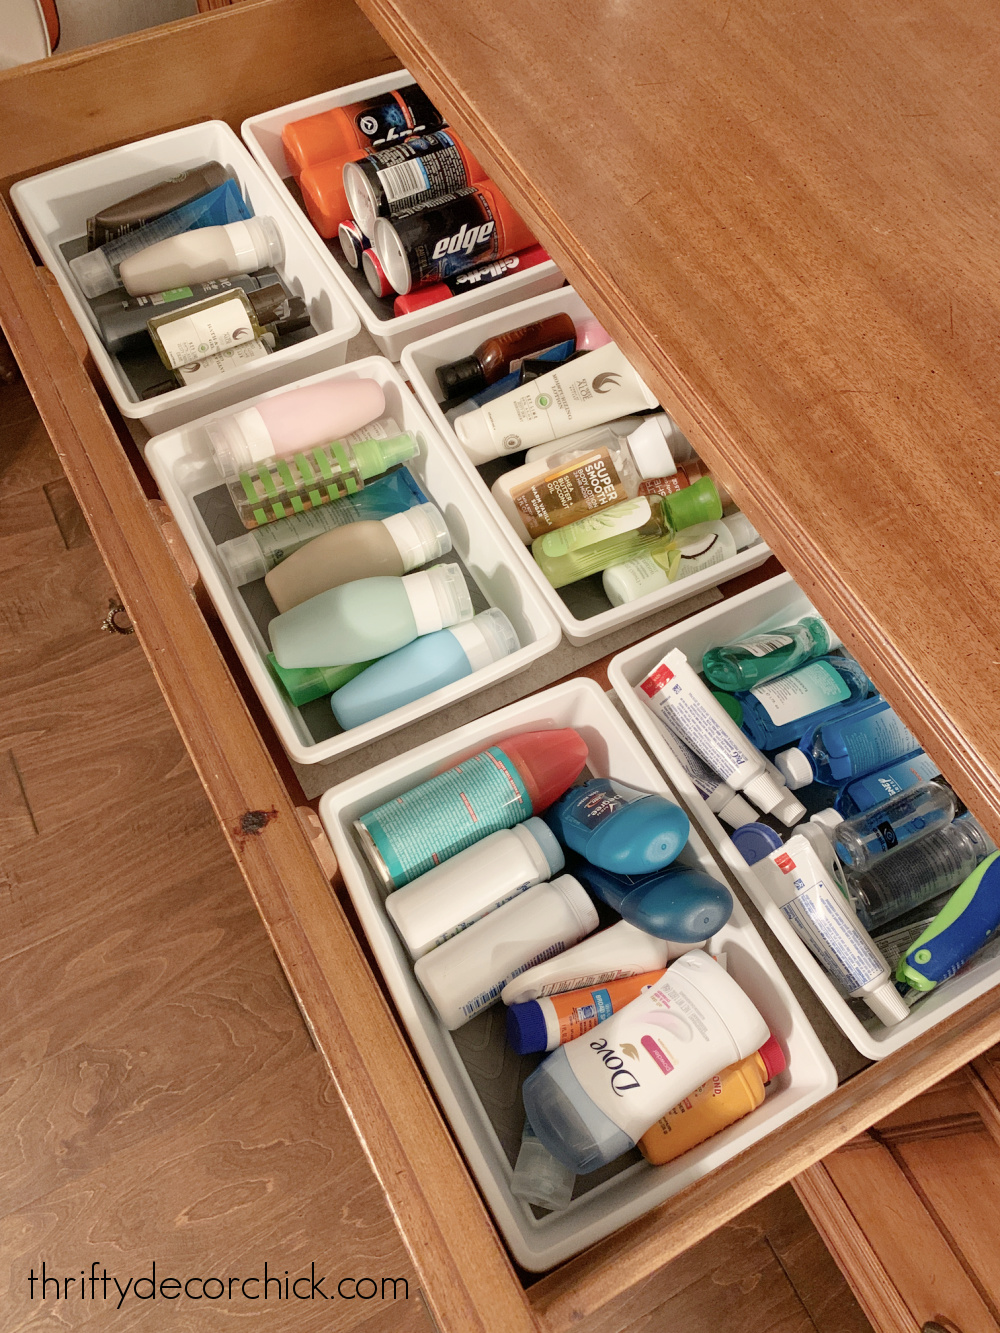
My husband is back to normal with travel now, and the drawers in our bedroom dresser hold everything he needs. I sorted like items into these plastic bins:
This post may contain affiliate links for your convenience.
See my policies and disclosure page for more information.
I sorted lotion, shampoo and conditioner, body wash, contact solution, deodorant and more in those bins. The other drawers hold all of our travel needs like bags, neck pillows and more.
It's SO convenient to have everything we need in one spot!
I'm determined to whittle at least the lotion, shower gel and hair items down to only refillable containers. It won't take long for all of us to use these up this year.
The next couple of items on my list were DIY, and I was kicking myself for not taking care of them years ago! When I added the grasscloth wallpaper and simple chair rail in here, I forgot to finish up a little bitty part in the corner by the door trim:

That one inch piece there and the quarter round below were a breeze to install -- it's the finishing work that takes forever. I had to lug out the nail gun, hole filler, painter's tape, caulk gun and paint to complete that little bit of molding. Sheesh!
When I "completed" the walls in this room a couple years ago, I ended at the space behind our bed. I just wanted to get the room back together and remember telling myself I'd paint behind there later...and never did:

I forgot about it until a few months ago when we were putting our new bed frame together.
This is one of those things that no one would ever notice...but I knew it was there. And I hate leaving spots undone like this, it's just silly to do all that work and not finish it up!
So we pulled out the bed and I gave that section of the wall a couple coats of the gray paint color -- Westchester Gray by Sherwin-Williams:

It wasn't quite dry there, but you get the idea. :)
When I got the bed back in place, it was time to finally secure our pretty rug to the hardwoods. It lays pretty flat, but I've tripped on the corners a couple times lately.
I used these sticky rug grippers I told you about last year -- they work GREAT:

Colby approves. :) You can read more about the pros and cons of these grippers for hardwoods here.
It comes with eight in a package, but I make it go further because we really only need one gripper per corner on most rugs.
While I was waiting on the paint to dry, I got to work repotting our big fiddle leaf in the corner:

What you can't see in that before pic was that the tallest leaves on the plant were on a branch that would not stay up on its own. The few leaves made it top heavy, so it would fall and almost break.
For awhile I was supporting it with fishing wire from the ceiling! 😄

No one could see it...we didn't even notice it! It was a great solution, but the plant was not doing well in that corner overall.
Fiddles need a lot of light (and not much else -- check out my fiddle leaf growing tips here!) and it was not happy with too little sun.
I pruned that leggy branch and replanted the whole plant, and it already looks a million times better. The bottom of the plant was doing way better than the top!
I switched our armchair that was in front of the windows over to the corner, so Fiddle will be able to enjoy more light:
 |
| Our chandelier can be found here. (Ours is from their outlet store.) |
I've wanted to try this layout for awhile, so we'll see how we like it. We rarely watch TV from the chair -- we're usually reading or watching an iPad, so I think it will work out well.
It's feeling so cozy with the lamp in that corner!:

As you can tell, Colby rarely leaves my side. :)
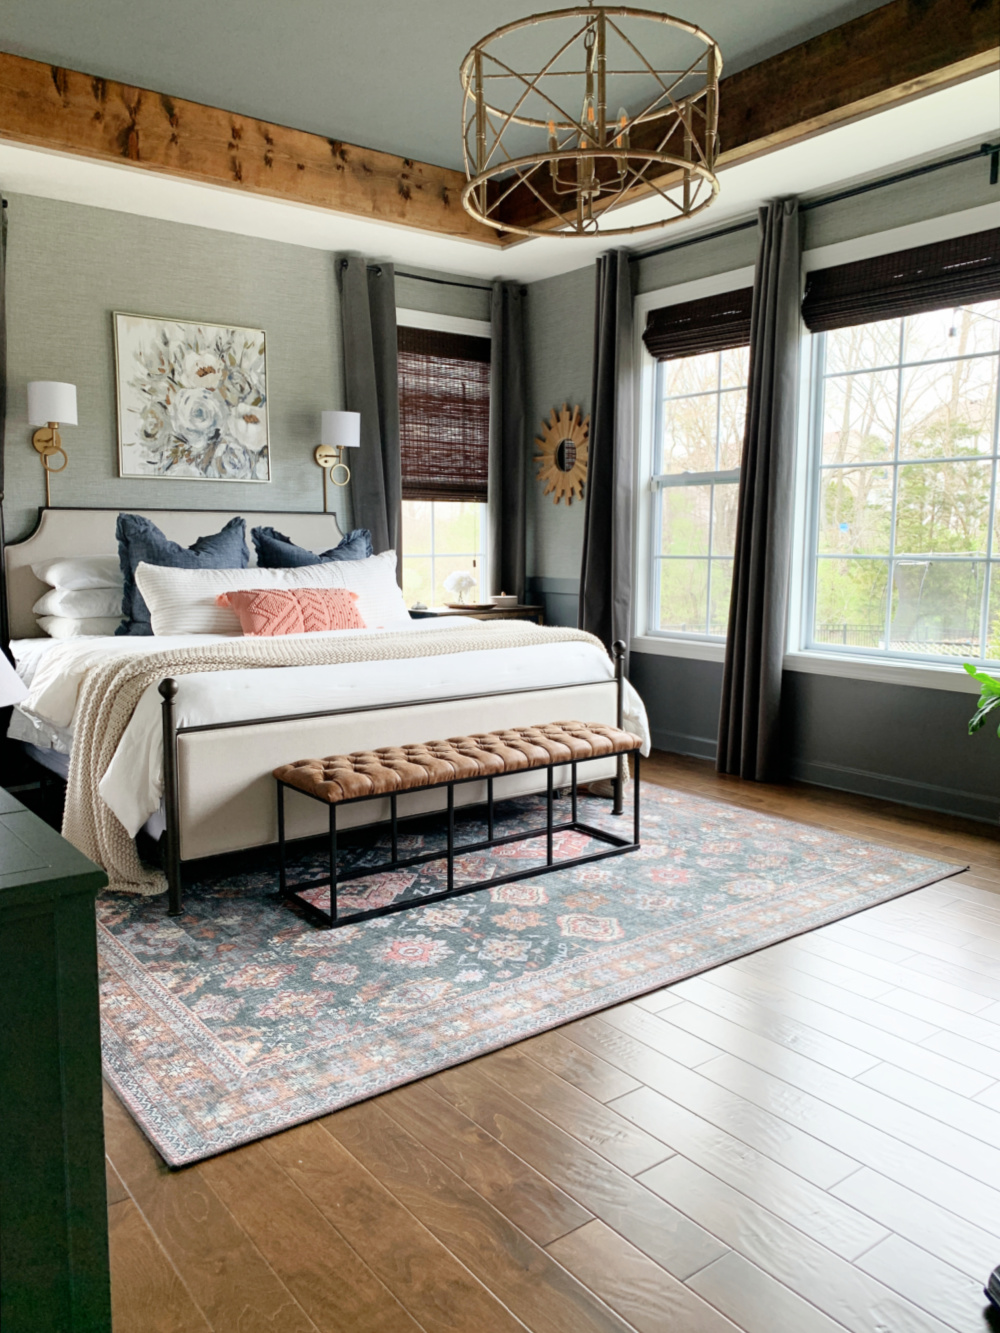
We love our cozy bedroom -- it has a warm, rustic feel with the grasscloth walls and the wood "beams" around the tray ceiling:

But also feels bright and pretty with our light bedding and ALL of those beautiful windows!:
|
| Read more about our colorful rug here. |
That's another room crossed off my long list! Most people would never notice these small DIY and organizing projects, but there's something about getting things done that makes a space feel refreshed and new.
I love it! I'm so glad I've forced myself to tackle these this week! Have I inspired you to work on your list? ;) I hope to share a couple more spaces with you this week...if I could start moving faster than a sloth.
Never miss a post by signing up to get posts via email.
Comments