
How to Use a Paint Sprayer for a Bold Furniture Makeover
April 12, 2022
Share this
Using a paint sprayer for detailed furniture painting.
I broke out the paint sprayer for the first time in YEARS and painted a
detailed bookcase in minutes!
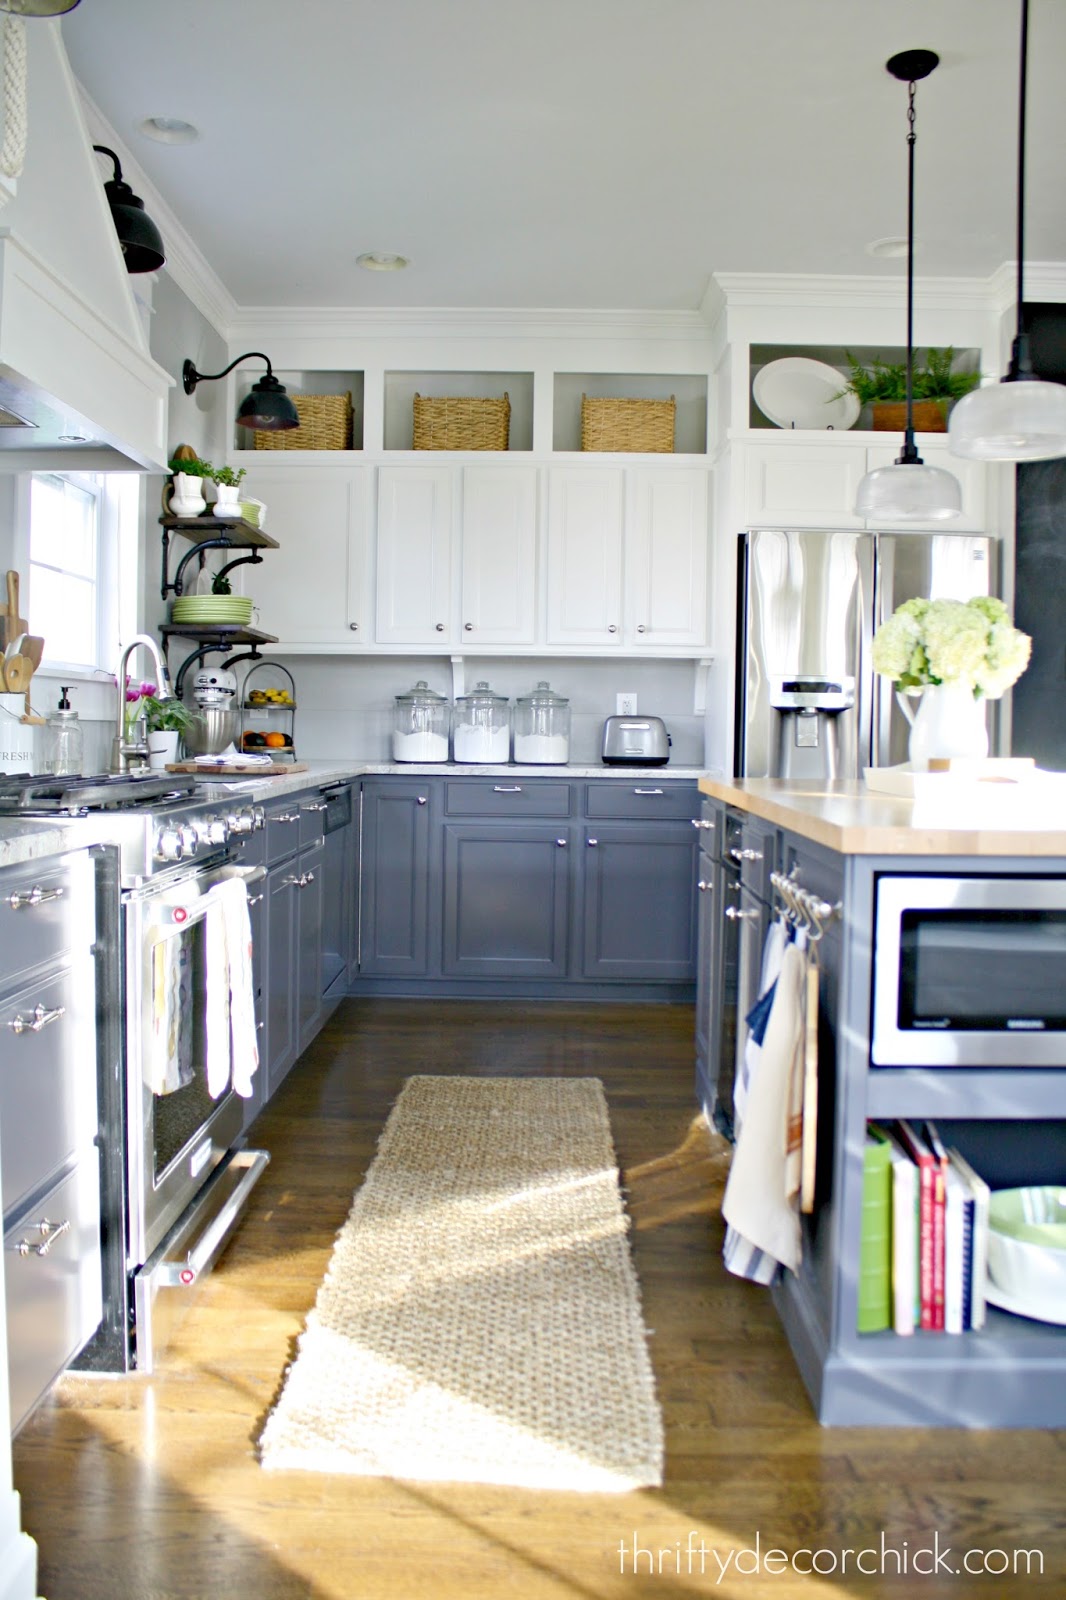
If you've been reading TDC for awhile, you know that years back I gave the
cabinets in our old kitchen a professional looking paint job with a paint
sprayer:
This post may contain affiliate links for
your convenience.
See my policies and disclosure page for more information.
I shared
the paint sprayer I used for the cabinets
and also the
step-by-step cabinet painting process
if you're interested in checking those out!
The cabinets looked FABULOUS, and as far as I can tell (friends of ours bought
that house and we visit frequently), they still do! I haven't inspected them
up close, but the whole kitchen still looks so good!
I did that makeover SEVEN years ago, can you believe it? And can you believe I
haven't picked up the paint sprayer since then? This was partly because I lost
pieces of my sprayer in the move (a number of my tools and home decor items
went missing during the process).
And also because I had done enough spraying for that kitchen to last me about
seven years. ;)
But it was time to do it again, because the latest item I wanted to tackle was
way too detailed to attempt with a paint brush. I got a new sprayer a few
weeks ago, and this one is very similar to the one I shared years ago.
This
Graco 360 paint sprayer
is even better, because it allows you to reverse the spray to get rid of any
clogs:
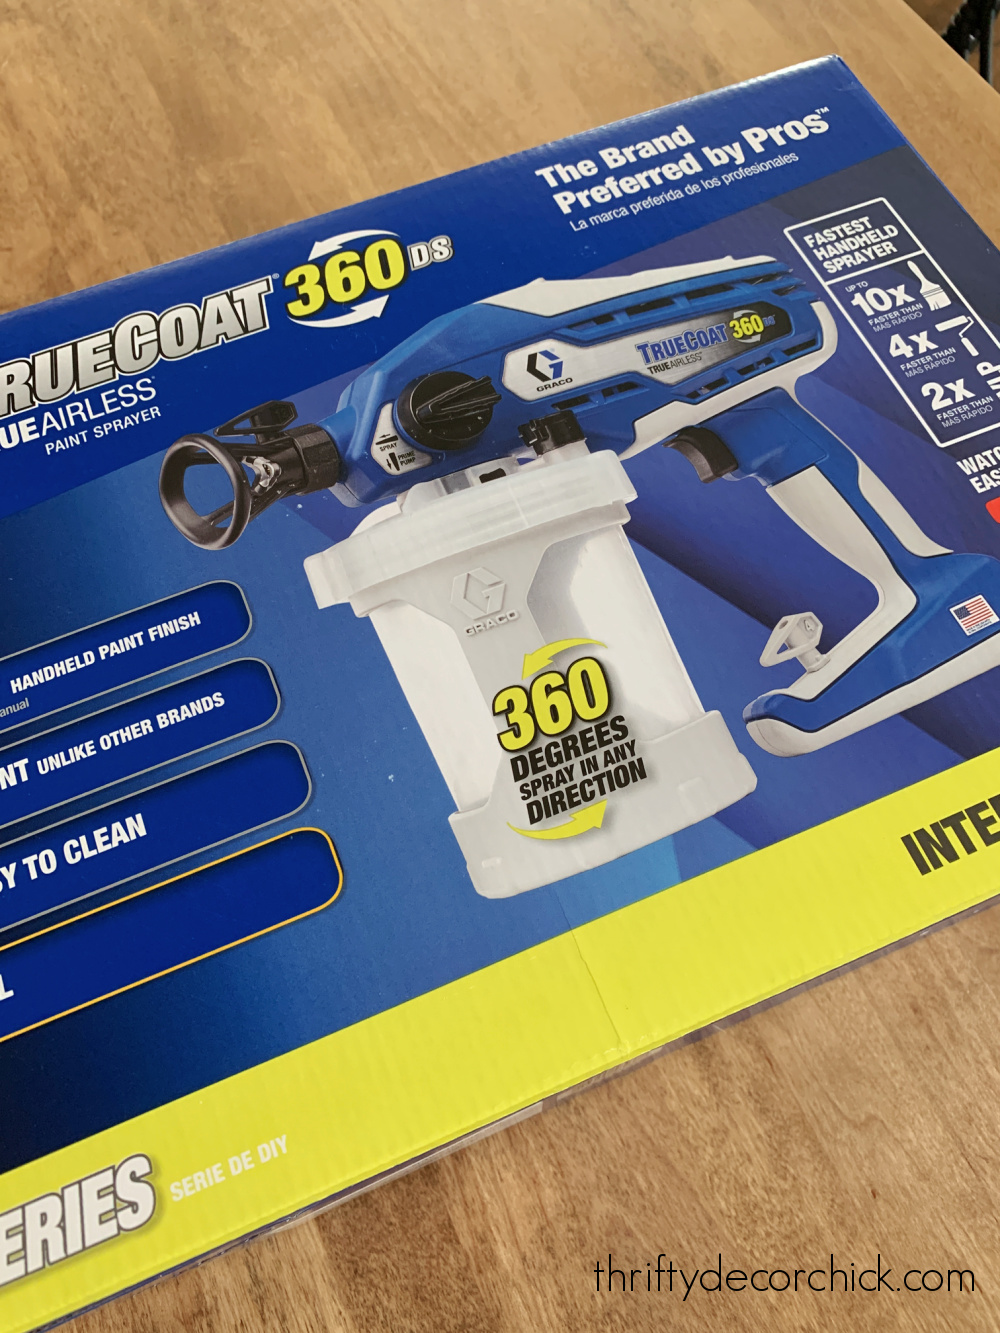
I don't think my old one did that, and this option was GREAT because I was
using years old paint that was a bit thicker. I also LOVE that you don't have
to water down the paint -- it is so much quicker to grab and get started when
you don't have to measure out the paint and water.
We have a spot by the large, tall windows in our family room that has bugged
me for years. First I had a little console table there, then I
painted my vintage table green
and have had that there for years.
I love that little table, but I really wanted something taller to take up the
visual space. I've had a search for "curio cabinet" saved in Facebook
Marketplace for about eight months...but nothing I found was right. Everything
was too short, too wide or too expensive.
One day I got an idea to do a little switcheroo with the vintage cabinet and a
tall open shelving unit
that was in our bedroom. We had it in our last bedroom as well:

I never move furniture around, so when I do and it works well, I'm giddy!
Because I loved the pop of green in that spot before, I decided to paint
this the same color. I also had an idea in mind to make it look more like a
curio cabinet instead of an open bookcase.
But as you can see, this would have been a major pain to paint by hand! So
much detail and all those nooks and crannies to deal with. I knew I would
need to use a sprayer instead.
First up, I had to prep it for painting! A good cleaning is the most
important step when painting furniture, in my opinion. I took the shelves
off and gave it all a good cleaning:

SO gross! I don't think those shelves had ever been taken off! Blech.
I also wiped down all those cut outs on the sides to get any dust and grime
off:

If you look closely, you can see that it had a paint treatment that I
didn't care for -- it was a brown wash of some kind that made the whole
thing look dirty.
Plus, it matched our Agreeable Gray wall color almost exactly, so I knew it
needed a deeper color. :)
Here are a few tips on painting furniture...
- A quick sanding before painting is never a bad idea, but this bookcase wasn't super shiny so I knew the cleaning would be enough.
- I rarely prime furniture -- I've only had a few instances where I had to touch up paint later. Primer is an absolute must with kitchen cabinets that get a lot of wear and tear, but with pieces like this I usually go straight to paint.
- Knock down any rough texture or splatter with sandpaper, after the paint dries.
We took it outside to spray it on the grass -- I laid out a drop cloth and
we put the bookcase flat on it's back to start. Here's a quick video so you
can see how easy it is to use a paint sprayer!
It makes quick work of it, even with all of those angles.
As I mentioned, my paint was a few years old and thick...so the nozzle did
get clogged a couple times (the reverse spray option made quick work of
getting rid of those!) and I had a little bit of splatter. But that's the
great part about using a good, quality paint...when it dried down I could
barely see where any of the splatter spots were!:

I always use Sherwin-Williams, but Benjamin Moore is great too. When it
comes to DIY expenses, spending more on paint 100 percent worth it!
I painted this in the color Vintage Vogue, the same color I used on my
office built ins:

I LOVED how it looked in this deep mossy green color! The open back had been
throwing me from the beginning, so I figured I could make it look more like
the cabinet I was searching for by closing up the back of it.
I used two thin, 1/4 inch plywood pieces and painted them to match, then
nailed them to the back of the bookcase and the shelves.
The $22 wood panel gave it the presence I was looking for all this time!:

I could always add a wallpaper to the back of it as well, but I wanted
something simple with the detailed sides.
I left one shelf out so I could put a lamp back over in this spot, and we
love it! The cut outs cast a really pretty shadow at night.

I LOVE love love the deep green with our dark blue accent color
(Cyberspace by SW) in the dining area and family room. These jewel tones
bring so much warmth to our home, but don't make it feel dark or
heavy.
We store some of our smaller games and card games here so we have easy
access at the dining table. I had these fabric covered boxes in the
basement, but they work way better up here:

The bottom drawer holds some of the bigger games we play most often.
I kept the other decor very simple, since we have enough going on in the two
rooms nearby.
I can easily take the backing off of the bookcase and I still have the third
shelf so I can change it up later if needed. I like having the low lamp
light in this spot so this paint redo worked out perfectly!
I moved the little table that was here before to the spot where this stood
in our bedroom, and it's perfect there! We needed less height there, so it
was a great switch.
I like how the taller cabinet looks next to our big windows...this spot
needed something more substantial!:

All it cost was $22 for the panel of wood and a couple hours of my time!
I'm glad to have a paint sprayer again...I have a project in mind that I've
been putting off for years that I hope to tackle with it this year.
Please don't be intimidated by this painting tool! It comes assembled and
ready to go and they have online videos that explain the operating
details.
A sprayer really opens up so many DIY possibilities and gives a beautiful
finish that is hard to get painting by hand.
Never miss a post by signing up to
get posts via email.
That looks AMAZING!!
ReplyDeleteThank you for this!! I really, really want to do our kitchen cabinets. They are the same as what you had in your old kitchen but I am so, so nervous. I decided to start with our bathroom cabinets (which are the same) but am not happy with the brush or roller treatments that I have used. I had already told my husband that if we are going to do the kitchen we would have to get a sprayer. I appreciate your recommendation and encouragement that we “can do it” :)
ReplyDeleteLOVE the green bookcase and what you’ve done with it in your space. Gorgeous.
This looks so easy! Is the sprayer easy to clean?
ReplyDeleteIt's not too bad! You put water or a cleaning solution in and spray like you would the paint. It takes a few minutes but it 100 percent worth the time it saves you painting. :)
DeleteI have that same sprayer and LOVE it! Just finished my laundry room cabinets and spraying them saved so much time over rolling/brushing like I have in the past.
ReplyDeleteThat bookshelf looks like it was always meant to be there!
Wow that turned out fantastic! I need to get a sprayer, but didn't know which one. Glad to see your real life outcome with the Graco.
ReplyDeleteBeautiful. I need to spray a very expensive detailed glass cabinet a navy with some sheen. It has small wood fine details and can't be painted with a roller and brush because of this. Question any issues with drips or fine details with this sprayer? Any advise on tenting a spray station to do it in? I assume you sprayed outside or in a garage? The piece I have is very heavy and can't be moved much without professional help so trying to figure out how to do this all and not destroy anything in the house and breathe is a challenge. Plus I am in a year round humid, buggy climate and outside isn't an option ever. The garage is possible if I do it with doors shut and at a time of year when it is cooler in the 60's. Still will have humidity but temp will be cooler. Any advise?
ReplyDeleteHi Carly! I have a similar dilemma and found this suggestion online. Maybe it can help you: https://www.1915house.com/spray-paint-furniture-indoors/
DeleteYes, you can buy a spraying tent to use in the garage! There is some overspray so that would be helpful for sure (if you can't do it outside).
Delete