
Easy DIY Acrylic Photo Ornaments to Preserve Memories
December 15, 2022
Share this
How to make easy DIY acrylic photo ornaments for your tree or decor.
These sweet acrylic ornaments were so easy to make, and they remind of us of some of our favorite memories from this year.
We'll have them to look back at for years!
I LOVE adding sentimental ornaments to the tree every year. I always purchase one for our son and that marks something he loves at that age.
This year his was churro ornament -- his favorite treat when we're at Disney. 😂 (He's loved them since our first trip, and now he's 16!)
If you've been reading here for a long time, you might remember the skinny photo Christmas tree I put up in our bedroom nearly ten years ago:

I've since added those photos to our photo albums, and I wanted to create some different ornaments that would hold up over time.
I found these flat, round acrylic ornaments in the holiday craft section at Hobby Lobby a few weeks ago and knew I could do something fun with them!:

This post may contain affiliate links for your convenience.
I may earn a small commission when you make a purchase through links.
See my policies and disclosure page for more information.
I had a plan in mind that changed up a bit during the process, but overall this was still a very easy Christmas craft!
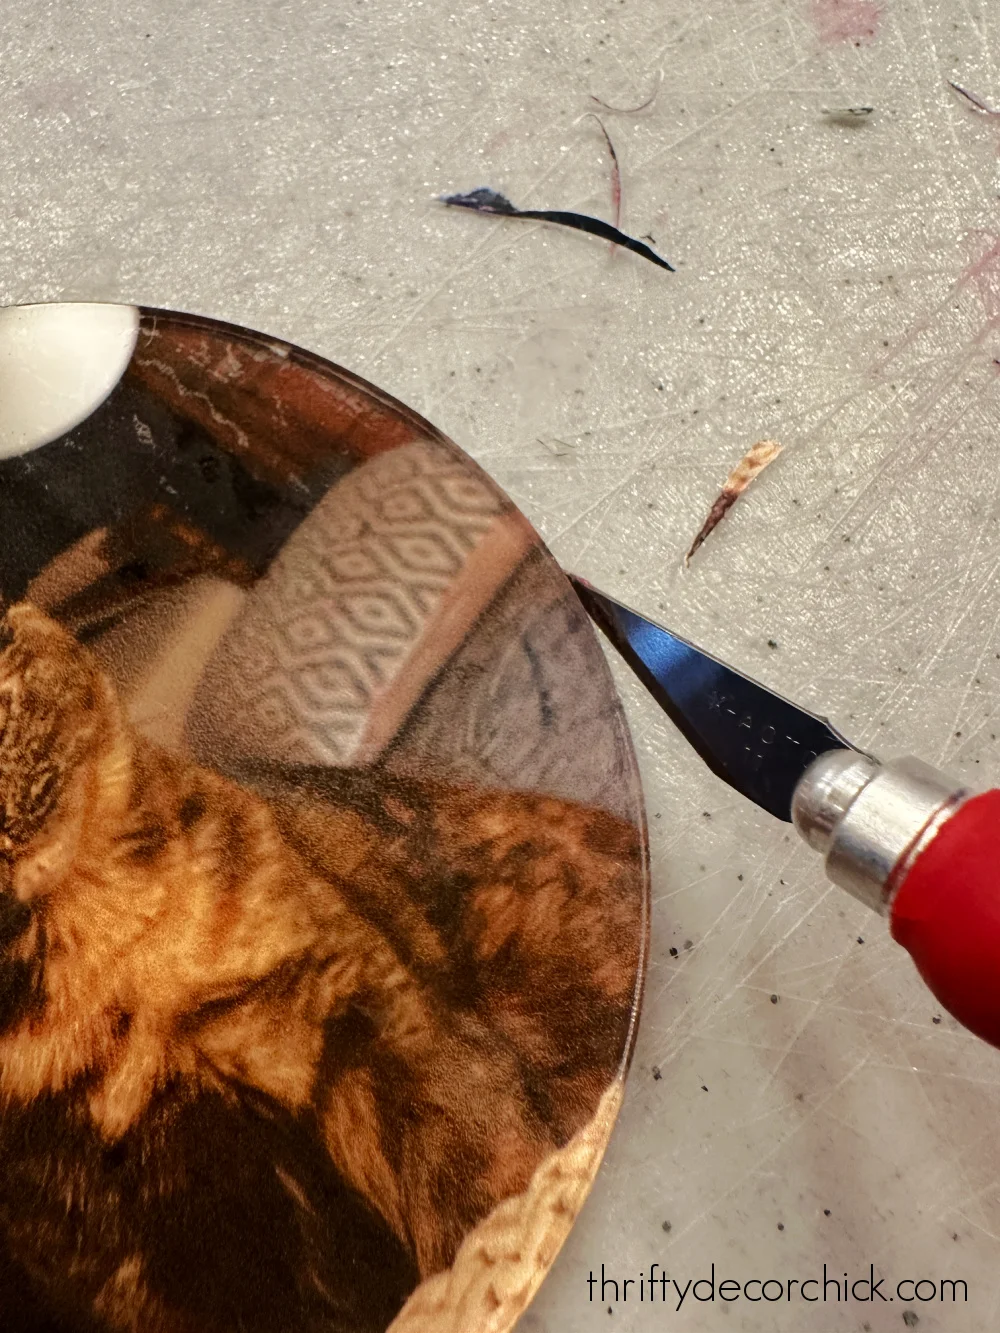
A good X-acto knife is always good to have for these types of projects! It makes everything so much easier. I had to use it to get even get the protective coating off the acrylic:

At first I thought they would be that softer matte finish. They're actually very clear and shiny.
I printed off some photos from my phone to the size I needed (these are 3.5 inches) and started to figure out how to adhere the paper to the ornaments.
My first try was unsuccessful:

I tried using a spray adhesive on the photos first, but as you can see, you see all of the little spray marks.
No worries! I peeled off the paper and washed these off to use again.
The answer was my good old trusty Mod Podge. This stuff is great! It will look cloudy when you apply it:

But dries nice and clear. It also acts as a protective coat when you're done.
I used a little too much for the first few:

But they turned out fine!
Gently turn your ornament over -- it may be lumpy like this:

You can use your fingers to massage the bubbles out, but I find that a flat edge works best.
I used our pan scraper from the sink:

The paper is just basic printer paper, but it held up well! Just take your time.
I tried adding the glue to the paper (instead of the acrylic), but it caused the printer ink to spread all over the photo.
When they were completely dry, I used my X-acto knife to cut the excess paper off around the ornament:
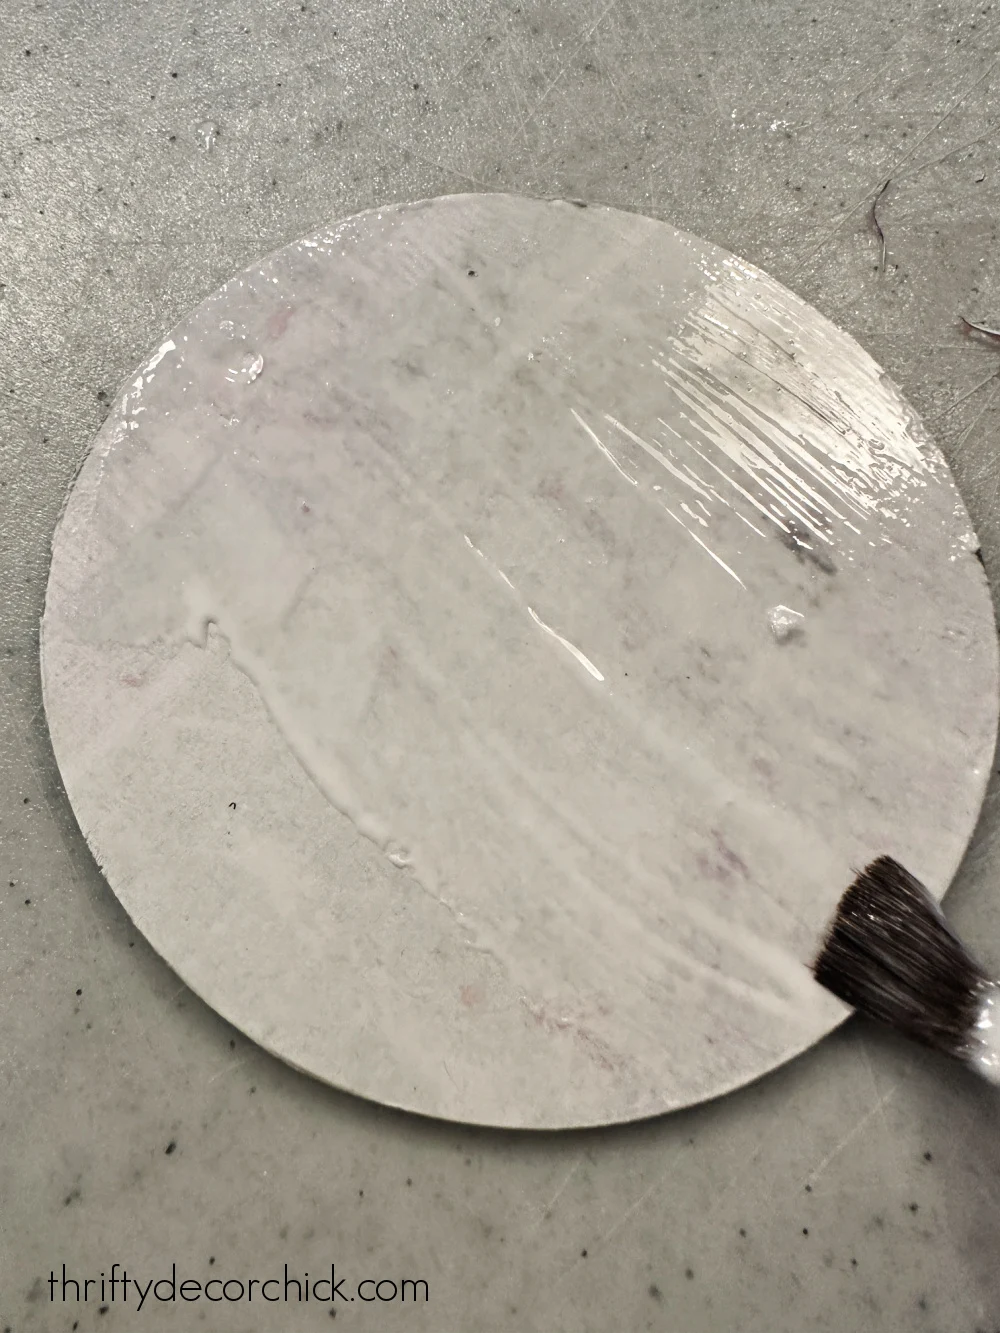

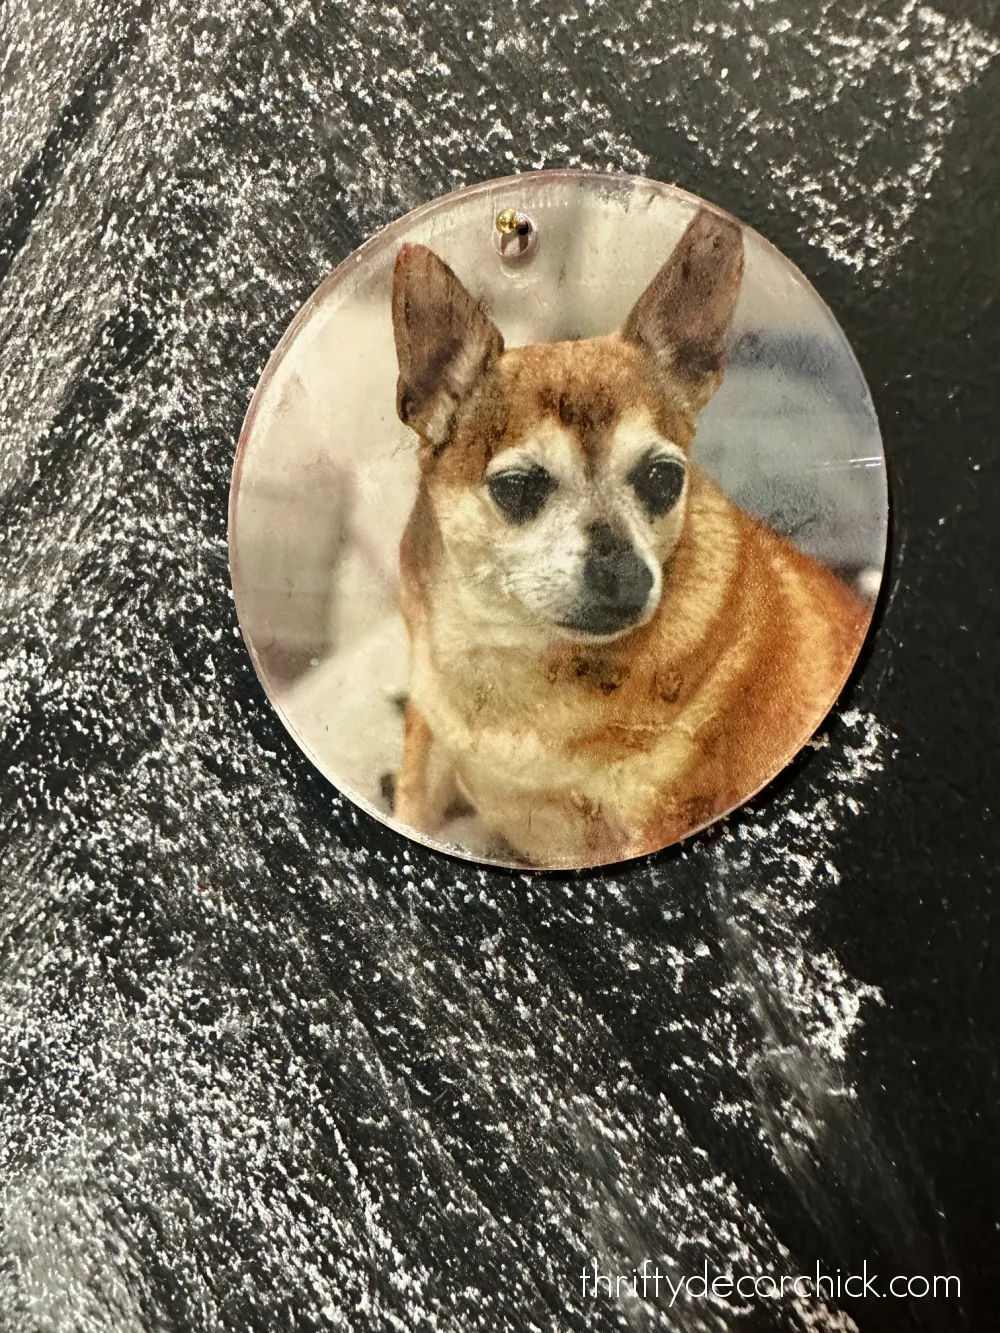


And then added a coat of the Mod Podge to the back to protect it:

The more coats, the more it will cover the paper.
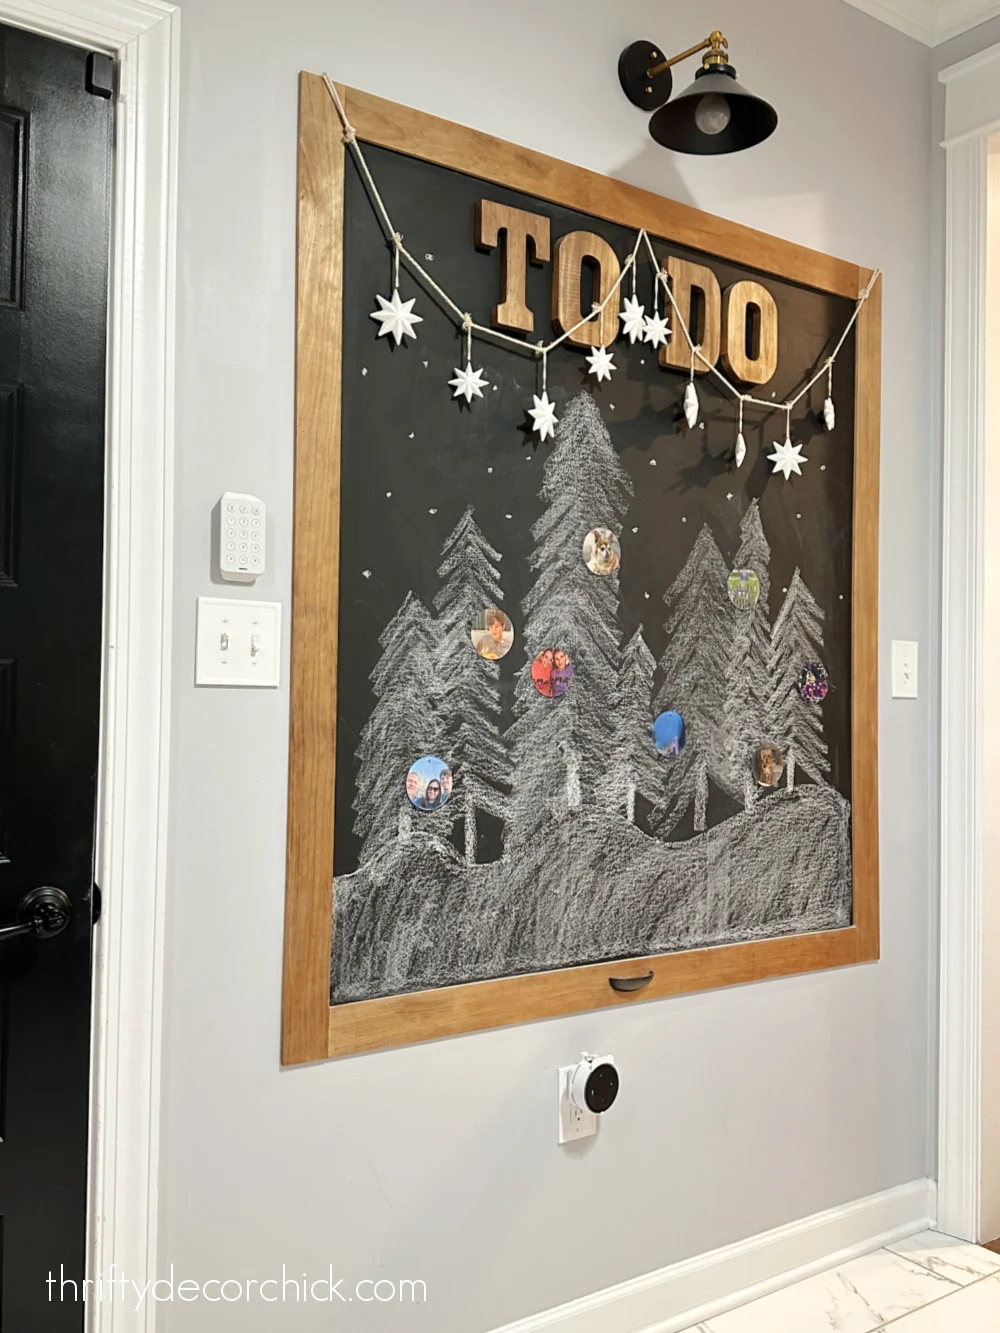
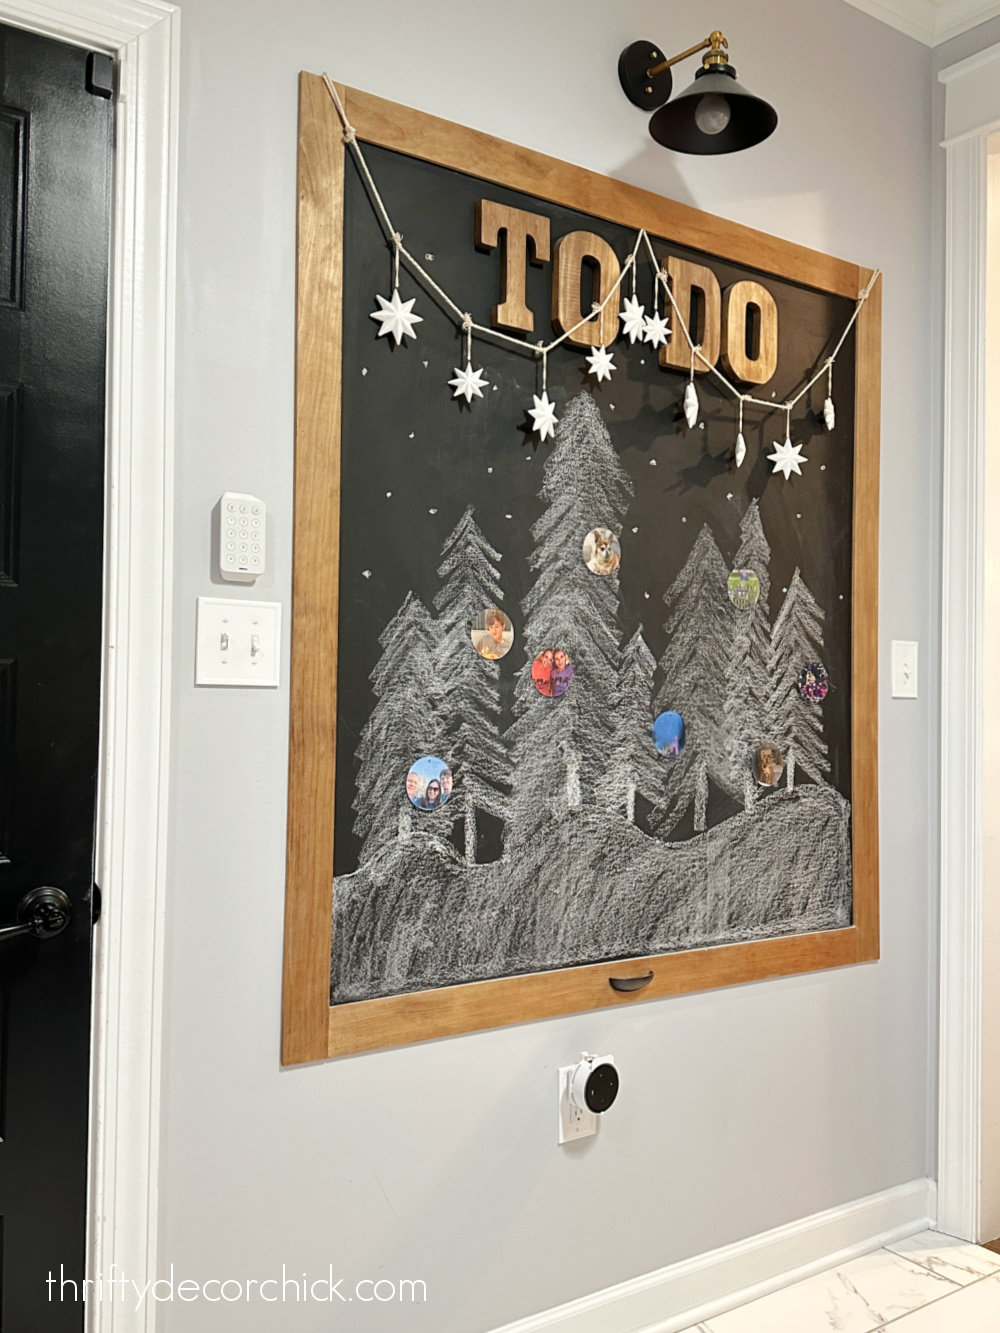
I was going to hang these on one of our Christmas trees, but had a cuter idea in mind!
Instead, I hung them with really small nails onto the "branches" of my chalkboard evergreen trees in our big mud room chalkboard:

So cute!! It's a fun little display that shows off some of our recent family memories.
It's hard to get a close up of them because they reflect everything (they would look so great on a tree with lights!), but you can see how clear the acrylic is:

I love that our friends and family will be able to check them out when they come in this door:

And now I want to add more, but in smaller sizes as well.
These would make a fun little gift for close family and friends -- maybe instead of Christmas cards? I just love that idea!
At first I was going make these with black and white photos, but I'm glad I went with color instead. You could do a sepia tone like I did years ago too.
What a fun way to look back on the year:
I have 16 ornaments (I have more to make) for $5 since I had the other items in my craft supplies. Even if you have to buy the glue and cutter, you'll be in this for less than $15 for all those ornaments.
This would be a great craft to do with friends or family as well. Even the kids could get in on the gluing part...if you don't mind the mess. ;)
Have you ever made photo ornaments for your tree? I'd love to hear how you've done it!
Never miss a post by signing up to get posts via email.
I think I will stop by Hob Lob on my way home from work - this will be a fun thing for me to work on this weekend!
ReplyDeleteWhat a fun idea!
ReplyDeleteWait one minute! Hold the phone. HE'S SIXTEEN? Oh my goodness. Chrissy
ReplyDeleteWhat a fantastic idea! I happen to have a big bottle of mod podge. Gotta get those acrylic circles and grab the grandkids for some fun
ReplyDeleteI can see the paint strokes of the modge podge in the photo. Any tips for that?
ReplyDeleteIf you use Mod Podge and a brush you'll have those, but they are barely noticeable. You could try a spray adhesive instead!
DeleteWould this still work if the photos came from a print shop and NOT on printer paper???
ReplyDeleteYes they'd probably work even better with thicker paper.
Delete