
Make This CUTE Winter Gnome {With a Detergent Container!}
December 01, 2022
Share this
An adorable holiday gnome craft...made with a detergent container!
Welcome to the cutest holiday craft you'll ever see!! I giggle when I tell
people about it, giggled while I created it and giggle every time I see
it.
Just adorable! And SO easy! This is a super fast craft and doesn't take much
as far as craft supplies or tools.

I saw this finished product on Facebook weeks ago, but didn't see the
blogger who created this project. *If you know who first did this cute
craft, please let me know so I can credit them here.*
The only "tool" you'll really need is hot glue. Even regular glue may work,
but it will take longer to complete.
First up, you need a detergent pod container:
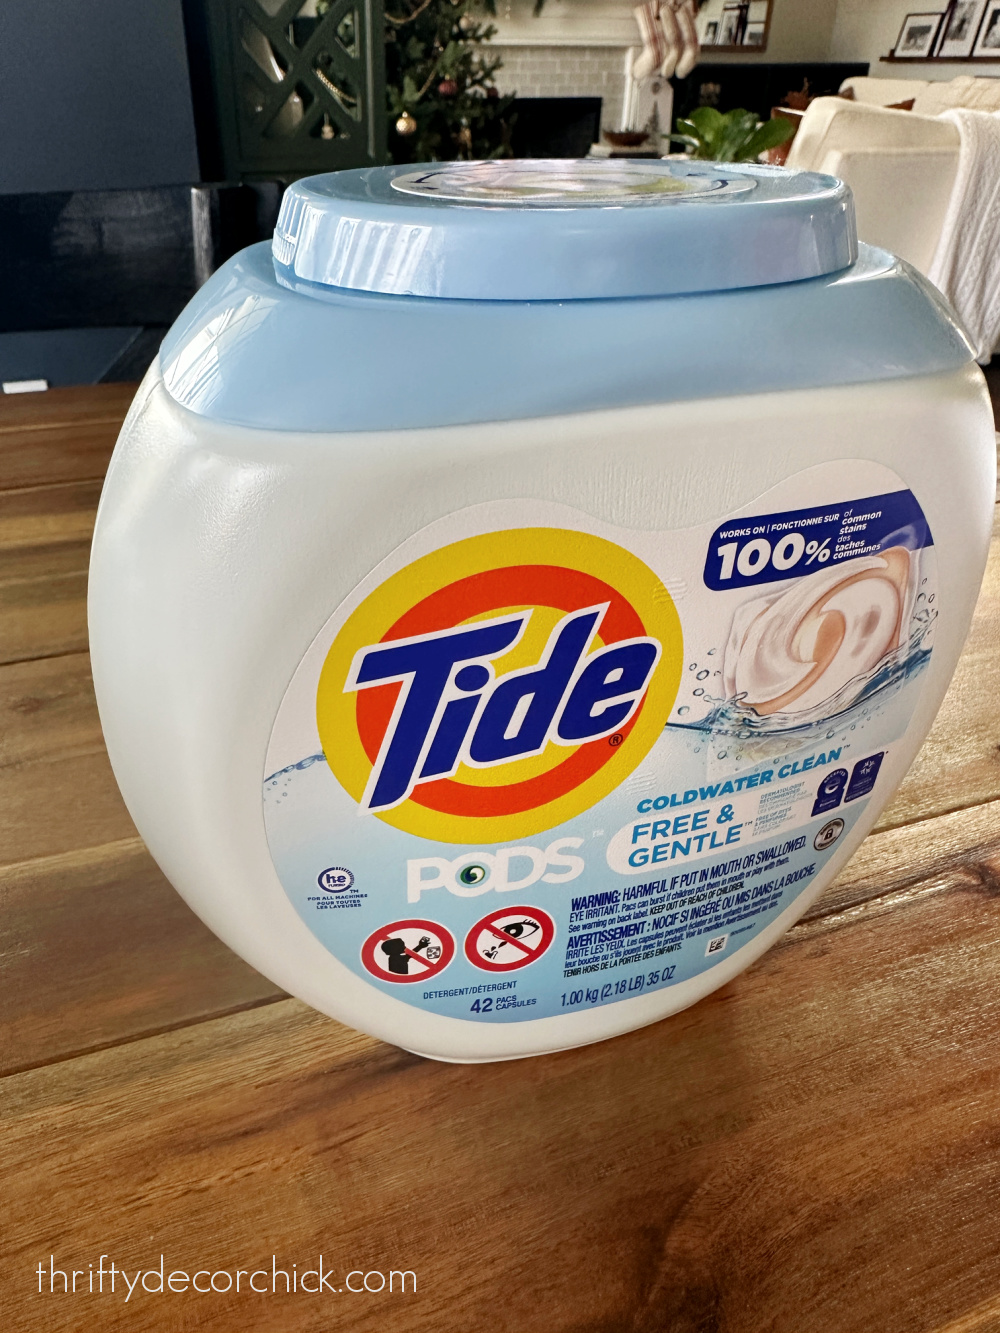
The brand doesn't matter obviously, it just needs to be this shape. I used
the 42 count container and it was perfect.
Next, you'll need fluffy fabric or yarn to make beard for your little
gnome.
Craft stores sometimes carry a wide "ribbon" with white curlicues, or you
can find
this soft white material in the fuzzy fabrics:

This post may contain affiliate links for
your convenience.
I may earn a small commission when you make a purchase through links.
See my policies and disclosure page for more information.
I found mine at Hobby Lobby but I've seen similar options at Joann Fabrics
as well.
The kind woman at the fabric cutting counter shared a great tip for cutting
this fluffy fabric!
Snip the fabric at the end and then tear it on the grain. This eliminates little tufts of fluff flying everywhere.
You don't need much of this fabric -- the thickness will depend on how long
you want the gnome's beard to be. :)

Now decide on your gnome nose! I had a few options and will share all of
them so you can see how they look.
I used a small drill bit to put a hole into a wood bead and also into the
plastic pod container:
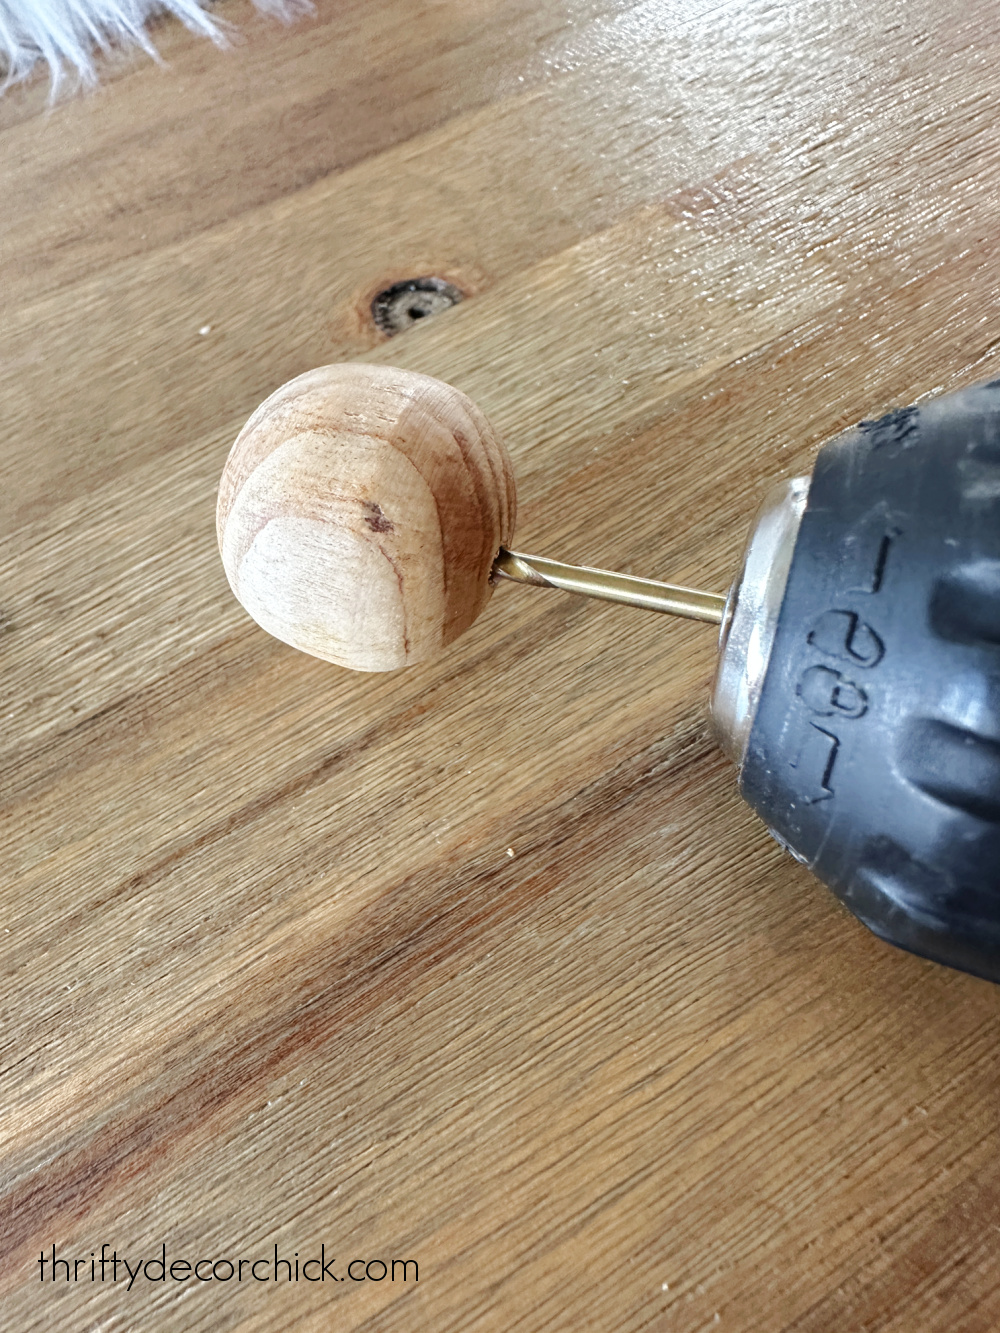
I put a small screw through the inside of the container to attach it
to the front.
Hot glue or epoxy would also work if you don't want to mess with all of
that. The screw just makes it more secure.
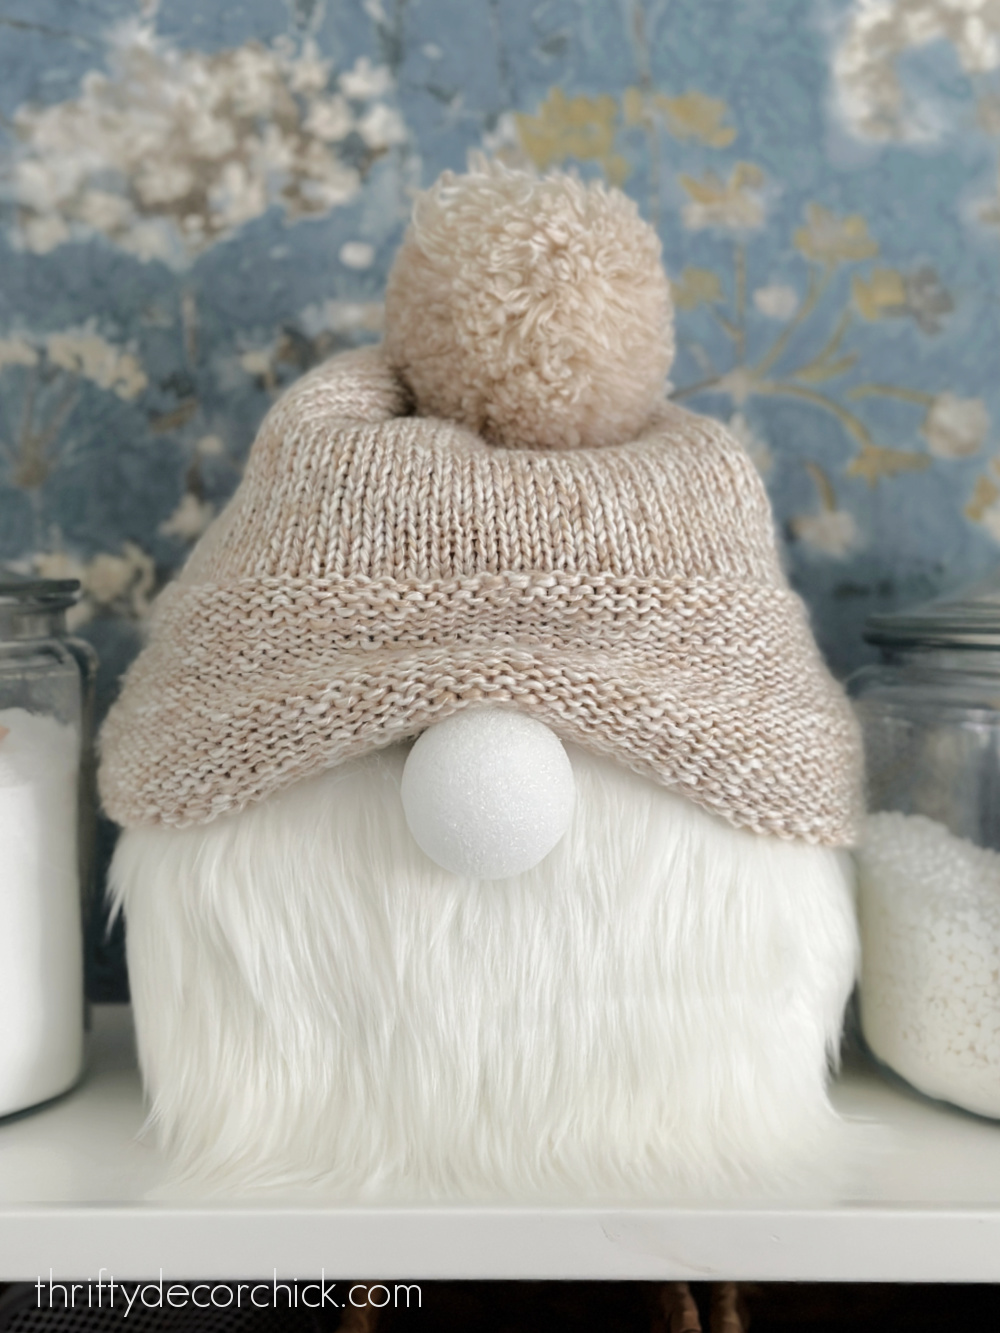
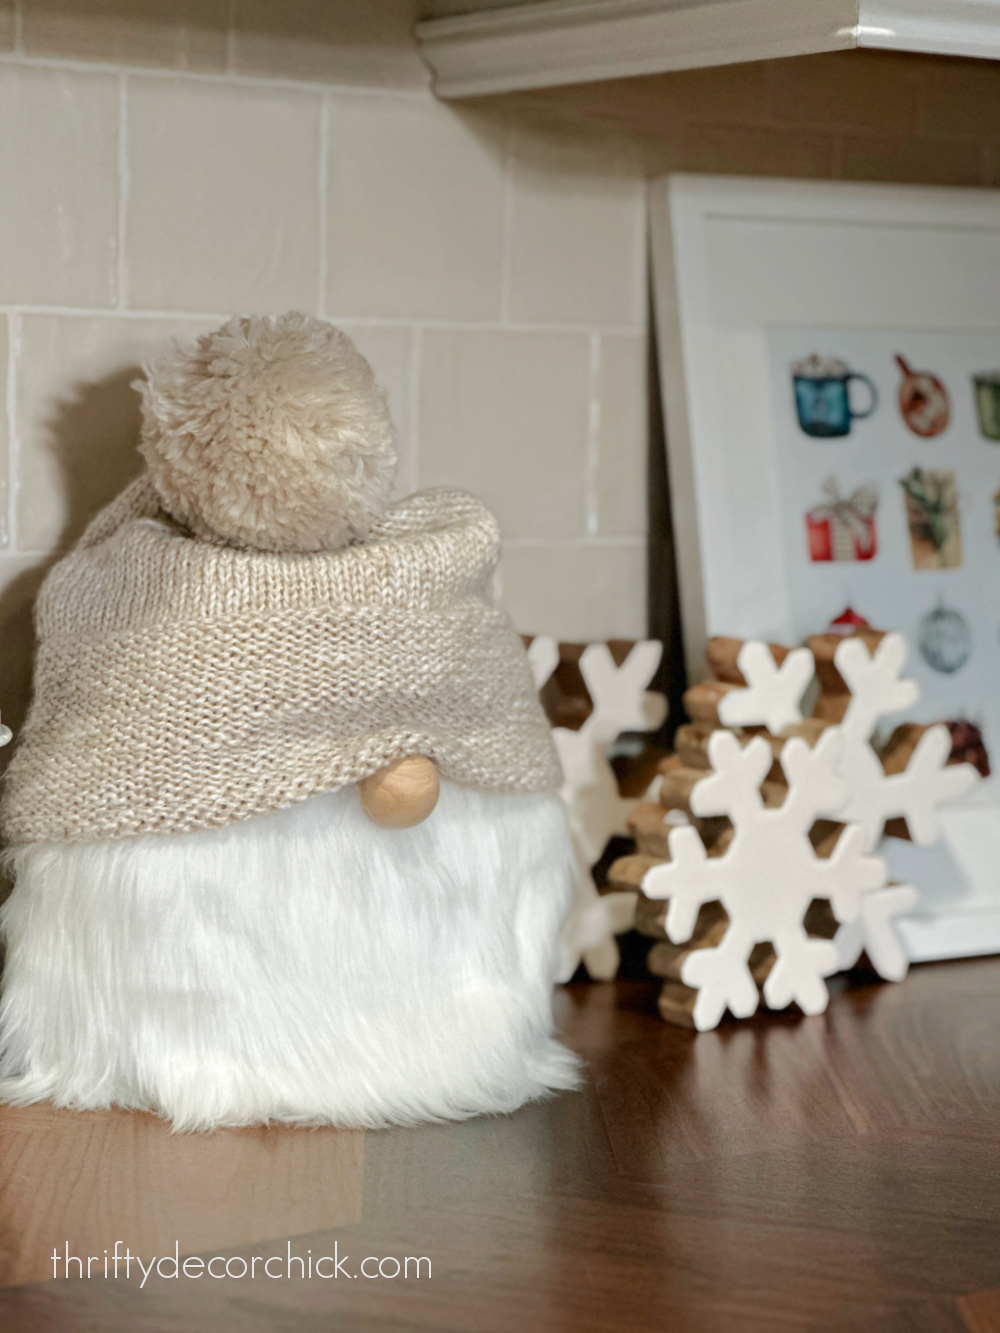
Then, the final step that completes your adorable holiday gnome...a knit hat
or beanie on top! I just used one that I have:

Come ON! Is that not the cutest?? The pom on top makes it!
I'm not even that big of a gnome fan...but this little guy is just too fun.
By the way, you don't need to glue the hat on -- it will slide right on and
you'll want to pull it down a bit so it slouches onto his nose.
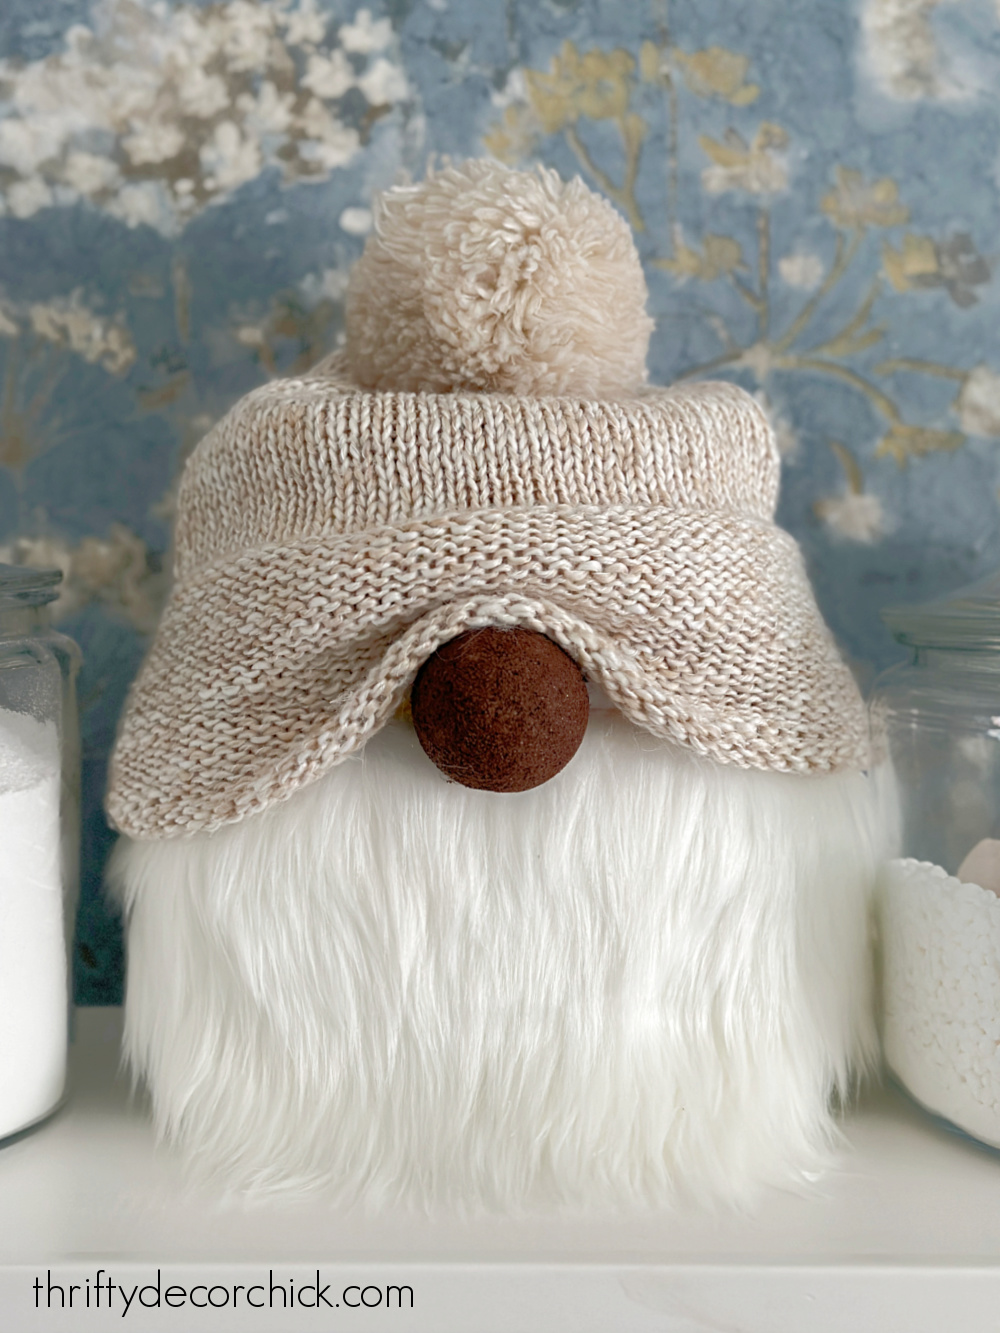
There are so many options for the nose! I cut the back off of a styrofoam
ball (to make it flat) and then hot glued it on:
Then I used
Burnt Umber craft paint
to paint the styrofoam ball a darker color:

And that was just as cute! I mean...you can't go wrong:
Or you can use a little yarn ball. This is one of my favorites:

I went for a more neutral look because my hat was this beige color, but you
could make this detergent container gnome SO many ways!
I'm going to make a few as gifts, and have this
bright red beanie
in my cart to use as well. So cute!!
For ours, I ended up with a slightly larger wood bead for his nose. The
smaller one was a little too tiny for me:

I put him on my
DIY washer and dryer shelf
for photos because he looks so cute in here. And because he's a detergent
container, duh! ;)
When you think about it, this would be a really practical gift. I think when
I make more I'll keep the pods in there (I had already poured ours into the
glass container we use). This would also give it some weight.
So not only will the recipient get a household product they can use, they'll
get a cute beanie for the winter and an adorable holiday
decoration!
If you're looking to make one of these as a gift and are starting from
scratch, you'll spend anywhere from $30 to $40.
But if it's for your home and you have most of the parts already, it will be
next to nothing! I only spent $6 for this project and that was for a ton of
the fluffy fabric.
Let me know if you try this sweet little holiday/winter craft out for
yourself! 😍
Never miss a post by signing up to
get posts via email.
Love it and it would make a great gift, as you say! So adorable!
ReplyDeletetoo cute!!
ReplyDeleteVery cute idea.....but (lol) I'm more interested in the blue wall paper. Would you share the pattern info please?
ReplyDeleteIt's gorgeous!!! I wouldn't mind trying to make the beard with a mop head... It'd take more time and work as I am guessing I'd need to separate the strings from the mop head and glue separately but it'd be a less expensive option for someone looking to make for less money. Thanks for sharing!
ReplyDeleteWhat a fun idea! And a great reuse of the detergent packaging.
ReplyDeleteSo adorable! I think if someone will be using it in the laundry room, a wool dryer ball could be used as a giant fuzzy nose :)
ReplyDeleteGreat idea!
DeleteSo cute! I saw someone asking for these containers in a local group for their class for an craft project and I wonder if it was to make these.
ReplyDeleteDo you remember where you got the wooden and white snowflakes? I'm obsessed! Thanks!
I'm pretty sure I got those at a store called Burlap and Birch a couple years ago!
Delete