
How to Make a DIY Tufted Headboard
September 06, 2017
Share this
How to make a tufted headboard and the supply list you'll need for this DIY project!
YES you can make your own tufted, custom headboard for around $100! I share all of the products you'll need in this step-by-step tutorial.
I’ve made my own headboards (and for friends!) for years -- even before blogging. It’s seriously one of the easiest DIY projects you can do and you will save SO MUCH money doing it on your own.
The headboard part I was used to -- but I was totally intimidated by the tufting part. I’ve never tufted one because it seemed like it would be hard…but it is not a big deal!
(I link to the supplies you'll need to make an upholstered DIY headboard at the bottom of the post.)
1. Decide on your headboard shape
I knew the shape I wanted the headboard to be for awhile, but I just found out the other day that it had a name:

Why this instead of regular foam? One word -- cheaper. ;) Foam is a petroleum based product, so it goes up with the price of gas. Which means it’s just going up and up over time.

Then I used a piece of muslin I had in my stash too, to cover everything again, but two layers are not needed. This just secures all the foam and gives you a nice base for the final fabric.
Speaking of that -- after all that I was ready to finish it up -- and because I was feeling lazy and didn’t want to drive the extra 15 minutes to the fabric store, I actually shopped the drapery aisle at Target:

I wasn’t sure exactly what color I wanted so I grabbed a few. ;) The two on the left were $17 for a panel -- which compared to a couple yards of upholstery fabric is pretty good.
Problem was we weren’t crazy about any of them when we tried them out. One was too light, one was too blah and one was too dark.
Soooo…the next day I went to the darn fabric store. ;)

By the way, years ago I tried the electric stapler you can find at the hardware store (about $30) and it is kind of a pain to use. It gets jammed and the staples don’t go in evenly no matter what I do.
For the curved corners I just grabbed the fabric and stapled as best I could:

Remember…no one will see this part.
Here it is in it’s (almost) finished state:

Getting there! The suit fabric is like a gray linen and looked so good. Way better than the drapes I picked out – I returned those.

It made this SO easy. More on that in a minute.
I grabbed some buttons too -- it’s so easy to make your own fabric-covered buttons:

I just used scrap fabric to make them all. Making buttons is fun.
So the tufting the headboard was a breeze – I couldn’t believe I had put it off all this time! I did poke myself a couple times, but overall, easy. :)
Many of you have asked about the new bedding – I found it at HomeGoods earlier this year:
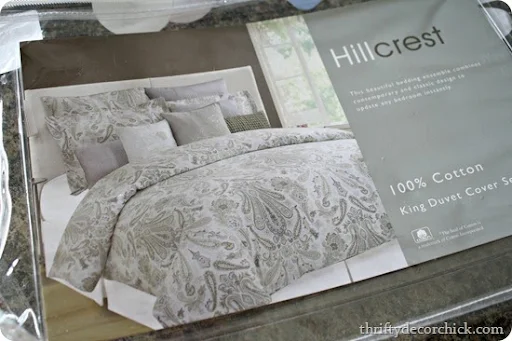
It’s by Hillcrest and it was a duvet cover and shams for $40. I had been looking for new bedding for months and just happened to find this, new sheets and the small pillow on the bed all in one trip. None of them are supposed to go together but I think they work well!
So far with what I made on the old bed, I’ve still got about $300+ to spend – I think I may make money on this redo! That’s what I’m talking about.
You can find upholstered and tufted headboards all over the place, but I promise you they are not hard to make on your own!

First up, Dad came down and we used his truck to pick up a big piece of mdf at the hardware store -- it was a big four by eight foot piece and the Lowe’s Guy cut it down for me:

This post may contain affiliate links for your convenience.
See my policies and disclosure page for more information.
My headboard dimensions are about 43 tall by 78 wide.
You'll need to measure your bed to figure out your sizing.
I wish I would have taken pics of how I cut the corners out, but it was so quick. Dad and I just searched the garage for something round (and used my bird food holder).
I wish I would have taken pics of how I cut the corners out, but it was so quick. Dad and I just searched the garage for something round (and used my bird food holder).
I held it up on the corner and figured out how big of a cut out I wanted, then did some quick measurements to make sure it was even on both sides.
Then I traced the bottom of the can and cut one side out with the jigsaw. That first piece is all you need to make the second one -- just flip it over and place it on the other corner, trace, and you’ve got a mirror image.
I hope that makes sense -- it was so fast I didn’t even think to take pics.
Dad helped me take the board upstairs where I went to work! I showed you how I made the headboard in my son's room and this was nearly identical till I got to the tufting part.
I hope that makes sense -- it was so fast I didn’t even think to take pics.
Dad helped me take the board upstairs where I went to work! I showed you how I made the headboard in my son's room and this was nearly identical till I got to the tufting part.
2. Find your foam
Like that one, I used mattress pads instead of foam from the craft store:Why this instead of regular foam? One word -- cheaper. ;) Foam is a petroleum based product, so it goes up with the price of gas. Which means it’s just going up and up over time.
I haven’t even checked the price lately but for three inches of foam for a nearly 80 inch headboard wouldn't be cheap.
The size was another reason – I would have had to use numerous pieces of foam to cover this and when you use the mattress pad you can get one big piece.
I had one I had picked up on clearance years ago (look for the XL twin sizes after back to school -- you can find them for cheap!) but it was too small for this headboard.
I had one I had picked up on clearance years ago (look for the XL twin sizes after back to school -- you can find them for cheap!) but it was too small for this headboard.
So I ended up with a bigger size (queen I think?), then ended up going back to get another one to do two layers because I really wanted it super soft. (I found them online for a good price here.)
I suggest using a spray adhesive on the wood and the foam before laying it down. Spray them like crazy and then lay the foam down.
I suggest using a spray adhesive on the wood and the foam before laying it down. Spray them like crazy and then lay the foam down.
You can still adjust, but it keeps things where they should be as you cover the headboard. When the foam is down, flip the board over and trim any excess.
One of the things I grew to dislike about our old headboard was how hard it was. I mean, it was wood, so yeah. And it had a curve to it so our heads never fit against it.
One of the things I grew to dislike about our old headboard was how hard it was. I mean, it was wood, so yeah. And it had a curve to it so our heads never fit against it.
This time I made the headboard tall and cushy that we could comfortably lean against it.
3. Cover your board
Once the foam is down, you want to secure it with a layer of batting or thin fabric. I used batting first just because, again, I wanted this super soft:Then I used a piece of muslin I had in my stash too, to cover everything again, but two layers are not needed. This just secures all the foam and gives you a nice base for the final fabric.
Speaking of that -- after all that I was ready to finish it up -- and because I was feeling lazy and didn’t want to drive the extra 15 minutes to the fabric store, I actually shopped the drapery aisle at Target:
I wasn’t sure exactly what color I wanted so I grabbed a few. ;) The two on the left were $17 for a panel -- which compared to a couple yards of upholstery fabric is pretty good.
Problem was we weren’t crazy about any of them when we tried them out. One was too light, one was too blah and one was too dark.
Soooo…the next day I went to the darn fabric store. ;)
I needed the stuff to tuft the headboard anyway (at first I wasn’t planning on tufting. Scared, remember?) so I took a quick look through the fabrics and found one I LOVED in the suit fabric aisle.
4. Drill holes for tufts
Before I used that I figured out where I wanted my tufts and drilled the seven holes:

I wanted it to be a simple design and some of the tufting I see is just too much for me. So when I did my math I decided to just do three across the top and four under that.
I wanted it to be a simple design and some of the tufting I see is just too much for me. So when I did my math I decided to just do three across the top and four under that.
That’s it -- anything lower would always be covered by pillows or the mattress so I didn’t even worry about the bottom.
5. Cover with fabric
After the holes were drilled I added the final fabric:By the way, years ago I tried the electric stapler you can find at the hardware store (about $30) and it is kind of a pain to use. It gets jammed and the staples don’t go in evenly no matter what I do.
I always revert back to my regular stapler (above) -- it takes more muscle but that’s good for ya. ;)
Sometimes the corners can get tricky, so I’ve always used a simple method -- start with the middle, then each side, pulling tight each time:
Sometimes the corners can get tricky, so I’ve always used a simple method -- start with the middle, then each side, pulling tight each time:

For the curved corners I just grabbed the fabric and stapled as best I could:
Remember…no one will see this part.
Seriously, the back doesn’t matter. Do what you gotta do!
Here it is in it’s (almost) finished state:
Getting there! The suit fabric is like a gray linen and looked so good. Way better than the drapes I picked out – I returned those.
6. Tufting with buttons
Now the part I dreaded…the (shiver) tufting. So not hard. At all. All the stuff I needed was in the same section at Joann’s. I picked up this waxed thread and it rocked:
It made this SO easy. More on that in a minute.
I grabbed some buttons too -- it’s so easy to make your own fabric-covered buttons:
I just used scrap fabric to make them all. Making buttons is fun.
So the tufting the headboard was a breeze – I couldn’t believe I had put it off all this time! I did poke myself a couple times, but overall, easy. :)
First up, I threaded one of my long upholstery needles and made a little knot at one end, then stapled it to the back of the headboard:

Then I pushed the needle through the headboard, threaded the button on, and pushed it back through to the back.
Then I pushed the needle through the headboard, threaded the button on, and pushed it back through to the back.
This is where the waxed thread comes in super handy -- it kind of held the button where it was while I secured it to the back. Regular thread would slip and be hard to keep where you want it. This worked GREAT.
I would just put a staple in the back of the headboard, but wouldn’t push super hard on the stapler, so it didn’t go all the way into the wood. Then I was able to wrap that thread around it a few times, then hammer it down to secure it. (Pic on the right.)
I didn’t pull each button super tight – I didn’t want it to be a deep tuft. And there is an easier way to do this by the way -- you can just thread both ends of the thread on the needle with the button already on it, then put it through from front to back and then secure.
But that method didn’t work for me because the waxed thread was so thick.
I was THRILLED with how it looked! I finished it up with some nailhead trim along the sides:

The particle board I used to make the headboard was 1/2 an inch thick and I went that size on purpose -- so these would have something to grab onto. Any thinner and it would have been hard to get them in well.
I’ve never used the connected nailhead trim (I usually just do them individually) but wow, this made it so simple! The nailhead stuff is $21 for five yards, but I had two coupons so I got it for about $10. :) (But I found it here for way cheaper than $21!)
I hung this up the same way I did in the Bub’s room – I used picture hanging hooks:

I figured out where the studs were and screwed into those in first, then that determined where I put the hangers on the back of the headboard.
When we got it hung I was so dang happy with how it turned out!: 
You can see the nailhead trim better in that pic. From the front you don’t see it as much, but it’s a great little detail when you get up closer. I love it!
You can see there why I didn’t add any buttons any lower too -- they’d just be covered.
7. Add some nailhead bling
I was THRILLED with how it looked! I finished it up with some nailhead trim along the sides: The particle board I used to make the headboard was 1/2 an inch thick and I went that size on purpose -- so these would have something to grab onto. Any thinner and it would have been hard to get them in well.
I’ve never used the connected nailhead trim (I usually just do them individually) but wow, this made it so simple! The nailhead stuff is $21 for five yards, but I had two coupons so I got it for about $10. :) (But I found it here for way cheaper than $21!)
I hung this up the same way I did in the Bub’s room – I used picture hanging hooks:
I figured out where the studs were and screwed into those in first, then that determined where I put the hangers on the back of the headboard.
When we got it hung I was so dang happy with how it turned out!:
You can see the nailhead trim better in that pic. From the front you don’t see it as much, but it’s a great little detail when you get up closer. I love it!
You can see there why I didn’t add any buttons any lower too -- they’d just be covered.
Many of you have asked about the new bedding – I found it at HomeGoods earlier this year:
It’s by Hillcrest and it was a duvet cover and shams for $40. I had been looking for new bedding for months and just happened to find this, new sheets and the small pillow on the bed all in one trip. None of them are supposed to go together but I think they work well!
So far with what I made on the old bed, I’ve still got about $300+ to spend – I think I may make money on this redo! That’s what I’m talking about.
You can find upholstered and tufted headboards all over the place, but I promise you they are not hard to make on your own!
It does take some time so just be patient with it. But you will save tons if you DIY this one -- you'll find most king sized headboards run around $1000 and up.
I think mine looks pretty darn good for less than $100:

Here’s the break down on cost:
Wood: $15
Foam: $45
Fabric: $8
Buttons, nailheads, etc: $25 (See below for a full list.)
Total was $93! And I have wood, foam, nailheads, buttons and thread left over to use on future projects.
Spray adhesive
Batting (optional)
Staple gun
Button kit
Waxed thread
Upholstery needle
Nailhead trim
D-ring picture hangers
I think mine looks pretty darn good for less than $100:
Here’s the break down on cost:
Wood: $15
Foam: $45
Fabric: $8
Buttons, nailheads, etc: $25 (See below for a full list.)
Total was $93! And I have wood, foam, nailheads, buttons and thread left over to use on future projects.
Items you'll need to make your own headboard:
Foam mattress padSpray adhesive
Batting (optional)
Staple gun
Button kit
Waxed thread
Upholstery needle
Nailhead trim
D-ring picture hangers
Similar dark gray linen fabric (two curtain panels)
If you went with one layer of foam/egg crate the price will go down. I had the batting and muslin but only one of those is really needed and they are both cheap.
If you went with one layer of foam/egg crate the price will go down. I had the batting and muslin but only one of those is really needed and they are both cheap.
Of course if you skip the tufting that will lower the price too!
I’m so happy with how it turned out. And it is SO much more comfortable than our old headboard.
I’m so happy with how it turned out. And it is SO much more comfortable than our old headboard.
Have you ever made your own DIY upholstered headboard? Did you find it easy to do? Have you ever attempted the tufting?
Here's an updated photo of this room after more updates:
See how the Tarva nightstand redo turned out here.
Here's an updated photo of this room after more updates:

See how the Tarva nightstand redo turned out here.
Find out what color I spray painted the brass lamps and all of the master bedroom updates here.
See how I made the dark blue headboard for our son's room here:

Turned out fabulous! I made an upholstered headboard with green silk for my old house without the tufting & seeing this makes me miss it. And I did a large tufting job on an ottoman a couple years ago. It was lots of fun & totally rewarding! I may have linked it to one of your parties before, but here it is :http://lessthanperfectlifeofbliss.blogspot.com/2011/10/diamond-tufted-ottoman-whew.html
ReplyDeleteLove, love, love it - alot!! Great job!
ReplyDeleteYou make it look SO easy! Like almost easy enough for me to give it a try but i'm totally scared! We have a CAL King bed with NO headboard and I hate that we don't have one. Might have to give this a try.....
ReplyDeleteWow I am loving this! This will mostly likely be my next project. I have been searching for just the right headboard for a couple of years - never finding the right combination of looks and price! I too always thought I could not do the tufting - but you have inspired me! Great job, love the fabric, it looks fantastic :o) Can't wait to meet you at Haven!
ReplyDeleteI'm in love. The tufting. That nailhead trim, sigh! It is fabulous! I want to make one!!
ReplyDeleteEmily
www.houseintheheights.blogspot.com
I've always been nervous about tufting. So glad you shared your experience with it. I've been debating whether to do it with the day bed headboard I'm planning on making...thanks for the inspiration. Your bed and bedding is beautiful.
ReplyDeleteHoly cow! I am so blown away and inspired. I have always avoided tufting. I think you pushed me over the edge to do it for my daughter. Such a great tutorial. I am loving your new bedding, too.
ReplyDeleteWow, turned out amazing! You did an awesome job on the tutorial too! It makes me feel confident to do my own!! Thanks for posting!
ReplyDeleteLove this. I will actually be attempting a headboard later on this summer. We desperately need something in the master bedroom!! I'll be coming back to this post for sure!!!! Thanks!
ReplyDeleteWow, that is gorgeous! I don't have need for a headboard right now but would totally try it. I am about to upholster and tuft a seat for my daughter though and your tips on the tufting will come in handy for that.
ReplyDeleteWow! It looks amazing! This is the BEST DIY headboard tutorial that I've seen, and there are A LOT. Thank you so much! How smart to use a mattress topper!
ReplyDeleteI have made a headboard before, but you're making me want to redo mine! I tufted it too, but didn't use wax thread (definitely will do that next time!!). And I love the idea of using a foam mattress pad - so smart and thrifty! It looks fantastic Sarah, I really love the direction you're going with your master!
ReplyDeleteI LOVE IT! I've actually thought about getting a tufted headboard, but just can't bring myself to spring for one because of the cost. But this, I could totally do! Thanks for the tutorial!
ReplyDeleteSo many great hints in this post. Love the fabric you chose! I especially love your comments about your dad -- makes for nice memories!
ReplyDeleteThis is great! I've been wanting to make one for a few years, and now that I'm moving into a new place I think I just might have to finally do it!
ReplyDeleteDid the connected nailhead trim also come from joanns? It looks awesome!
This came out awesome! Great job on the tutorial.
ReplyDeleteThanks for the tip on the foam mattress pad instead of the buying foam at the fabric store!! The cost of the foam is seriously what has been keeping me from tackling this project!! I absolutely love to use suiting fabric in decor and this is no exception, it's just beautiful!!
ReplyDeleteLove, love , love this!!! I like color you chose as well!
ReplyDeleteRachel @ R & R Workshop
I made my own last year, and was on the cusp of tufting. I hung it up to decide and then the lazy bones set in and I never took it back down. :O)
ReplyDeleteThe one I wanted was at Pottery Barn and it was INSANELY, stupid expensive. So I knocked it off. I used drop cloth and love it. I spent less than $50 total. Score. The pictures kinda suck 'cause they were takin' back in the days of my point and shoot, but you can see it here: http://rindymae.blogspot.com/2011/08/diy-upholstered-headboard.html
I'm lookin' at it now, and lookin' at yours, thinkin', hmmmmmm, tufting......it turned out awesome. Love it in your room.
Love it! You make everything look so easy. I definitely want to make this for my room!
ReplyDeleteLove Love Love this headboard! Never thought of using bed padding...hmmm! Great choice on the fabric too! Thanks for sharing.
ReplyDeleteWow...amazing! I love your fabric choice! I've really wanted to do this for ages, but I'm worried I'll screw it up. You made it look so easy though, I might have to give it a shot!
ReplyDeleteJenna @ Wife in Progress
It turned out amazing! I love the fabric and bedding, too. I haven't ever made my own headboard, but I have recovered a tufted headboard. I was surprised it came out so nice, lol. I would have made one, but I just got too good of a deal at target.com.
ReplyDeleteNow I'm just mad we don't have a HomeGoods nearby. I'm certain they have the perfect bedding but I'll never find it without making a trip somewhere. Hey HomeGoods - come open up shop near me! Your headboard and bedding is beautiful! I'm totally jealous.
ReplyDeleteWow! Turned out amazing! And now it sounds fairly easy. Love all the gray!
ReplyDeleteOh my, what a gorgeous job you did on this headboard! It looks so professional and the color is beautiful in your room, too.
ReplyDeleteOf course I love this and proceeded to show this to my husband, his exact words "this is classy, looks like a something from a hotel."
ReplyDeleteIt looks great! Diamond tufting is so much harder. I did a deep tufted princess headboard for my little one. I have yet to blog about it though. It turned out to be adorable, but it was hard work!
ReplyDeleteThanks so much for showing us how to make a headboard! I LOVE it! It's so beautiful! I love the lighter colors you are using. I'm sure you will be thrilled when you're all done. Thanks for the inspiration!
ReplyDeleteLove it! I tried tufting with thread and could never get the look I liked so I finally used screws and washers and then glued my covered buttons on. It was soooooo much easier than thread and tying! I am absolutely in love with the look of your new room!
ReplyDeletegreat idea!
DeleteI've always been intimidated in making my own headboard. You have made it seem so simple! This is on my fall to-do list for my son's room.
ReplyDeleteI love love love love love this! Thanks for this tutorial! I've been planning to make a new headboard for our guest room for awhile now and plan on starting the project in a few weeks. This makes me so excited! Love the way it turned out and the fabric you chose!
ReplyDeleteI love it! I may be brave enough to make one too! Thanks for sharing!
ReplyDeleteLooks amazing!!! I've bought the stuff to make one for my guest room... but it's on my "LIST" of many to do projects :) I hope mine turns out as nice as yours! Thanks for sharing.
ReplyDeleteAmazing! Girl, you need to do a video tutorial on tufting! Love how it turned out!
ReplyDeleteYou. Are. A. Genius! Mattress pad instead of foam...DUH! I just made cushions for my outdoor sofa and spent a fortune on the petroleum based foam. The headboard is beautiful and I love the colors that you're using. Great job!
ReplyDeleteThis is awesome!! I love that you did it for under $100- amazing!!
ReplyDeleteLooks great. Recently, I saw a blogger use peg board instead of MDF. She did have to attach it to a wooden frame but she didn't have to drill the holes. You made this seem very simple.
ReplyDeleteanother cool idea. probably more expensive though?
DeleteWow! That is beautiful!!! I would really like to try that and it looks very do-able. My only concern with a fabric headboard is soiling. Does this not happen? And if it does, how do you clean it? Also, how do you measure where to put the hooks on the wall and on the back of the headboard so they match and are level. I can just see myself drilling holes and hanging hooks and then the darn thing is crooked! We have hung various mirrors over the years where the hooks (rings) are on the back of the mirror and getting the hanger on the wall to match the exact place the ring must go has been a nightmare. We end up with holes all over the place. Maybe we are hanging-impaired :) Thanks.
ReplyDeleteThis look beautiful! We do not have a headboard, which I hate. This definitely inspires me to make one. I may add it to my list of DIY projects for next week, since it is my last week of summer before our school year starts and I really want to get some projects completed!
ReplyDeleteI love that you used suit fabric, it looks so classy. Great tip!
ReplyDeleteWow! It turned out great! I've always been afraid of tufting but you make me feel like this just may be possible!!~~Angela
ReplyDeleteOh my goodness, this looks incredible and so professional. Who would have know it was that easy. Thank you for sharing this, I am definitely saving this for future reference. Can't wait to see the final reveal, you are so talented. Enjoy your blog and look forward to seeing it in my email each morning.
ReplyDeleteThanks for this great tutorial! We have a tufted chocolate brown leather headboard from Pier 1 that I got on clearance yrs ago. It's great, but I'm ready for something lighter. I was thinking of slip covering it, but after seeing your new headboard I may just try my hand at making a whole new one for us.
ReplyDeleteLOVE IT!! You do such a great job of making these intimidating projects accessible for us mere mortals! ;-) I'm constantly finding inspiration here! I thought I would share a tip for batting that I stumbled upon when I reupholstered my dining chairs. I had typically chosen my batting by the yard from the fabric store, but one day while looking for party supplies in Wal-Mart, I happened to notice their quilt batting! Comes in Twin, Full/Queen & King. Wal-Mart's price was MUCH cheaper than comparable at the fabric store in my area. And, I've got batting to spare for when I make one of these headboards! ;-) Thanks!!
ReplyDeleteJust the post I needed! I think I can beat your price. I "found" a piece of plywood, framed, in brand new condition out for trash pick-up in a very nice neighborhood. I purchased 2 bags of brand new egg-crate style foam for Queen size beds for $1 total at a yard sale. The lady was thrilled to get rid of them. Found material at JoAnn's on clearance - got 3 yards for $11. And now I know how to put it all together, thanks to you. Think I'll go to JoAnn's and splurge on those buttons. I was also afraid to try the tufting, but now I think I can! Thanks, TDC!
ReplyDeleteLooks great!! I'm feeling really inspired! Also, what does your matress sit on? I have a sleigh bed with the head/foot board attached to the bottom, so i'm wondering if i'd have to purchase something else for the bottom
ReplyDeleteSarah, it's amazing! Well done :) The headboard looks so tailored and perfect.
ReplyDeleteWhen I read about where you got the linen from, I read it as "suitcase fabric aisle." I was all "what the what? What the heck kind of fabric store is she shopping at?" Evidently, reading isn't one of my foremost skills.
Well done, Missus! That looks really smart - and I too, love your bedding. Our bedroom is grey and cream with yellow "pops", and the bedding is grey. Never saw yours over here in the UK but it's a great look with the headboard.
ReplyDeleteI wish I could pay you to make one for me!! How tall is the headboard?? From top to floor? Thanks!
ReplyDeleteLove your new headboard with the tufting! We made our own headboard several years ago and bought a matching bedspread for the cover. Using the chart, mine is the Cleveland style. Thanks for the fabulous tutorial - I'm ready for a change and tufting is my plan!
ReplyDeleteSo beautiful, Sarah. I am poised to make a headboard myself, just as soon as I finish my list of projects in the living room. I had a sheet of plywood for it leftover from a remodel, until my husband used it on the ground to get his truck out of the backyard mud... sigh.
ReplyDeleteIt looks AWESOME, Sarah! Love the nailhead trim and the tufting. Like you, I like the simpler look of not too much tufting. You did a great job on this--thanks for the tutorial!
ReplyDeleteJust saw this on Beckie's page!!!! Seriously love it! Totally pinning and making!
ReplyDeleteHappy day to you!
karianne
I LOVE IT! I made something similar for our guest BR last year (I used drapery fabric but am coveting that lovely suit fabric). Great minds! =) Now I'm wishing I added tufting to mine because yours looks DELICIOUS.
ReplyDeleteYour headboard looks amazing! Making one of these has been on my list for a while. Your instructions are great and I think I might be able to tackle it. Thanks for all the suggestions on how to use cheaper materials, I would not have thought of that. Thanks as always for the inspiration.
ReplyDeleteTammy @ thecoloreddoor.blogspot.com
Love your headboard! It's gorgeous! We made ours in a similar shape, but without the tufting. Now I'm thinking we should add tufting!
ReplyDeleteObsessed with ths project! Greatest, love the details you or died...makes it seem do-able for even the crafty-challenged. I'm inspired!
ReplyDeletexoMorgann
Www.glitterinthegrey.com
I love it! I have been tempted to buy one, I will not have to now :) It was great seeing you at Haven!
ReplyDeleteDebbie
I love this! Awesome job! I also love the duvet cover? Where can I purchase that duvet cover set?
ReplyDelete~ Patti
Thank you for this tutorial, for me it's the best instructions I have read out in blogland and I have even had my husband read it. We're going this weekend to pick out fabric and going to give this a shot. I've always wanted a tufted headboard and your instructions make it seem feasible for us to do. I just had one question, how tall did you make your headboard?
ReplyDeleteShel I think it was about 42 inches tall if I remember right! Good luck!
DeleteSo with the headboard hung like that does it bounce or anything say like when you lean up against it to read. I just dont want anything banging when I lean back because I like to prop up in bed alot and read before going to sleep. Thanks so much! God Bless! Mechelle
ReplyDeleteNope not at all! With the mattress pushed up against it it doesn't move. :)
DeleteI have been redecorating my master bedroom and the final piece I needed was a new headboard. After searching endlessly for one and pricing them between $400-$2000, I came across your site. Your instructions seemed simple enough for even me to do! Lo and behold, they were! Yesterday my husband and I took on the DIY project and now have a beautiful tan-colored, tufted headboard in the Grosvenor shape with silver nail-head trim. It looks amazing! The cost was a bit higher than yours at $150, but considerably less expensive than purchasing one. The greatest difficulty was finding the nail-head trim, as neither Hobby Lobby, Michael's, nor the home improvement stores carried it. We did have success at Hancock Fabric and JoAnn's. We also put some super glue-gel between the front and back of the buttons for extra hold. Thanks again for your easy tutorial! We have a great statement piece of furniture and enjoyed the time partaking in the project together. My recommendation is if anyone is considering buying an upholstered headboard, make it yourself! It's simple, thanks to these instructions!
ReplyDeleteThanks!
Erin
Thanks for the detailed instructions. I just wanted to recover an existng headboard but I want to add tufting to it. Can you please tell me how to figure out how many yards of fabric are needed? I have a king sized headboard..,just measure it and add some for wrapping to the back ??
ReplyDeleteYou'll want to see how long it is -- and as long as the headboard is not taller than the width of the fabric you should be able to get away with two yards or less!
DeleteThis is soo awesome! How a headboard can add so much to a room! I absolutely love this. I really want to try this. do you by any chance remember the measurements of the particle wood? It looks like yours was maybe for a queen?? Which is what I need! I too would like a tall headboard.. also did you staple the mattress pads onto the board as well or did you use another technique to attach them? Thank you so much, you did an amazing job!
ReplyDeleteThank you! I just measured the width of the bed (ours is a king) and then figured out how tall I wanted it. I used a spray adhesive to get the pads on there -- stapling them would make them pucker a bit, you know? I didn't want that to show when I put the fabric over it. I hope that helps, good luck!
DeleteI'm definitely going to try this, but instead a head&footboard for my daughter's crib!
ReplyDeleteGirl, thanks for this DIY tutorial on how to make such an elaborate and expensive looking headboard for such a crazy great price...I am inspired. I will post when I get mine done....
ReplyDeleteI hope mine will turn out as ritzy and glitzy as yours!
if you use the egg crate foam which way should it face? Love this blog! thanks.
ReplyDeleteIt should face the board, or wall, so you don't see the divots in the foam. :)
DeleteI am in the process of making my headboard right now and am using mdf as well. Just wondering if you had to hammer in the staples? I am having a hard time stapling through the mdf. Thanks!
ReplyDeleteYes! Sometimes it goes in fine and sometimes I have to hammer to get them flush.
DeleteThank you so much for this post! My husband and I are going to team up on a headboard for our king size be in our bedroom...this is the BEST post I have found to give us some guidance on our project! Thanks again for sharing!
ReplyDeleteLove your headboard!!! What size buttons did you use or recommend using? Thanks :)
ReplyDeleteI'm not sure what size these were -- they didn't have a lot of options though. I'd say they are maybe about an inch across? Maybe more?
DeleteThis is gorgeous! I just got a jig saw for christmas and this would be the perfect project! How far apart are the drilled holes for the tufting? And what was the size of the MDF after you had it cut down? Thanks!
ReplyDeleteGlad I stayed up long enough to find this one. Great ideas. Thanks.
ReplyDeleteI am making a headboard now. Thanks for the tutorial.
ReplyDeleteLove It Love It Love It !!! I do have a couple of questions I want to do a deeper tuff should I wrap the fabric a little loser to accommodate the deeper tuff ? And where did u get those nail heads that are connected ?? Plan on doing my room and my girls room. Will keep u posted.
ReplyDeleteThanks so much
Could you please let me know the dimensions you used? And is it for a queen or king bed? I'm trying to get a reference point for how large to make ours. Thanks! It looks so great - can't wait to make ours!
ReplyDeleteI love the way the headboard turned out! so much that i am in the making of one very similar and was wondering how many inches from the top is the first row of buttons?
ReplyDeleteSorry I just saw this Nicole -- it's about ten inches from the top.
DeleteWhere did you find this nailhead trim??
ReplyDeleteJoann's Etc.
DeleteI made a headboard, using yours as inspiration. Thank you so much for the easy to follow instructions! We love our new headboard!
ReplyDeleteLove your bed head ! Wondering how much nailhead trim you used ? Just the one packet ?
ReplyDeleteThis is genius! I'm getting a new house next month and want to start DIY projects to make it a home, cause as we know, money is tight. I was wanting to make my own tufted headboard. So glad I found your blog for this and so much more!
ReplyDeleteI made one today in seriously under an hour thanks so much for your blog
ReplyDeleteI made this at the weekend. I am so happy and was very straightforward. I haven't done the tufting yet but will do it at a later date. I also kept it the rectangle shape as it was my first ever project. My friends couldn't believe I made it myself and it only cost $39!
ReplyDeleteJust a note on staple guns. I wanted to reupholster my couch and found out electric staple guns don't have the force necessary to staple into hardwood or thicker plywood. So you can use a hand stapler, tough on the hand, or the kind with an air compressor. That's what the pros use but most of us doing DIY projects find this a bit more expensive than we care to spring for!
ReplyDeleteOH MY GOODNESS, I loveeeeeee this!!!! My friend just me this site because I was going to spend $900 on a bed. She said NO don't do that!
ReplyDeleteYes this was brilliant! I love how mine turned out as well!
Deletei've been meaning to get back to your blog for awhile now. i love your IG feed and it made me smile that you are also an indy girl. love love love this headboard. i've been toying with the idea of trying this and i think you've convinced me. i'll let you know how it turns out...hope you enjoy your weekend!
ReplyDeleteOh my God, I never knew the headboards had names. That diagram was so useful!
ReplyDeleteCharmaine Ng | Architecture & Lifestyle Blog
http://charmainenyw.com
I'm a little late to the party. If I want to take a white wicker headboard thats the perfect shape for what I want, can I just cover it and do all the necessary steps that way instead of getting a board?
ReplyDeleteYou could definitely try! I'm not sure how sturdy it would be if the fabric doesn't have something to grab to in the middle, but it would probably look good!
Delete