Adding some rustic charm to the kitchen
March 27, 2017
Share this
Hey all! I got a late start writing this morning because we started some more demo on the bathroom! I'm so stoked. I finished up taking down the wall last week but today they are taking out the tub insert and replacing it. We went back and forth about taking out the "builder" tub with the surround and went ahead with it.
They'll also be making some small lighting changes and then when the budget allows I'll move on to the new window, flooring and then a new vanity.
I work with Minwax a few times a year because I LOVE their products and love sharing how you can use them in your home. I think adding stained wood touches around the house adds a slight rustic charm and some warmth that's always welcomed.
This weekend I completed a quick project that I think makes a big impact in our kitchen. LOVE it. We've had a chalkboard on one of the walls for years:
It actually started as a much smaller chalkboard that I framed out years and years ago. I used magnetic paint on it too -- but I tell you what, that stuff is a pain in the butt. You have to mix it like crazy and it still takes a bunch of coats.
Because of that I didn't go magnetic with the rest of the wall. But you can still see where that smaller part of the wall used to be framed out because it is thicker there from all of the coats. I wanted to try to cover that up just a bit and I've just felt like that spot needed some warmth.
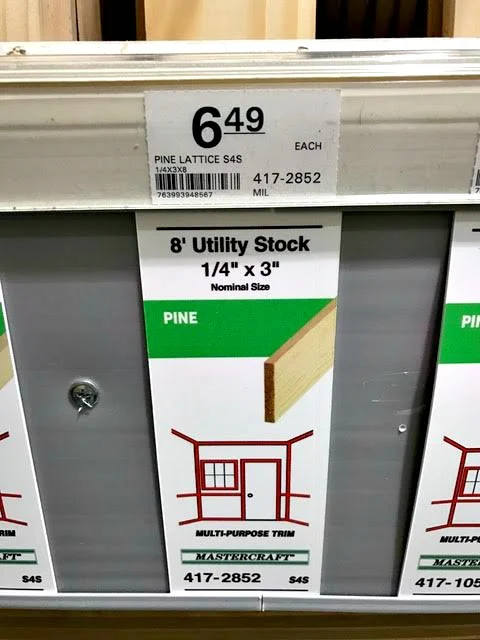
Wood and stain to the rescue! I took a trim to Menards because I wanted very thin but wide wood, and they have the best trim selection I've found. I ended up using this wide lattice:
I only needed three pieces so this project only cost me $20!
It was just a little bit rough so I did a very light sanding -- nothing crazy:
Make sure to wipe the dust before you start the staining process!
As always, I started with the Minwax pre-stain conditioner. I don't stain without it anymore -- it gives the wood a nice even surface before staining:
It's nice because you can stain pretty much immediately -- no waiting!
I have fallen in love with the Provincial stain (and every time I see or write it I think of Beauty and the Beast -- it is such a beautiful movie!!). This color is just a lovely in between -- not too dark or light and it really shows off the beauty of the wood.
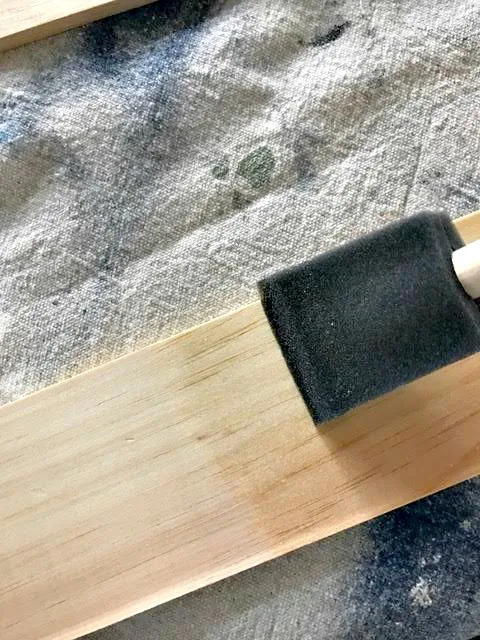
As you can see, I use foam brushes most of the time when prepping, staining and protecting the wood:
I don't recommend using foam rollers for any of these because it will leave you with some bubbles -- you'll have to go over it a few times in ensure they're gone.
It is important when staining that you make sure you can complete your stain -- you can't start and stop in the middle. Also, as you're going, be sure to brush back over the wood. Lines or bubbles like this are what you want to avoid:
The longer you let the stain sit, the deeper the color. I don't ever find it necessary to leave it for more than a few minutes though. You can always do another coat if you want. I err on going lighter because it's difficult to go lighter when you've stained it too dark.
Here's how it looks after wiping the stain (bottom ones have been wiped, top is still wet):
Don't worry though! You'll get that richer look back when you protect it at the end!
Once the stain dried I hung my boards:
We have nine foot ceilings so the vertical pieces had to be added on to -- I cut them at an angle (I just find it's easier to make it seamless when you do an angle) and then finished it up at the bottom. I didn't miter (or angle) the rest of the pieces -- they are all straight edges.
When it was all up and I was sure it was dry, I added a coat of the Minwax one coat polyurethane:
Again, the foam brush gives you good control and allows you to knock down any bubbles. Bubbles are bad when staining or protecting your wood! :) You want a nice, smooth surface when you're done.
I hadn't tried this poly before and quite liked it. It dried quickly and left the wood smooth to the touch:
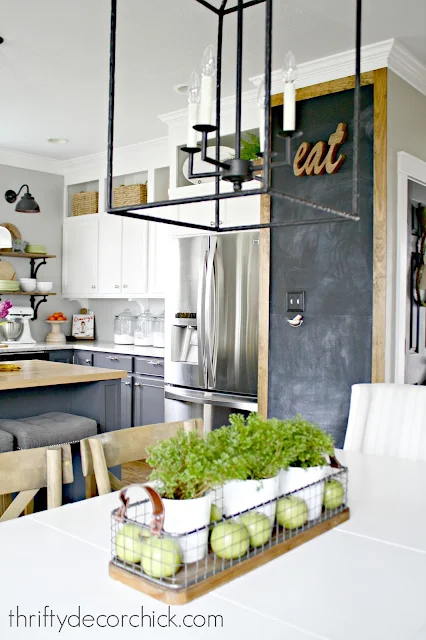
I liked the end result even better than I thought I would. I knew it would bring more warmth to the room and I'd love the stained wood with the black, but it's just even prettier than I imagined:
I had the EAT sign and ended up doing a quick coat of the stain on the top of that as well! I wanted it to match up with the frame just a bit more.
The wood ties in so beautifully with the other wood accents in here -- the kitchen chairs, shelves and even the island top (which is lighter):
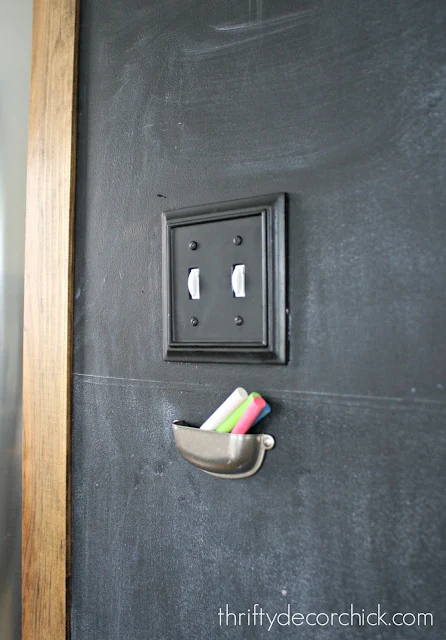
I use upside down cup pulls to hold our chalk. I did the same upstairs:
I just add a tiny drop of hot glue on both ends and they hold up great.
I love how it looks like a little smiley face. ;) So often it's the simplest projects that make the biggest difference! I just LOVE this. I have wanted to add this little detail for at least a year now and don't know why I waited so long. It only took me a few hours, start to finish:
You can see more about that big chalkboard wall here. If you have any questions at all about this process or how I made the chalkboard wall, feel free to ask!
You know how much I love a pop of black in a room and a chalkboard wall is the perfect way to add that -- it's just a fun addition too. Kids in the house or not. :)
Here are a couple more chalkboard projects if you're interested! OH, and my pin it button is working again (it was gone for months, I'm incredibly on top of things) so you can just hover over the photos and click that on the top right to pin anything.
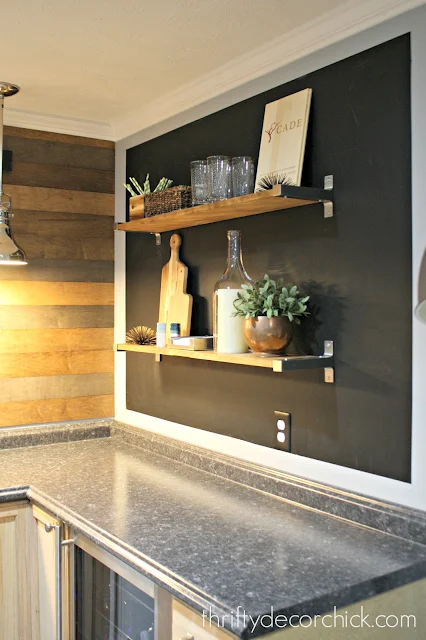
Basement kitchenette chalkboard wall and shelves:
Giant DIY board made from scratch for our office/craft room:







Who knew that a frame could make such a difference?!? Love the finished look - a little bit of rustic is a win in any space. :-)
ReplyDeleteDon't you love it when the idea in your head turns out so well!
ReplyDeleteLooks great.. I have been meaning to frame a mirror the same way. how did you attach the frames to the wall .. nailed them in?
ReplyDeleteLooks fantastic... The framing made such a hugh difference.. Great job.
ReplyDeletelove the chalk holder idea too..
I would want a catching ledge on the bottom for all the chalk dust!
ReplyDeleteI have read your blog for years and am always amazed at what you accomplish. I love how simple yet impactful this project is. Thank you for sharing! LOVE the chalk holder idea, too.
ReplyDeleteGreat DIY post. Your 100% right about not being able to lighten when you go to dark....leaned that the hard way :/. Chalkboard looks great and look forward to more DIY posts!
ReplyDeleteLooks amazing, but then again, I expect nothing less from you! :)
ReplyDeleteI love the rustic and formal look the framing gives the wall and the upside down pull, great idea! Might have to steal this whole idea onto our chalk wall!
ReplyDeleteOk, the idea of the upside down drawer pull to hold chalk is literally BRILLIANT!!! I'm using it for our huge chalkboard on the wall that we also framed out. I'm also going to use one under our bottle opener on the bar all to catch bottle caps!!! LOVE IT and thank you!
ReplyDelete