
How to Seal and Protect Wood Counters Around a Sink
December 13, 2017
Share this
How to treat and protect wood counters around a sink.
It's actually quite easy to protect butcher block countertops with an undermount sink!
And YES...you can have an undercount sink with wood countertops. :) If you treat the wood well, your wood counters will last forever!
And then you do it and it takes no time at all, turns out beautifully and you kick yourself for waiting that long?
Yeah, I do that often. :)
Yeah, I do that often. :)
When we were picking out finishes for the kitchen I knew right away I wanted to do butcher block on the island again.

Our contractor suggested we use mineral oil for sealing the wood, and even though I have never used that for my butcher (but have for cutting boards), I agreed to use that after talking to some friends who did as well.
But if you ran your hand over it, it was rough from the popping. To knock that down a bit I used very fine steel wool (grade #0000) over the whole thing:


I've had it in varying forms in our last kitchen and adore it. I just love the warmth the wood brings to a kitchen...and they are easier to take care of than you think:
This time we have a sink in the island. I thought I may have to treat it a little differently than before.
This is when I should have trusted my gut and experience a little more, because I made some choices that didn't turn out the way I hoped.
Our contractor suggested we use mineral oil for sealing the wood, and even though I have never used that for my butcher (but have for cutting boards), I agreed to use that after talking to some friends who did as well.
Well, it didn't work well at all. They put numerous coats on the wood and I wasn't happy with it for many reasons:
- I'm not sure if it was just the brand, but one thing that bugged me is the mineral oil didn't change the tone of the wood in the slightest. Usually any kind of oil will deepen the wood tone at least a little.
- It was still very light and looked just like bare wood (I asked the installers when they were going to oil it, turns out they had already put on many coats).
- When we would use the sink or place a glass on the counter, it would leave a raised water mark. You don't want to deal with water issues and a protective coat on wood counters should NOT allow for that.
We left it bare for six weeks before I finally decided on a plan and started it one night...and it hardly took any time at all.
The first step was to prep the wood and get rid of all the water marks. I am kicking myself I didn't take a before pic, because it was looking pretty crappy.
The first step was to prep the wood and get rid of all the water marks. I am kicking myself I didn't take a before pic, because it was looking pretty crappy.
This post may contain affiliate links for your convenience.
See my policies and disclosure page for more information.
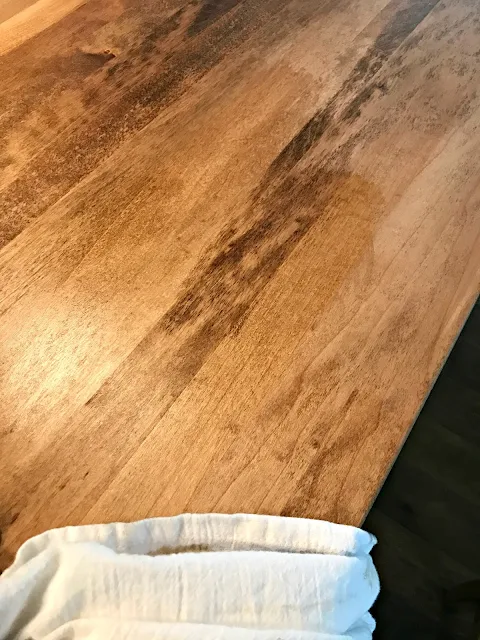
But all it took was wiping down the counter with a wet towel to "pop" all of the wood.
Using water on your wood opens it up and is actually not a bad idea before staining.
The water marks disappeared and everything was looking uniform again.
But if you ran your hand over it, it was rough from the popping. To knock that down a bit I used very fine steel wool (grade #0000) over the whole thing:

My Dad always recommends steel wool and I find it works great to smooth out the wood out a bit. Dads are always right!
You don't want to sand it down big time, just a light pass. You'll feel with your hands where it's working.
There will be some residue from the steel wool, but using a wet rag would pop the wood again, so a tack cloth is helpful here.
It is sticky (I absolutely hate the way it feels so I use a glove!) and grabs all the junk before you stain.

Next up, the prep! SO important!
I know I blabber on about this every time but it's good stuff. The Minwax pre-stain conditioner gives your surface a nice, neutral finish to even everything out:

You can find it at any hardware store and I highly recommend it. Just wipe it on, that's it!
I did a small staining project recently and was in a bit of a hurry so I didn't use it. I was shocked at the difference.
One thing in particular I noted was that wherever I went to apply the stain, my rag left marks where I started on the wood. So if I added stain in the middle, there was a clear mark from where I applied.
With the conditioner that doesn't happen. You can start wherever and the stain wipes on beautifully. I won't do another project without it. :)
It also allows you to work with the stain a bit longer and keep that "wet edge" as you work. (You don't want stain to dry mid-project or you will see where you stopped and started.)
I've been raving about this Provincial wood stain for a year or so now and I'm using it again.
It's become my go-to color. It's a perfect brown -- no red tones and not crazy dark:

I used that on the butcher block because it works with our floors so well. I didn't want them to match exactly, but I did want it to be the same tone.
You can see a little in this photo how similar they are:

One thing to note about staining -- and I noticed this because we had lived with the bare wood for so long -- it can be a little bit of a shock when you first apply the stain.
Staining is one of my absolute FAVORITE projects because it's instant gratification. But it brings out details of the wood that you didn't see before. That's the beauty of it, but it can throw you off at first too.
Not to worry though, because after the process it looks amazing and you want to sleep on the island because you love it so much. ;)
You need to let your stain dry well -- follow the instructions, but at least 12 hours is good for a project like this.
Some people like to add another coat but I rarely do. One and done for me!
After it's dry, take your steel wool and go over the whole surface again. This gives you smooth start for the next step.
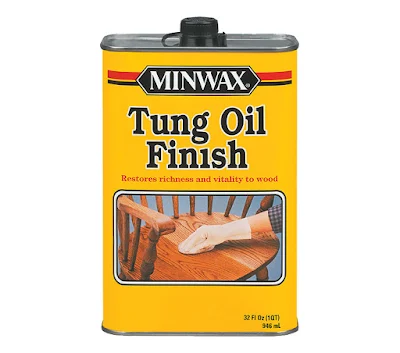
Because I wanted to have a surface that protects against water, I went with Minwax Tung oil:

I should have just trusted what I know and love from the start! I used it on our first butcher block and was so pleased with how it protected the wood.
Pure Tung oil is best, but it can be hard to find.
It's not a thick finish like polyurethane, so keep that in mind. I don't like using poly on a countertop because if you need to refinish it down the line it's more difficult to remove.
Tung oil really seeps into the wood and protects beautifully. I used a rag to apply (just like I did the stain) and poured it out onto the counter first:

Then rubbed it in.
Don't be stingy with it -- it will penetrate the wood so it's hard to use too much. It really finishes off the whole process so nicely -- see how it deepens the tone even more?:

Ack! I just love it! So good.
Use a rag to really work the excess into the wood. I did this at night and used the lights above the island to kind of stand back and see where it didn't look like it was rubbed in well.
You can tell by the sheen where it needs to be worked in.
I waited 24 hours in between coats of the oil, and sanded once again in between with the steel wool. This ensures that your surface will be smooth as a baby's behind.
Two to three coats of Tung oil is recommended, I used two and it's protecting the wood wonderfully. I like to reapply every six months to a year, but I've waited years in between coats and it held up so well.
I made sure to really rub it into the cut wood around edge of the sink, as well as around the faucet:


Since I've finished we haven't had to baby the counter one bit. It's just awesome stuff and I really can't recommend it enough.
Liquids just sit on the surface and even sticky stuff can be scrubbed off no problem:

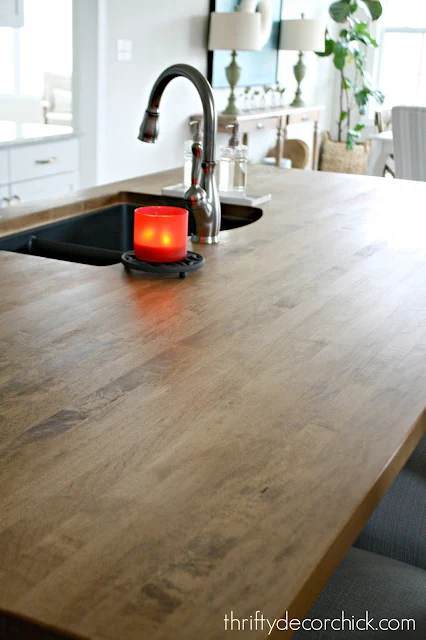
It's prettier than I could have imagined. We absolutely LOVE it:


It warms up our kitchen so much!
Wood just feels cozy and homey to me, and is a great contrast with the modern materials we have in our kitchen.
You can't go wrong with a combo of solid surfaces and wood in my opinion:


I found the stools at Target. I had been on the lookout for a fourth of our previous stools for months and couldn't find one anywhere. So we'll use those in the basement eventually.
I know many worry about wood around a sink, with good reason. But this oil protects so well, I'm not worried about the wood counters at all. We do wipe up around the sink after using it but we did that with laminate and granite too.
I know some are concerned about having a food safe wood counter, but after curing this stuff is not going anywhere.
We don't cut wood on our butcher block -- I love the eventual nicks and dings that give it a patina over the years, but I would never cut right into it.
If you ARE planning to do that with your counter, do not use stain.
Do you have butcher block counters? How have they held up?
I'll be sure to update you on how ours hold up! I don't have worries that this will stand the test of time -- we didn't baby our old counters and they were awesome.
Never miss a post by signing up to get posts via email.
Great post, Sarah. Thanks for the tutorial. I'm going to use the conditioner next time!
ReplyDeleteIs this food grade stain/wax? I've had great success with beeswax.
ReplyDeleteI’ve had mine for 6 years and I still love them! The only thing I recommend is do not leave a rinsed off can good on the counter, it will leave a black ring.
ReplyDeleteI honestly have never been a fan of butcher block counters but yours are STUNNING! I love it!
ReplyDeleteLOVELY!!! I am patiently waiting for a "real" new house tour-ha!
ReplyDeleteI'm looking to get a large butcher block piece for my island (5'x9). What source did you use?
ReplyDeleteJust beautiful, Sarah! Question- what happens when someone leaves a cold drink on the counter and walks away and you don't notice till hours later? Also, you said you can scrub sticky stuff off- what do you use to clean/scrub? Can you use dish soap and the scrubby side of a sponge or would that take away the protective coat?
ReplyDeleteWe have walnut butcher block counter tops. We've had them for 6 or 7 years now. All we did is wipe tung oil on them to seal them (no stain required because of the beauty of the walnut wood). They still look absolutely beautiful. I reapply the tung oil around where my sink is and the coffeepot (I slide it forward and back every day) about every year and a half or two years (whenever the area I slide over begins to look dull). I have been amazed at how low maintenance they have been. I've never had any issues with water rings or any sort of staining from things being left on them.
ReplyDeleteSarah, I haven't had time to check any of my blogs since we are in the midst of still renovating out 1977 colonial jenky home. I just pooped on and saw you kitchen. Ummm, are those golden champagne pulls from Amerock??? If so I put the exact ones in my kitchen!!! With the knobs that have the white lucite looking front.
ReplyDeleteHow long does the odor from the tung oil last? Especially since it is the winter season and there are no windows open. I used polyurethane on a scrap piece of our butcherblock and we brought it in to see how it changed the color and within 30 minutes had to remove it from the house! OMG it smelled so bad. And just for kicks I kept it on our back porch for over a month and it still has an odor. I am very sensitive to smells, which can be a curse. lol
ReplyDeleteThanks so much! Jessica
What do you recommend for taking care of wood cutting boards? You mentioned using mineral oil. I just finished personalizing some wood cutting boards for gifts, but when I washed one it felt rough afterwards. Thanks for all your helpful posts, especially for those of us on budgets!
ReplyDeleteI just got a round wood dining table from a from a friend (for $40...SCORE!). I'm wondering if I should follow this tutorial to condition/stain/protect my table? Thoughts?
ReplyDeleteI have used Tung oil on many projects but mainly on dining room tables. I have waited entirely too long between coats (years) and only re-do when the color is uneven. The protection is still going strong. Highly recommend this!
ReplyDeleteThank you so much for sharing this tutorial! I have been looking all over for just this sort of info and this is the best before and after with photos that I've been able to find.
ReplyDeleteTung Oil Finish from Minwax is my very favorite wood top coat! Refinished my dining room table top 5 years ago with it, and it holds up to abuse! I wipe it with a damp rag and it looks just as good as the day I did it, even with a family of 7 using it relentlessly. Big fan!
ReplyDeleteThe Real Milk Paint makes a dark Tung oil that is all natural and food safe. It deepens the color of the wood and protects it. You have to mix it with a citrus solvent that they also have. I recently used this on my new wood top on our island, and it was amazing!
ReplyDeleteWOW. You came through so much on this blog. THANK YOU! I searched around online for ways to finish butcher block, and you had the most comprehensive, simple, and straight forward plan. I did everything you suggested to a T, and my counter looks amazing! I even used Provincial 211. Sending an air hug from this happy mom!
ReplyDeleteHow has the wood held up around the undermount sink? Did you use the same steps for vertical side of the wood at the top of the sink? I'm trying to decide between undermount and drop in sink with a butcher block counter I've ordered. If I do drop in I'm worried about the water that always seems to be between the sink and the backsplash/wall.. Thank you for the great info!!
ReplyDeleteIt's held up great! We have a deep sink so that may help. Yes, that received the same treatment as the rest. I would be concerned about that too -- if you can have it undermounted I would do that!
DeleteHello! Do you recall what type of wood you used?
ReplyDeleteThis countertop is maple!
Delete