
How to Install Peel and Stick Wallpaper
March 23, 2018
Share this
Easy do it yourself peel and stick wallpaper tutorial!
If you've ever wanted to attempt hanging wallpaper, these step by step instructions on how to hang adhesive wallpaper will help!
I've absolutely fallen in love with wallpaper over the past few years. You can see all of my wallpaper projects here!
This is one of my favorite DIY projects because you'll get a big impact for very little money (and effort once you get the hang of it).
This sticky product is different than traditional wallpaper (see the easy way to hang the pasted version here), because it's more of a plastic material instead of paper. It's like contact paper and has a sticky backing.
Don't worry, it doesn't look like plastic -- these come in all kinds of textures and sheens. I love that this is removable wallpaper and can be easily taken down later.
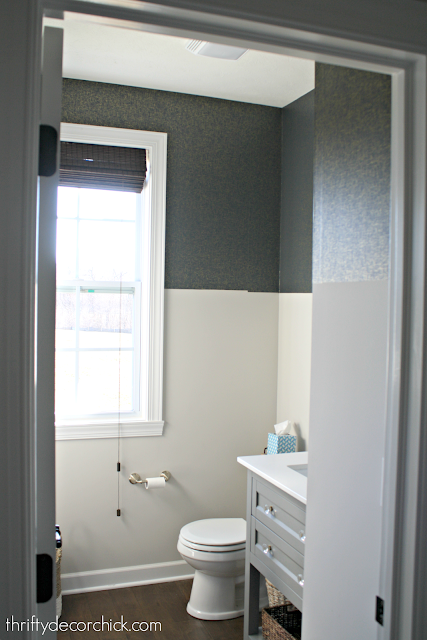
I shared some of my DIY plans for the house and how I planned to use this wallpaper from Target:

This post may contain affiliate links for your convenience.
See my policies and disclosure page for more information.
The online reviews were pretty good so I figured it wouldn't be too bad to install. But then a couple of you said it was a pain so I got nervous. Ha!
Well I'm pleased to say it went really well and I'm super impressed with this stuff so far.
There are a few tricks to getting this install right.
Before hanging your wallpaper
You'll want a clean, dry surface free of dirt or dust.
Be sure to fill any holes in the drywall bigger than a small nail, as the wallpaper will accentuate them.
Any wallpaper is best when applied to a flat wall with little texture. I get asked all of the time about wallpapering textured walls, and from what I've learned it is not recommended.
You'll want to knock down any heavily textured walls before installing wallpaper.
These are the supplies you'll need to hang wallpaper:

I used the following for this install:
- a level for a straight edge
- measuring tape
- a pen or pencil
- scissors
- a sharp utility knife
Cutting your wallpaper before installation
Lay your paper good side down and mark the length you'll need along the back. I measured and then marked that measurement at a few places across the wallpaper:

I was only installing this around the top portion of the walls so I didn't have to be super precise with my measurements -- the top and bottom will be covered with board and batten trim.
I used the level to draw a line along my marks for cutting:


The only thing I would change about this product is the plain back -- I SO wish there was a grid pattern on the back to help with straight lines!
I watched a video one how to install this product and they suggested placing some cardboard on the floor and using a level and razor knife to get a straight cut.
We don't have any floors I would dare use a razor on -- even with some cardboard underneath. So I just cut it with scissors and it worked fine.
If you aren't planning on covering your edges, you may want to try using the razor blade and a straight edge at least for the top of the wall. (At the bottom you can use the utility knife to trim it off at the baseboards.)

I started my first strip over the door -- it was the smallest part and also the most inconspicuous. I didn't want to start on the first wall you'd see when walking in! ;)
I'll share a list of specific tips at the end of this post, but as I went around the room I realized how easy it was for the pieces to start get a little wonky.
Hanging your wallpaper
Starting at the left side of your wall, measure the width of your wallpaper and use a level to draw a vertical line just past that:

As long as the wallpaper was similarly spaced against that line I knew I was good.
Be sure your first strip is perfectly level vertically!
Always leave a bit of excess paper at the ceiling (and at the bottom), so you can trim that down later for a consistent and straight cut line at the top and bottom.
After your first piece is up, you'll want to work around the room by aligning the next strip.
The first few seconds are definitely the hardest -- getting the piece to match up to the one before.
Align the paper on the right edge of your previous strip to start. I always overlap the wallpaper just a bit (less than a quarter inch) because it can contract over time.
Make sure your wallpaper design matches up well if you overlap!
When you get it right, it's just a matter of spreading it on and getting any air bubbles out. (That part was fun.)
You can use this wallpaper smoother to make sure everything is flat. For smaller projects I use my hand. You can feel any bubbles that way.
The bubbles are easy to work out, or you can pull the paper back up to get them out as well.
Even though I'm adding crown molding, I did end up trimming the top of the paper just because the uneven edges were bugging me.
Slide your razor along the corner to trim them up:

Those pieces peel away easily after cutting:

That's the same process you'd use along baseboards too.
This room is not even close to done, but I like taking you on makeovers step-by-step!
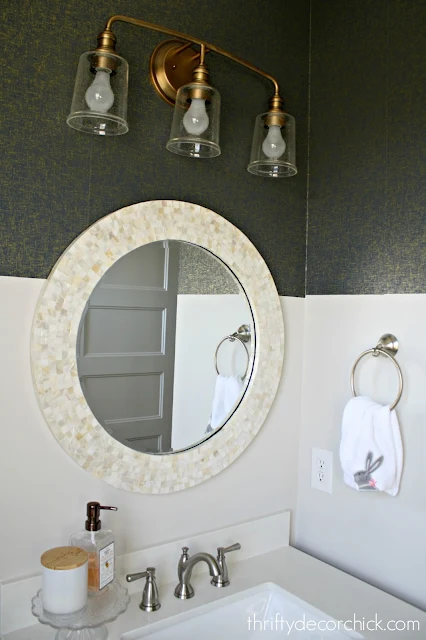
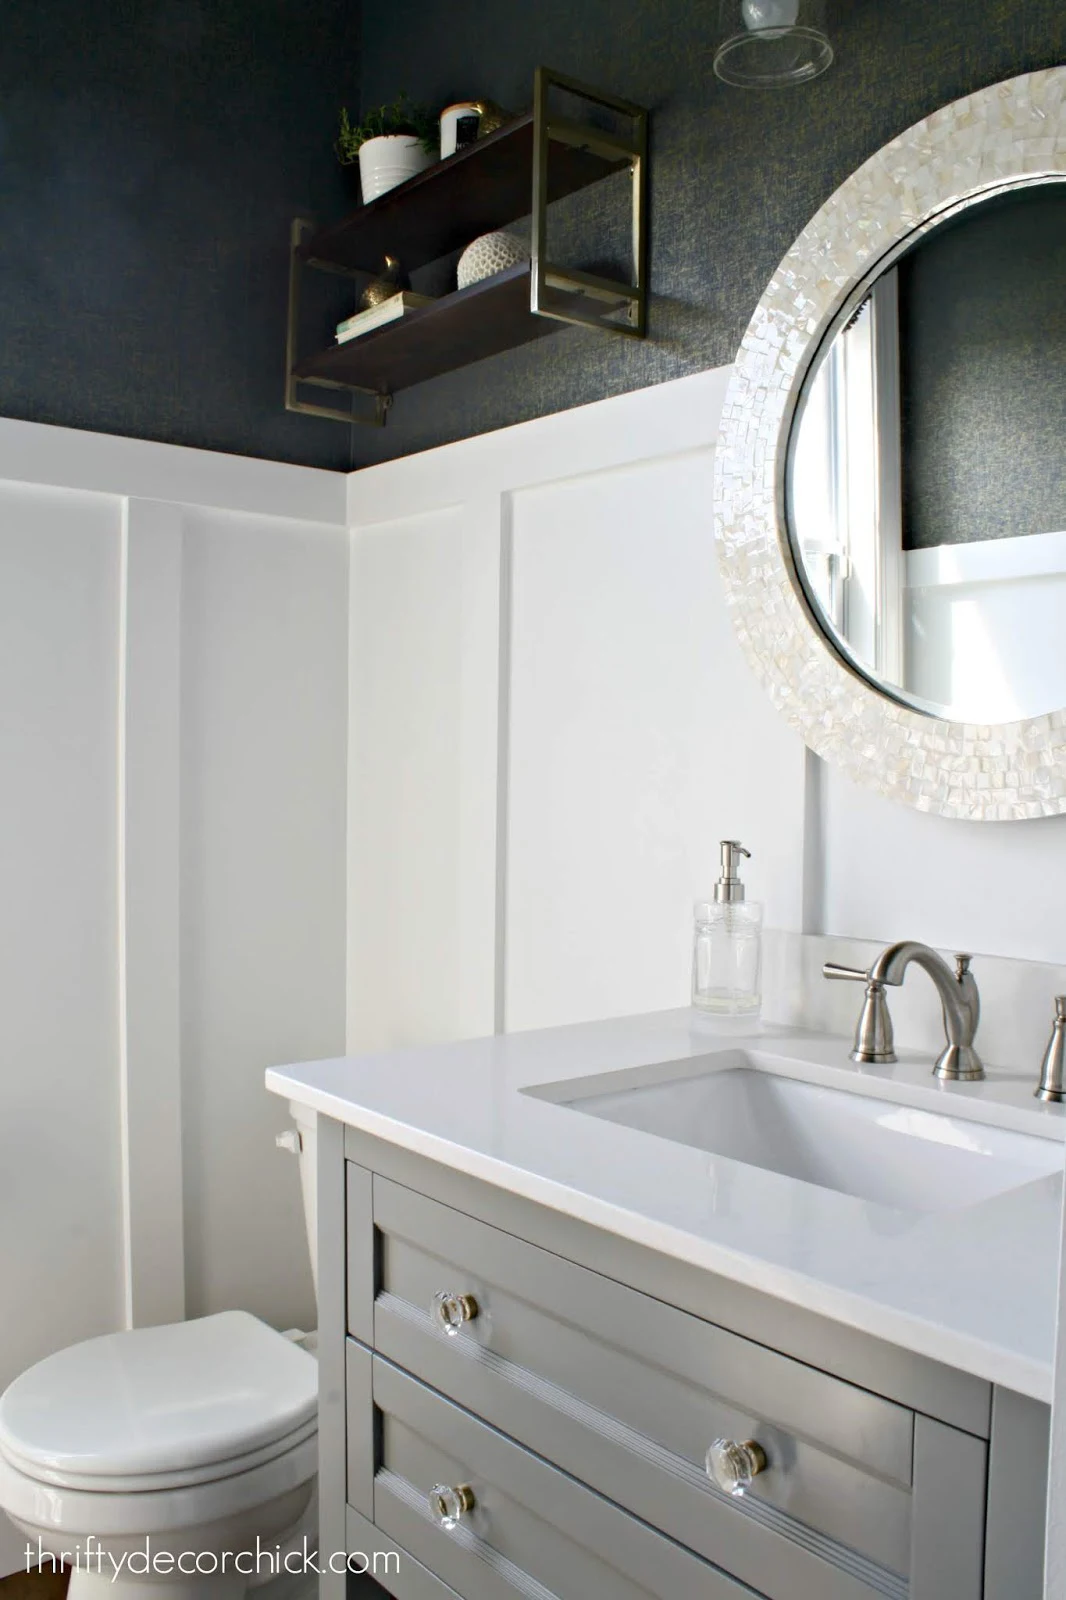
Here's how it looks now:

We LOVE how it looks!! I'm so happy we like it! 😂
It's turned this bathroom into a little jewel box -- I can't wait to see how the rest comes together! I just love it with the light fixture and the mirror:

I'm not sure how regular wallpaper works (I've only ever used it for artwork, not on walls), but I tried wrapping the inside corners with one piece and it was WAY too difficult.
With regular wallpaper I'm sure it's easier to scootch around.
So for these corners I would just cut to the size needed and then start with a new piece on the other wall:

You can see just a slight bit of the wall color in some spots but I'll paint those a dark blue and I think they'll totally disappear. (Target sells paint that matches their wallpaper by the way.)
I only had one outside corner to do and that one I wrapped around the corner.

It is NOT perfect, that's for sure. I gave up perfection a long time ago, so it doesn't happen much around here anymore. ;)
As I always say -- if anyone is that good that they notice the slight imperfections then they get a COOKIE.
But if they notice in and then tell me they noticed it...maybe they won't get one cause that's kind of rude. Hmmm...
A few more peel and stick installation tips:
- A wallpaper with no repeat like this design is EXTREMELY forgiving. You don't have to match any design up as you install and there is very little wasted paper.
- You'll see more imperfections with the lights on or in direct sunlight than you will with lights off. You can see where some pieces overlap a bit, but you have to look for it. Even unforgiving wallpaper shows seams so it's something you just need to consider.
- I did learn as I went to cover the seams in a certain direction -- some spots you can see the edge of the paper. If you work with the light sources in the room you'll see how it works better to overlap in certain directions (away from the light).
- This wallpaper is similar to contact paper adhesion so you can peel it away and apply over and over. I completely removed a couple to rehang once or twice.
- I found it was best to peel the paper backing from a top corner and then fold the paper back so it wouldn't get in my way. Once I had the top section hung correctly right, I'd start peeling the rest of the backing off as I went down the wall.
- For the skinny parts next to the window and door I installed the paper above, and then just cut a smaller strip for down the side. You can't tell at all that they're not all one piece.
I actually found this kind of fun. It was oddly satisfying -- like painting a room a little bit at a time and seeing it transform bit by bit.
Even though I didn't find this too difficult, I can see how doing the whole length of the wall would be a LOT harder.
If you try it I recommend a smaller part of the wall like this, and definitely a forgiving print as well! At least for you first try. :)
If you have any other questions, let me know! Now I'm on to phase two -- paint and molding!
See the finished powder room with the board and batten walls here:
Never miss a post by signing up to get posts via email.
Love it! I've been eyeing one of their papers forever, maybe I'll pull the trigger. Another suggestion for the corners would be to just use a sharpie in a matching color to touch it up, might be easier than trying to paint.
ReplyDeleteGorgeous, Sarah! I was looking into peel & stick papers on pinterest recently (thinking of doing something similar in my powder room) and someone mentioned that you can spray your wall with something(soapy water maybe?) which would allow you to slide the paper on the wall a bit to get it into place while hanging and that it would dry and stick as usual. Did you do anything like that while you were hanging? If not, was it very difficult to work with/ get it into place? Did you have to peel and re-stick a bunch of times to get each piece in place?
ReplyDeleteI did not -- I don't think it would stick with that on the back. It took a few tries sometimes but it's so easy to restick, most weren't bad at all! Some went up perfectly, some I restarted three times! :)
DeleteHow easy is removal if you fall out of love with it in a few years?
ReplyDeleteYou're supposed to be able to just pull it off. We will see!
DeleteHow will you be able to "just pull it off" if there is molding on top of it?
DeleteI'll have to use a razor where it meets the crown. The paper itself won't be covered.
DeleteLooks great! Would you mind sharing where you bought the mirror above the vanity?
ReplyDeleteHomeGoods!
DeleteWith regular wallpaper, I've always been told to first paint the wall the same color as the wallpaper background. Over time there will be shrinking and expanding and those pesky lines will show up. Having the similar colors hides all kinds of problems! I imagine this would apply to the peel and stick version also, although it would require the extra step of painting!
ReplyDeleteI'm curious as to how well the paper will hold up with bathroom moisture. Be sure to let us know! I would love to give this a try!!
As always, I love reading your posts!
Thank you Anne! I thought about that about halfway through but was too lazy, ha! ;) I don't expect any issues since there's just a sink but I'll update for sure!
DeleteLooks amazing!! Do you have texture on your walls? If so, does the texture show through the paper?
ReplyDeleteNo we don't, not sure how that would look!
Deletethis brand says it doesnt work on texture, fyi!
DeleteI love the wallpaper. Are you going to add a molding around the base? I didn't see anything about it in the blog post, and I know you said it wasn't perfect but my eye was immediately drawn to two areas where the paper wasn't level.
ReplyDeleteYep!
DeleteThat looks great. I have not been to Target for awhile....looks like I need to go shopping!
ReplyDeleteI do want to share with you something I learned the hard way (experience). when you apply the paper first and then the trim pieces your paper is behind the wood so if in the future you wish to change / remove the paper it is stuck under the boards....argh, a razor will cut it off where they meet but it doesn't always work perfect. I now put up all my trim boards and then my paper so I do not run into this issue.
Oh yes, I'm anticipating that. I'll have to recaulk anyway, so that should cover any issues. So worth it to not have to make it perfect! :)
DeleteLooks great! I used it in the shiplap design and started to have trouble with the lines being straight. But it was techincally easy to apply outside of that. I agree wholeheartedly on the grid lines!
ReplyDelete