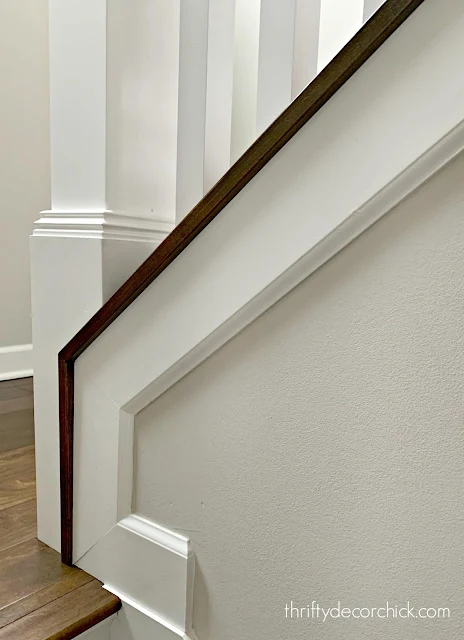
How to install a board & batten wall for cheap
January 17, 2020
Share this
Hey there! I've FINALLY started the stairway wall project I've talked about forever!
After going back and forth on what I wanted for at least a year, I just went for it. I hit a snag along the way and redirected...I'll share that in a minute!
I started with the lowest wall because it was the easiest to reach. ;) Here's how it's looked for awhile after I built and installed my picture ledges/shelves:
I decided on a super simple look that won't compete too much with the fireplace design I did late last year.
I started by removing the trim under the stairs -- it's pretty standard for builders to use baseboard (didn't get a before pic so this is another spot on the stairs):
The trim I was planning to use is 1/4 inch thick and if you butt it up against the smaller side of the base, it didn't meet up to my liking. I wanted them to be as flush as possible.
This post may contain affiliate links for your convenience.
See my policies and disclosure page for more information.
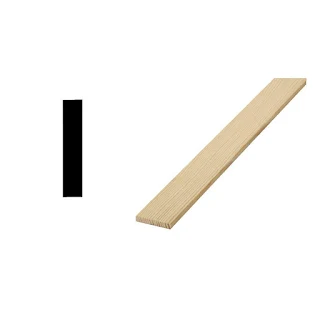
I don't LOVE the baseboards used as trim anyway, so I wanted to change it up. I wanted something a little cleaner, so I was planning to use these thin lattice strips from the hardware store:
Here's the thing that sometimes bites me in the butt. Once and awhile I'm impatient and just want to get after a project. Normally I'd have the luan I usually use cut down instead of buying the lattice. Luan is only $15 for a 4x8 piece and it gives you ten or so strips (depends on how wide you have them cut).
Thing is, I was being lazy and didn't want to go grab the wood and have it cut down at the store. And the cuts aren't always GREAT -- it's a free (or very low charge) service and I'm so thankful they do that at our local hardware stores. But sometimes they aren't cut well and you're left with a lot you can't use. It just depends on who cuts it! I wanted to go the easy route this time and I should learn by now that that doesn't usually end well. ;)
Soooo...when I took the base off below the stairs, the gap between the stained wood and the drywall was too large for me to use the lattice. For all the parts farming the wall, I was going to have to use something wider.
I didn't even realize I had scrap strips of luan already cut down in our garage from another project. Score!! I was able to take all of the base off (except at the bottom) and replace it with luan:
This part was pretty easy because I just held the old base up to the new trim and marked the length and angle it needed to be cut.
Now my trim had something it would fit perfectly flush against. You can see I also added some along the left side so the whole thing was trimmed out.
I thought maybe I could still use the thin lattice for the rest of the wall so I started installing:
And I hated it. It looked all wrong.
I do have to say -- until it's painted it's really hard to envision how it will look. Keep that in mind as you work on projects like this. A coat of white paint (or whatever color) will unify everything and make it look better 100 percent of the time.
I could just tell immediately that the thin strips were off with the thicker stuff framing it.
So I dug around more in the garage and found enough of the luan strips to finish the whole wall. DUH. I could have saved so much time!
Here's a little trick when you're installing trim up against an angled wall or trim -- hold the end of the piece you're installing up against the angle (use a level to make sure it's perfectly horizontal or vertical):
Mark the top and bottom (and then draw a line if your saw doesn't have a laser line). Place your trim on the saw and move the saw angle till it matches up. It will get you an exact match!
Figuring out the spacing for board and batten is a math game. I figure the space between the two end pieces of trim on each side of the wall. That was 129 inches. My strips are 4.5 inches wide, so I figured out how many I wanted (four) and subtracted that total:
129 inches - 18 (4.5x4) = 111
Then I divided 111 by how many "open" spaces I'd have vertically. Four pieces of trim means five spaces so...
111 inches ÷ 5 = 22.2
I ended up doing 22 inches to give myself a little wiggle room.
I added a horizontal piece across the top (placement is wherever looks best) and I was done!:
Well not done done. Next up: filling holes, light sanding and then at least two coats of paint, probably three.
I went with one line across horizontally instead of a few because I didn't want it to get too busy. It's easy to take away or add more if I want to change it up. I want this to be an accent that adds character to the room, but I don't necessarily want it to be the main focal point.
I should have known that I'd like the thicker trim much better anyway! That lattice was going to be way too wimpy.
I know it's hard to envision this in it's unfinished state, but bare with me. When it is all white it will look sophisticated, but won't overpower the space. It will be very pretty when I'm done...that's the plan. ;)
Oh, and I never plan to remove those picture ledges so I trimmed around them.
It's been awhile since I've shown you how to do basic wall trim with this cheap stuff. You can do so much with just one 4x8 sheet! Stay tuned to see that first wall finished up.
See below to see just a couple of the projects I've done with these luan boards. It's easy to use and looks great when painted!
See more of our home here. To shop items in our home, click here! Never miss a post by signing up to get posts via email.


Going to be beautiful! That's the formula I used for my board and batten...my cousin who was helping thought I was a math wiz! 😂
ReplyDeleteSo pretty! I love some of the examples you showed at the end! ❤️✨
ReplyDeleteCharmaine Ng | Architecture & Lifestyle Blog
http://charmainenyw.com
Nice! It is always great to put personal touches in a home.
ReplyDeleteYou're amazing ❤️love it!!!
ReplyDeleteWow, thanks for showing how you did it.
ReplyDelete