
How to Install Picture Frame Trim on Plain Walls
June 09, 2021
Share this
How to add decorative trim to dress up basic walls.
There are so many different types of decorative molding for walls, but this simple trim is the most elegant. It truly transforms a space!
I started this picture frame molding project right after I finished the
HUGE wall of bookcases
in the basement but I kept getting distracted by other projects that were
brighter and shinier. ;)
The
mud/laundry makeover
and the
garage clean out and organization
took up a couple of those months. And then I was just...well, tired from all
of that. A couple of weeks ago I finally started up this panel molding
project again.
It took longer than expected because when do a project like this, one thing
always snowballs into a million other smaller projects. Every. time.
But I'm
REALLY loving how it turned out and I'm also really happy I added all of the
smaller projects.
When I finished the wall of built ins in our basement living room, I knew right away that the
other walls needed something:

I've planned to do these molding boxes for a long time, but knew I needed to
wait until after the built ins were done to determine the size.
We LOVE the dark, moody gray we have down here (Westchester Gray), but
painting the walls made me even more sure that the wainscoting would look
REALLY good:

I had to decide on the design first -- I only had three wall sections that I
wanted to add trim to. I took a photo of one wall and then added lines using
my phone editing.
The traditional two boxes was what I initially wanted to do:

But I thought I'd try out adding one more at the top and loved it:

This post may contain affiliate links for
your convenience.
See my policies and disclosure page for more information.
I used the simple decorative pine trim
I used in our dining room
as well. It's simple but elegant, and not crazy expensive:

It's one of my favorite types of molding and you can find it at Menard's, Home Depot and Lowe's.
I painted our walls in a flat sheen, but I always use semi-gloss paint on trim.
I painted so many of these eight foot pieces...with brushes,
rollers, and then with my favorite find, this little paint pad:

It was great because I could just dunk it in the paint in the can -- no need
to pour into a tray. It got into the little groves easily and made quick
work of the painting. I think I got mine at the dollar store, but this is a whole set!
I usually wait until the trim is on the wall to paint, but since I was
doing a different sheen I painted these before.
I
installed the crown molding first and then cut scrap pieces of wood in the sizes I needed to space out my
boxes.
Each wall trim box was 3.5 inches away from the nearest wall (except for around
the window where I did twice that to accommodate for the drapes) but at little less from the ceiling.
I spaced each panel two inches from the top, bottom and between each box:


Using those a piece of scrap like this makes for a much easier installation...you can easily check to see that
everything is spaced out the way they should be. I also checked for level as
I was installing them as well.
I finally bit the bullet a few months ago and bought
this battery-powered nail gun
and it is a game changer! I've been carrying around a compressor and
fighting the air tubing for 15 years. The cordless nailer is SO much more
convenient, but definitely heavier.
The molding needs to be mitered at a 45 degree angle because of the detail on the trim:

This is why I usually paint after the trim is on the wall -- after caulking to cover gaps and using wood filler for nail holes, you have to do more coats anyway:

Although I didn't caulk at all with this trim because it fit so flat against the
walls. Get the nails into studs where possible, and for other spots you can
nail at an angle to secure it well.
This wood trim is very lightweight, so no wood glue or Liquid Nails is needed.
When I was done I knew there were some more things I wanted to tackle. That skinny shadow box trim at the top of the walls were crying out for some lighting! I so wish I
had all of these ideas in my head when we were building, because I would have
added electricity then.
But I didn't, so I went with my go-to, the
battery operated sconces:

I shared how to
add sconces without electricity as well here! It's such a great hack. These art lights are great -- I just don't love the
brass tone. So like last time, I sprayed them a more consistent brass
color.
I moved some of the artwork around, changed up some of the decor and painted the
baseboards to match the rest of the walls. At the last minute I also added
some additional trim in the angled part under the stairs:

That took me forEVER. The angles were not computing in my head and it was a
couple hours of checking angles and going up and down the stairs to the garage
to cut. Only twenty-five times or so.
Usually you'll need to do some math to figure out the number of boxes for the walls, but this time I went with bigger sections that just flow better with the room.
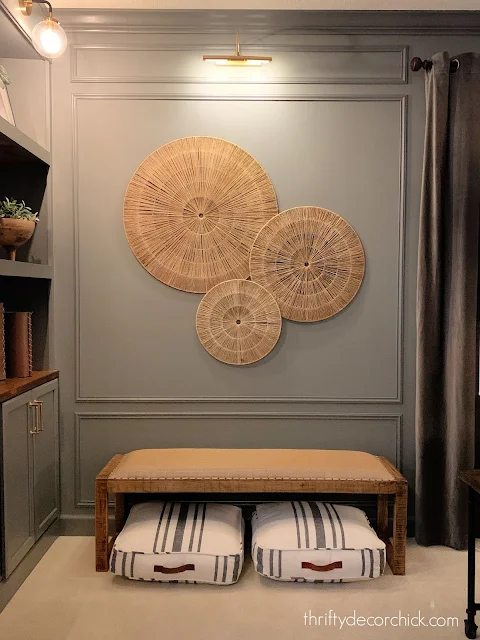
I moved the mirror that was here and replaced it with these AWESOME
round whicker wall hangings:

Holy cats, I love them so much. So, so much. I want to hang them all over the
house! They look so good and you get the whole (huge!) set for under
$100.
All of the projects were SO worth it...it looks so good!!:


I always love crown molding in a room too. It's a traditional touch that adds
so much character and charm.
I love this space most at night when we have the recessed and bookcase lights
dimmed and the art lights turned on:


The wall molding is the perfect finishing touch down here. If I've said it
once I've said it a million times...trim work makes SUCH a big difference
for not a lot of money.
I spent about $150 for the molding, but it usually
costs less than that. (The trim has gone up $2 each since I bought it a few
months ago!)
I used a lot because of the three sections and large size, so this project
could easily be done for under $100!
Here are a few before and after pics...this space has seen so many DIY
projects over the past four years!:


We are spending more time down here than ever! It's definitely our favorite
spot in the house lately:

I'm so happy to have another project crossed off the list. Now onto easier items like some organizing!
Questions? Here are the projects and items in our basement family
room:
Built in bookcase how-to
Changing out the recessed lighting
to brighter/more efficient fixtures
Drapes and giant map are from IKEA
Dresser is vintage
Rug was a HomeGoods find years ago
See how I added this
panel trim to our dining space here:

And ALL of my
wall molding projects over the years here!
See more of
our home here.
To shop items in our home,
click here!
Never miss a post by signing up to
get posts via email.
Wow, it looks great - what a transformation! It looks really complete now.
ReplyDeleteAbsolutely stunning! Is that wooden piece under the mirror new as well? It’s beautiful!
ReplyDeleteThank you!! It’s a vintage piece I found forever ago on Craigslist. 😊
DeleteI love your house! I always think everything looks perfect, and then you come along and add shelving and trim and lighting and WOW!!! It makes such a huge difference. Your skills are amazing. Your “vision” is what makes everything come together.
ReplyDeleteI've never seen such a beautiful basement!
ReplyDeleteWhere did you find the world map? I love it! The entire room looks amazing!
ReplyDeleteThank you! It was from IKEA years ago.
DeleteHoly cow. It looked great before, and now it looks GREATER. I so admire your skills.
ReplyDeleteHow is the battery life on those lights?
ReplyDeleteSo far so good! I always set the timer on them.
Delete