
DIY Walk-in Closet Makeover Reveal! {With IKEA Pax Units}
November 10, 2021
Share this
Custom DIY closet reveal with IKEA Kallax and Pax units for tons of storage.
I transformed my closet full of wire shelving into a perfectly organized space with these inexpensive IKEA options!I plan to customize this space even more, but it's already undergone a huge transformation and functions SO much better.
It is absolutely LOVELY to walk into my closet and find just what I'm looking for. This makeover truly has simplified my days.
Now there's a spot for every little thing. I can find what I need easily...and I can't even tell you how nice it is putting clean clothes away now!
Fixing my problem areas
As you'll see, my closet is a great size...that was never a problem! It's long and had plenty of hanging space...too much really.Here are a few before pics to show you how the wire shelving was installed:

There were some specific things I wanted to address in this makeover:
- I don't have a TON of hanging clothes and needed much more storage space for folded clothes and shoes.
- I added a dresser years ago, and that helped quite a bit. But I wanted dedicated areas for bulkier items like sweatshirts and sweaters.
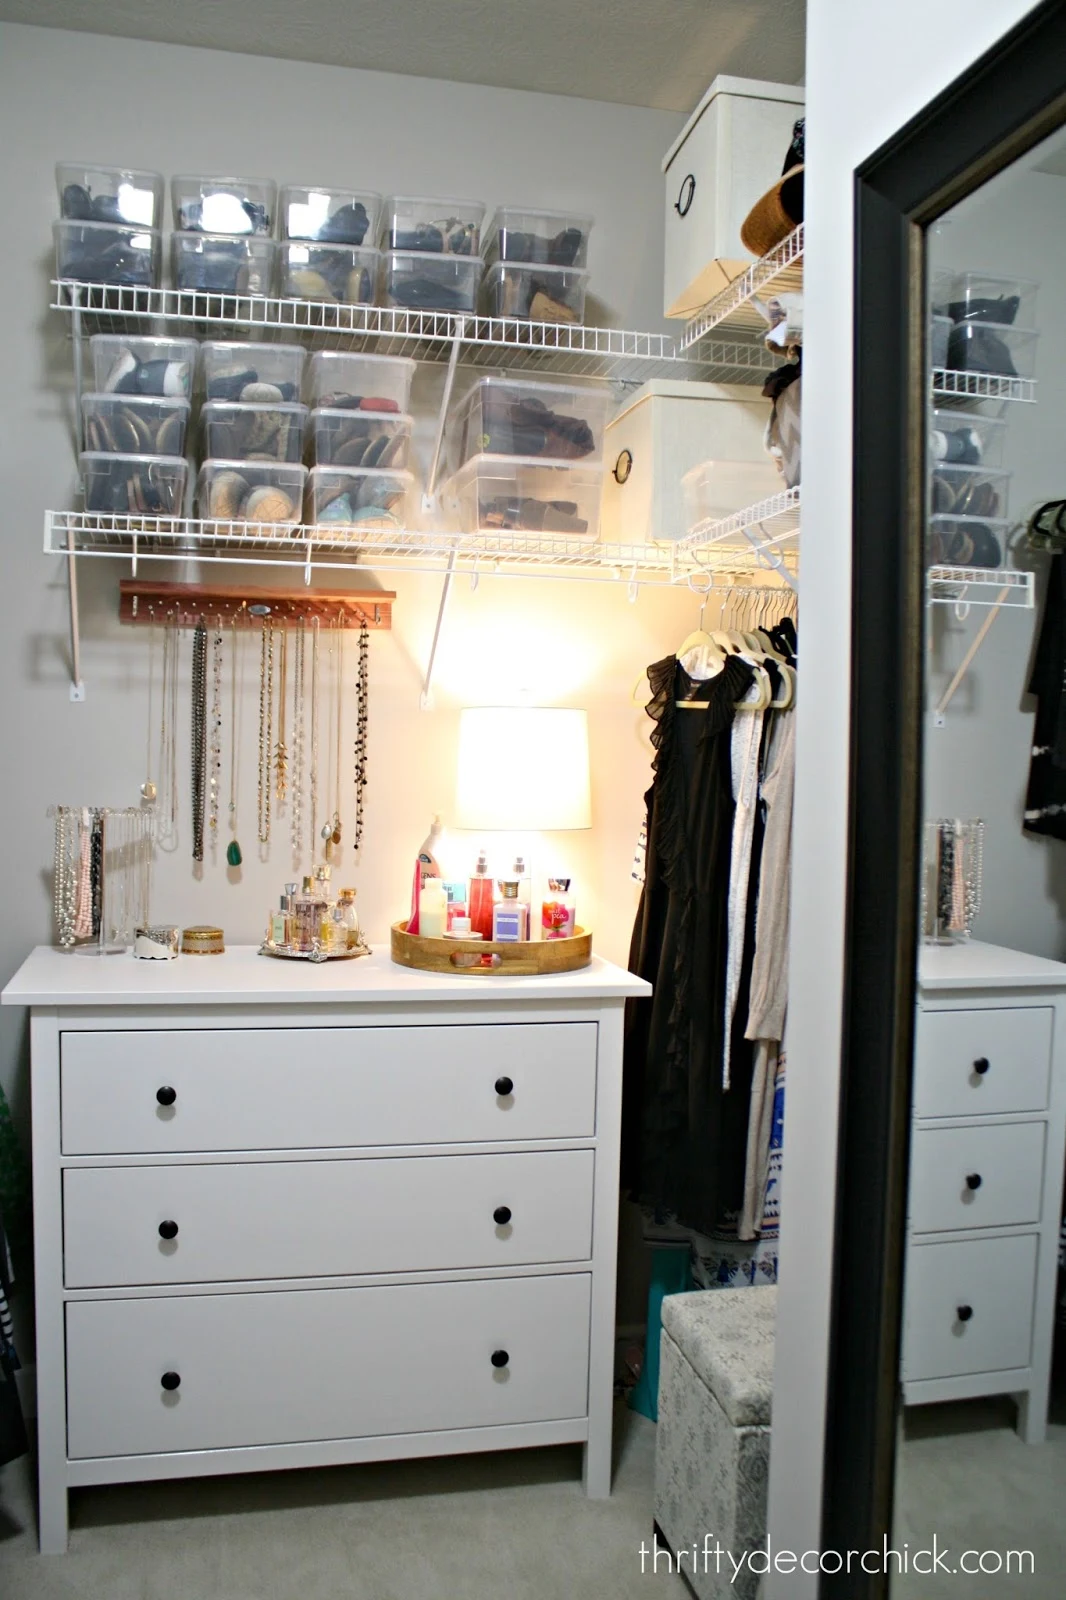
- I liked the idea of some kind of "vanity" area where I could keep my jewelry and perfumes.
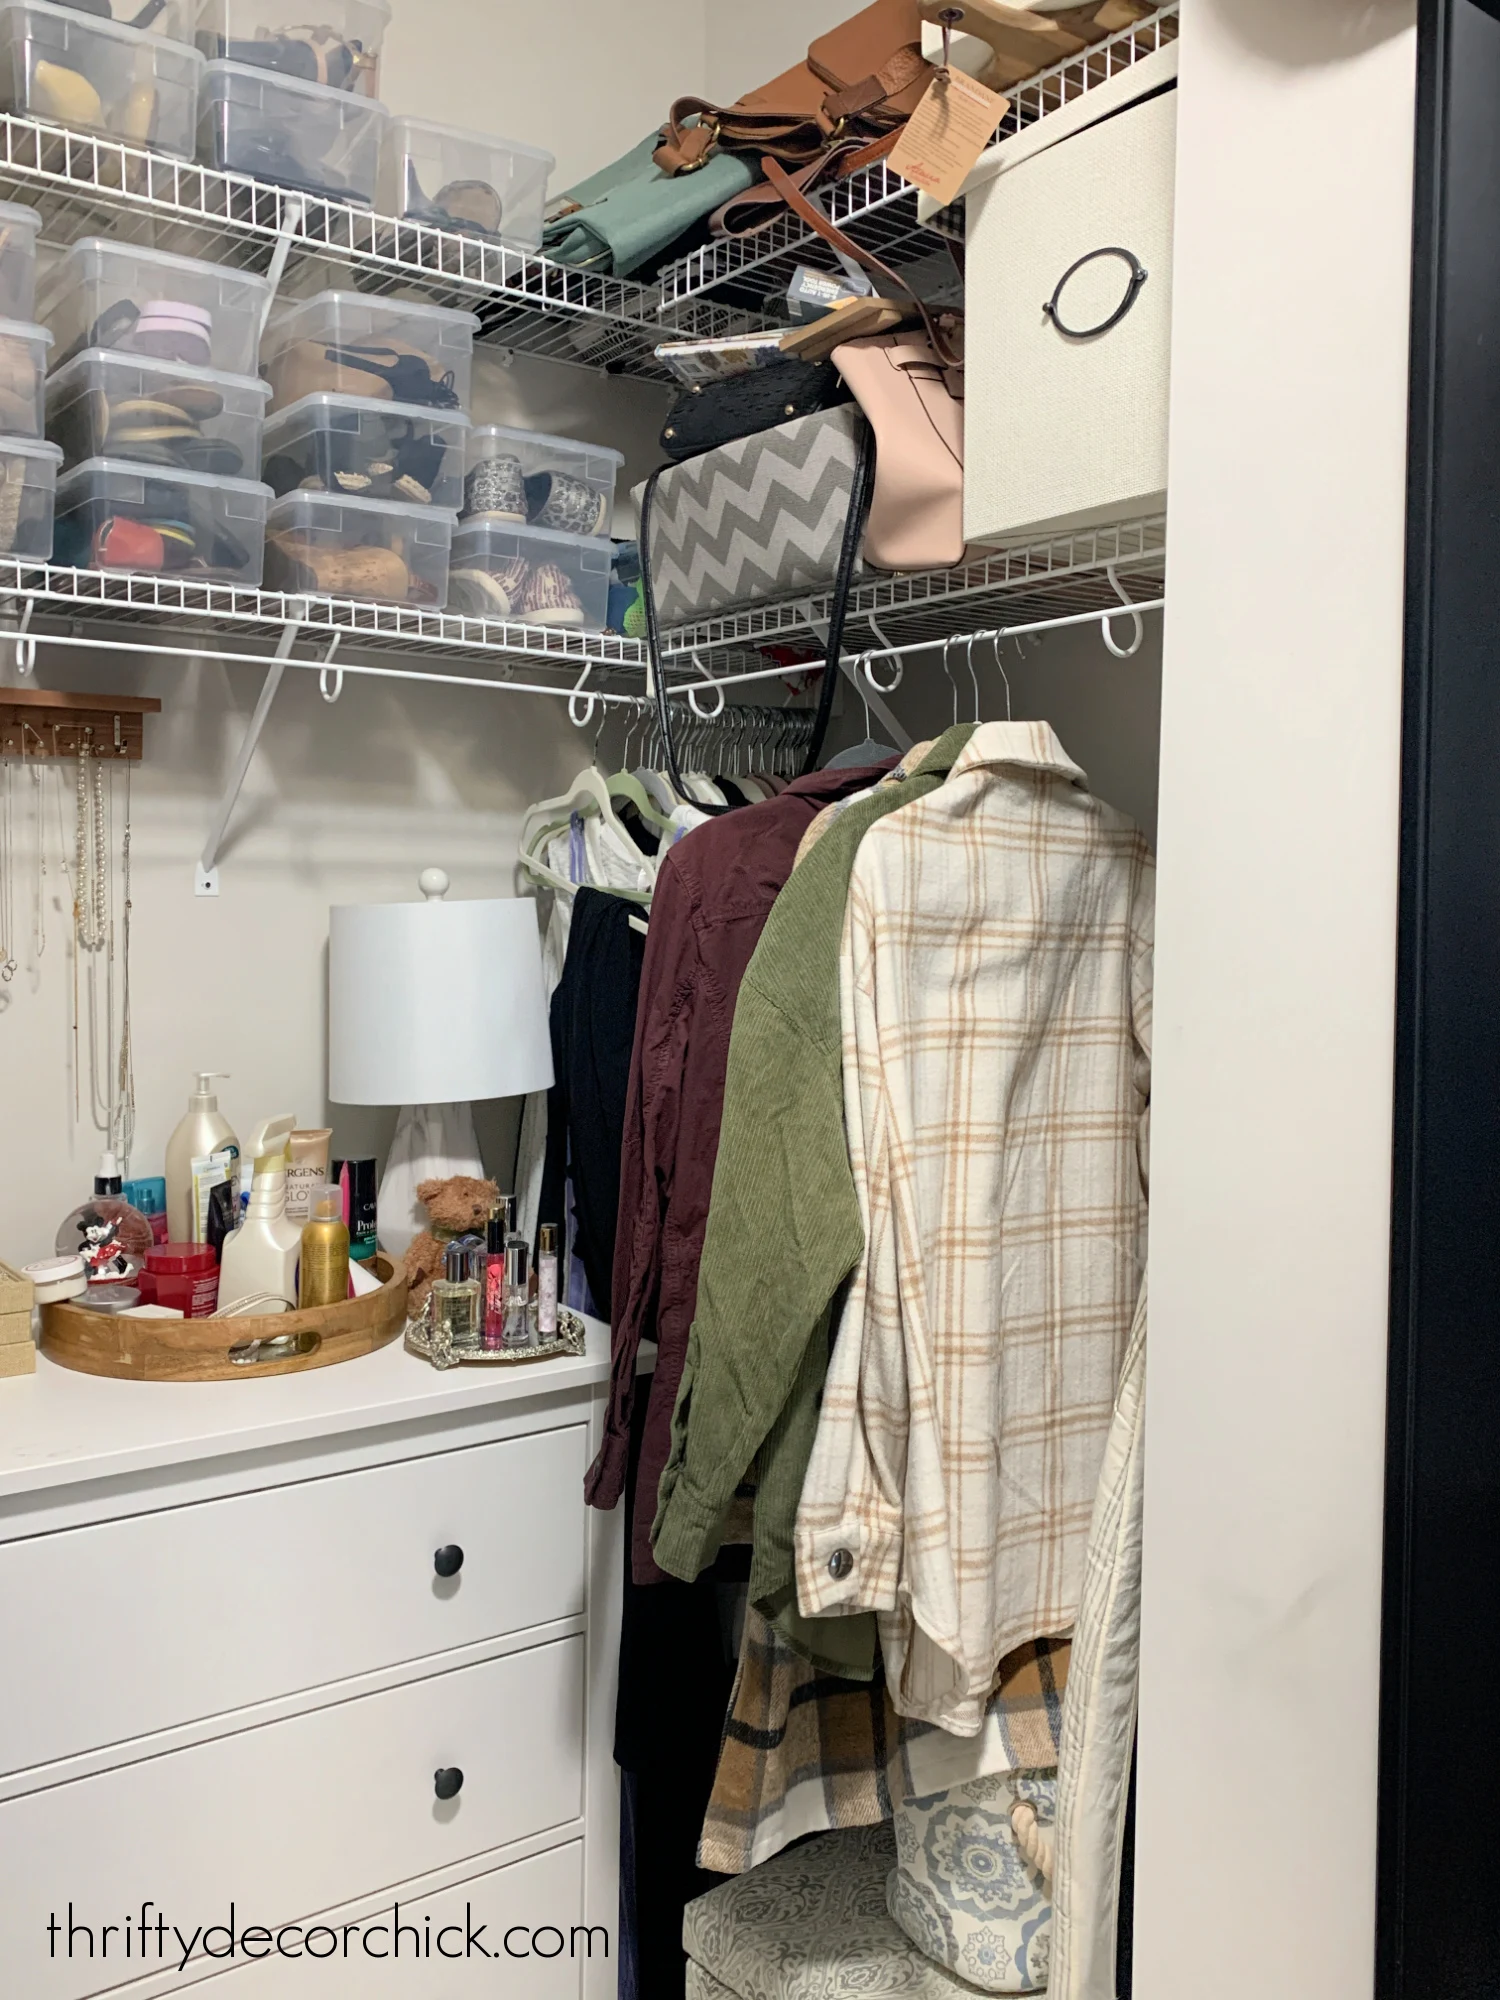
- Better shoe storage. The shoe bins kept them covered on the wire shelving, but it was a pain to dig through those stacks to find what I needed.
- Storage for purses and bags -- as you'll see I used to just throw them to the top of the shelf till I needed them next. ;)
My very first step was to go through ALL of my clothes again so I knew how
much storage space was needed.
I use the Konmari method to declutter and highly recommend it! It helps me decide right away what to keep.
I felt like this corner was such wasted space! That little nook was the perfect spot for my plan:
I used two Kallax shelf units from IKEA and stacked them to create this wall of built in storage cubbies:
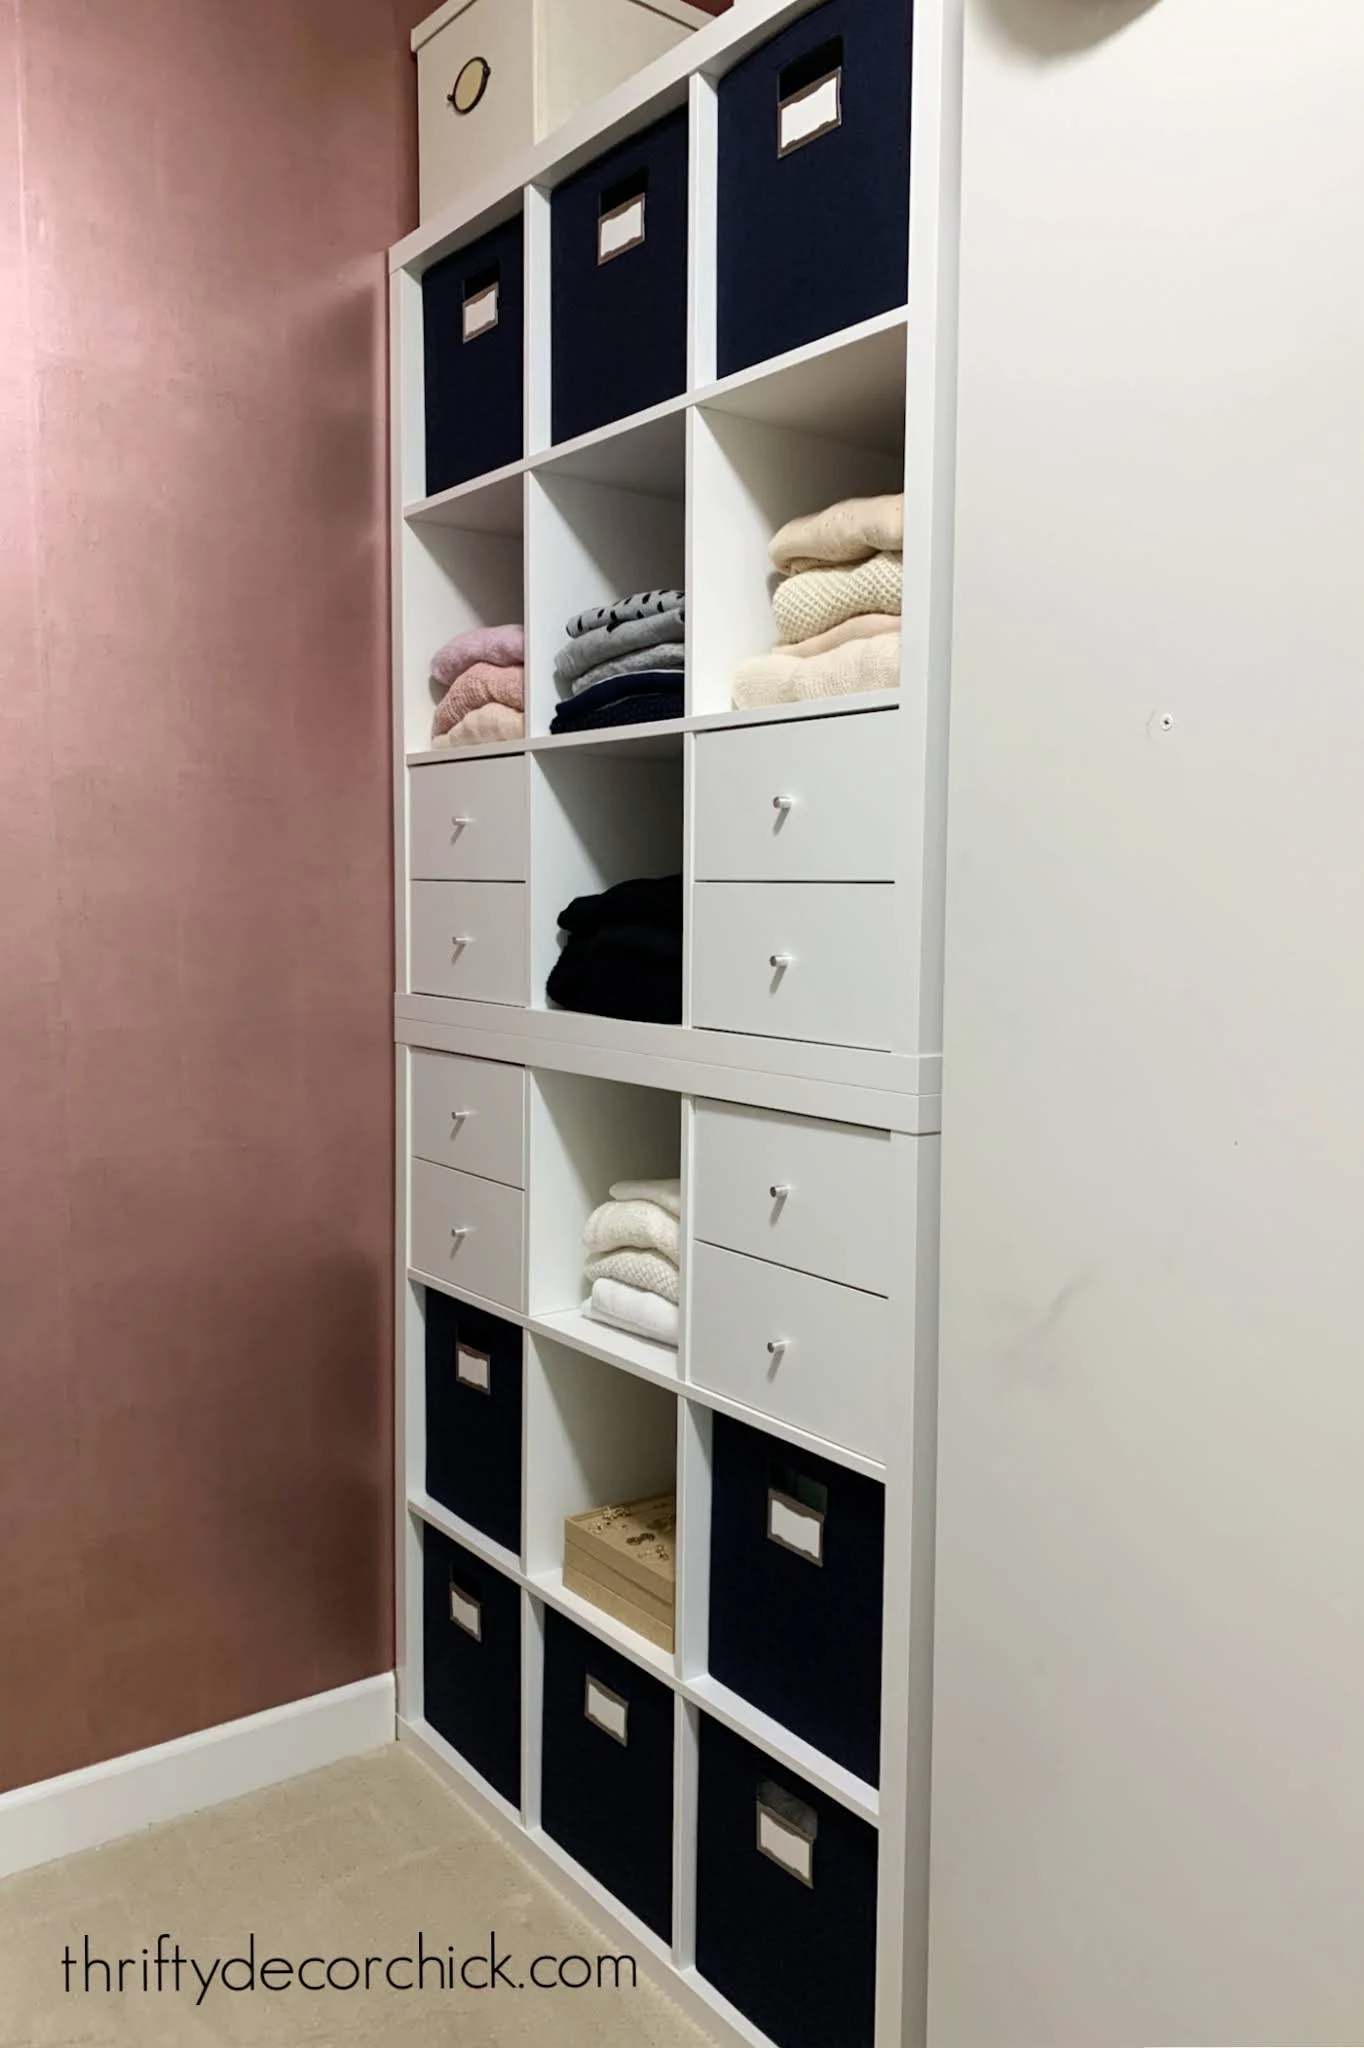
This has functioned SO WELL, I can't even tell you. Why did I wait so long to do this?
Those pull out bins are perfect for sweatshirts, thick sweaters and off season stuff like Halloween or Christmas clothing.
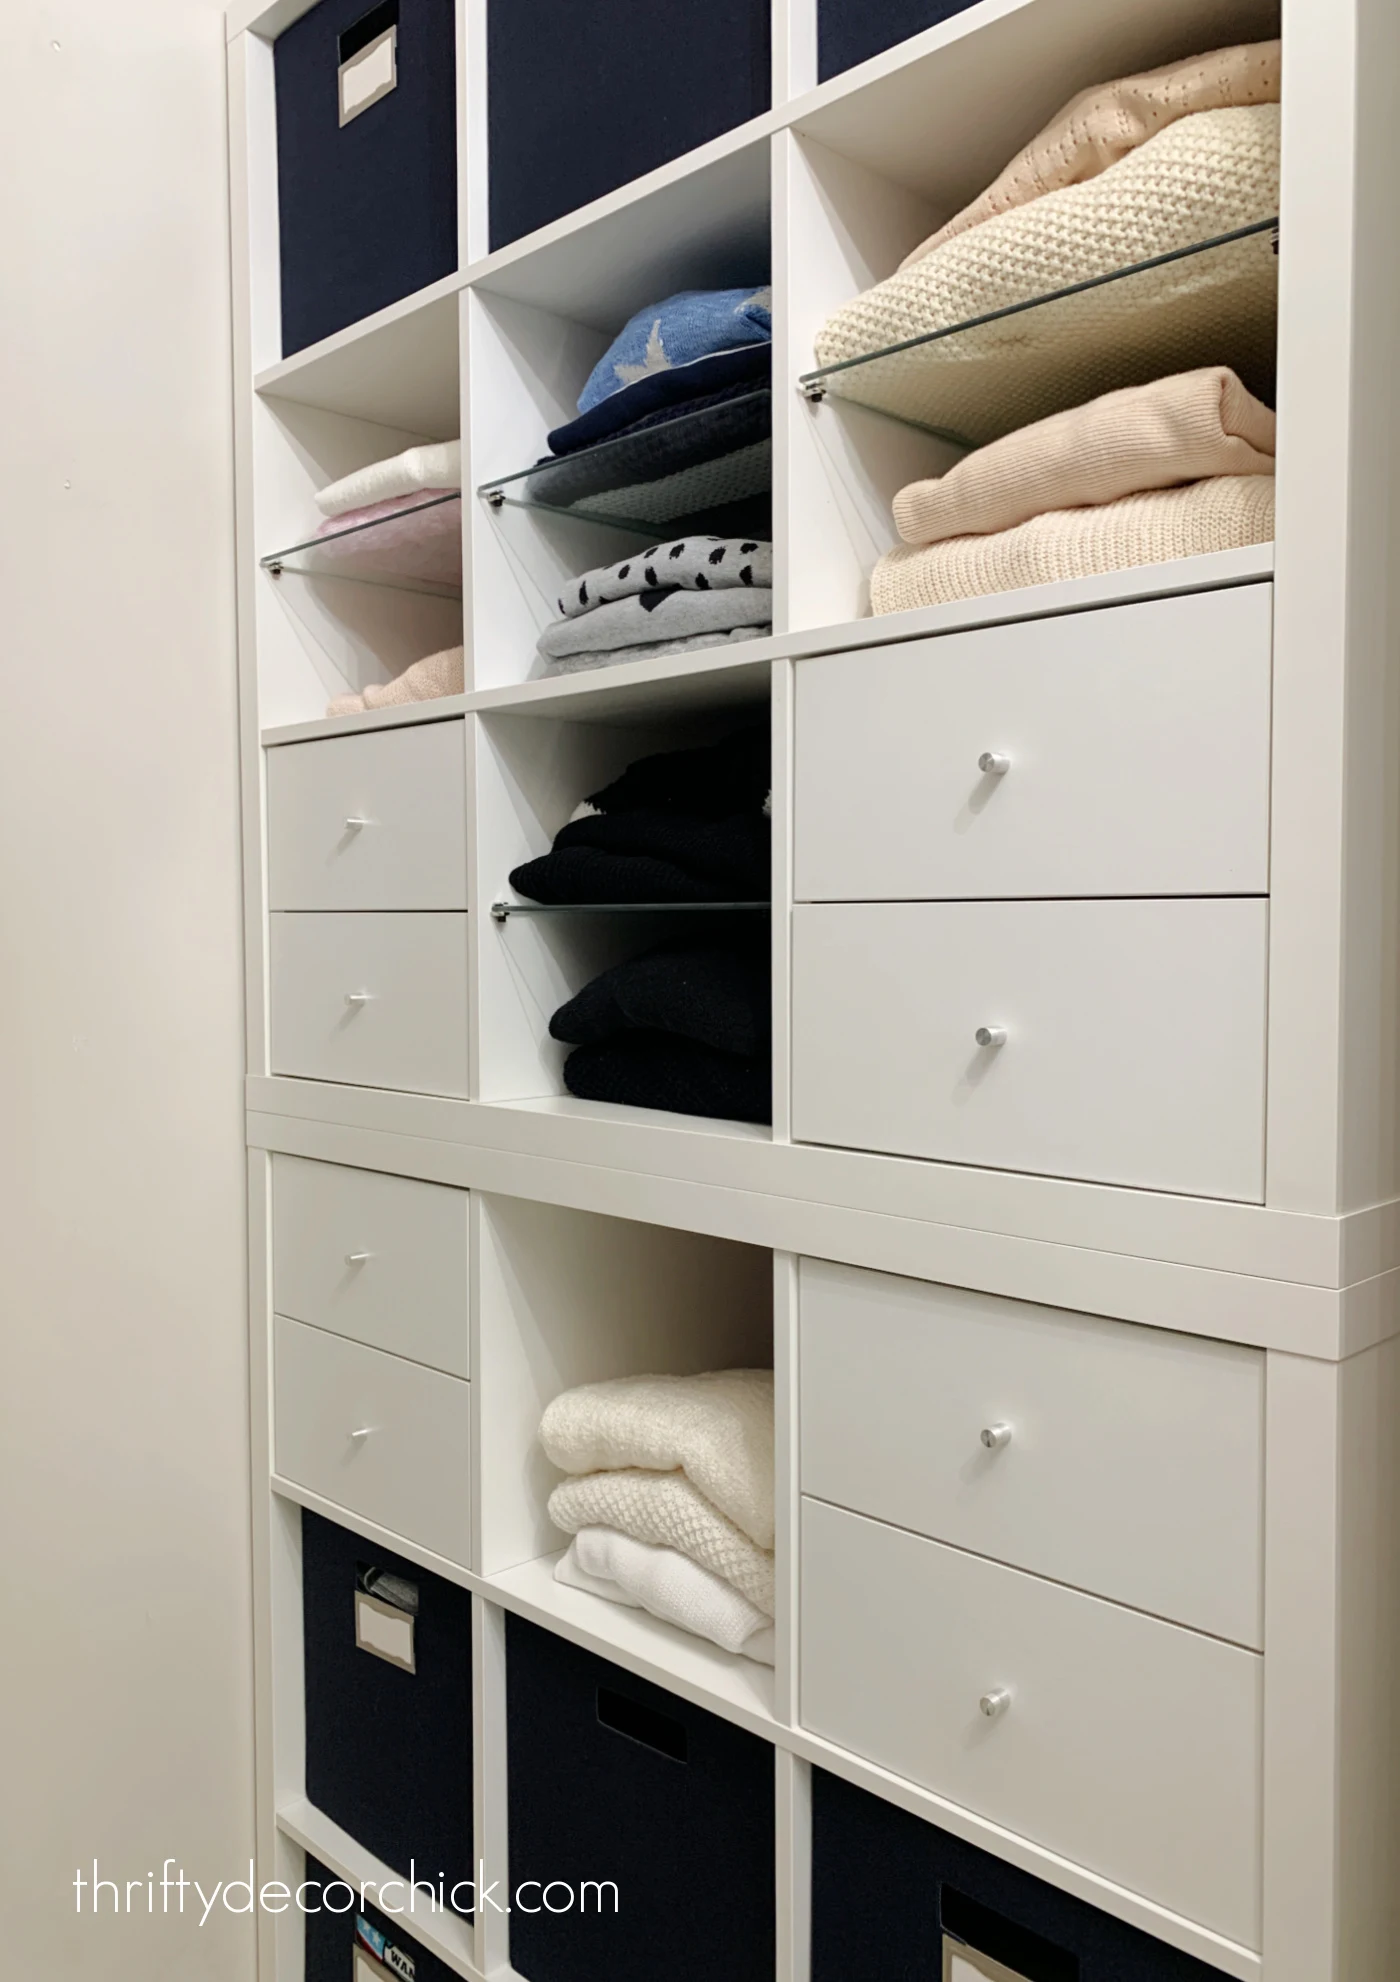
I also added some of the Kallax inserts that turn the cubbies into two drawers. These are great for smaller items like socks and sports bras.
I later added glass shelves inside a few of the open cubbies so I could break up the stacks of clothing a bit:
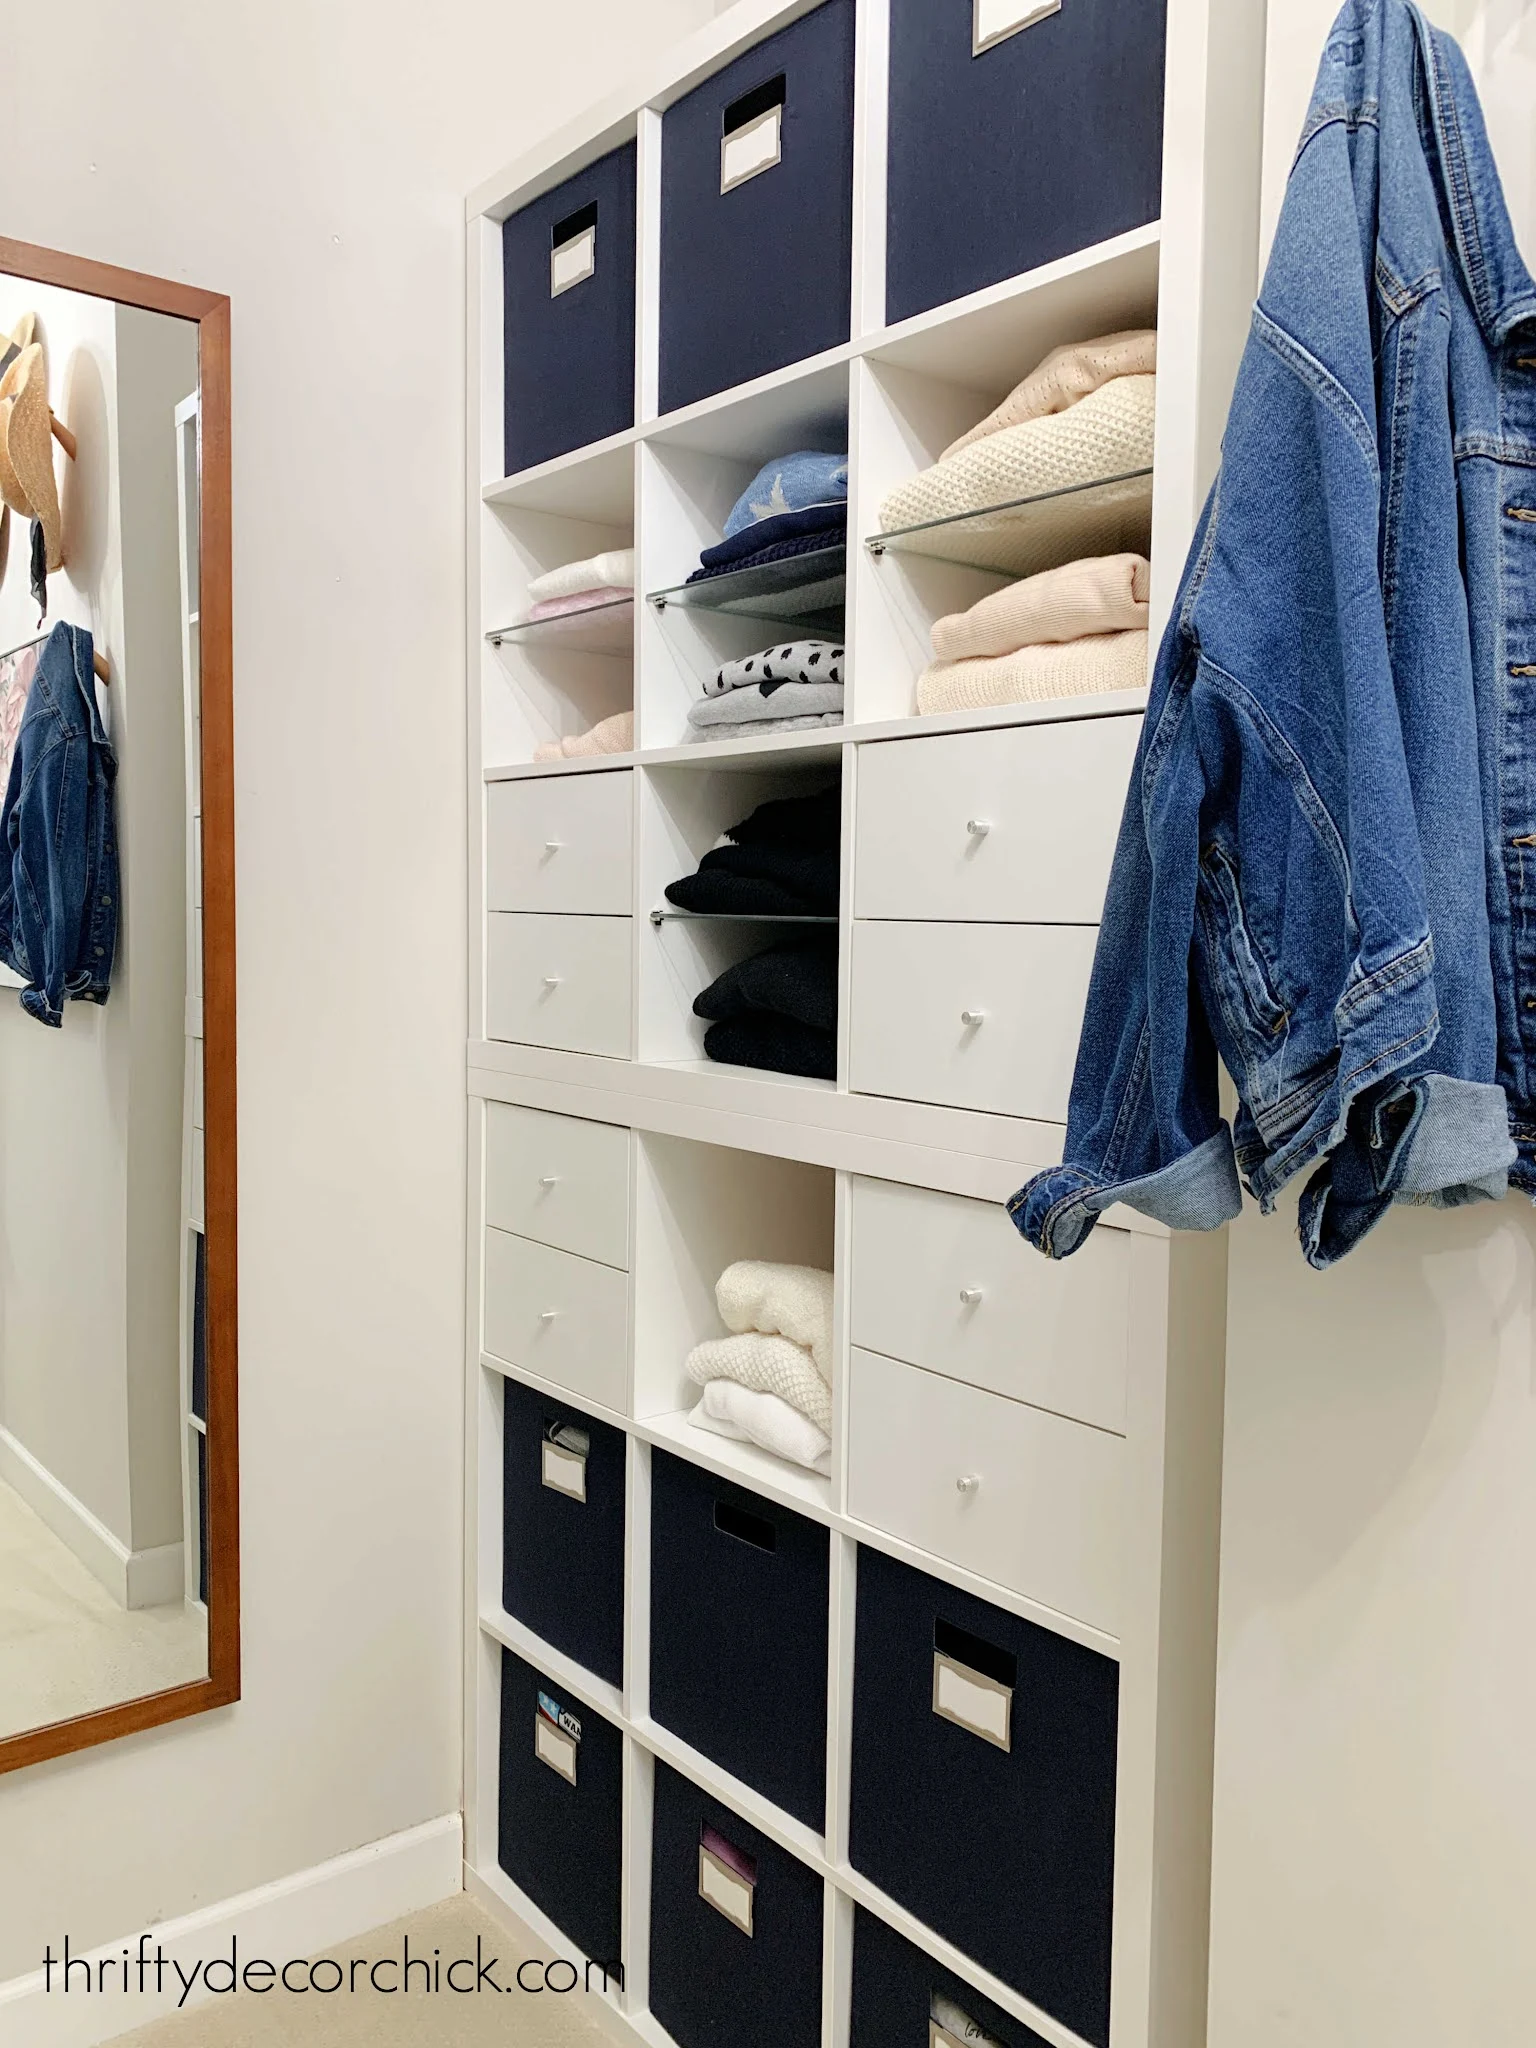
That way I don't have to adjust the whole pile when I'm pulling a sweater from the bottom!
I still need to label those canvas bin labels!
The drawers inserts were a great investment in this closet redo -- they are perfect for small stuff!
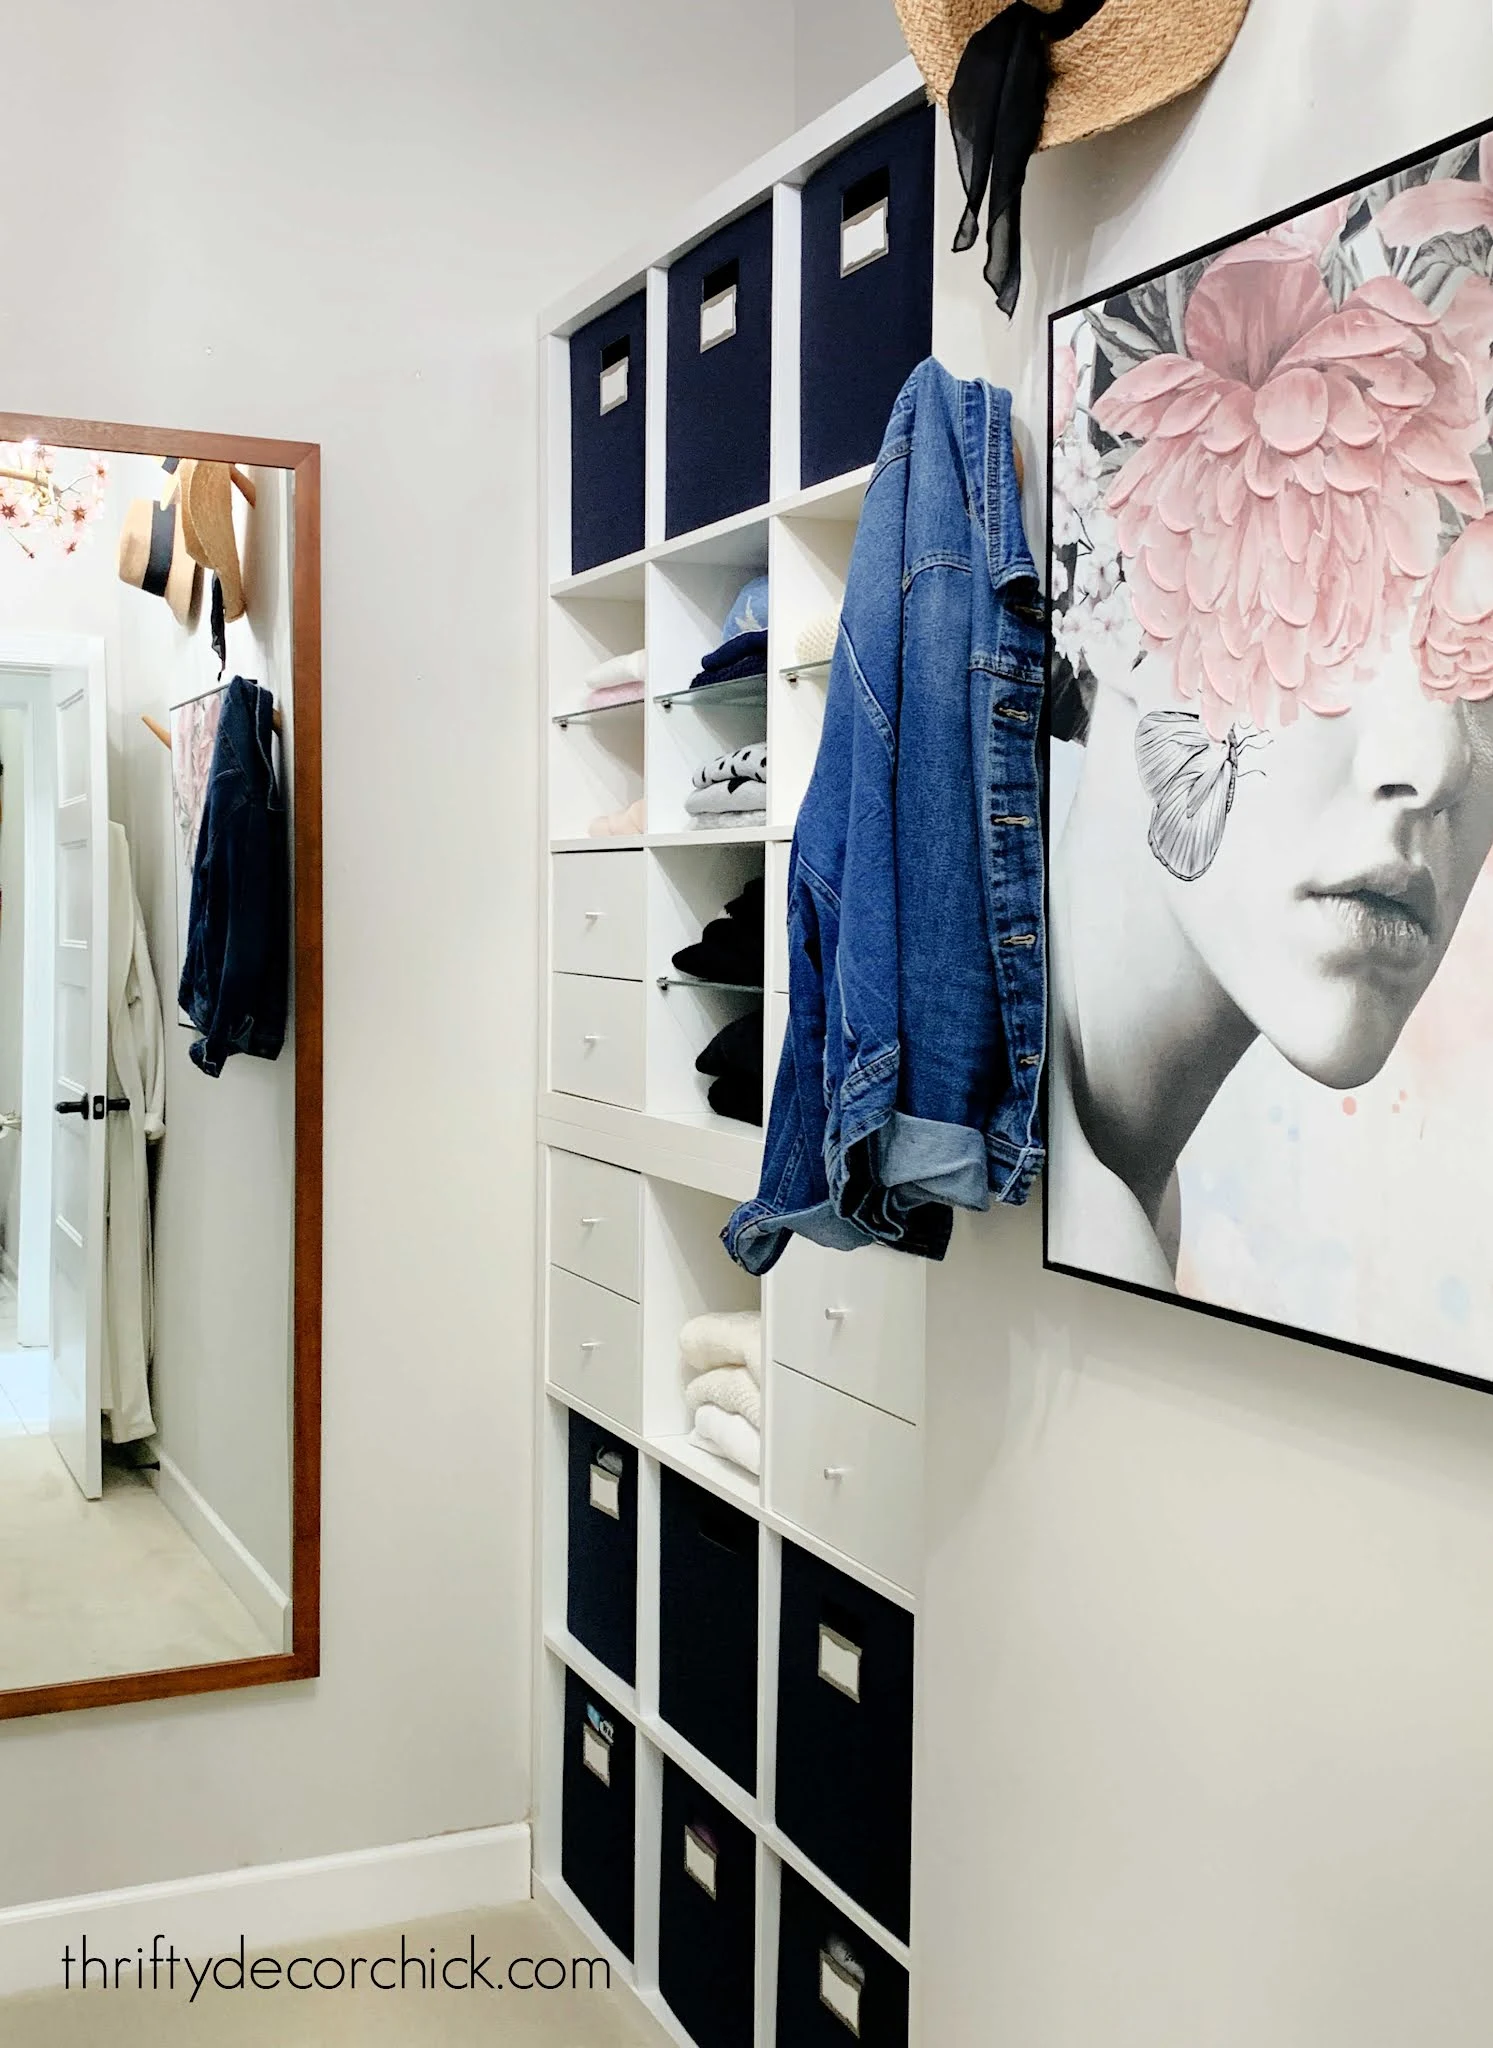
I hung these modern wood hooks on the wall to the right for my hats and jackets I wear most often:
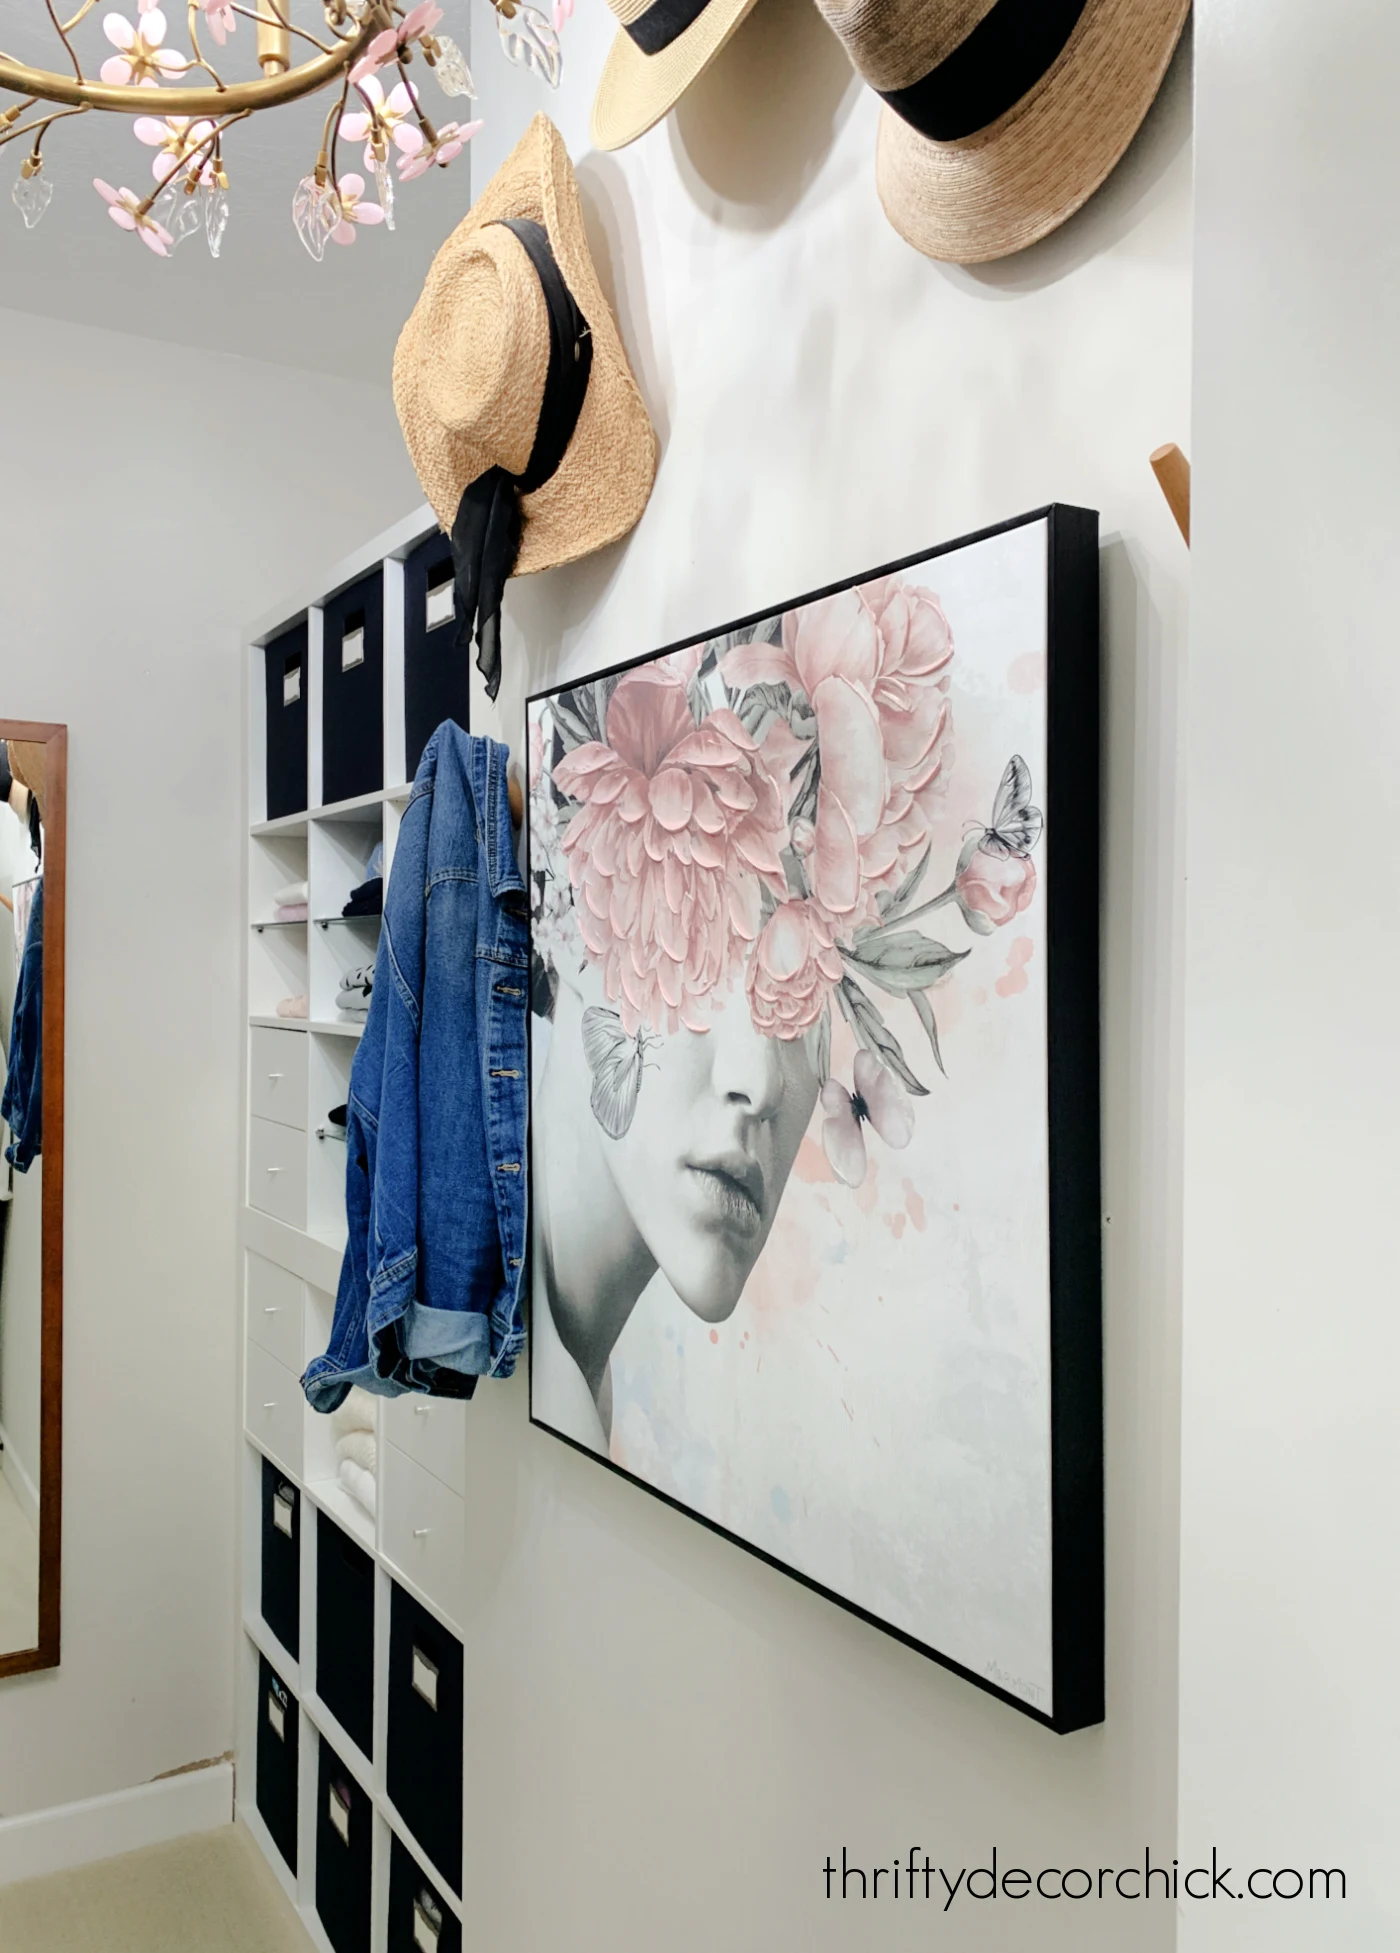
Not sure that art will stay, and the pink wallpaper I had up was feeling too heavy, so I'll be replacing it. I didn't have much up yet, thankfully!
My new plan is going to be beautiful! In my head anyway. :)
I use the Konmari method to declutter and highly recommend it! It helps me decide right away what to keep.
Storage for bulky clothes
I shared the first part of this closet makeover with you a few months ago.I felt like this corner was such wasted space! That little nook was the perfect spot for my plan:
I used two Kallax shelf units from IKEA and stacked them to create this wall of built in storage cubbies:
This post may contain affiliate links for your convenience.
See my
policies and disclosure page for
more information.
This has functioned SO WELL, I can't even tell you. Why did I wait so long to do this?
Those pull out bins are perfect for sweatshirts, thick sweaters and off season stuff like Halloween or Christmas clothing.
I also added some of the Kallax inserts that turn the cubbies into two drawers. These are great for smaller items like socks and sports bras.
I shared how to remove the wire shelving and more of this easy build in the link above!
I later added glass shelves inside a few of the open cubbies so I could break up the stacks of clothing a bit:
That way I don't have to adjust the whole pile when I'm pulling a sweater from the bottom!
I still need to label those canvas bin labels!
The drawers inserts were a great investment in this closet redo -- they are perfect for small stuff!
I hung these modern wood hooks on the wall to the right for my hats and jackets I wear most often:
Not sure that art will stay, and the pink wallpaper I had up was feeling too heavy, so I'll be replacing it. I didn't have much up yet, thankfully!
My new plan is going to be beautiful! In my head anyway. :)
For the left side of the closet with the double hanging rods, I changed my plan a few times.
Once I lived with the new cubby unit for awhile, I got the organization bug and I knew I wanted to make the entire closet work better.
Choosing a Pax unit layout
I did some research and decide to go with IKEA's Pax system. I had never used these products, but have seen many people create beautifully organized closets with them!
I'll go into more detail about the Pax frames in a later post, but you can pick from many colors and dimensions to fit your closet needs.
They have options in two heights (79" and 93"), two depths (13" and 22") and three widths (19", 29" and 34").
I chose the 93" height (because we have nine foot ceilings) and the 22" depth (because I wanted to be able to hang my clothes inside).
For the widths of the units, I had to do some measuring to figure out what configuration would work best. I ended up with one 19" unit, one 29" unit and two 34" units.
You can play around with the sizes to figure out a layout that works best for you! I have a bit of space left at one end, but I use that for our ironing board, so it worked out well!
The finished closet layout
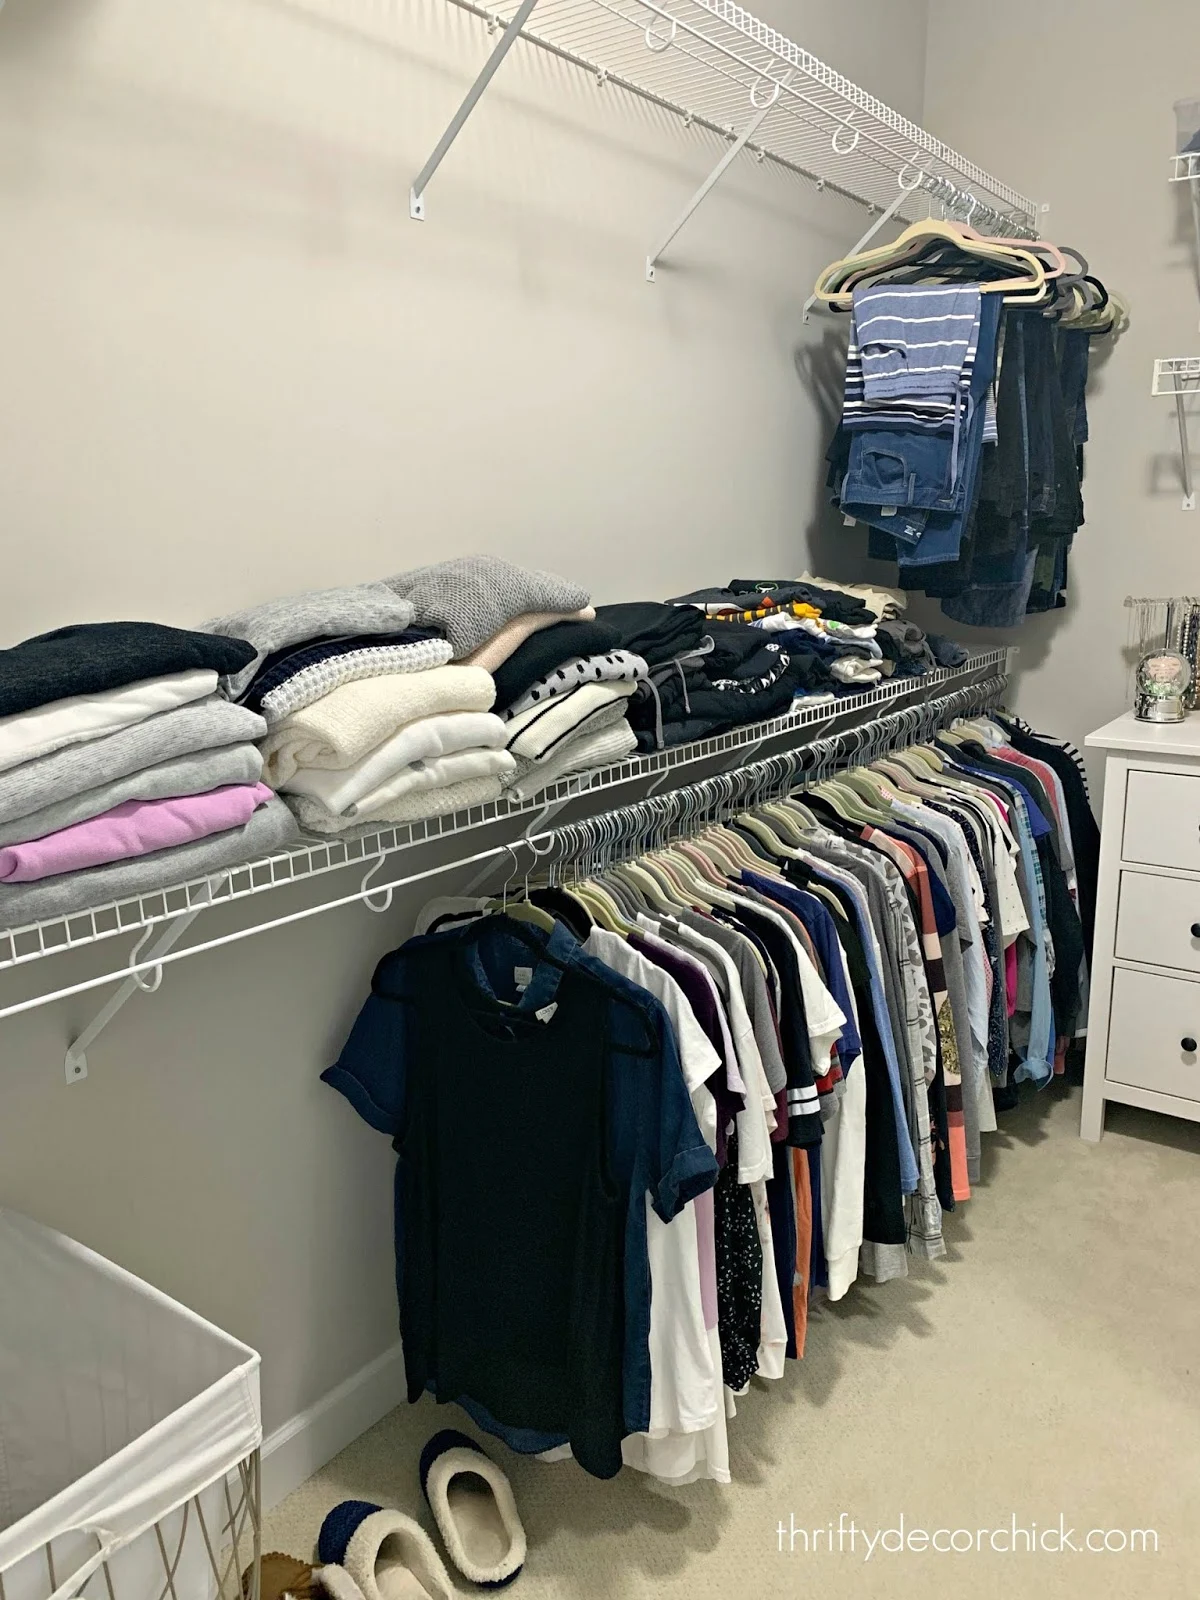
It wouldn't be right to share the finished closet without showing you the messy before, right??This side of the closet was by far the worst...it annoyed me that I had so much space but wasn't really using it.
As hard as I tried, the folded clothes on the wire shelves always ended up in a mess:

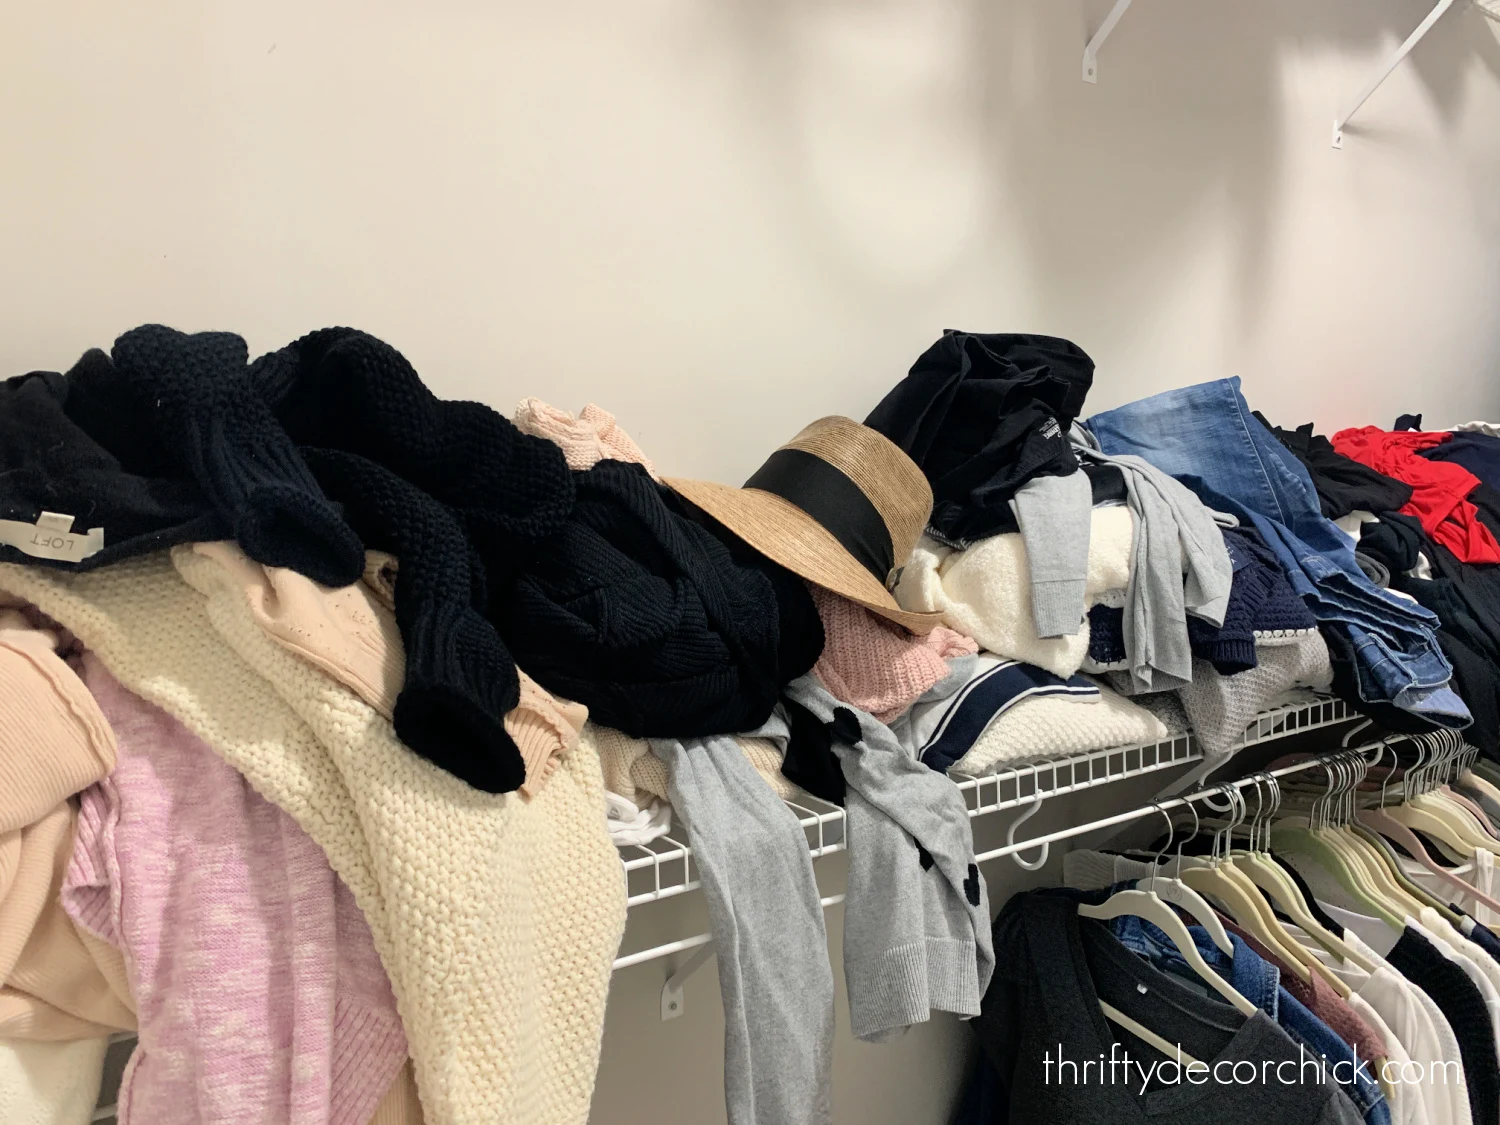
I've learned over the years that disorganized spaces make me anxious and moody. It was frustrating to walk in this space every day!
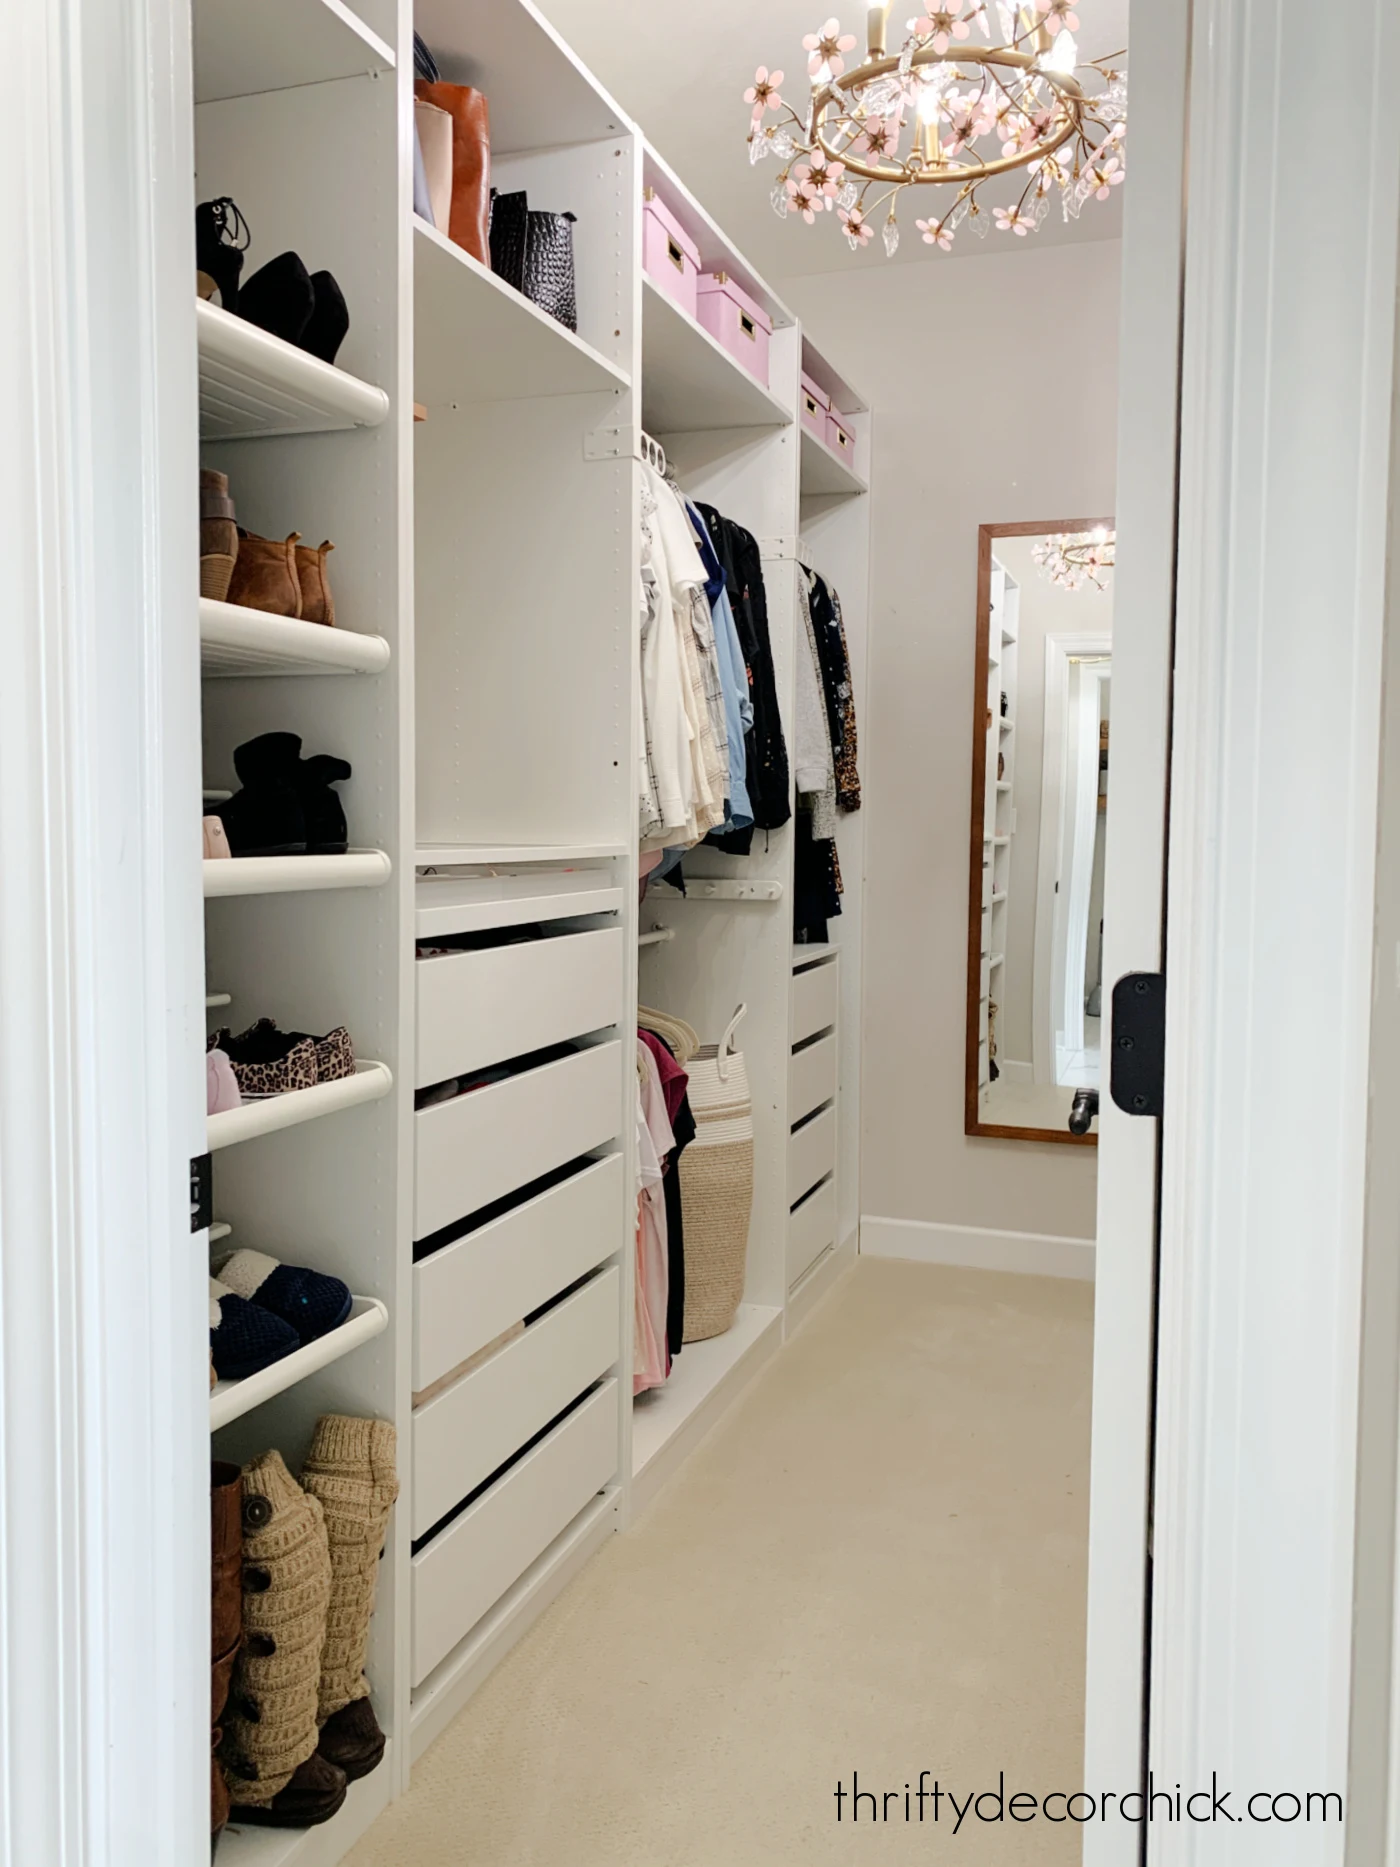
Thankfully, that mess is no more! After weeks of building and installing the IKEA Pax wardrobes, I have a much better view:
|
| See how I changed the hallway light to a chandelier |
I'm SO thankful to have this beautiful, organized space now!:
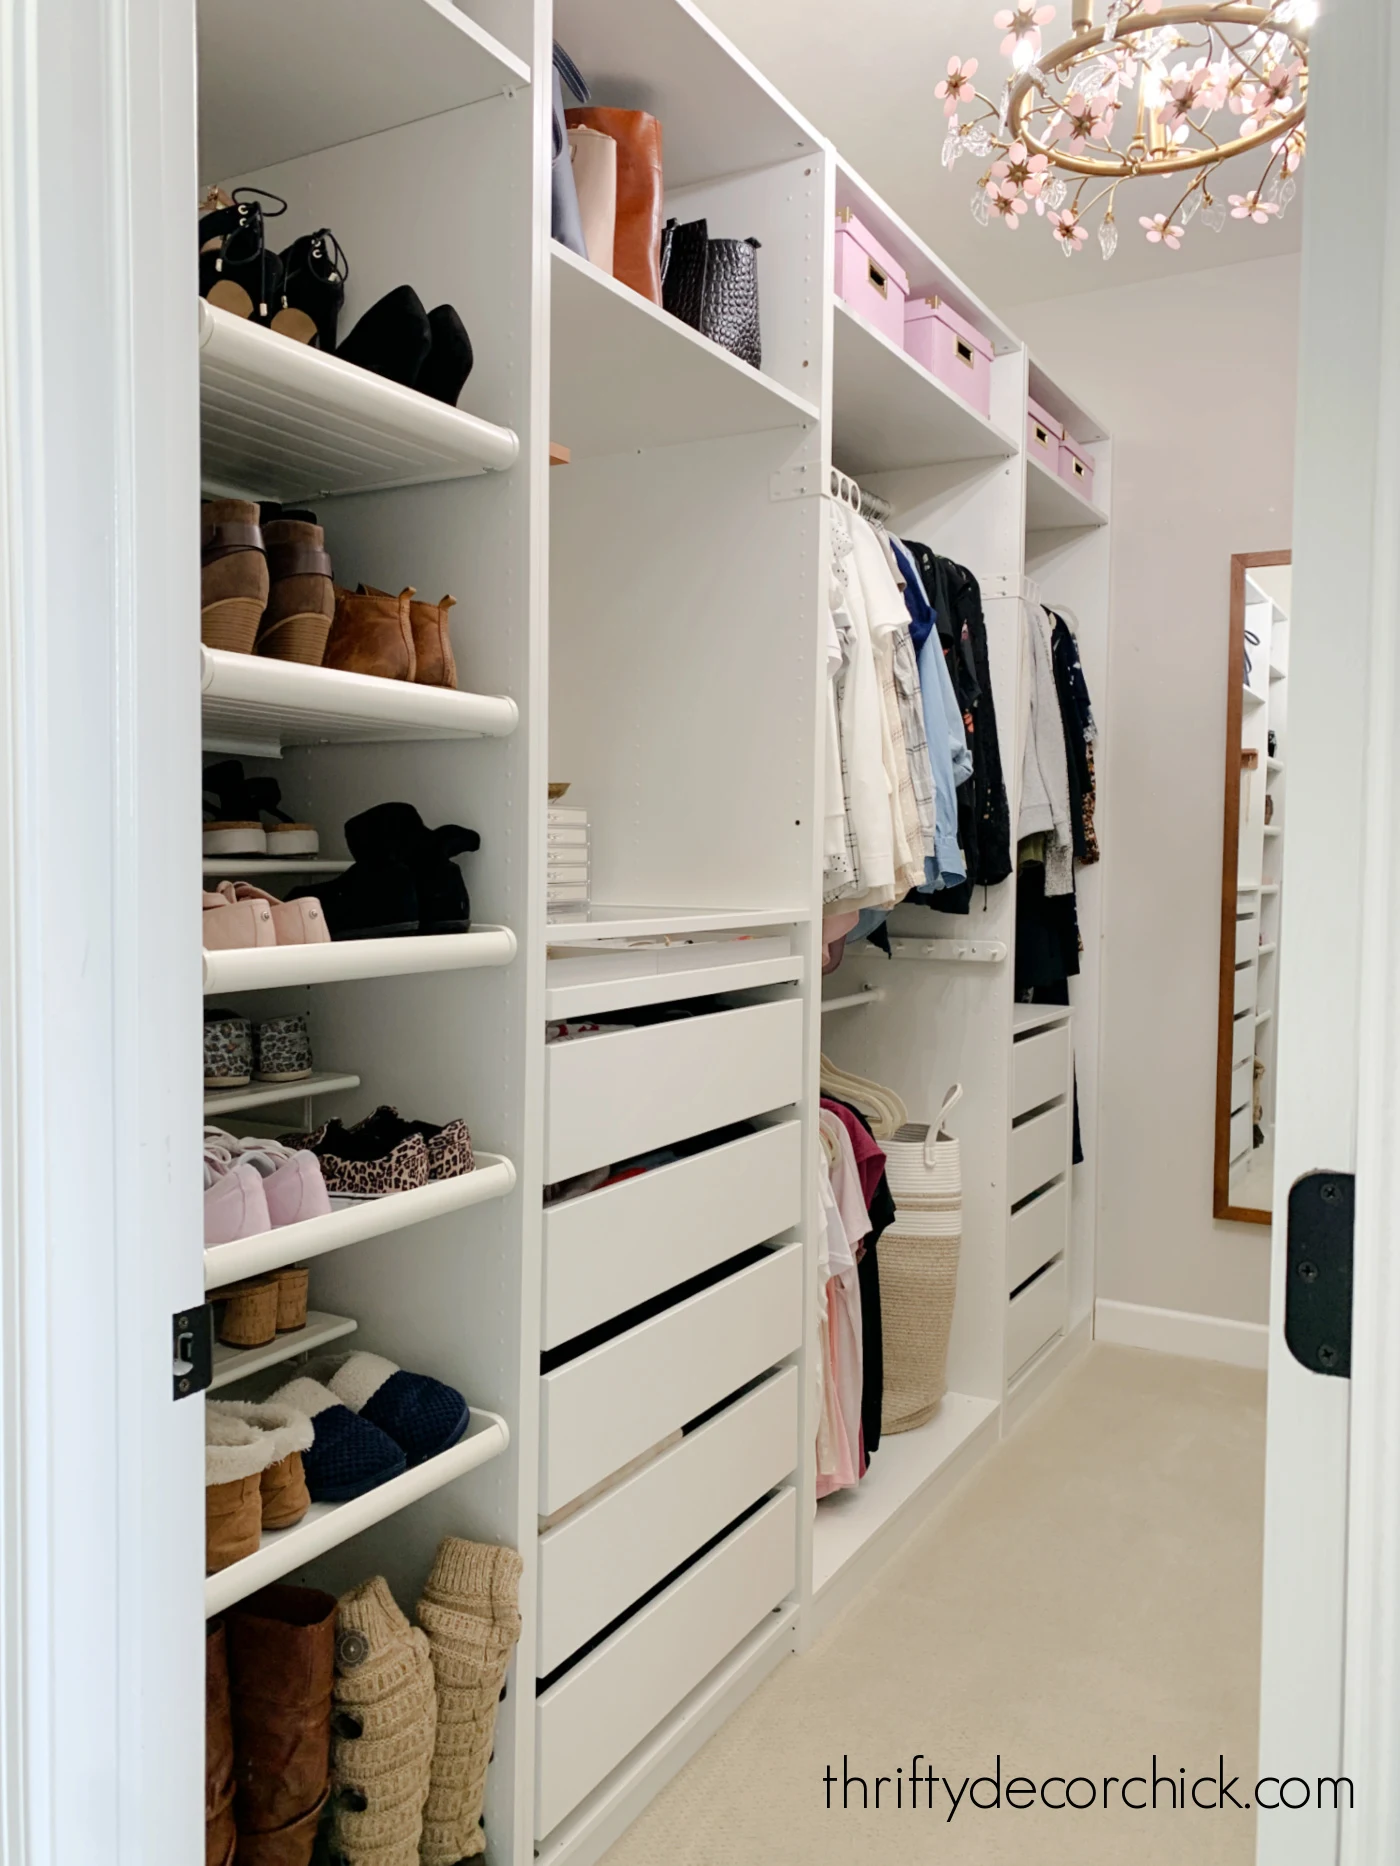
You can add so many custom touches to the Pax units with their Komplement organizers! I'll go into more detail about those below.
I set up the closet layout so that the items I reach for most are at the front. Let's take a tour...
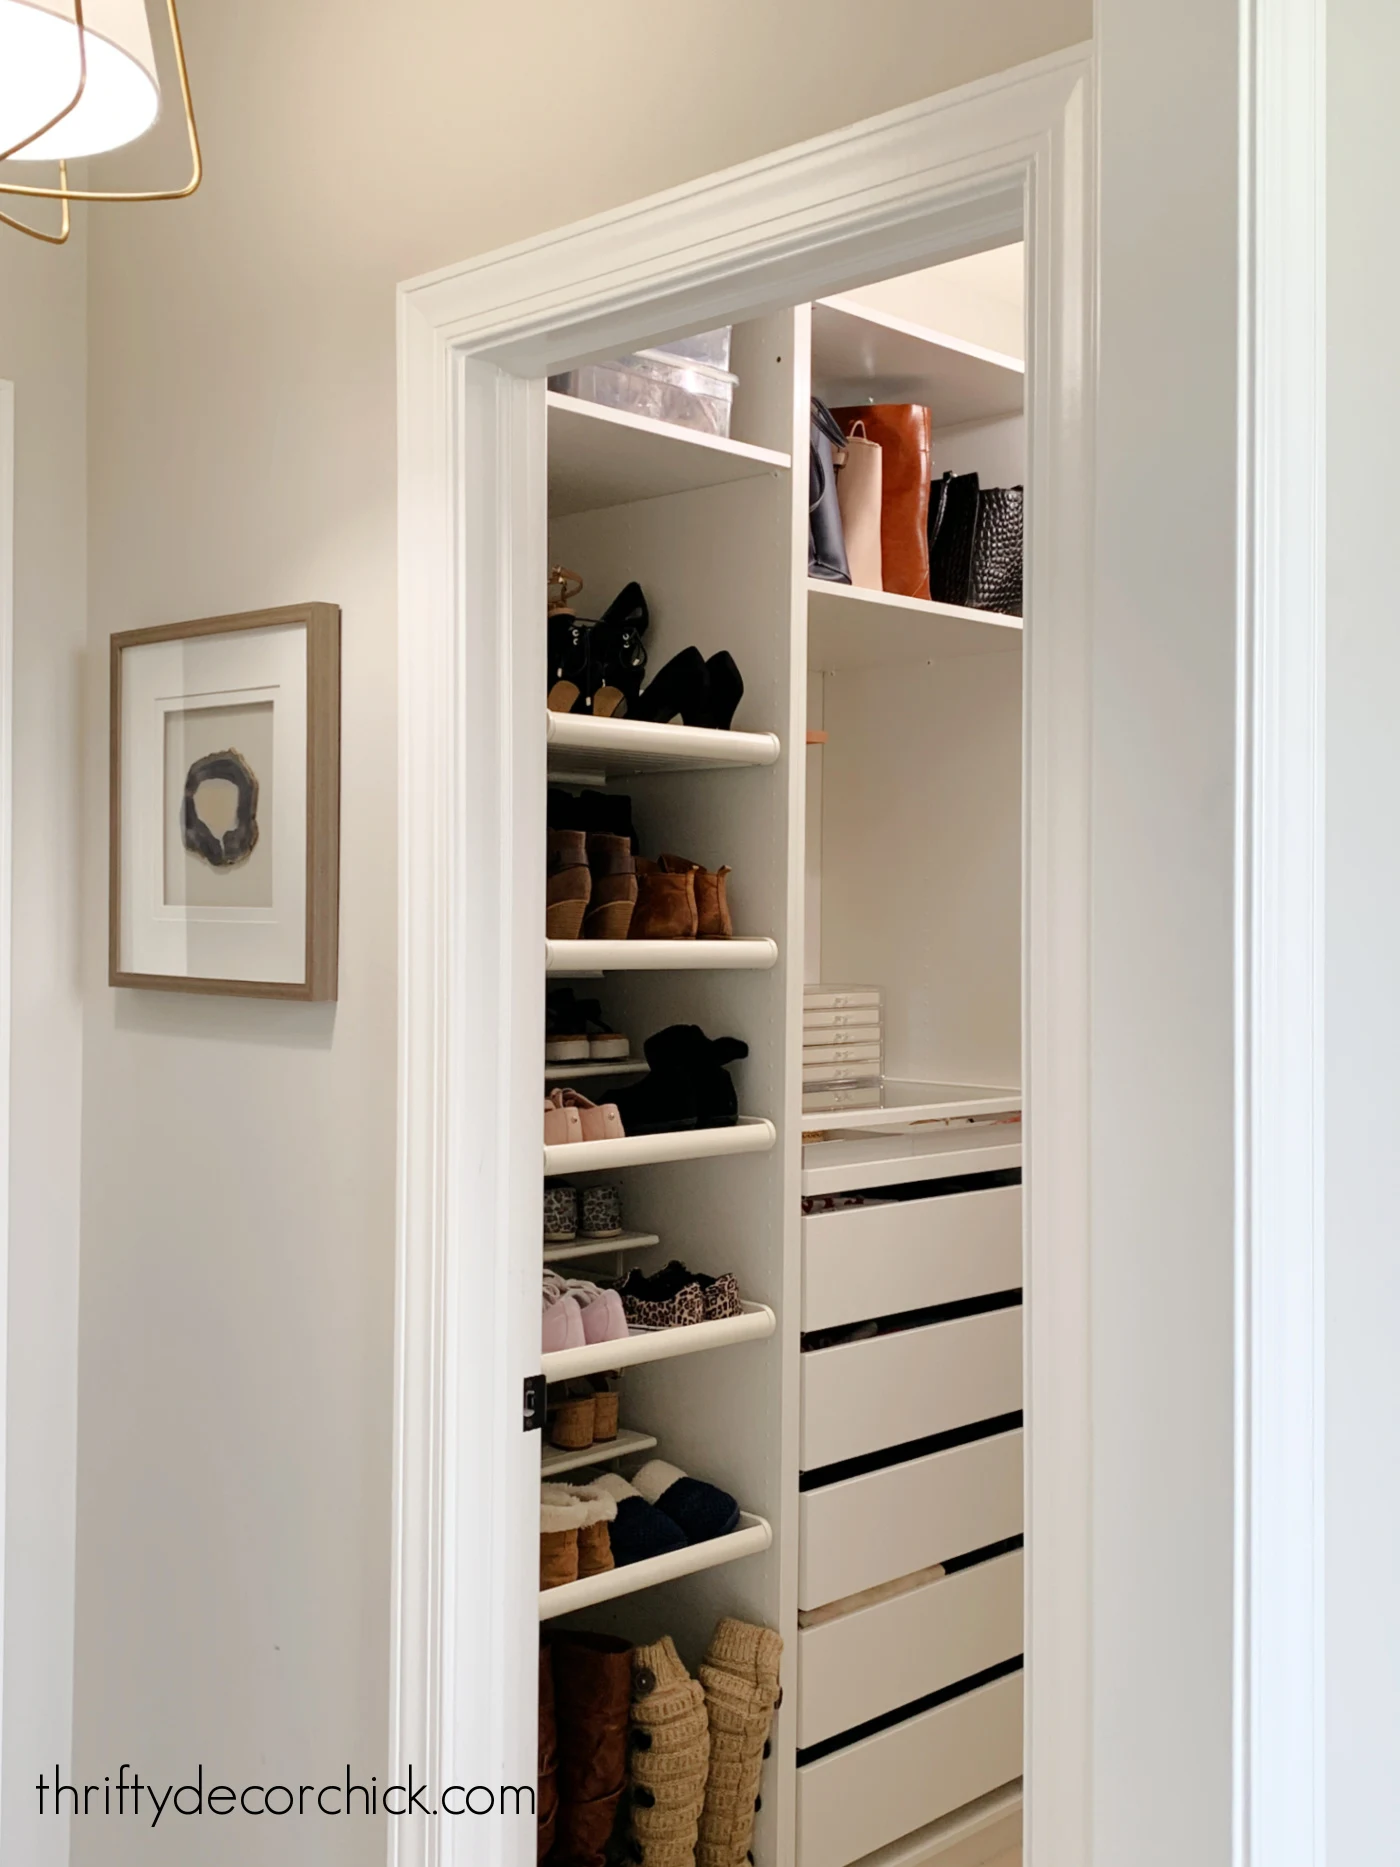
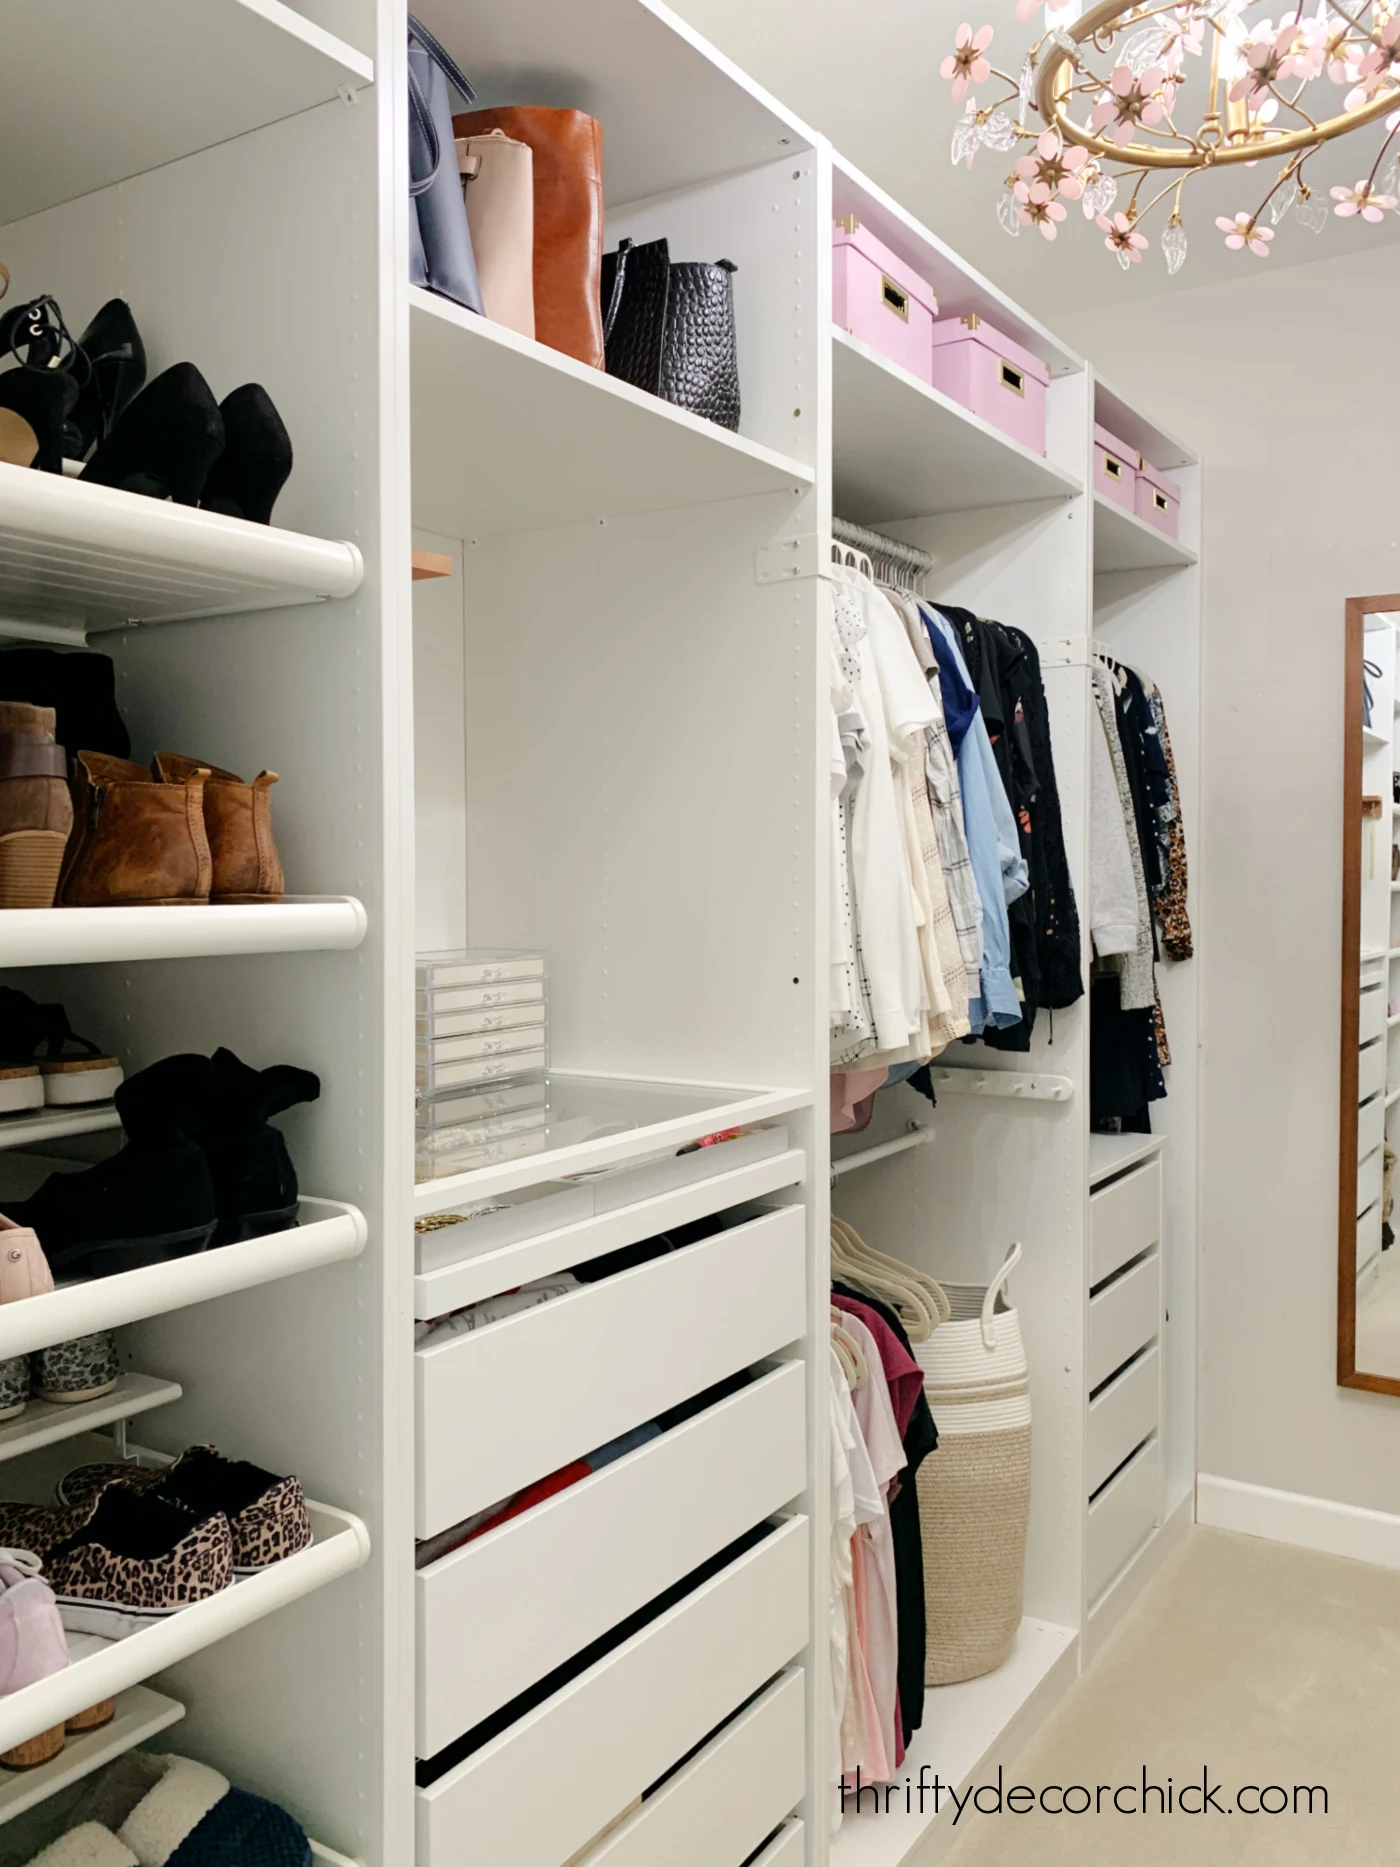
Pull out shoe shelves
Shoe storage was a big problem I wanted to fix: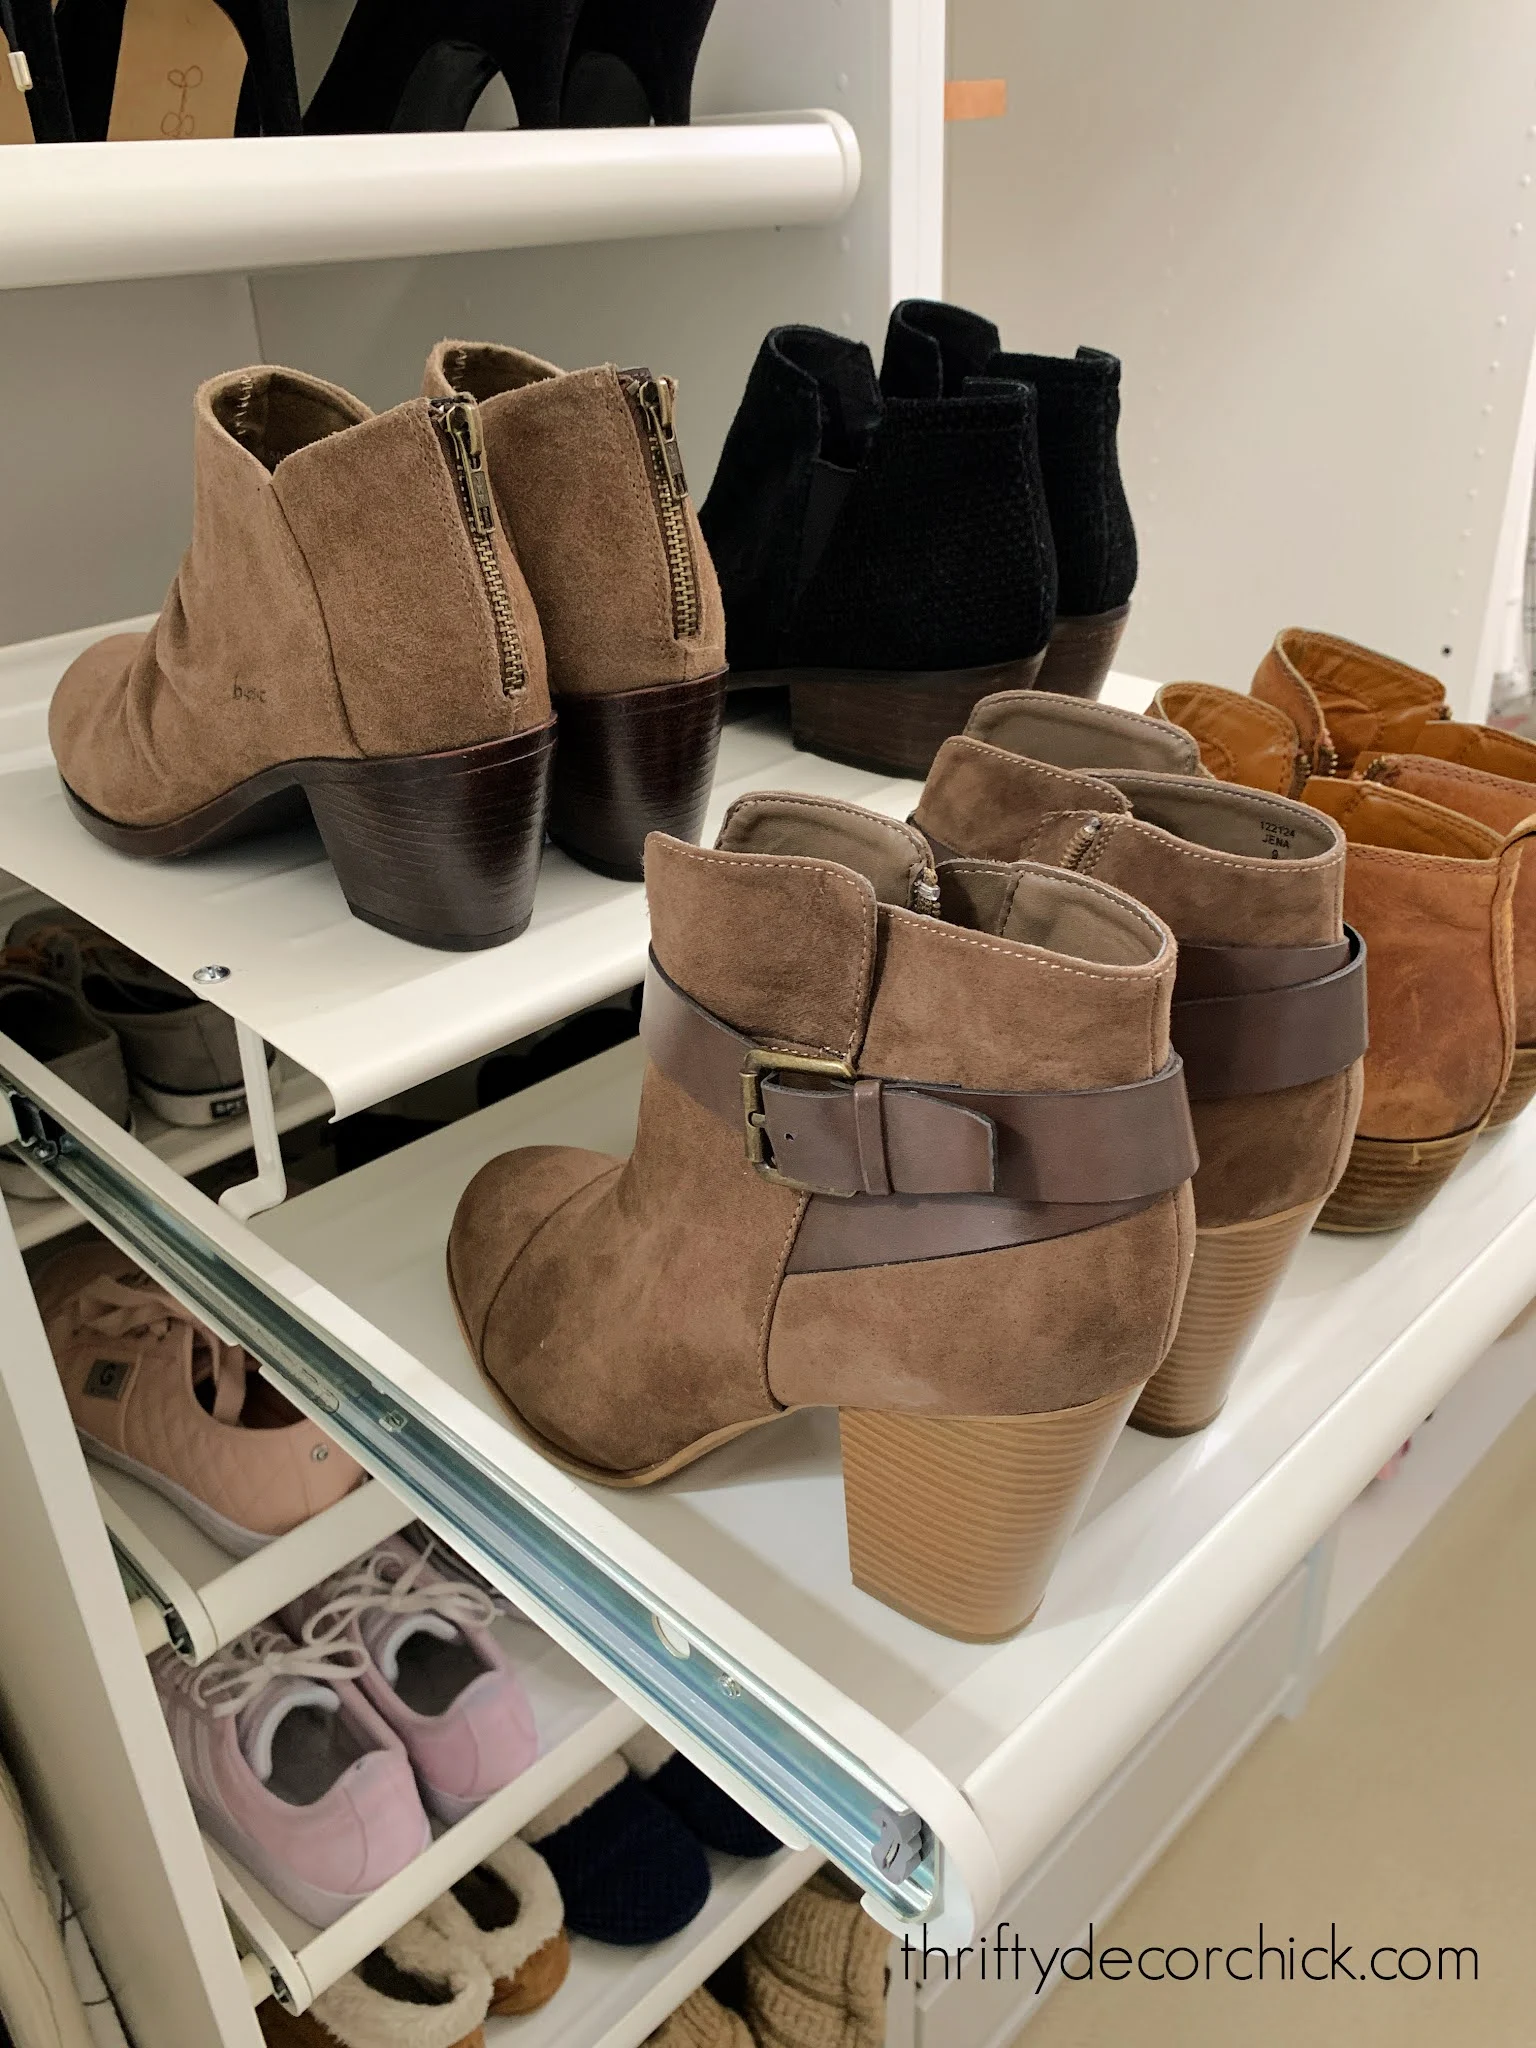
These Komplement pull out shoe shelves are awesome! You can get up to three pairs of shoes on the top level of each pull out.
I also like that they are protected a bit, so the shoes I don't wear as much won't get crazy dusty.
When you install these pull outs, figure out how much vertical space you'll need in between shoes.
Taller boots and heels will need more clearance when you pull them out.
Drawers for folded clothes
While working on this closet makeover, I decided that it would be best to start folding more items instead of hanging them.I used to hang almost everything -- jeans and t-shirts especially. I did it out of necessity since I didn't have a good spot for folded clothes.
Deciding to keep more in drawers has opened up SO much hanging space and just works better for me overall.
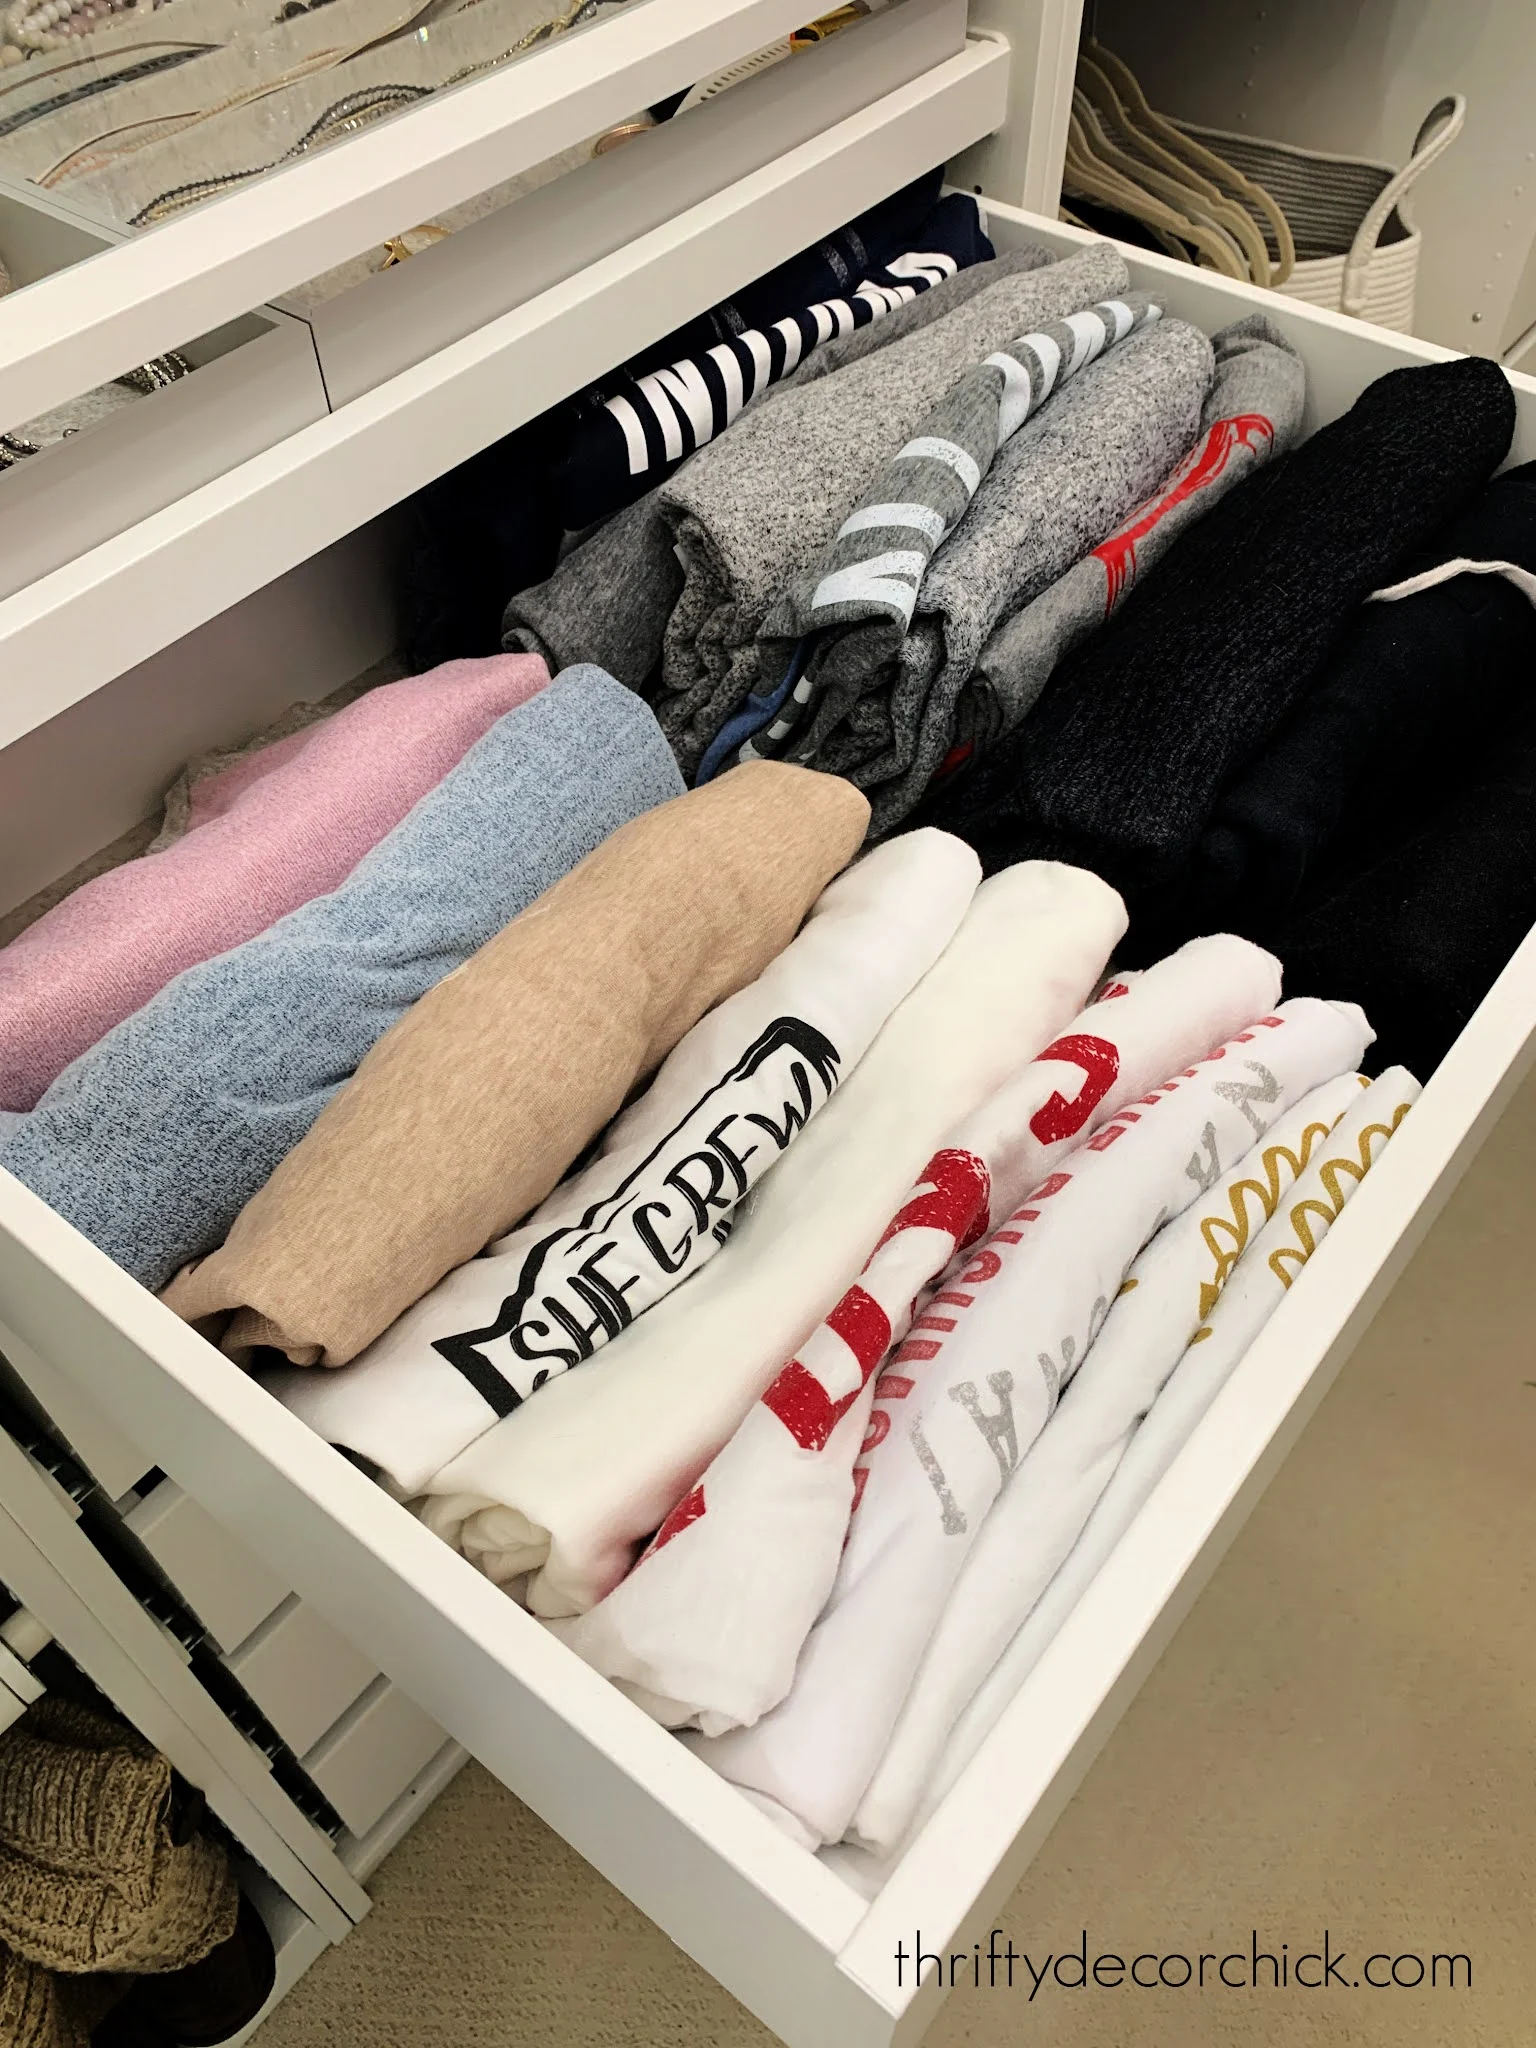
I've discovered that I see (and therefore wear) more of my clothes when they are folded and stored with the sides up like this:
The Pax pull out drawers don't have much depth, and I was worried about that
at first. But if you store your folded clothing as I'm show here instead of
stacking, you're able to fit a TON inside.
It is SO nice to have drawers with just short sleeved shirts inside, or work out clothes, lounging outfits...whatever.
I can see what I have so. much. better.
Storing clothes on their sides keeps your drawers more organized -- no digging through piles!
The Komplement drawers are all soft close, so no slamming! You know how much I love a soft close!
Jewelry vanity with mirror
I wanted a little spot with a mirror that would hold all of my jewelry in one place. I love how this turned out!: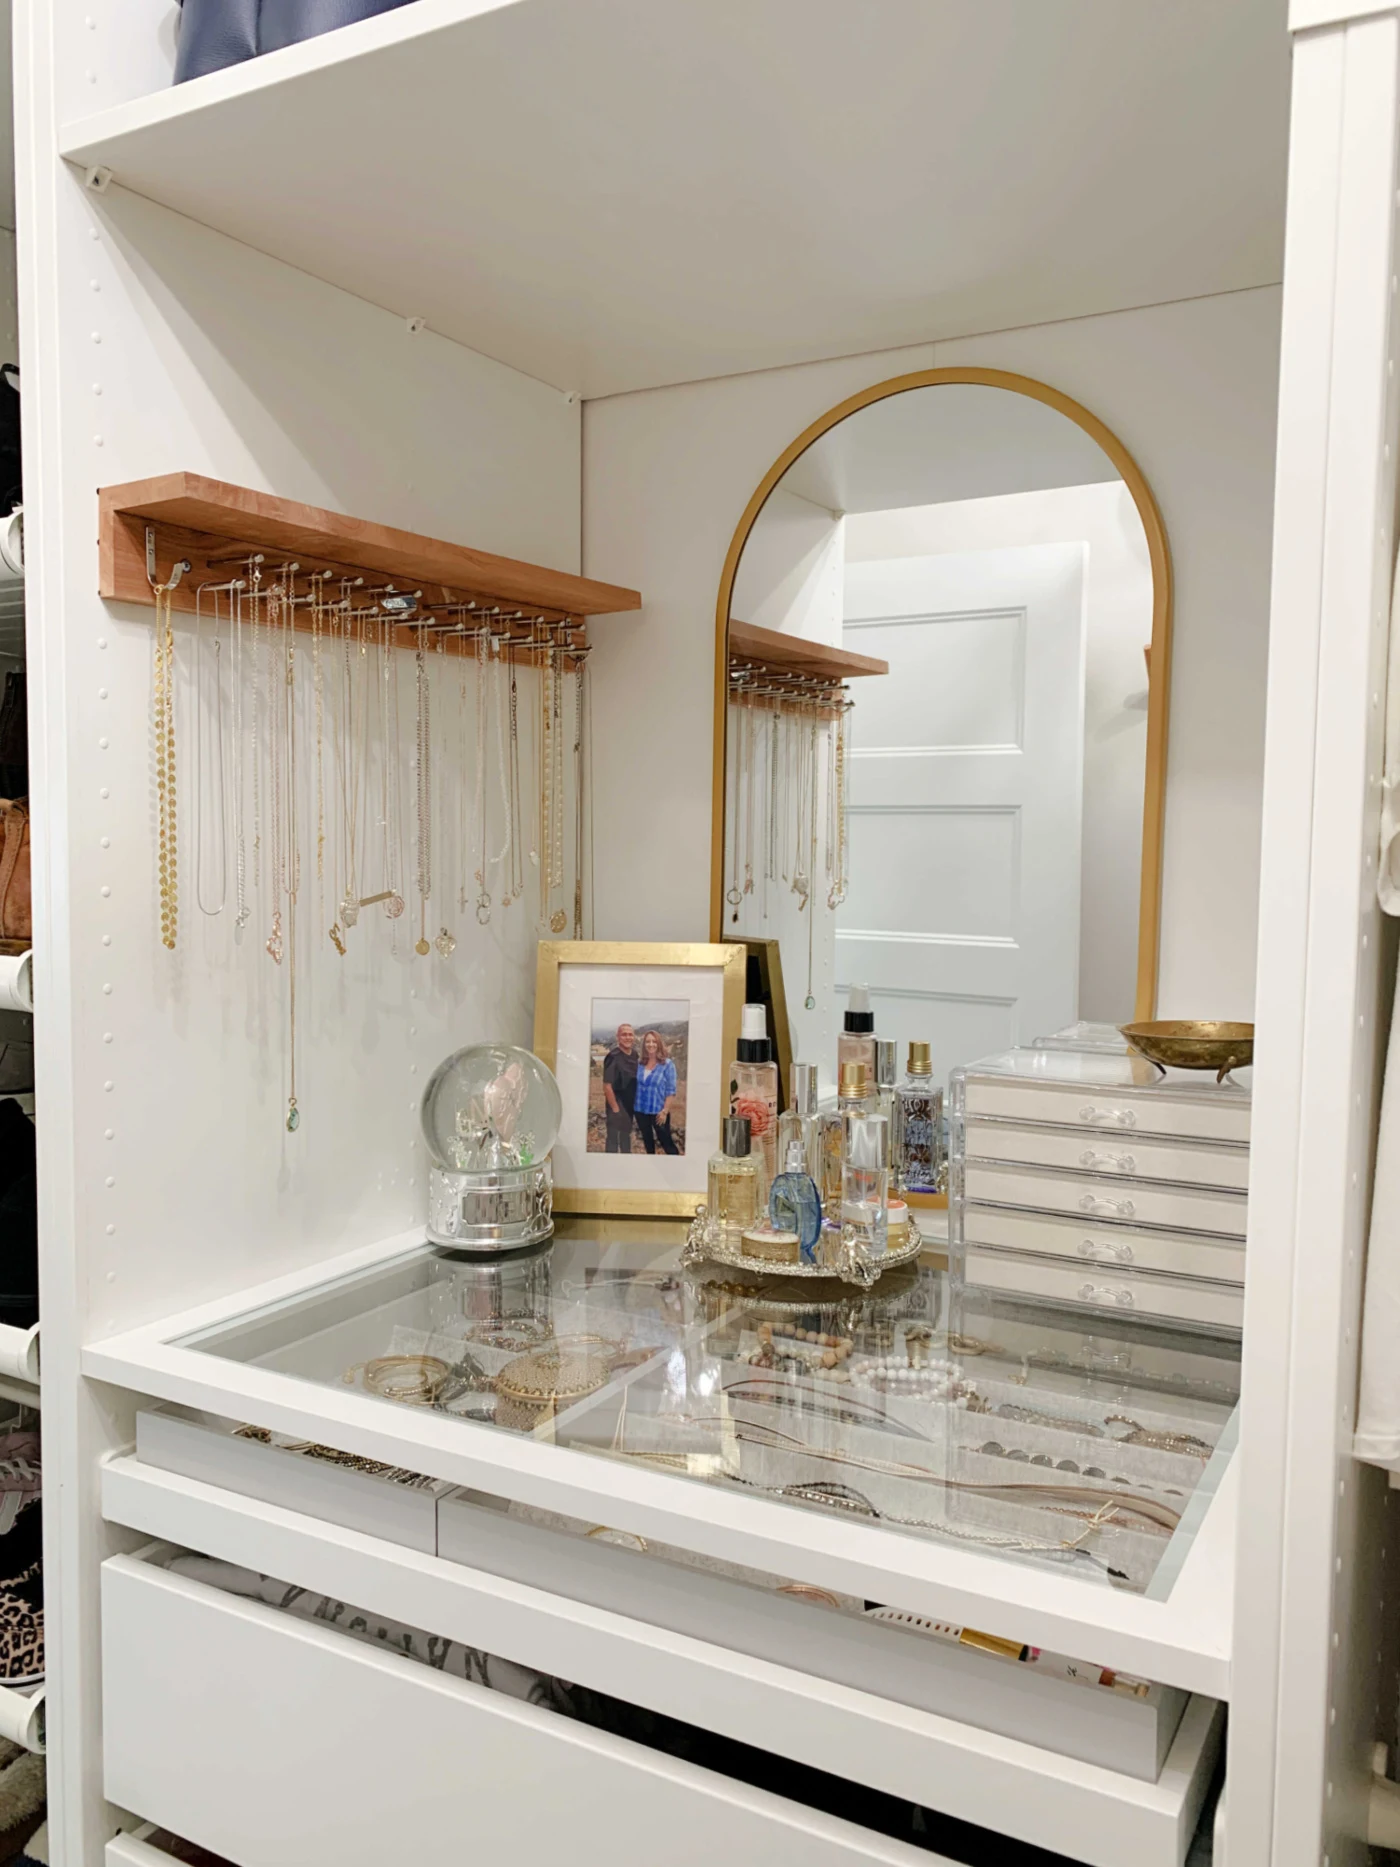
I still use that tie rack as a necklace holder -- love it.
I found a better solution for earrings -- this acrylic jewelry organizer holds a TON of them:
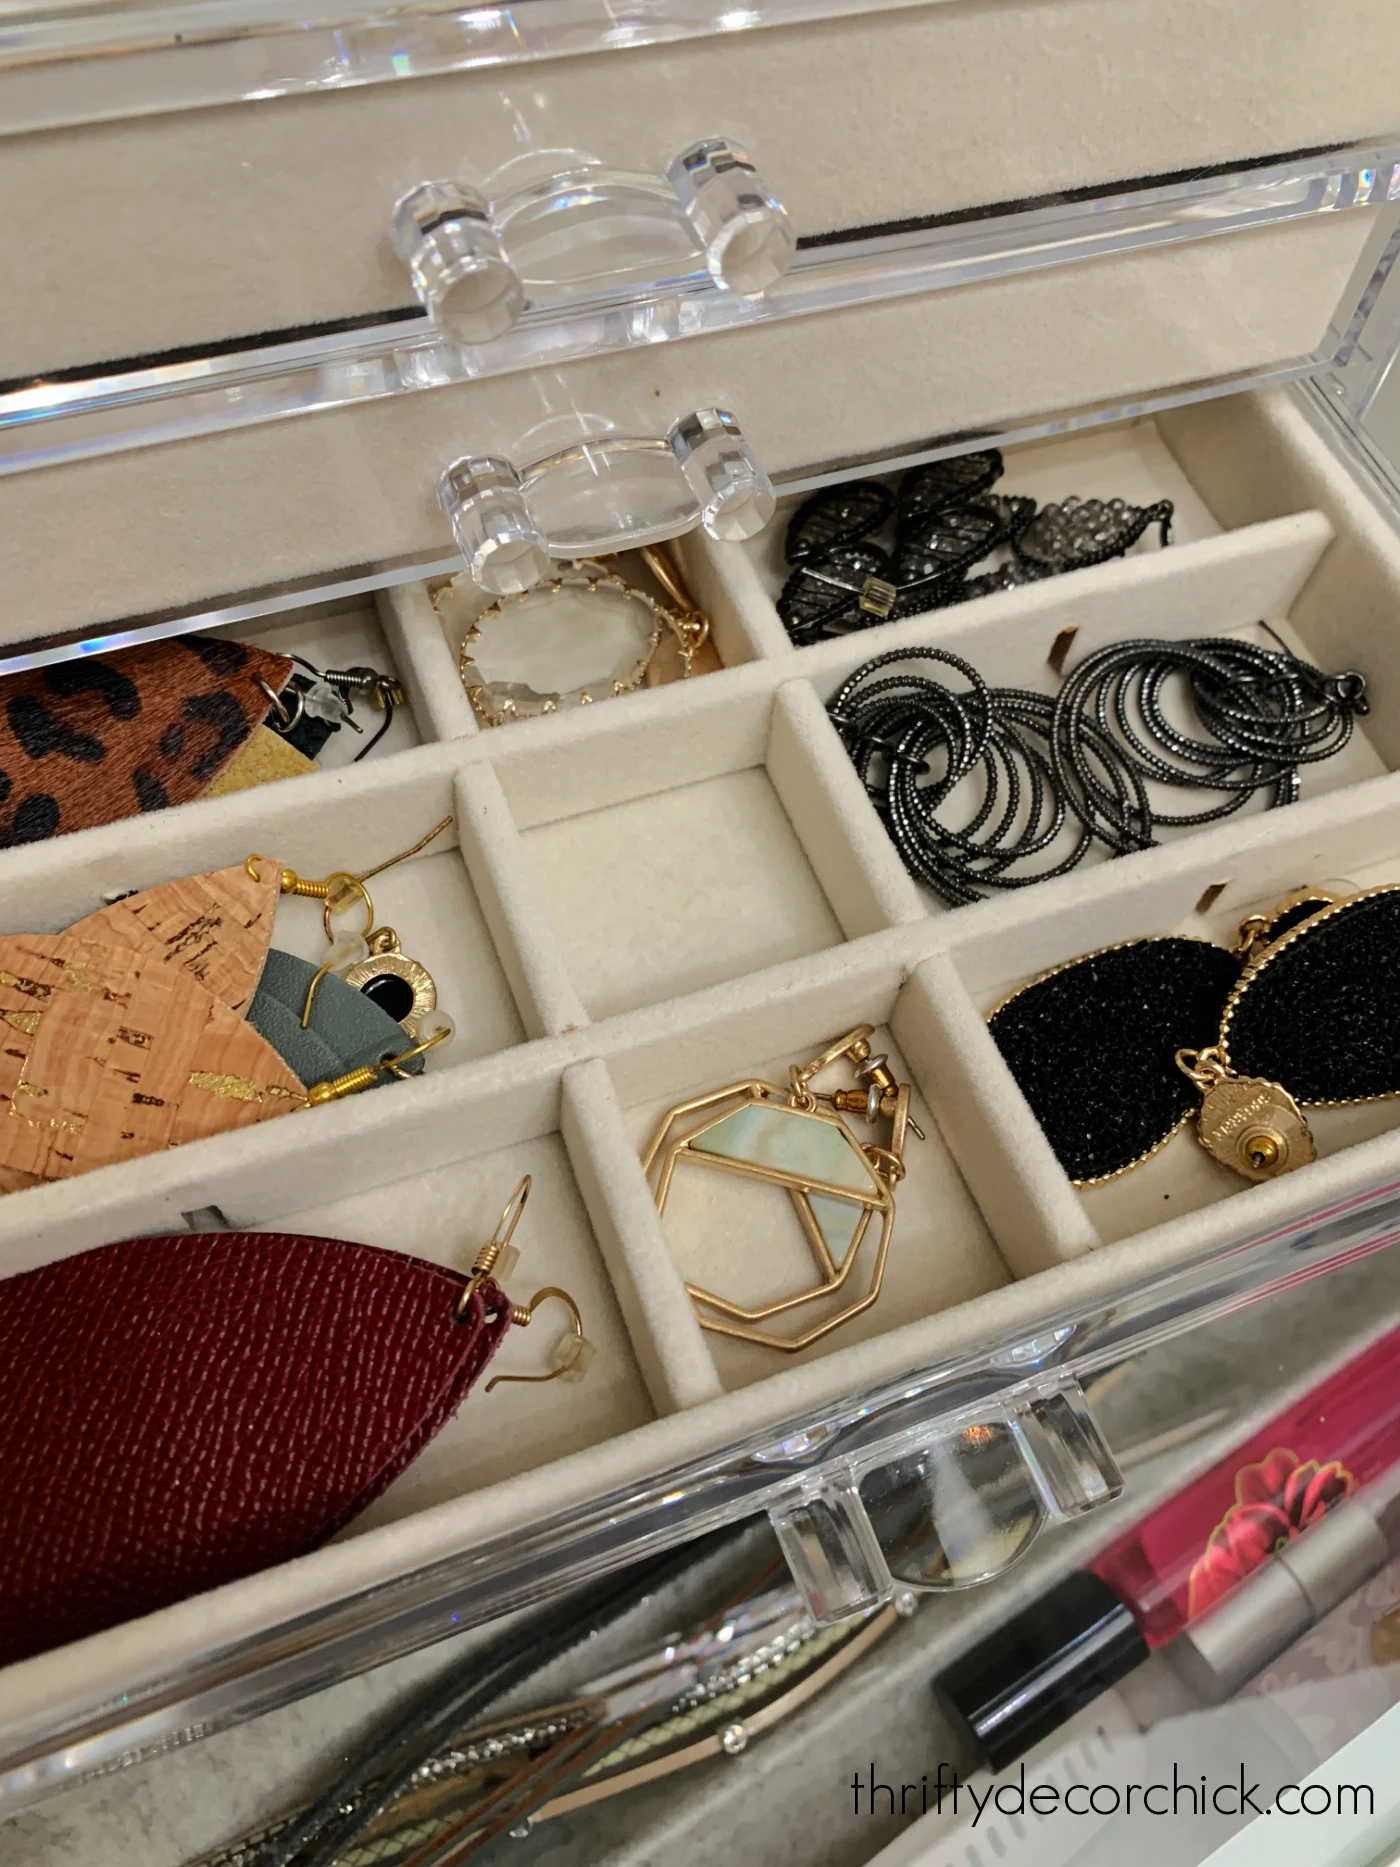
And I used a Komplement pull out tray with soft jewelry organizers for the inside:

I keep bulkier jewelry and accessories in those...I love this thing!
Long clothes and extra storage
I installed one of the mid-sized Pax units at the back for my longer clothing.I don't have a ton of dresses, so those hang on the right and longer cardigans and jackets are on the left of that section:
One of the Komplement options is an "L" shaped section you can attach inside the built ins.
This allows you to use what would be wasted space under shorter clothes:
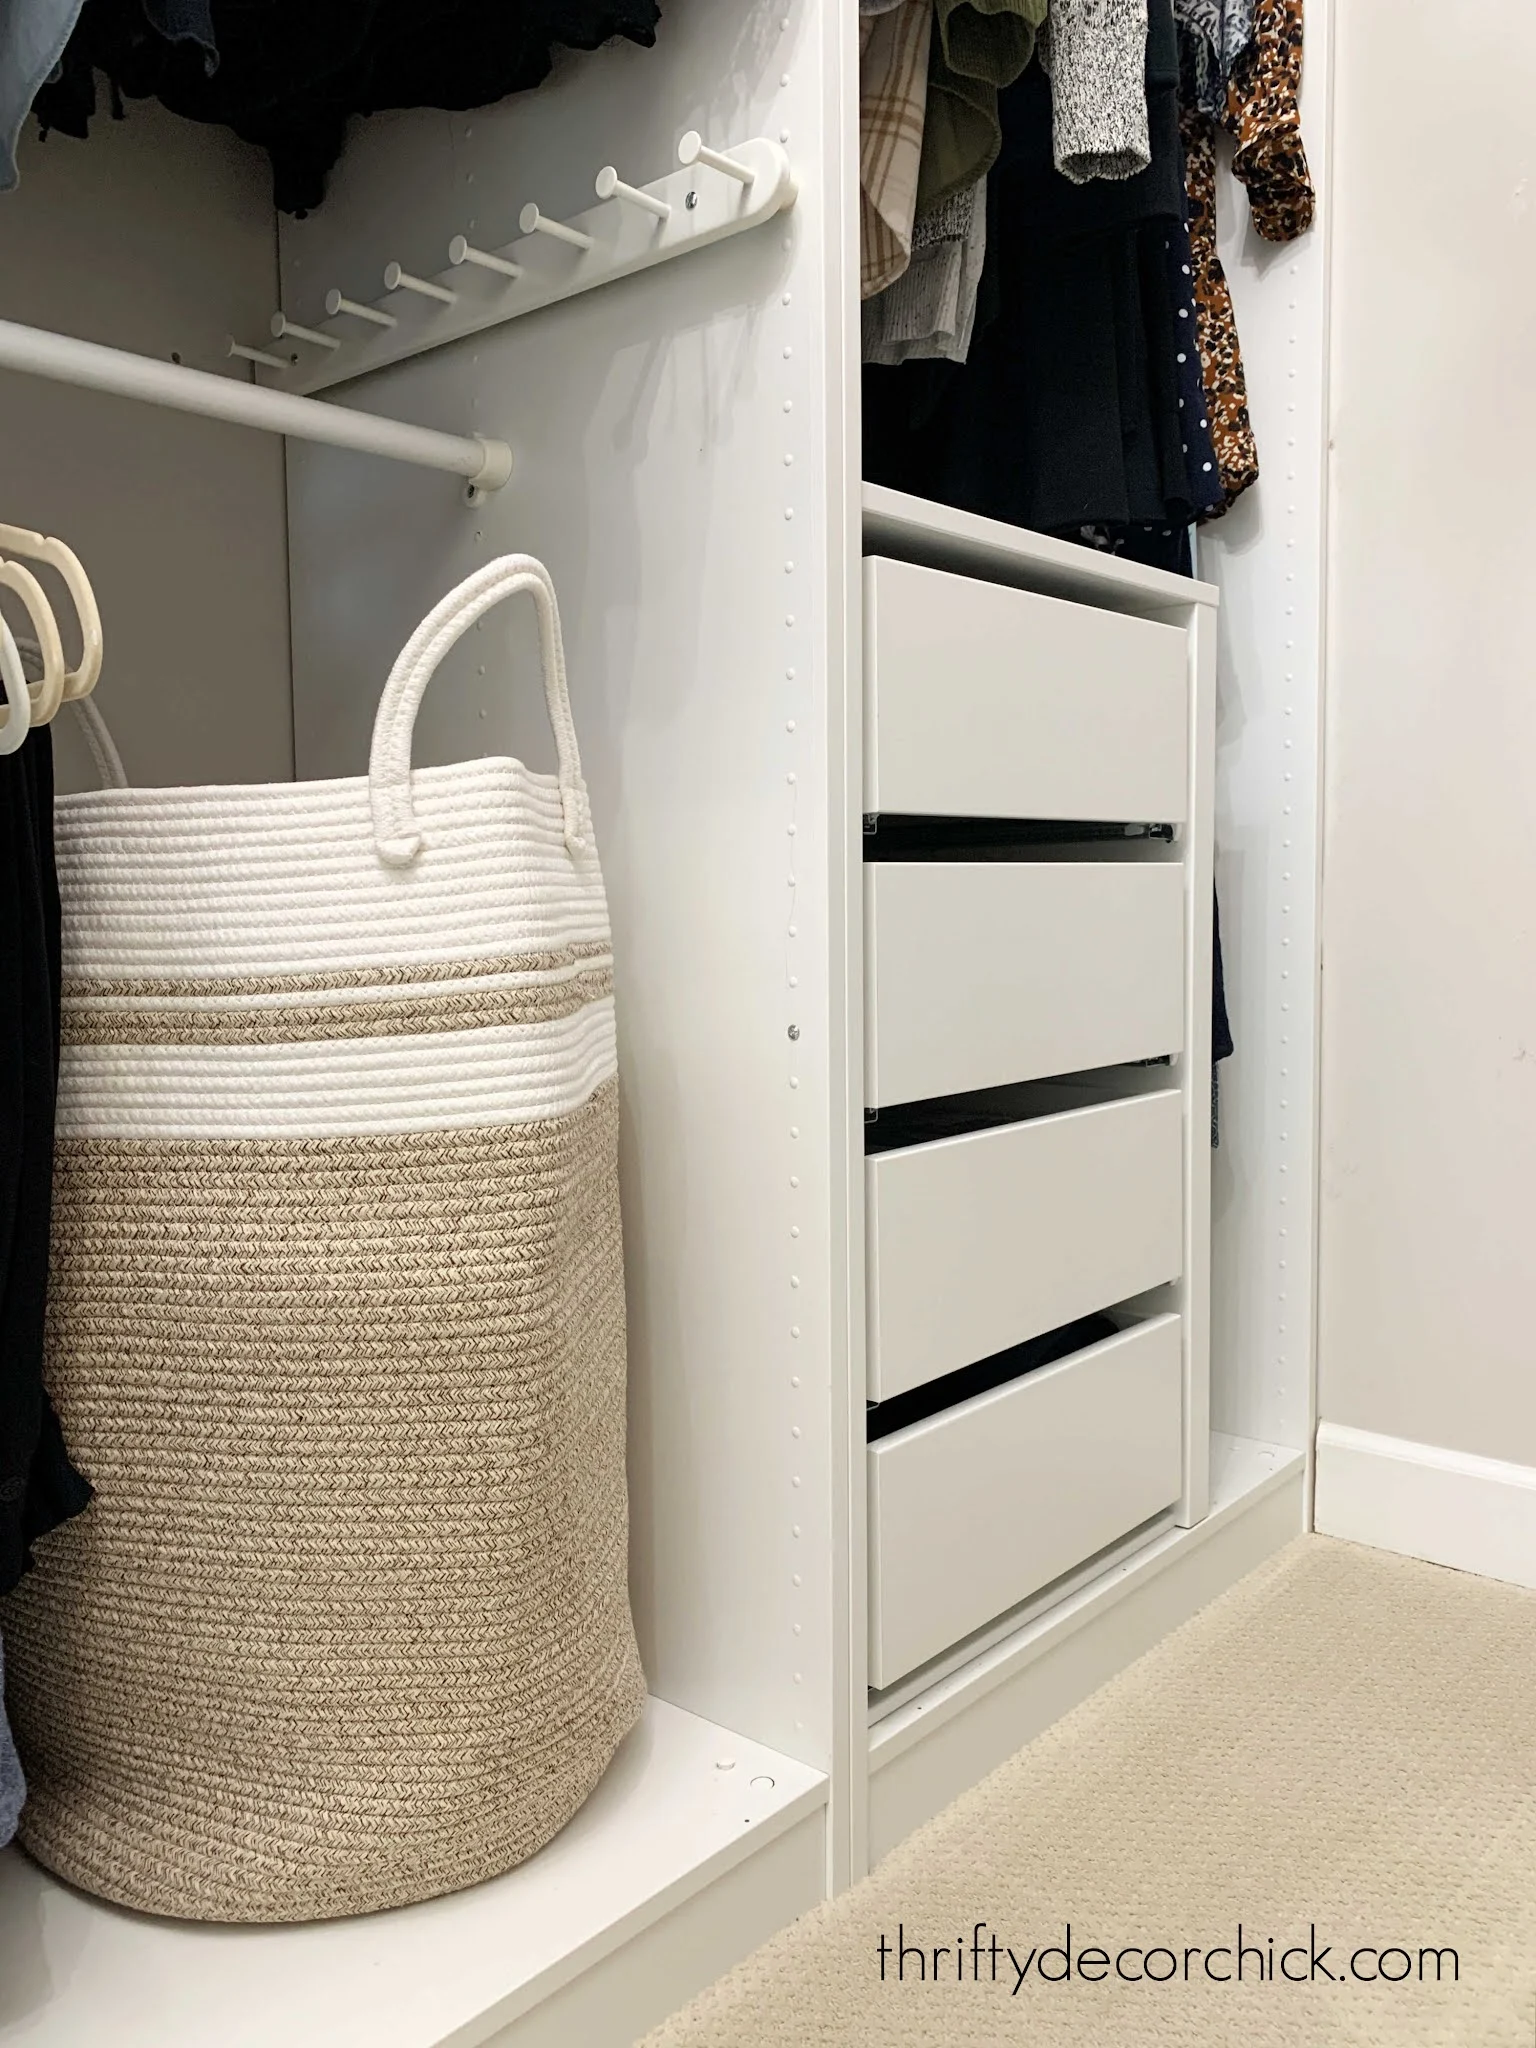
I LOVE the extra drawers! I use those for random stuff -- clothes that are a little (ahem)...snug, slippers, odds and ends.
I store my purses (large ones are out, smaller ones are in the storage containers) and other random items at the top on the Komplement shelves:

I don't need to access those much so it's nice that they are up and out of the way.
My splurge for this room was this Grace Flower chandelier from Pottery Barn:
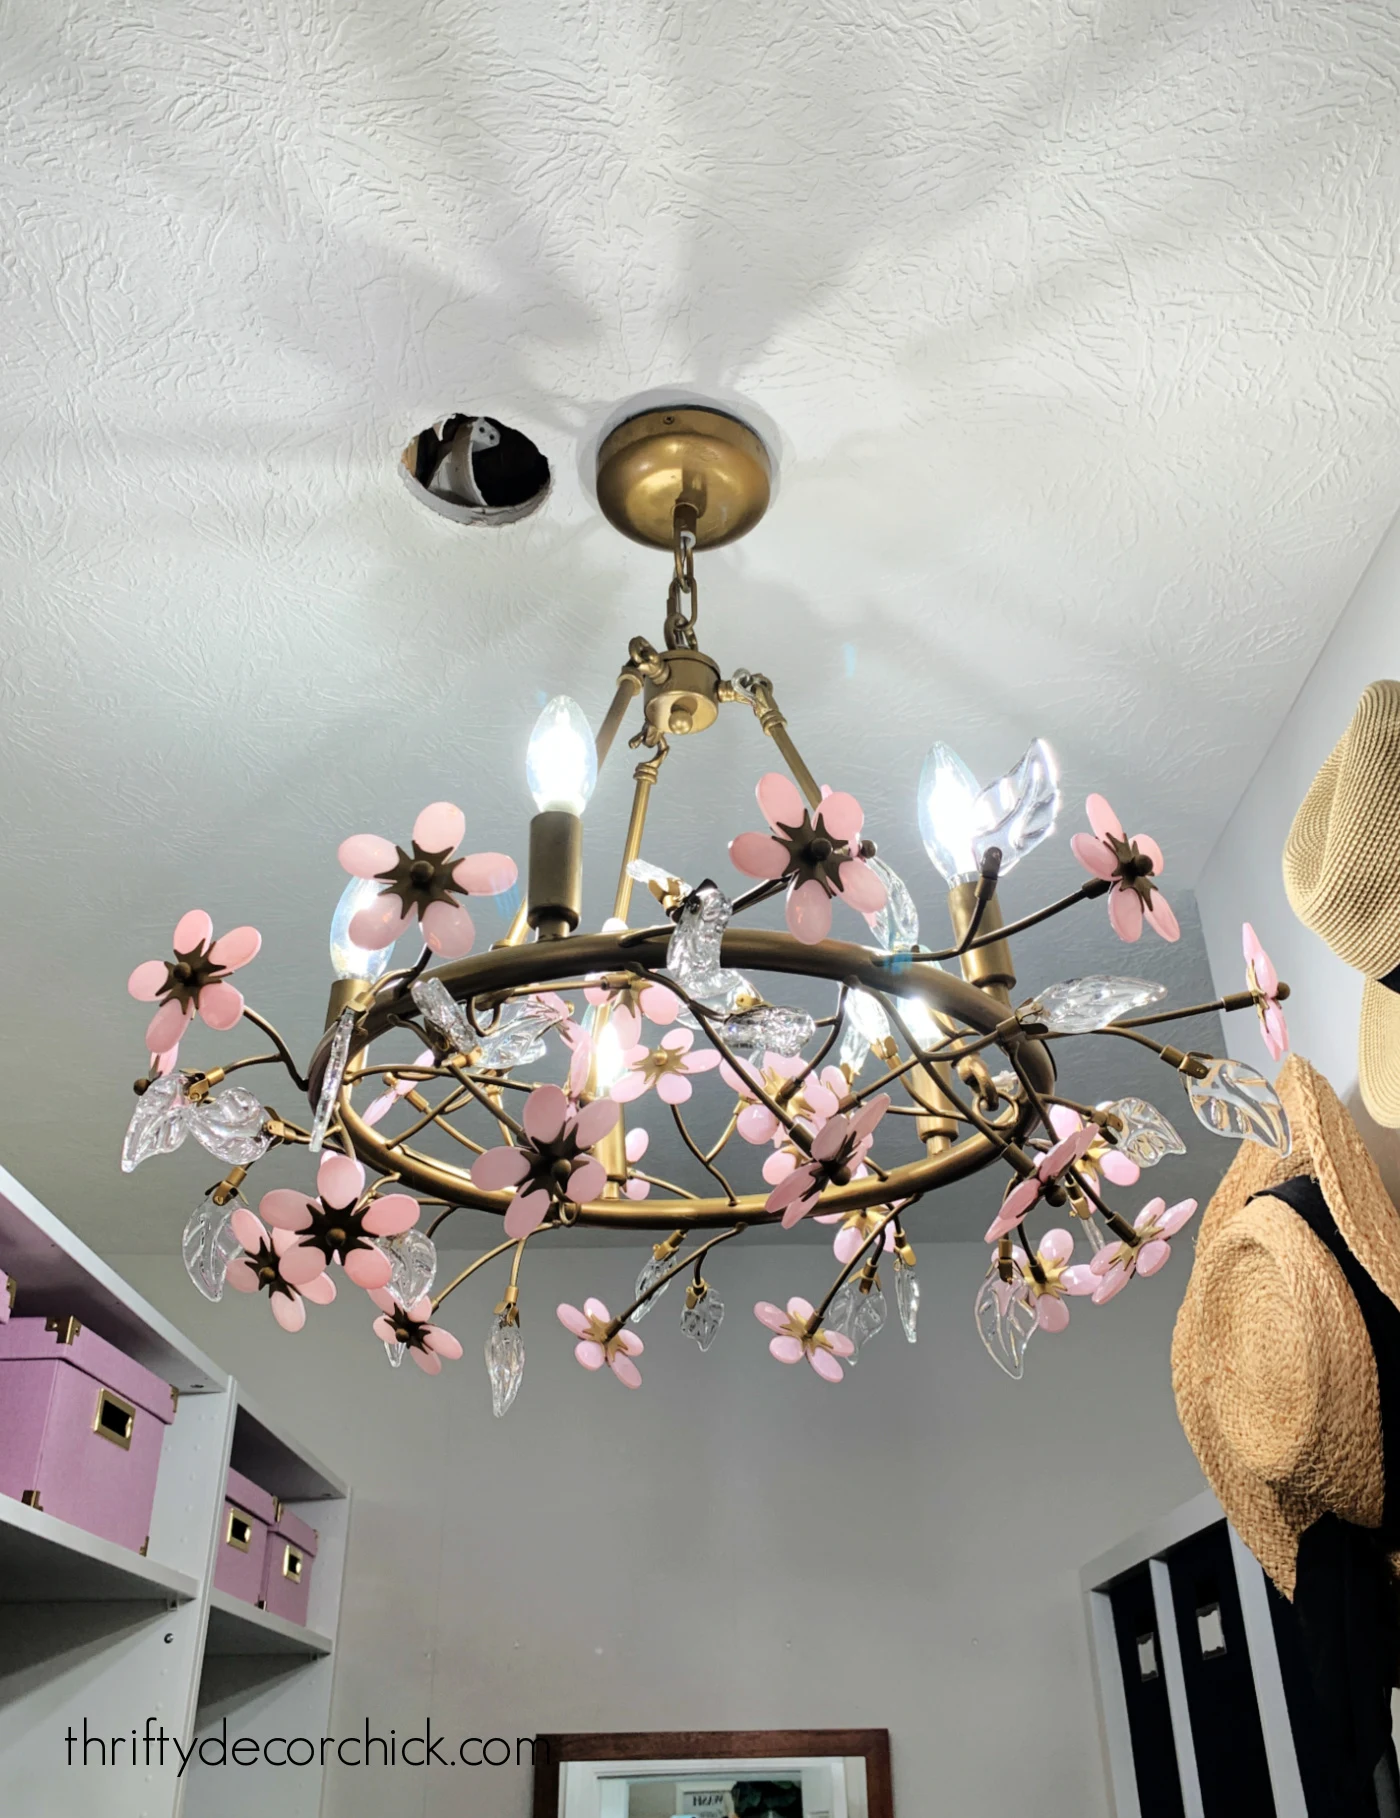
As you can see, I had to move the light to the middle of the room. :) Adding the units on the left threw off the center of the ceiling.
I still need to cover that hole! 😀
I knew as soon as I saw that fixture I knew I wanted to use it in here! I love how feminine it is...the flowers are so pretty.
Thankfully I got it on sale, and then for awhile it disappeared off of their site so I thought it was discontinued.
But it's back and they have a gorgeous flush mount version as well.
This closet makeover required a ton of work and patience!
Of course with all of their items, you have to build the IKEA Pax system
before you can install, so that adds some time and effort.
It's worth it because you're able to create a custom closet for way less than you'd pay elsewhere!
Because stock is harder to come by lately, you may have to wait for items or change your design to use what is available.
This took me WAY longer than it normally would just because I had to wait for so many items to come back in stock.
But I was fine with it because it made me slow down and figure out how to best utilize this space.
I can't even tell you how great it is to have this organized and pretty space!
It has changed my days for the better in so many ways!
It makes me giddy...I've never had a closet like this!
Here's another look at the before and after shots...
First, the underutilized back corner:
And now with the wall of cubbies and shelves:
The other side of the room was the pain in my butt before.
Here's another look at the before and after shots...
First, the underutilized back corner:
And now with the wall of cubbies and shelves:
The other side of the room was the pain in my butt before.
All that wasted space and wire shelving!:
And now, so organized and pretty!:
And now, so organized and pretty!:
My IKEA Pax closet is thisclose to my dream closet...but I'm not quite done
with this room yet!
I have a bunch of ideas in mind to add a custom look to these Pax units. I'll be adding baseboards, crown molding and trim for one.
I plan to add a few other small additions to dress it up just a tad as well.
I will share that process soon!
I have a bunch of ideas in mind to add a custom look to these Pax units. I'll be adding baseboards, crown molding and trim for one.
I plan to add a few other small additions to dress it up just a tad as well.
I will share that process soon!
Never miss a post by signing up to get posts via email.
Fabulous! A place for everything!
ReplyDeleteSimply amazing! You are so talented!
ReplyDeleteOh DROOL. Fantastic transformation, Sarah! I'm trying to work out my own closet, looking at IKEA components. Like yours was, it is large enough but not efficient. Your finished vision is really helpful.
ReplyDeleteYour closet is absolutely stunning! What an amazing job. I have total closet envy! Enjoy it!
ReplyDeleteP.S. Can you share the name of the paint color in the pictures right outside the closet? Love that color!
Sorry, I just saw where to find the name of the paint colors! No need to reply to my question.
ReplyDeleteLooks fantastic! I say keep the artwork, but hey, you do you!
ReplyDeleteI love this so much. Is is rude of me to ask for a price breakdown? And how deep and wide is this master piece?
ReplyDeleteSarah, I've been following Thrifty Decor Chick since the beginning and both of your beautiful homes. I so admire your thoughtful designs and your ability to execute them yourself. If you haven't already (and I somehow missed it), will you be disclosing the dimensions of your closet and the end cost for the gorgeous DIY remodel? I have zero carpentry skills, though I need and want a pretty and functional closet like yours, so I'd need to hire a skilled carpenter. I'd just like to have an idea of a DIY vs contractor. I've never forgotten the beautiful fireplace and bookcases in your previous home, your remodeled kitchen (your tip for the best refrigerator print cleaner...water) and upstairs craft room, your son's bathroom. You and your blog are a true inspiration to me. Thank you.
ReplyDeleteLove it! Two quick questions...
ReplyDelete1 - What is the piece that you used to hold the different PAX units together? Was that a DIY thing - or does IKEA sell those now?
2 - What did you use to fill in the little holes that make the shelves adjustable? I used the PAX system in my pantry and those little holes drive me bonkers!
Thanks!
Roz, you just did the work for me. We're considering bedroom remodel with walk-in closet, and I keep telling Justin we have to use Ikea. Now I can show him this and convince him. Love ya! Jenny
ReplyDeleteThis is just lovely; I'm so happy for you! You had me at the glass shelves between the sweaters, but THEN, WOW! I love it all. I imagine you pulling out those shoe shelves when you walk by because you can. So fun! Waiting for inventory restock looks like it was well worth the wait! I'm guessing moving your things into this gorgeous space was a motivator
ReplyDeleteto purge again. Your husband *does* have some closet space, right? ha Chrissy