How to Make Large Wooden Fall Porch Signs
September 06, 2022
Share this
How to make large DIY fall signs for the porch or inside!
You can make your own wood porch signs for way less than buying in the store...and you can customize the size and message to anything you want!
I got this DIY fall porch sign idea when my sister and I were out checking out fall decor in the stores a few weeks ago. We both love the season and love walking
around getting ideas.
I saw a tall "fall" sign that was really cute, but I knew I could do it bigger
and better myself. I envisioned it on the front porch -- I'm so excited to
have a porch to decorate this season!
Luckily I keep extra wood from projects so I already had the boards I needed
for these. I planned on only a tall skinny one at first, but then got an idea
for a second sign too.
First up, I found a wood pumpkin at the craft store and painted it...well,
pumpkin:
Then I got to work on the actual boards that would make the signs. I always
start with a conditioner before staining. It's super easy to use and it really
preps the surface well:
This post may contain affiliate links for your convenience.
I may earn a small commission when you make a purchase through links.
See my policies and disclosure page for more information.
If you've ever tried to stain without a conditioner, you know that sometimes
the stain doesn't go on consistently over the wood. This helps that big time!
I never go without it now. You just wipe it on and then stain within two
hours.
I've never used
these staining clothes but thought this would be a good time to start:
They provide gloves on the package so you literally don't need a thing -- no
applicator makes this super easy.
Usually you'll need a brush or rag to apply, but these cloths are saturated
with stain and make for quick work:
I was using two different kinds of wood and they stain differently. One had
more of an orange tone than I would like so I gave it a really fast swipe of
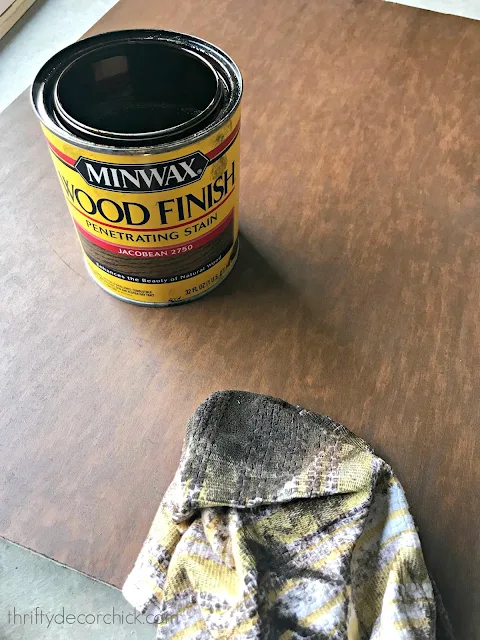
Jacobean (a favorite) over the top.
That helped the two woods to match:
While I had my beloved Jacobean out, I gave the pumpkin a quick coat as well.
I didn't put any new stain on the rag -- just rubbed in what was left on
there:
The orange was a little too orange for me and with the stain it was
perfect!
When the stain dried (another bonus of these wipes is it dries really
fast) I applied a coat of polyurethane on both.
The poly is always one of my favorite steps because it really brings out the
beauty of the wood and stain:
I used
wipe on poly this time -- I just pour a little on the surface and then rub it in
really well. It is awesome because you don't deal with any little bubbles that
sometimes show up with a brush. Love it.
I placed the pumpkin and letters on to make sure of placement:
And then sprayed the letters in this spray paint color called almond. White was too stark and
this is more of an off white with some brown in it.
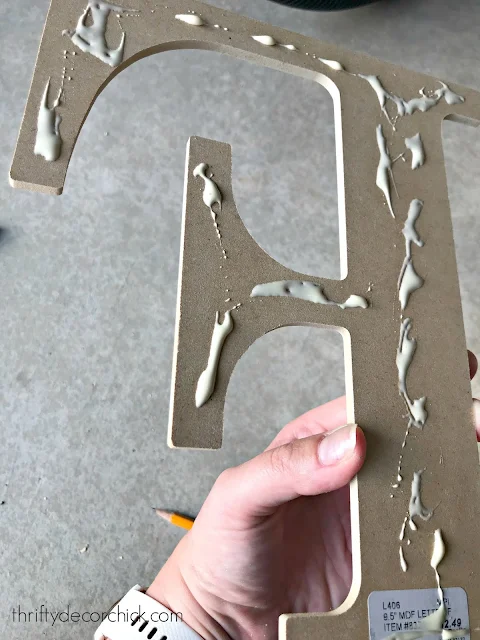
I used wood glue on the backs of the letters to adhere them:
While those dried I sprayed some wood trim called lattice (that I just used on
the kitchen island project!) in the same color and nailed it around each board to make a very simple
frame.
If you want to save a few bucks, there are other options instead of the ready-made letters:
- Print out the letters and trace them onto the board with a pencil, then paint!
- If you have a Cricut or other cutting machine, you can use those to apply letters as well.
I already loved these as they were...but I had plans for some fun little
details.
I glued moss along the bottom of the pumpkin to look like grass and
then some leaves on the stem as well. The fall sign got some simple wood
leaves to bring in some orange.
I mean...they're pretty cute, right?
The fall sign is way bigger than the one I saw in the store. Our porch and large door can take larger pieces like this...anything smaller would be a little too wimpy.
My cute signs will live on our covered porch that
doesn't get any of the elements. If yours does you'll want to keep a project
like this inside to protect it. Or you can spray them with this protective clear coat sealer.
These would look just as good next to a fireplace or leaning against the wall
on top of a console. They could go anywhere!
The moss under the pumpkin is my favorite part. ;) I got the little faux leaves from the foliage I
used to make
this pumpkin fall wreath:
They all play together so nicely! All I need new is a few hay bales and corn stalks and we'll be in business. :)
I almost used orange string lights on the pumpkin but I chickened out. I was going to
drill holes in the sign and push the lights in from the back. I did it on some
scrap wood and just didn't trust it would look OK, and I would have hated to
ruin the whole thing.
I think it's just as cute without!:
They look great with our IKEA lanterns! (They're not necessarily meant to be outdoor lanterns but they'e held up well for years!)
The best part is I made these porch signs the exact size and specification I
wanted. And they are truly one of a kind!
I hope this tutorial was helpful if you want to try making fun signs for your fall porch display! (Remember most big hardware stores like Lowe's and Home Depot will cut the wood for you
-- call ahead to check.)
See more of my fall porch decor ideas here!:
Never miss a post by signing up to get posts via email.


Very cute! I'm a Fall lover as well and am always so excited when September hits. :)
ReplyDeleteOh my gosh it's so cute and what a genius way to save money and just do it yourself!!
ReplyDeleteThe trim frames really add a pop and fabulous finishing touch to both your signs, great job!
ReplyDeleteLove them! The lighter trim really finishes them.
ReplyDeleteYou should make them reversible with like a thankful or merry Christmas and just flip them around for the next season or holiday!
ReplyDeleteGreat idea!!
DeleteAs I was reading through this post I was thinking they were cute, but the point when I LOVED them was when you added the frames. Such a perfect finishing touch! Can't wait to see your finished porch!
ReplyDeleteWhat is the color of your front door, in the photos it looks like a really dark brown but any idea of the paint color?
ReplyDeleteSo cute, Sarah! I'm in sign making mode for a booth I'm moving into TOMORROW! 😲 I'm doing some with a faux frame- painted border, so easy.
ReplyDeleteThese are great! I love the pumpkin with the moss!
ReplyDeleteReally cute! Where did you get the hook that is holding your wreath?
ReplyDeleteThis looks so nice & pretty attainable-sometimes I think that DIYs look too complicated, but this isn't one of those!
ReplyDeletexoxo, SS
Southern and Style
Very eye catching... what size did you make the fall sign ?
ReplyDeleteThanks! I'm not sure of the exact size, but it's at least three feet tall.
Delete