
How to Make Cute Scented Candles Using Old Wax
September 05, 2025
Share this
How to easily make your own scented candles (from leftover candles) for the fall season!
Reuse leftover wax and cute seasonal decor to make your own fall candles in
just a few steps!
I was pleasantly surprised at how easy it was to upcycle and DIY a couple
candles. This was my first try at making my own candles and I learned a few
helpful tips along the way.
I decided to do this last minute, and ran into Dollar Tree to get a couple
things. Otherwise I was winging it with items from home, but I'll share a
couple suggestions later in this post that make this project even easier!
I've wanted to attempt this candle making process for awhile, and the broken
glass jar on one of my favorite candles finally made it happen:
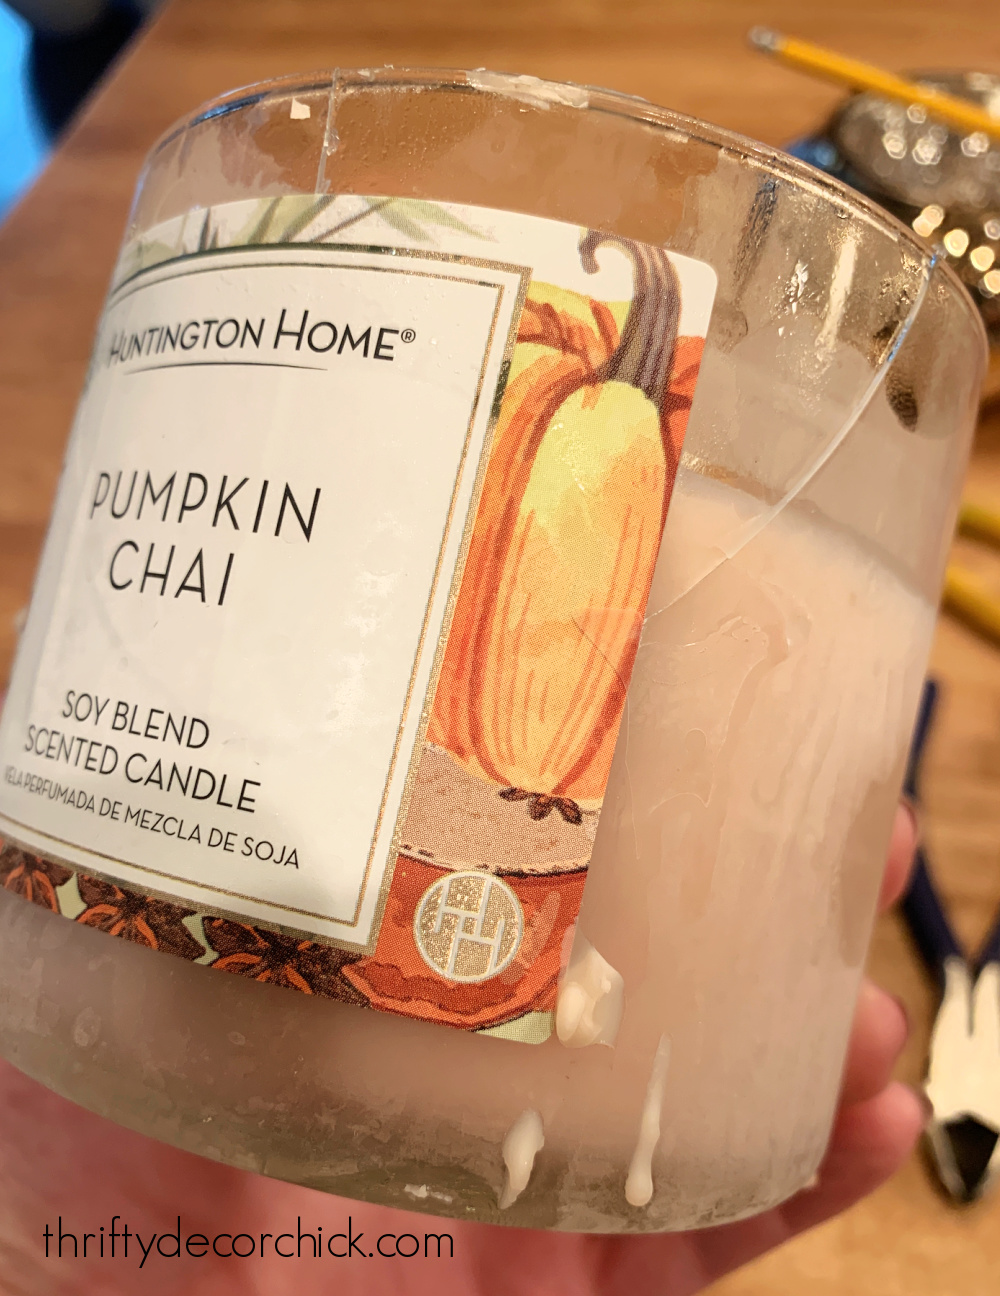
I LOVE this scent from Aldi so much, I got three of the candles when they
came out years ago. This is my last one and I didn't
see a crack in the glass when I lit it one night and some of the wax
spilled out of the cracks.
Instead of throwing it away, I decided to
reuse the leftover candle wax like I showed you here. After putting it in the freezer to loosen up the wax, it dawned on me I
could finally try my hand at making my own fall candles!
I was trying to use what I had for the most part, and if you're able to do
the same this project will won't cost you a dime! But if you want to avoid
the first few steps I'll share an even easier way to do it at the end.
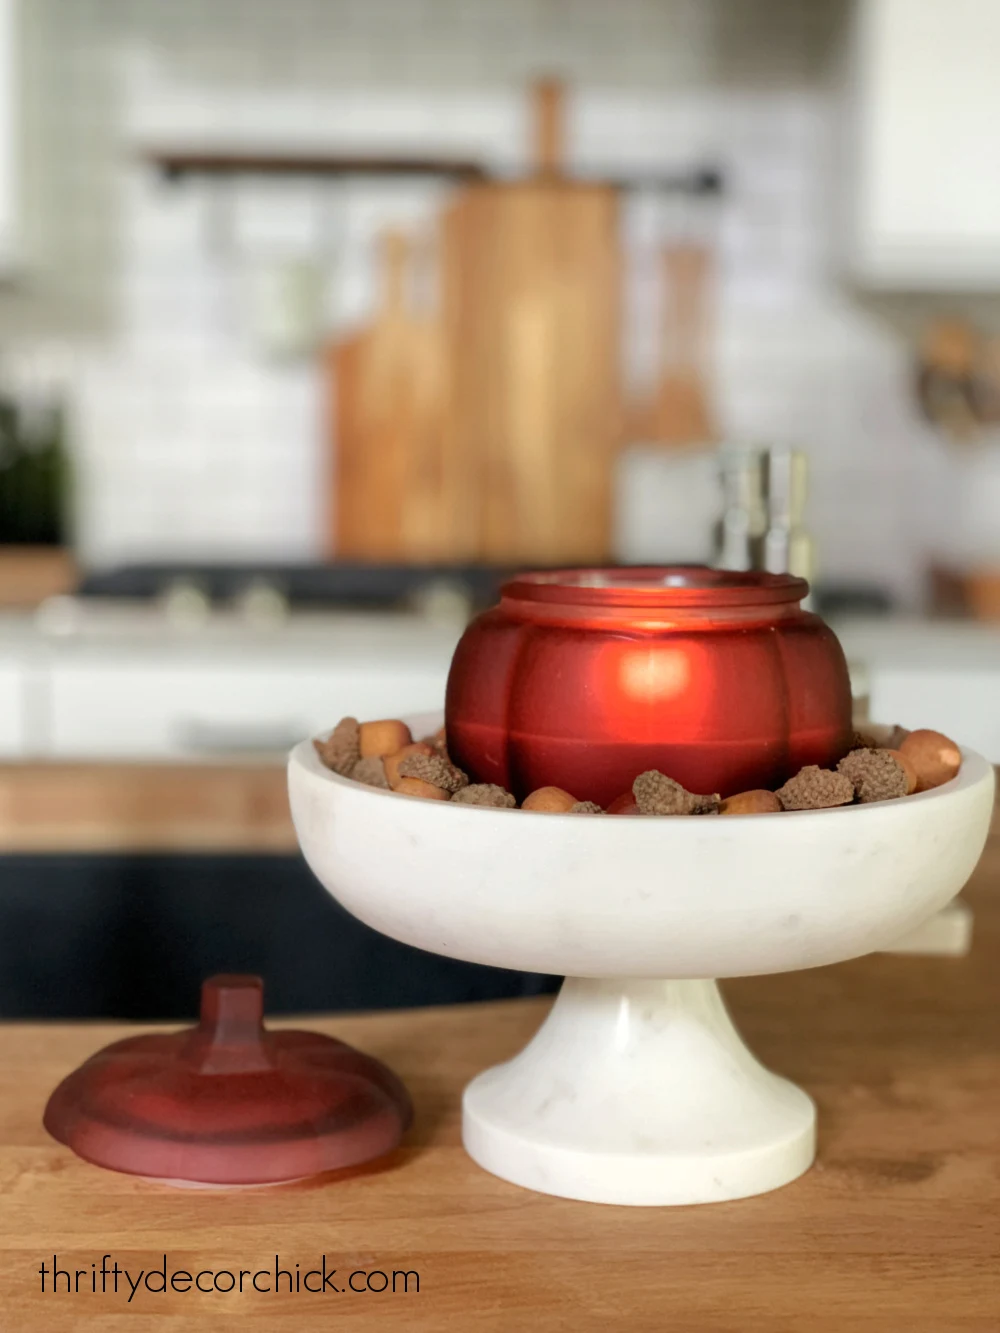
I had two pretty containers that I wanted to fill -- one was a candle we had
used up last year and one was just pretty glass dish.
My favorite method for removing wax from an old candle is to place it in the
freezer for at least a few hours. It will pop out easily and with little mess after freezing!
You may have to use something like a (screwdriver) to break up the cold wax at first, but the rest will break up easily.
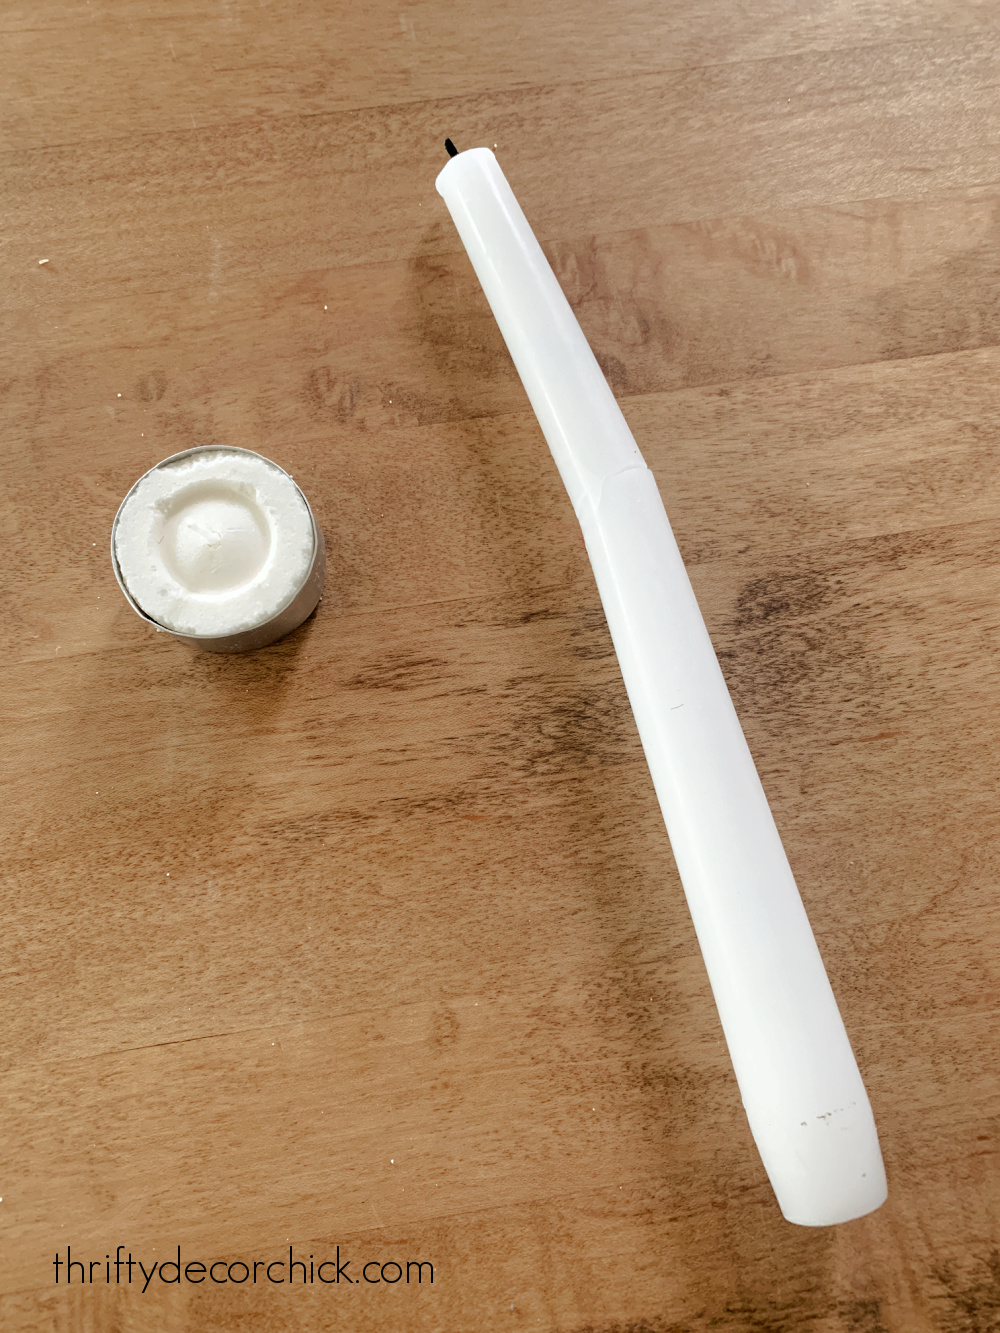
Assemble your wicks
I had my containers and needed wicks for my two would-be candles. You can
find them at craft stores, but I wanted to use what I had on hand.
I grabbed a votive and a long (broken) taper candle:
This post may contain affiliate links for
your convenience.
I may earn a small commission when you make a purchase through links.
See my policies and disclosure page for more information.
Obviously the wick in the votive was too short, but I still needed that for
the metal base. The taper candle was going to provide my long wick.

It worked perfectly! I was able to get two out of the one candle.
I took the wick out of the votive to use the metal base:
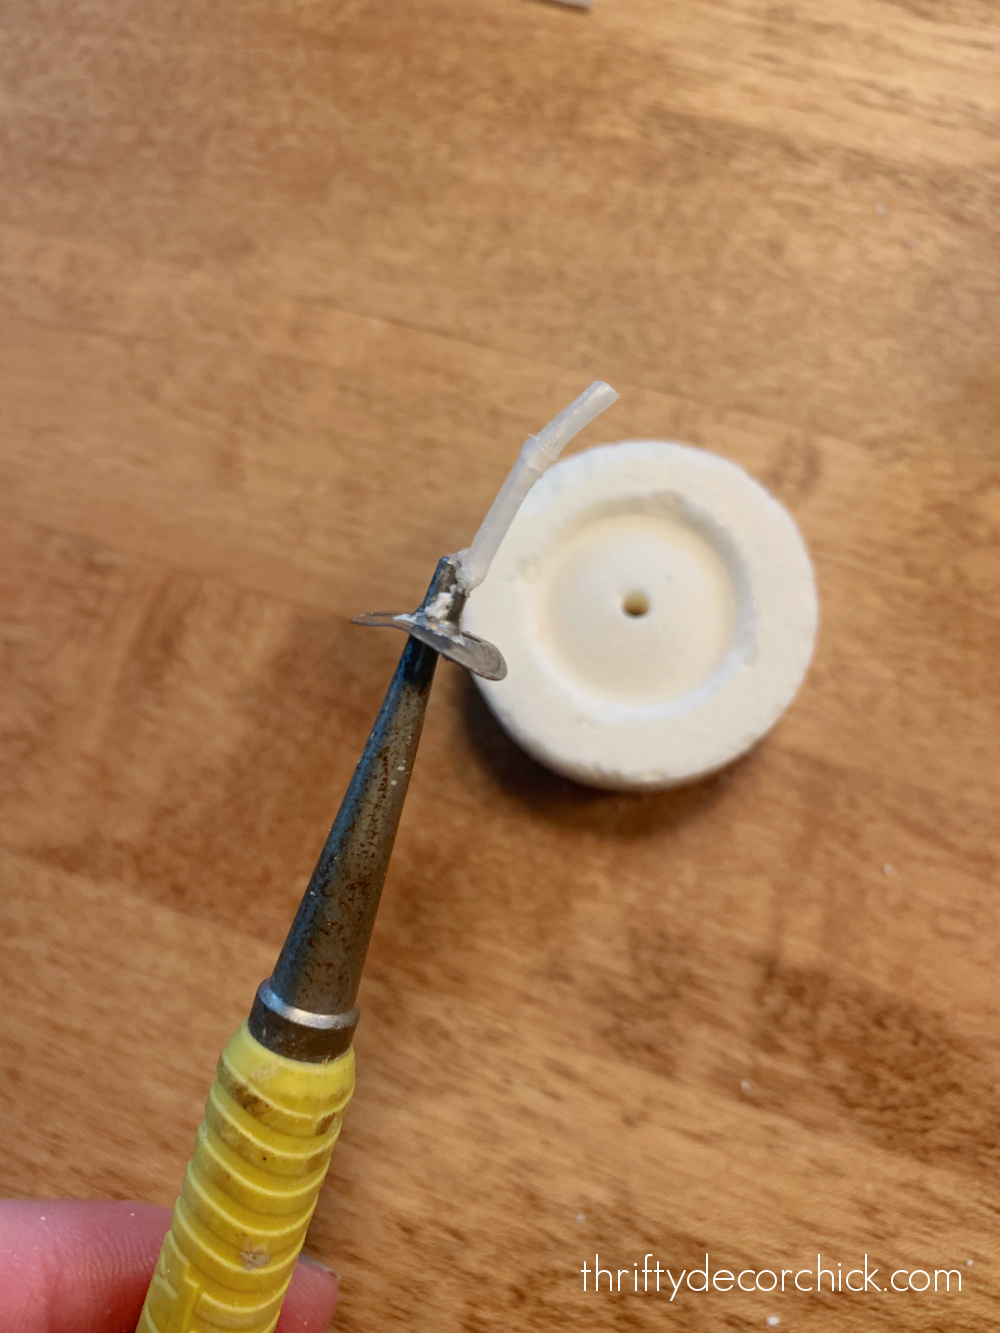
It came out with a slight tug and then I was able to push up from underneath
with a nail driver. It fit perfectly inside to open up that small clamp a
bit. If you have skinny pliers those will work as well.
I inserted the new wick and used pliers to clamp and secure the wick in the
holder.
Adhere your wick to the container
I used a dab of
high temp hot glue
to attach the metal wick holder to the bottom of the jar:

The votive isn't necessary, I just figured I'd fill up some space in there
since I had it on hand. :)
It's important to attach the metal base to the bottom of the container so it doesn't float around as the candle burns.
There are also
sticky wick tabs you can use to attach them to the bottom as well!
As you can see, I used a pencil to keep the wick upright as I poured the
wax. You can use just about anything -- as long as you don't care if it gets
wax on it!
Melting the old wax
There are a few ways to melt your wax once it's out of the candle, but the
easiest and safest way (in my opinion) is to warm it in the oven on low
heat.
I used an inexpensive bread pan from the dollar store and heated my candle
wax for about 25 minutes at 200 degrees. I wouldn't go much higher with the
heat -- you don't want the wax to boil and make a mess.
I placed my pan on a metal sheet to protect the oven even further:

Extra bonus -- our house smelled amazing as I was doing this!
And no, the oven doesn't retain any of the wax scent. I made salmon ten
minutes later and the fragrance didn't linger at all in the oven.
Check on the wax every five minutes or so to see how it's doing. I turned
the oven off for the last five minutes to let the last of the pieces melt
away.
Fill your new candle!
I placed my glass vessels on foil and a cutting board, then used a
wide-mouth funnel to pour the melted wax into my two vessels:

I found a set of three funnels at the dollar store and the biggest one was
perfect for this. You want the top to be wide so you don't have to worry
about getting the wax into narrow area as you're pouring.
I thought this part would be a lot scarier than it was. :) It was quick,
easy and I had zero mess.
If you're reusing an old candle like me, make sure not to let any of the
debris from old wicks get into your new candle.
You can remove it with a spoon before pouring, but I found it wasn't
necessary. Because those bits sat at the bottom of the melted wax as I
poured there were no issues -- they stayed in the pan.
Make sure to go slow and have patience as you pour!
If you have leftover wax, pour it into the metal votive casing with a wick to make scented votives!
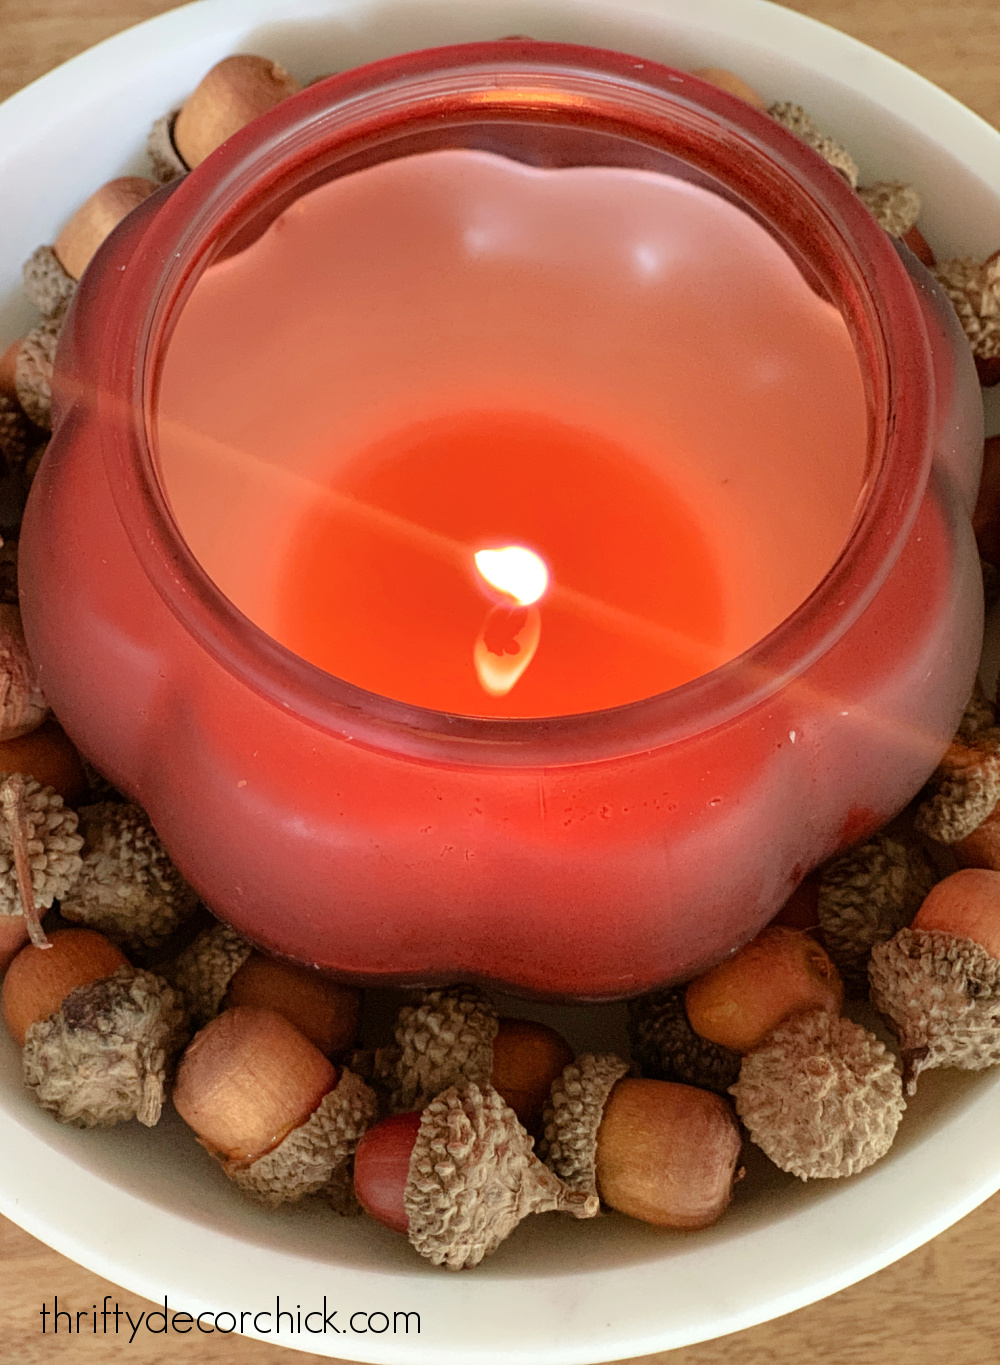
That's it! I let my new candles harden and dry overnight and then cut the
wicks down:

I kept the excess wicks for future candles, because I'll definitely be doing
this again!
I love that I was able to use something that would have been thrown away
otherwise (well, if I hadn't planned to use the wax for our warmer at
least), and I was able to reuse some really cute vessels.
So many of the old jars from spent candles are too pretty to toss
afterwards!:

I couldn't believe how easy this was! If you don't have an old broken candle
around like me, you can use the following to make your own scented candles:
- scented wax melts
- a bunch of votive candles
- soy wax flakes or beads (these melt quickly in a microwave safe container)
- wax from candles with a scent you love, but you'd like a prettier container
- similarly scented leftover candles
I like to use soy wax when possible, but if you're not particular, this
whole project could be completed with items from the dollar store.
Contrary to popular belief, it's best not to make your own scented candle with essential oils. (Unless you're versed in the candle-making process that is!) Many oils can be a fire hazard (among other issues).
I loved this project so much, I've already purchased
this candle making set
to use in the future. It has the wicks and sticky pads, plus a pot you can
warm the wax in double boiler style. (Use a large pan with boiling water and
then place the pot in with the wax to melt it.)
If you have an old saucepan or pot already,
this wick set
will be all you need. Either of these will allow you to prep your container
in just a couple minutes, so you can skip my recycling steps at the
beginning of this tutorial. :)
I LOVE how these turned out and can't wait to make more!

Have you tried making your own scented candles? If so I'd love to hear your
tips and suggestions!
Never miss a post by signing up to
get posts via email.
Great directions and how-to ideas!! I’m going thrifting today and I’ll be on the lookout for cheap taper candles to get the wick…awesome idea!!! I found a gorgeous vintage green glass bowl the other day to use to make my own candle. Thanks so much :)
ReplyDeleteMy pleasure, enjoy! 😊
DeleteI am going to try this! Last spring I made bees wax candles and it created a deep well in the center when lit. I want to reuse the containers and the wax. Thanks for this!
ReplyDeleteI’m glad it helped! :)
Delete