
How To Build an Easy DIY Laundry Shelf Over Washer and Dryer
May 19, 2025
Share this
How to build a shelf to hide the washer and dryer components.
This easy DIY shelf will hide the ugly washer and dryer components, but also
gives you plenty of additional storage for laundry needs.

This is the second time I've added a
DIY shelf unit behind our top loader washer and dryer
-- I love them!
This shelf project was one of MANY in our mud room/laundry combo makeover. I
tackled so many DIYs, from
customizing a set of base cabinets
to
tiling the backsplash
and finally
adding beautiful floral wallpaper.
This washer and dryer shelf was something I was really missing in our
current laundry area. As a reminder, this is what we had when we moved
in:

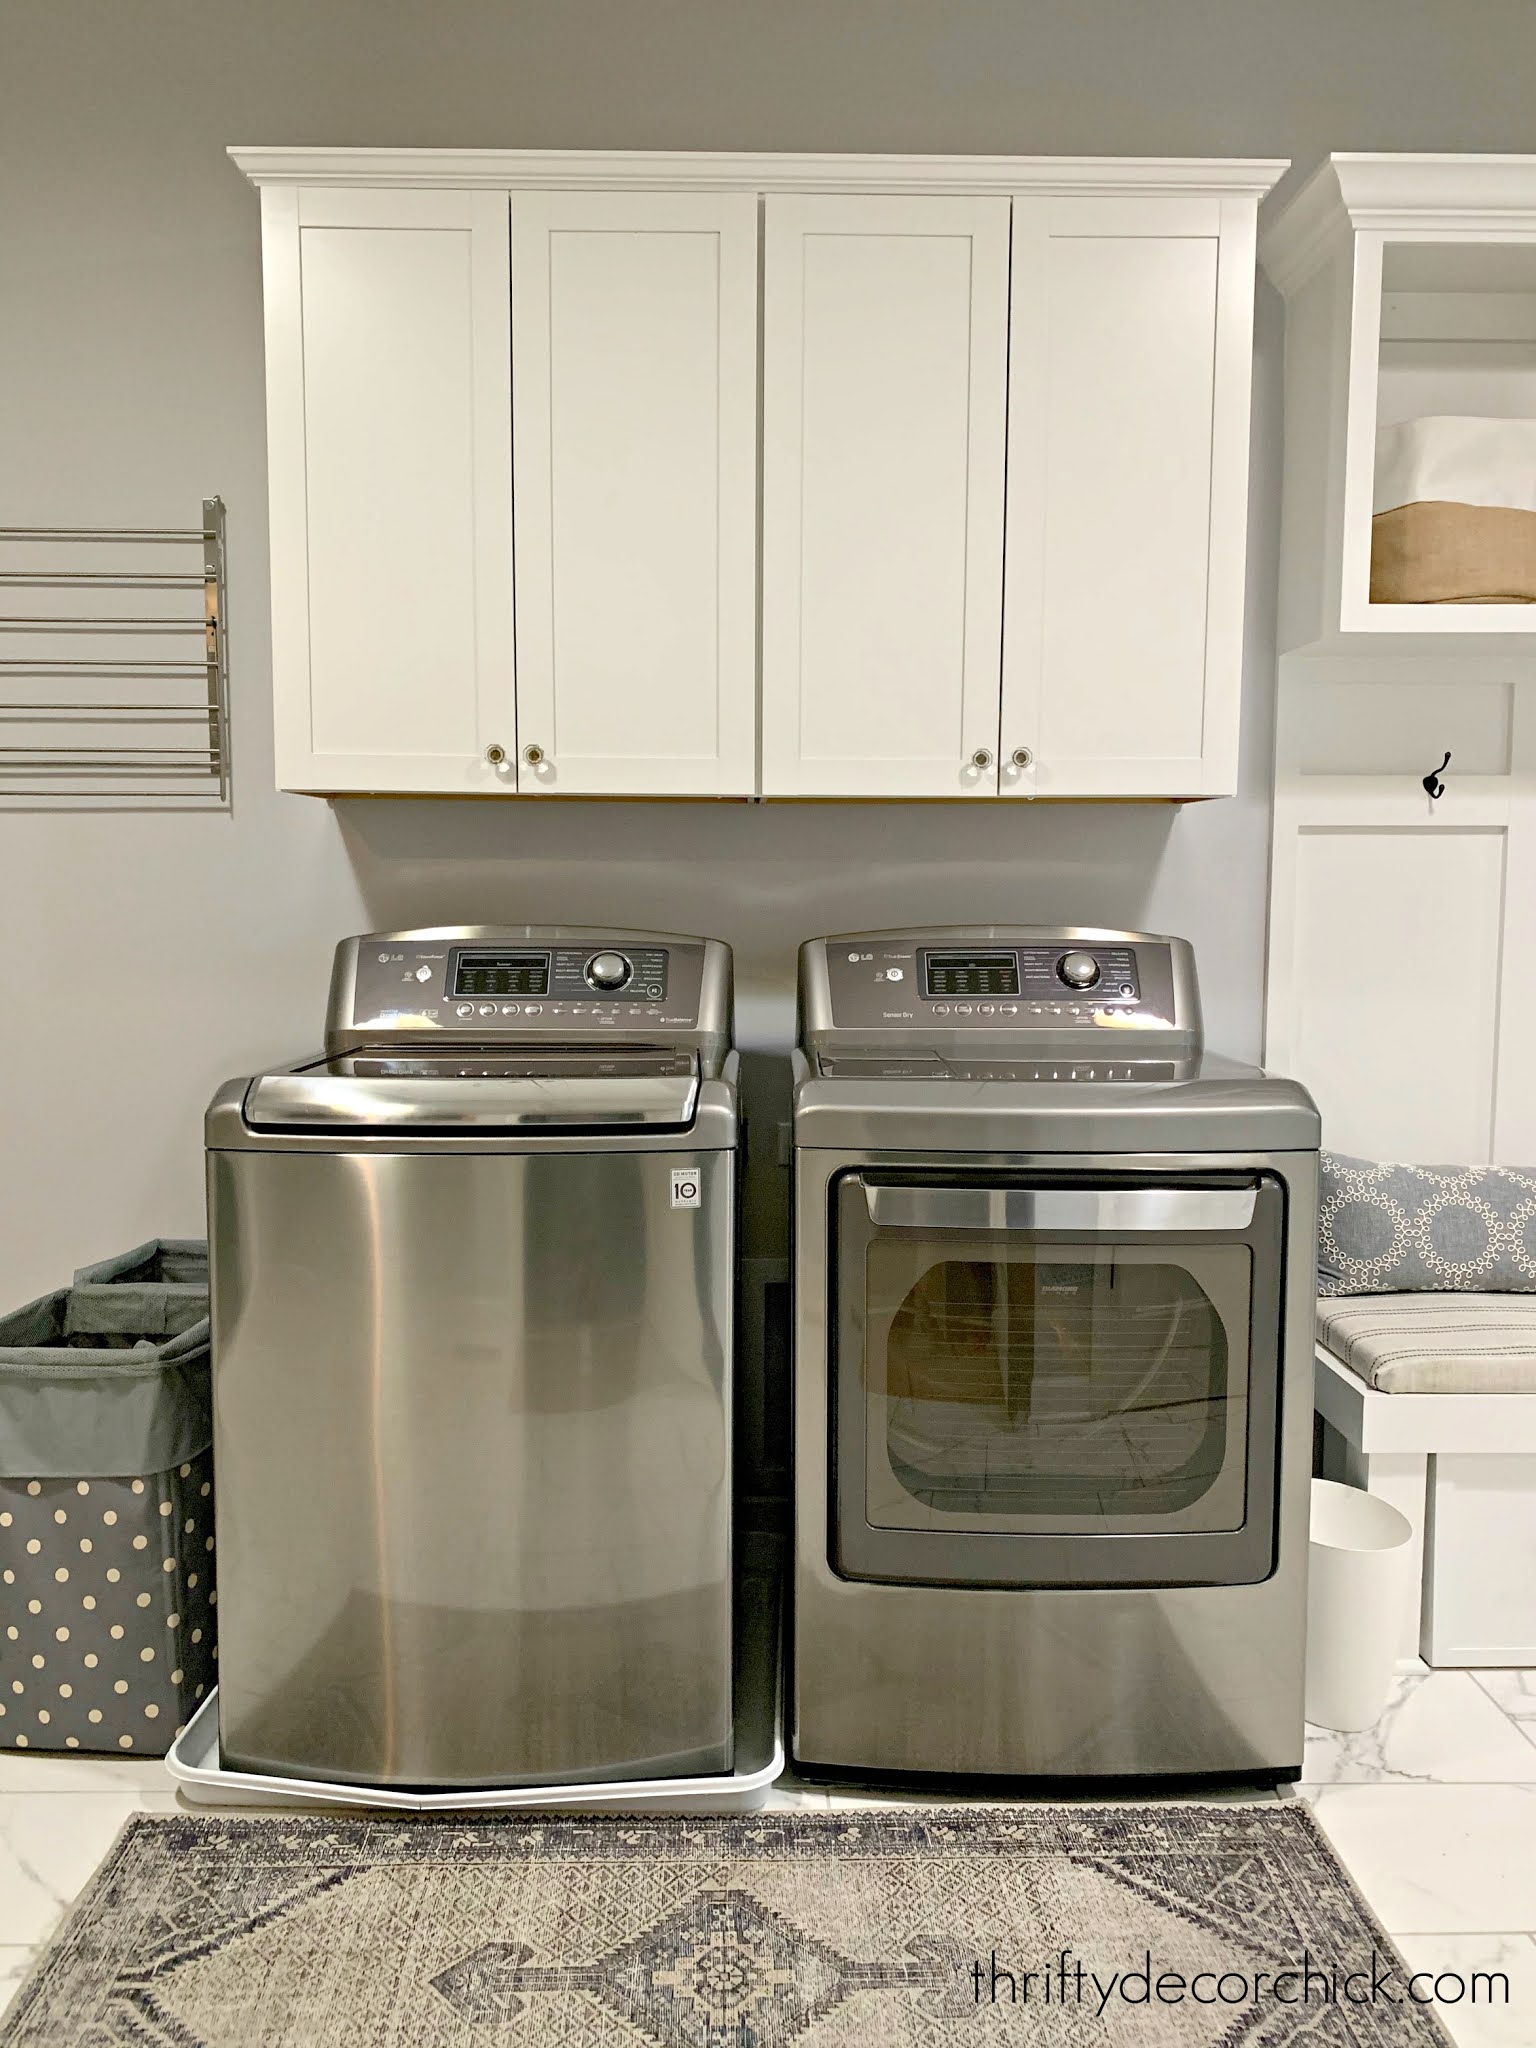
Not bad at all! But the cabinets were hung at a height that were better
suited for front loaders -- there was no room underneath to put a shelf, but
it was difficult to reach over the washer and dryer and access the
cabinets.
**I get a lot of questions about that tray under the washer -- it catches
small leaks. It was cracked so we ended up removing it. (I now use
a Govee water sensor
next to the washer.)
Part of my big plan for this space was to move those cabinets over to
another wall in here,
with drawer cabinets underneath. This was a great decision, it made the flow of the room work so much
better.
That created space for the shelf above the washer and dryer. You can see
how I built this shelf to hide the ugly stuff behind the washer and
dryer
at our old house:

This post may contain affiliate links for
your convenience.
I may earn a small commission when you make a purchase through links.
See my policies and disclosure page for more information.
It gave us better access to things we reach for most.
I built this one a little differently so I could add some more storage
space. I started by figuring out the middle spot between the two machines. I
hung a piece of scrap wood and drilled it into studs:

This acts as a support for the bottom shelf -- I like to add a little extra
security wherever I can!
Then I placed some supports at the sides as well -- I used these to secure
my vertical boards (nailed into the side of the supports) as I was
building:

(Ignore that white scrap on the right, it was just leaning there.) The
inside boards were purely for support at the beginning, but I'm keeping them
there so the vertical pieces won't move around. You can't really see these
when you're done.
You can also build this shelf elsewhere and then bring it in and install. I prefer to build it in place so there are no issues with fit and size.
I suggest cutting away your baseboards so the side supports can go flush
against the wall. The wood was 3/4 inch, so I cut the baseboards
accordingly:

This makes everything more secure and looks more custom. I use
this small oscillating saw
and it works great!
The bottom shelf was next -- I attached it to the long horizontal support
(the first piece I installed) and the side supports. I nailed it with my
nail gun first:


And then secured it from underneath using screws. (I
used a Kreg jig
to make pocket holes underneath.)
You can also use wood glue and then screw into the sides to support that
shelf. Just be sure to use a drill bit to make a hole for the screw to go
into first -- this will help prevent the wood from splitting. You'll also
want to make sure you can cover the head of any screws with putty or
trim.
The top piece went on last and I mitered the ends so you don't see any
rough edges on the side or top of the shelves:

The whole thing was super secure, except for in the middle of the top
shelf.
It was bowing a bit with heavier items, so I added a support in the middle
that created two sections:

I used common pine for this project -- the cheapest I could find! I was
planning to paint instead of staining.
I knew stain would look great, but I would've wanted it to
match the counters
we put in here. I didn't want to mess with trying to find a stain
match.
The mud room bench unit right next to it is a bright white, so I went with
that:

I caulked everything, then gave it a few coats of semi-gloss white paint. I
ended up adding a simple MDF trim to the front to cover the irregular edges
of the wood boards, but it's not needed!
It turned out SO great! It's perfect!:

I'll share links to all the items on the shelves below.
I love having everything we need out and easy to access, but also looking
really cute. ;) I lucked out and found
those cute baskets
that fit perfectly on the bottom shelf.
I just love it!:

And here's how it looked after the wallpaper was added to this wall:


Here's where we started:
And how it looks after the whole makeover:

You can see every step of this
laundry room makeover here. This is one of the pretties rooms in our house and I LOVE IT.
The shelf instead of cabinets (we couldn't reach) functions so
much better for us! I also love how this unit hides the ugly stuff behind
the washer and dryer.
Here are sources for the items pictured:
Runner is from At Home
Glass spray bottle
for stain spray

Never miss a post by signing up to get posts via email.
You are my DIY hero!!
ReplyDeleteSo kind, thank you! :)
DeleteI love the drying rack, clearly you have had it for a while. I don't suppose you know where you got it? The whole thing looks absolutely spectacular. I cannot tell you how much I appreciate the fact that while your spaces are amazing aesthetically, function is a top priority for you, because it is for me too! Thank you!
ReplyDeleteThank you so much!! I got that from IKEA, but I'm not sure if they sell it anymore. :(
DeleteHi, in case I missed it somewhere, would you mind sharing the dimensions you used? I have the same set up and washer and dryer. I am more interested in what your depth of the shelves are. This is the exact look i am looking for.
ReplyDeleteThe boards I used were 1x10s, which are actually 9 and 1/4 inches. The height and width will depend on your W/D size. I hope that helps!
DeleteWhat type of container do you use for liquid fabric softener? It looks like you have a small carafe with a lid but I did not see that listed under sources. If you don't mind sharing I would appreciate it. Thanks!
ReplyDelete