
How to Use Rub 'n Buff For Easy Updates {With Pictures}
July 13, 2021
Share this

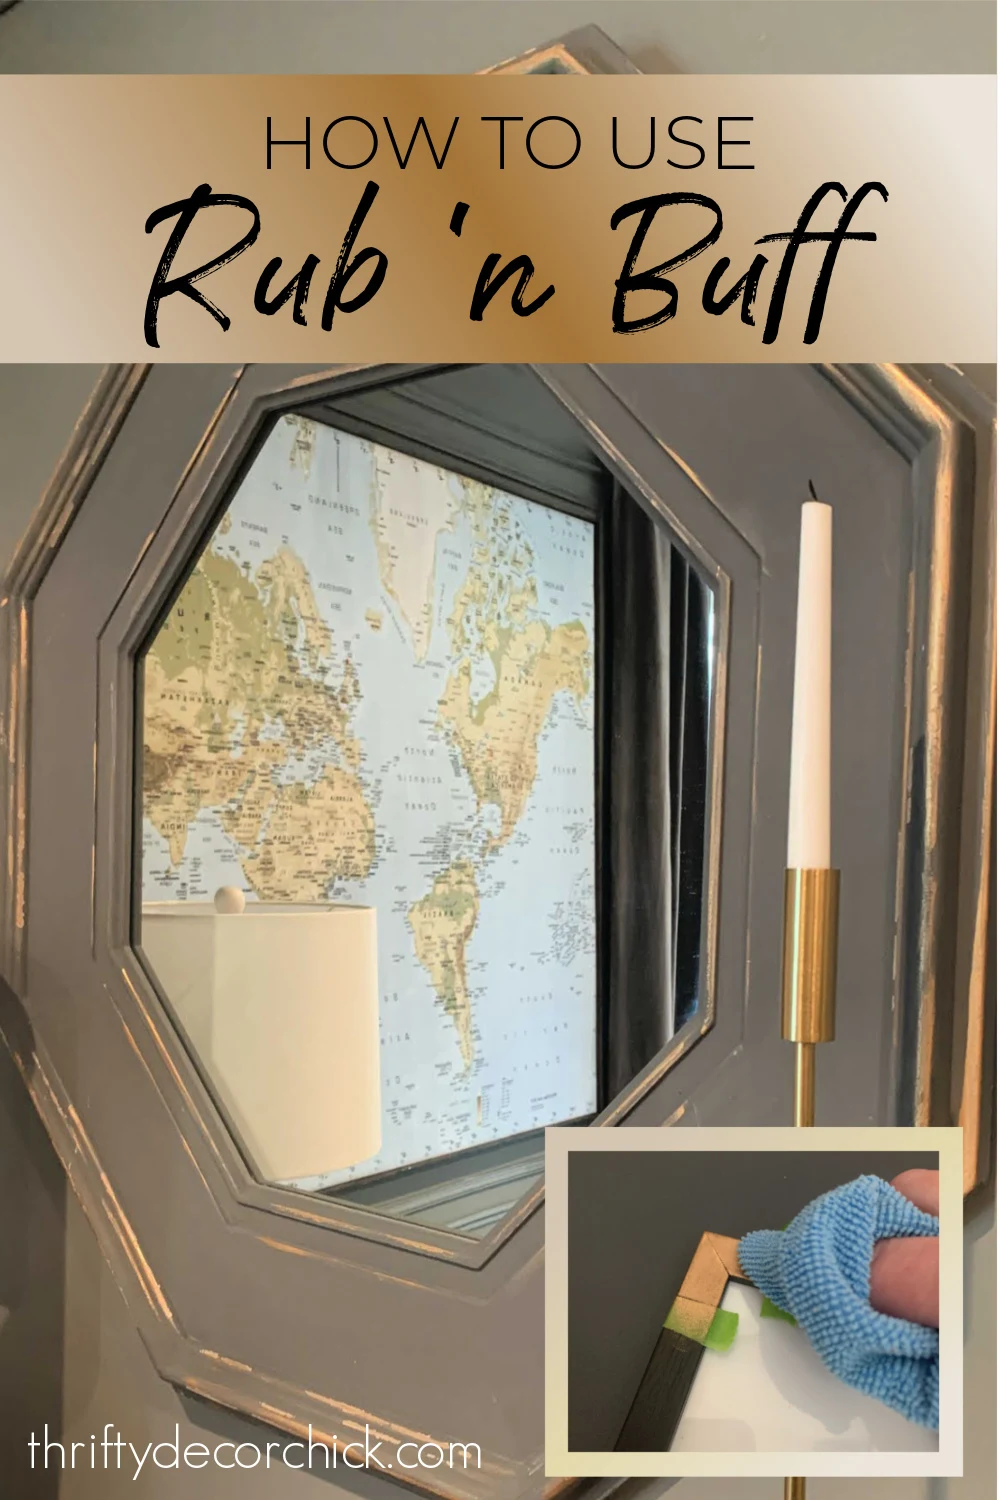
How to use Rub 'n Buff wax metallic finish for home decor projects.
If you have a decor item that needs a little something, this "paint"
that comes in a tiny tube is the perfect answer for a quick and easy update!
Rub 'n Buff is this amazing metallic finish that is super easy to apply (you
just use your finger or a soft cloth). The finish adds dimension and
interest to basic decor like frames, mirrors and decorative objects.
It really shows off pretty detail on those items as well -- so if you have
an intricate mirror or frame, Rub 'n Buff is perfect for it.
What is Rub 'n Buff?
If you've never used it, you'll be shocked at the power in this little bitty
tube!:

This post may contain affiliate links for
your convenience.
See my policies and disclosure page for more information.
This antique gold color is one of my favorites!
Rub 'n Buff is not really paint -- more of a wax paste made from fine metallic powders. It has a strong pigment and applies easily to hard surfaces. You can
lightly buff it out to soften the look a bit.
It's great for smaller details and eliminates the hassle of using spray paint outside.
I've used this stuff for years, and it's my go-to when there's something in
our house that is looking a little bland.
How to apply Rub 'n Buff
It doesn't look like much, but this stuff goes a loooong way. It's easy to
squeeze out too much -- you want to err on using too little and you can
always add more or layer the finish.
You only have to use a tiny bit for accent projects. I usually
start by dabbing my finger on the opening:

I used the
antique gold finish
for this project.
For the best adhesion, start with a clean, dry surface.
I usually use my finger -- I feel like it's easier to do detail work that
way. But you can also use a soft clean cloth to apply it:

YEARS ago I added a
simple gold detail on the front of some frames
near our fireplace:

From far away it gives the look of metal brackets. I loved that look so
much, I did the same to some of the frames on our family room
DIY picture ledges.
I used a few pieces of painter's tape to mark off the corners and then just
rubbed it on:

It dries almost immediately, so you can buff it out right away.
Use either your finger or a cloth to rub it in and even out the
finish:

I like a finger for application and a cloth for the buffing part. You don't
have to buff, but it does give it a pretty sheen and blends it
nicely.
You can use Rub 'n Buff for larger projects, but I've always loved the
little detail it adds in smaller doses:

See how to build those
picture ledges here! More about the
board and batten here.
I think I'm going to add it to the sides of the frames as well, so we can
see the gold accent from all directions.
I love this mirror in our basement and that it matches the walls almost
exactly:

Sometimes you want contrast, sometimes a more muted look is what you're
aiming for. I love how this blends in for a more modern look, but it needed
something.
When I added
the box molding on the walls down there, I moved the mirror to another wall and then added gold
accents with the Rub 'n Buff:

The paint on the mirror had a slightly distressed look on the edges, so I
used those as my guide.
It only took a few minutes and made a big difference!:

On something like this especially, there's no perfection needed. Just
swipe it on here and there until you get the look you want!
Where you can use Rub ‘n Buff
This stuff adheres to all kinds of surfaces -- metal and wood are easy. I
haven't tried it on plastic so let me know if you have! It's an easy way
to change up light fixtures, frames, art, decorative knobs...the
possibilities are endless!
I've grabbed these tubes a lot over the years -- it's especially lovely
when used to highlight pretty texture.
It made the
raised, ornate details on this frame pop:

You can use it instead of spray paint for smaller pieces too. I "painted"
some red metal bells in our Christmas decor last year. The Rub 'n Buff
gave them a vintage look with more dimension than straight spray paint
would give.
If you have a large item, you can spray paint it and then add some detail
with the Rub 'n Buff on top. It's so versatile!
I did just that to turn this
wood terrarium to more of a metal look:

The
pewter Rub 'n Buff gave it the look of metal, with some variation that straight spray
paint can't give.
Tips for using Rub 'n Buff
- Remember, a little goes a long way -- start with a tiny amount!
- No need for brushes, you can use your finger or a cloth.
- It's easily removed from your fingers with nail polish remover or mineral spirits.
- Play around with colors! It comes in nine different metallic finishes, from silver leaf to copper.
- The more you buff the finish, the shinier it will get!
I love that it gives pieces an older, aged look because the finish
isn't perfect, especially on textured surfaces.
It added detail so our mirror isn't so blah anymore...just enough to make it
stand out!:

Have you tried this magical wax finish? It's fun and easy!
If you're looking for similar gold or brass finishes, their European Gold, Gold Leaf, and Grecian Gold options are beautiful!
Save this tutorial for later by saving this image to Pinterest:
See more of
our home here.
To shop items in our home,
click here!
Never miss a post by signing up to
get posts via email.
Thanks for this. It sounds like something I will enjoy using. I was wondering how it would work on a door handle. Does it wear well or is it better for things that are not touched often?
ReplyDeleteLove Rub 'n Buff. I've been using it for probably 20 years now. Like you said, it is perfect for bringing out details and for adding a touch of glam here and there. One of the things I try to never be out of.
ReplyDeleteYou always open my eyes and have me envision something in an entirely new light! I was positive this post had no application in my life but now I'm looking around to finds ways to incorporate this!
ReplyDeleteI love this stuff. I had to give plastic a quick coat of spray paint to make it stick. The black rub and buff kinda sucks but maybe that was just my application/project.
ReplyDeleteI just love your blog. You have the best ideas!!!
ReplyDeleteGreat info. Thank you!
ReplyDeleteI would use latex gloves when applying this. The cheap sponge brushes you can get at a craft store work really good too.
ReplyDeleteI have an antique spelter figure oil lamp, the metal figure is very detailed, too much for using my finger or cloth. Can i use a small brush with good results? And i really like your posts, thank you...
ReplyDeleteThank you! If you used a smaller, stiff brush, I think that would work!
ReplyDeleteHow do you wash the cloths you use to apply the run n buff? Do you just throw them in the washer?
ReplyDeleteYes! They get stained, but I can use them later for staining projects when they get too bad.
DeleteJust used the silver rub n buff on plastic, now it is 55 year old plastic so results may vary if it is new. It works!
ReplyDelete