
Kitchen Beverage Bar {with New Tile and Shelves} Reveal
December 09, 2021
Share this
Reveal of our beverage bar with thick floating shelves and hanging wine glass storage in the kitchen.
How I tiled a wall in our kitchen the easy way and the reveal of our
coffee/beverage bar! This spot has become a hub in our kitchen and is a MUCH
better use of this space.
Remember that little wall next to our fridge that I've wanted to address for
years? I left it open on purpose when we built (instead of having an upper
cabinet hung).
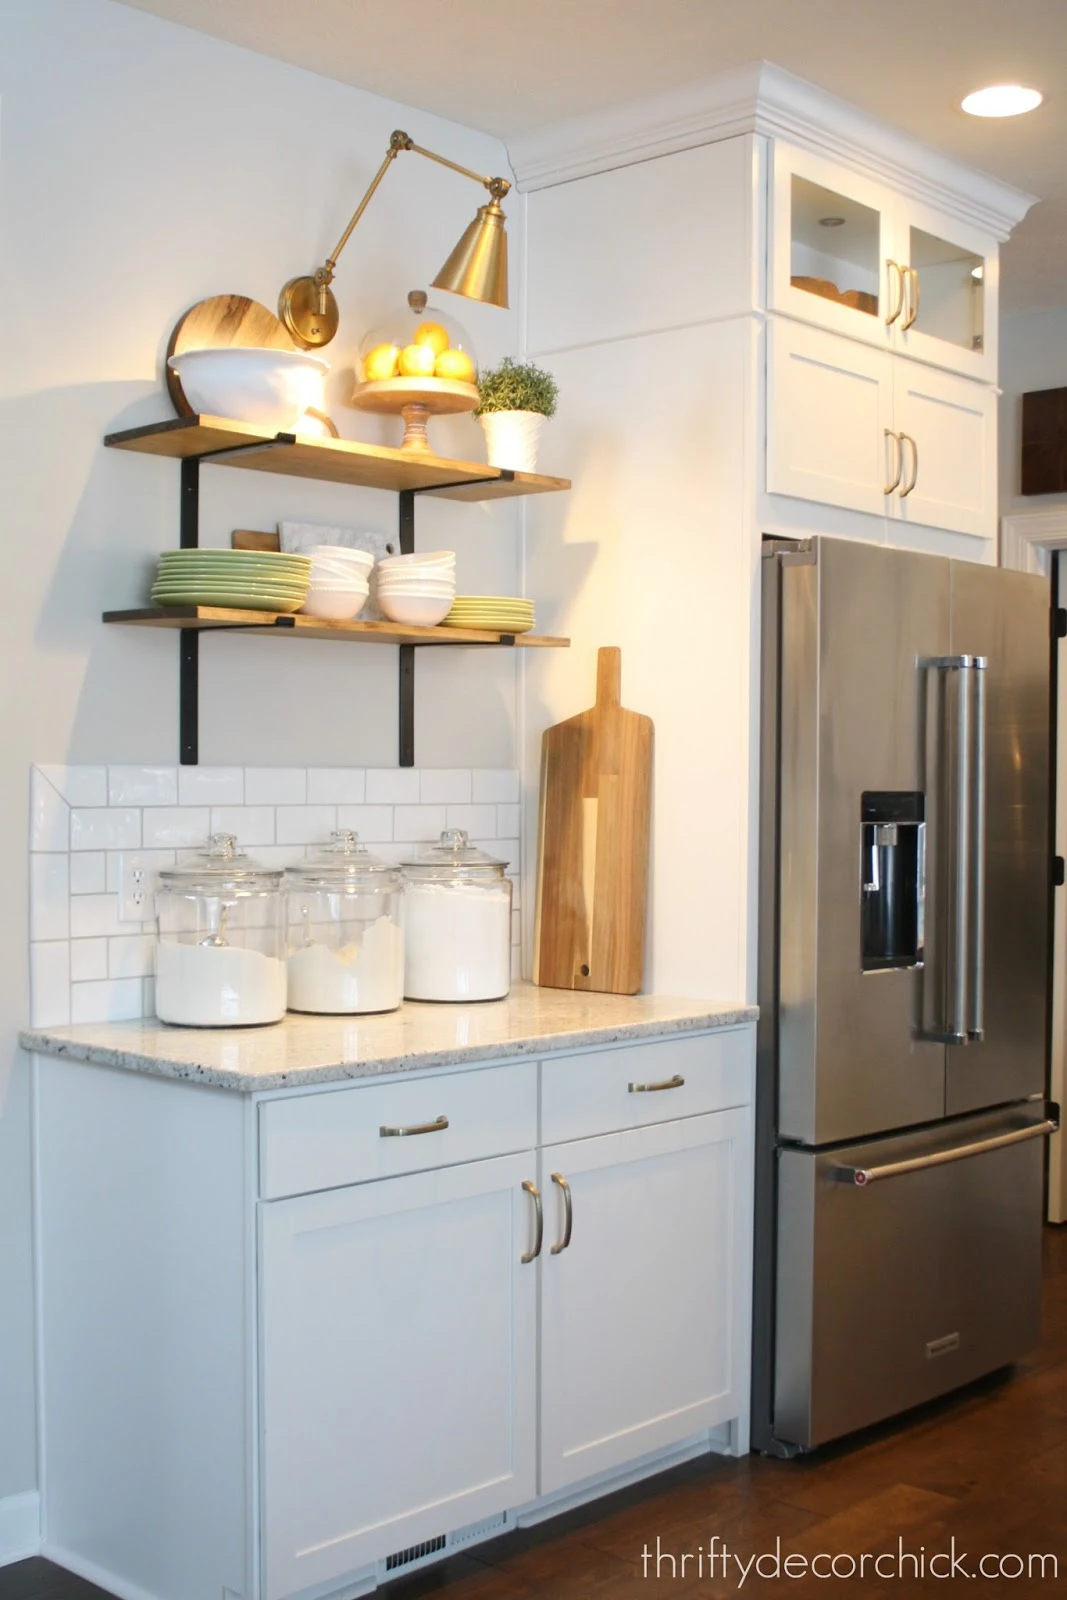
I hung some wood shelves with metal brackets soon after we moved in:

We would have had to add the regular cabinets, but also the upper cabinets
with glass, plus trim. And then we would have to have electric run
for both the upper and lower cabinet lighting.
It was more than we wanted to spend for just a little bit of storage. All we
really wanted was a spot to hold some our nicer wine
glasses.
Plus I have a big project in mind for our kitchen, and the cabinets would
have been in the way of that. I'm hoping to make that happen next year.
:)
So I came up with an idea to beef up the shelving in that spot and add some
wine glass storage. Here's another view of what I started with:
This post may contain affiliate links for
your convenience.
See my policies and disclosure page for more information.
I figured I'd eventually do something a little more permanent later, and
that's just what I did last month:

So much better!!
I built super
strong and substantial floating shelves
on that wall instead, and it immediately looked SO much better.
My husband just started to get into drinking coffee this year, so I created
a little coffee bar with all of the items he needs every morning:

But I wasn't quite done yet!
I really wanted to make this feel like it was all there from the start, and
I knew tiling the whole wall would do just that.
It would have been fine to stick with just the lower part tiled, but I
always prefer to have the backsplash go up higher to the ceiling where
possible. It feels more finished to me.
We had a good amount of tile left from our build, but I had to purchase a
bit more of
our ceramic subway tile. It has a handmade look that is a beautiful alternative to basic subway
tile.
Last time I tiled was in our mud/laundry room and I used a new method that
worked SO well:

You can see how I
tiled the easy way without mortar here.
Last time I used a tile mat that I had held onto for years. It worked
perfectly and I loved how easy it was to install the tile.
This time I used a brand called
Musselbound, and it's very similar but has some differences:

It's basically a roll of super sticky foam. It's really thin and adheres to
the wall very fast.
It is much harder to adjust than the brand I used in the laundry room!
It also doesn't "give" as much as the other version when it comes to
adjusting the tile. With the last one, I had a few seconds to wiggle the
tile exactly where I wanted it.
This time, not as much.
It was fine, but you really need to get the tile placement right the first
time! :)
Overall it worked well, and it is MUCH easier than spreading mortar on the
wall. I liked that it came with a few tile spacers in three different
sizes:

Unlike mortar, where the tile can slip as it dries, you don't have to have a spacer between each and every tile when using this mat.
They provided just enough so I could place each tile and then reuse the
spacers as I went. I used the smallest spacers for under the tile and on the
sides, and an 1/8th inch spacer between each one.
I used the same easy tile cutter as last time and it is so much
quicker and cleaner than the wet saw.
I may not have to use a tile saw again!
After I was done with the grout, some final caulking and then major clean
up, it was time to decorate!
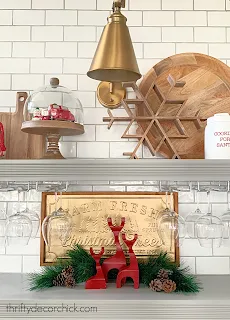
Perfect timing to add some Christmas decor in the kitchen:


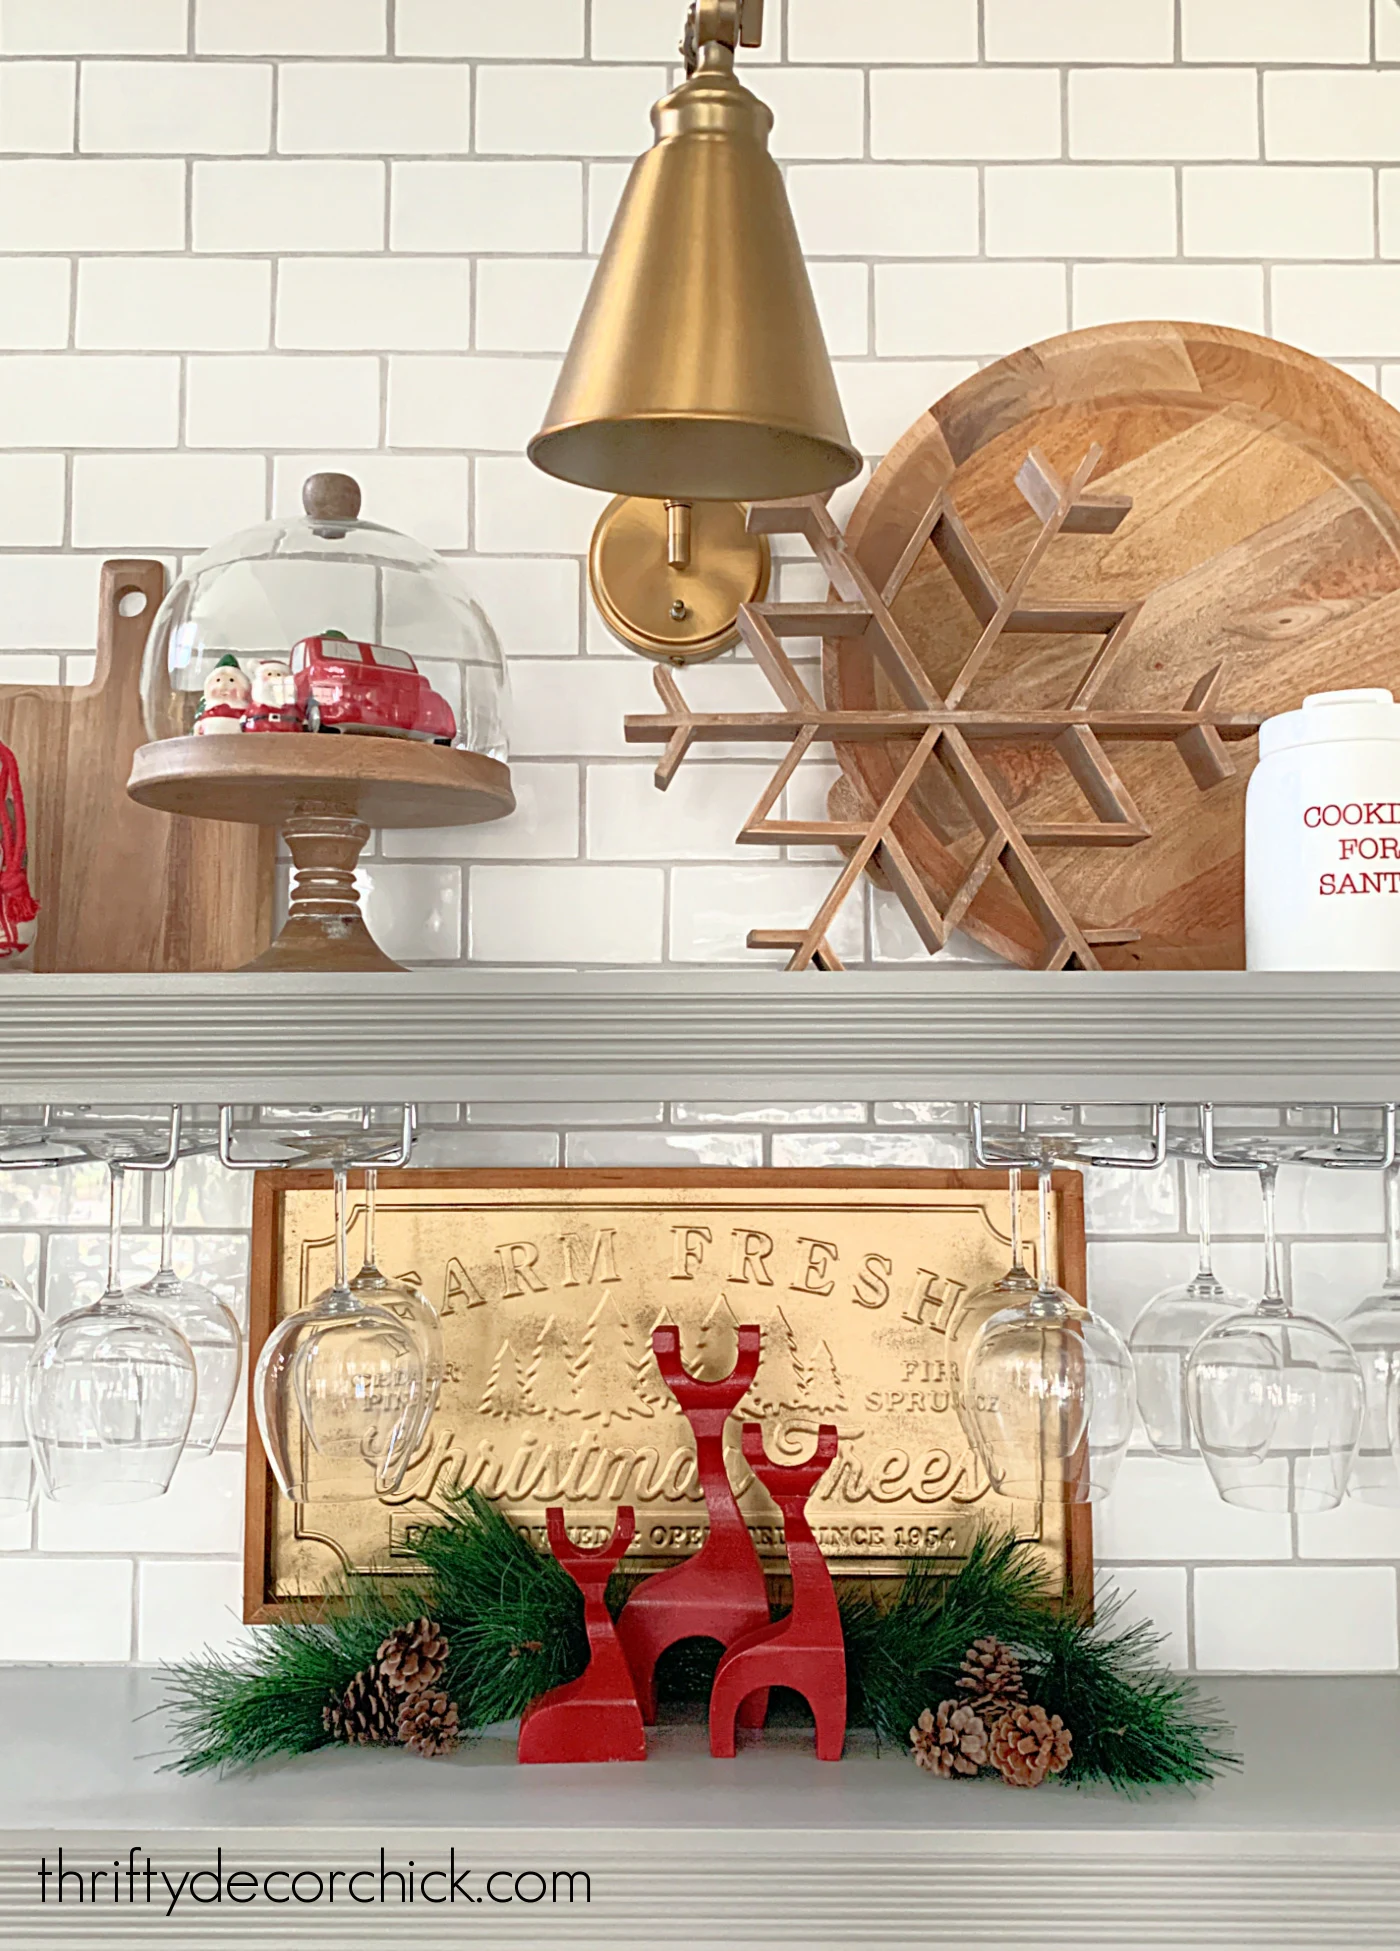
Those wine glass holders have already been SO efficient and are easy to
use.
We love having them out for easy access, and they just look pretty!:

This is our wavy subway tile and the grout is the color Silverado by TEC.
As you could see in the before pics, I used to keep large glass jars full of
dry ingredients like sugar and flour on this small counter.
This new set up is so much more functional, but I think looks a ton better
too:


It looks like it should have always been this way, which is a sign of a
great project in my eyes!
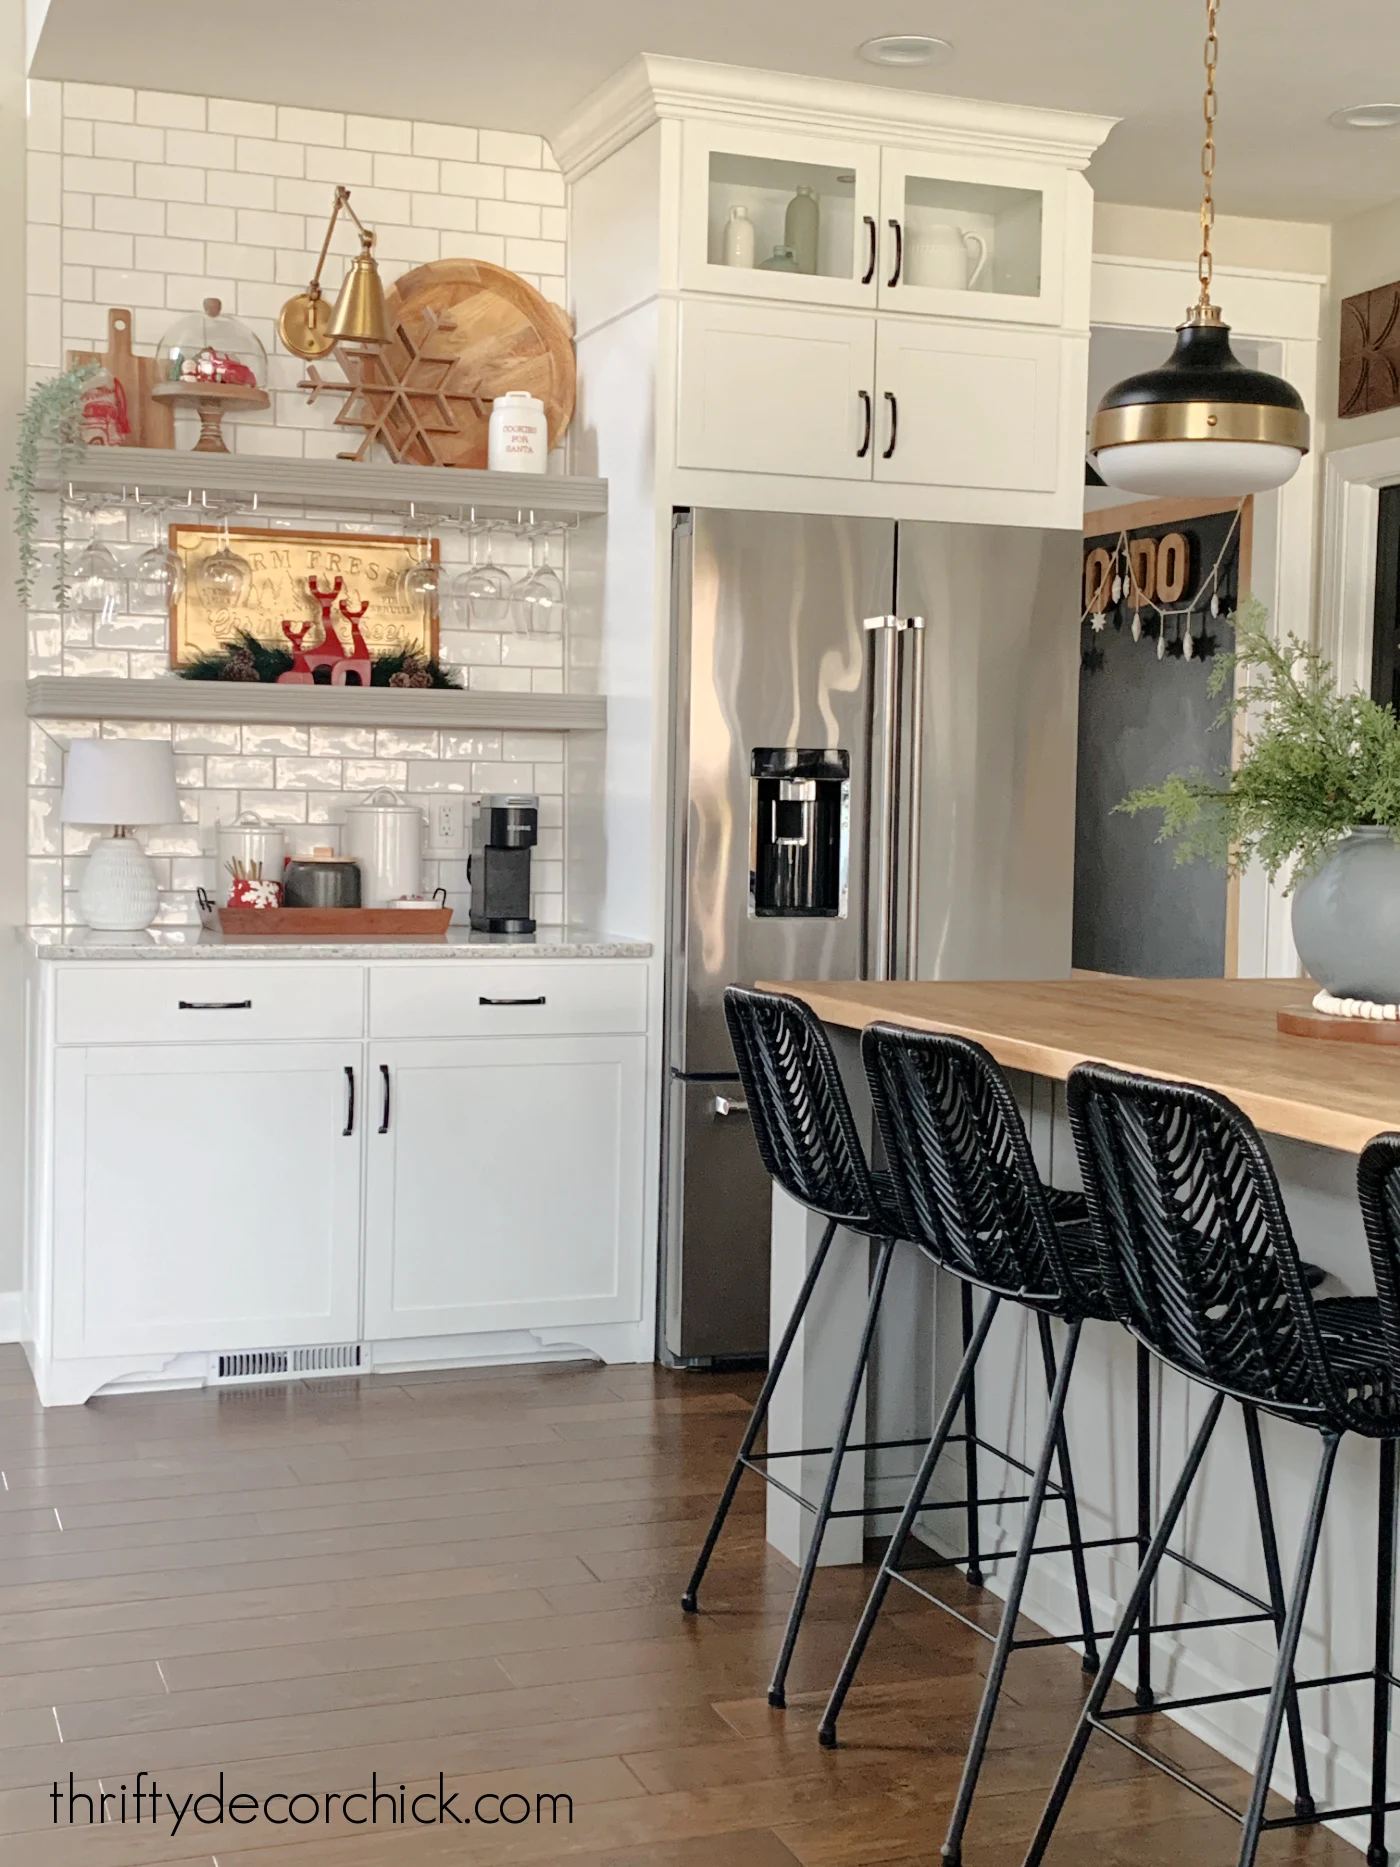
I LOVE this area now...it's so much more custom looking.
It's made a big difference in here:


We keep all of our wine tools and openers in one drawer, and the coffee
pods in another.
This new beverage bar is one of our favorite spots in the house right
now!
These projects were time consuming, but not difficult. It always
surprises me how much simple updates make in a space. :)
Here's a before pic of this spot in our kitchen:
And here it is after I added the custom
trim to the side of the base cabinet, installed
cabinet feet,
spray painted the cabinet hardware
and built those heavy duty floating shelves:

Love it!!
Have you attempted a tile project? That tile mat makes for a much quicker
and cleaner installation, that's for sure!
Now if they could come up with non-messy way to grout! :)
You can find sources for the items pictured here:
- Undermount wine glass holders
- Wood tray with handles
- Brass Christmas tree art -- Big Lots
- Small white lamp
- Dark gray canister with lid
- White canisters -- At Home stores
- Red wood reindeer
- Large round tray
- Cabinet hardware
- Brass sconce
- Black counter stools
Never miss a post by signing up to
get posts via email.
You can try wrapping your Keurig cord in a white yarn or jute twine. I have done this where it is not possible to hide the cord when in use. It works well
ReplyDeleteWhat a difference! So beautiful and I love that tile.
ReplyDeleteThat is gorgeous! What a difference the tile to the ceiling made and the thicker shelves!
ReplyDeleteAs always, Sarah, your vision is remarkable. Yours is the only blog I have stuck with after all these years…and you never disappoint!
ReplyDeleteYou have no idea how much I love you, oh and utilize your ideas!
ReplyDeleteLooks great! I love the wooden snowflake; where did you purchase that?
ReplyDelete